Overland Tech and Travel
Advice from the world's
most experienced overlanders
tests, reviews, opinion, and more
Tire repair in the field
“Stop!”
I’d heard the unmistakable hiss of a punctured tire losing air, and alerted my partner, who was driving the Ford pickup we were using to conduct road surveys in southern Nevada. Our job took us down scarcely used tracks with significant incursion from creosote bushes, which leave vicious little daggers sticking out around the base of the plant as the perimeter dies off. This was our third puncture today—and it was not yet 8:00 in the morning.
Two minutes later we had the tire repaired and had resumed collecting GPS data. We didn’t even bother to add any air, much less replace the punctured tire with the spare.
Tire failure is by far the number one cause of vehicle breakdowns in the backcountry, whether you are exploring Nevada or Namibia. Yet I’m astonished at how many people still rely on a single spare and maybe a can of fix-a-flat as backup on remote excursions far from AAA. The irony is that the farther you are away from well-traveled routes and outside assistance, the higher the possibility of running into projecting root splinters, knife-edged rocks, or even an off-camber rut that can pop a tire bead right off the rim and deflate it instantly.
Why not be prepared, and self-sufficient? With a few tools, a good air compressor, and a proper repair kit, you’ll be able to repair any tire mishap short of a shredded blowout and be on your way.
Most tire problems result from simple punctures in the tread area, where the tire actually contacts the ground. Close to civilization, likely culprits include nails, bolts, and screws. Farther afield, you might run afoul of those creosote daggers or any number of other biological or geological hazards. At higher speeds, punctures typically occur on the rear tires—the front tire rolls harmlessly over a nail or screw lying flat, but pops it into the air where it can land pointy end up just as the rear tire passes. At low speeds, it’s more often the front tire that will find some projecting bit. A nail that embeds itself in a tire might not make its presence known for hours, since it forms a partial plug and slows deflation. A root end is more likely to puncture and pull out, causing rapid loss of air and possibly an audible warning.
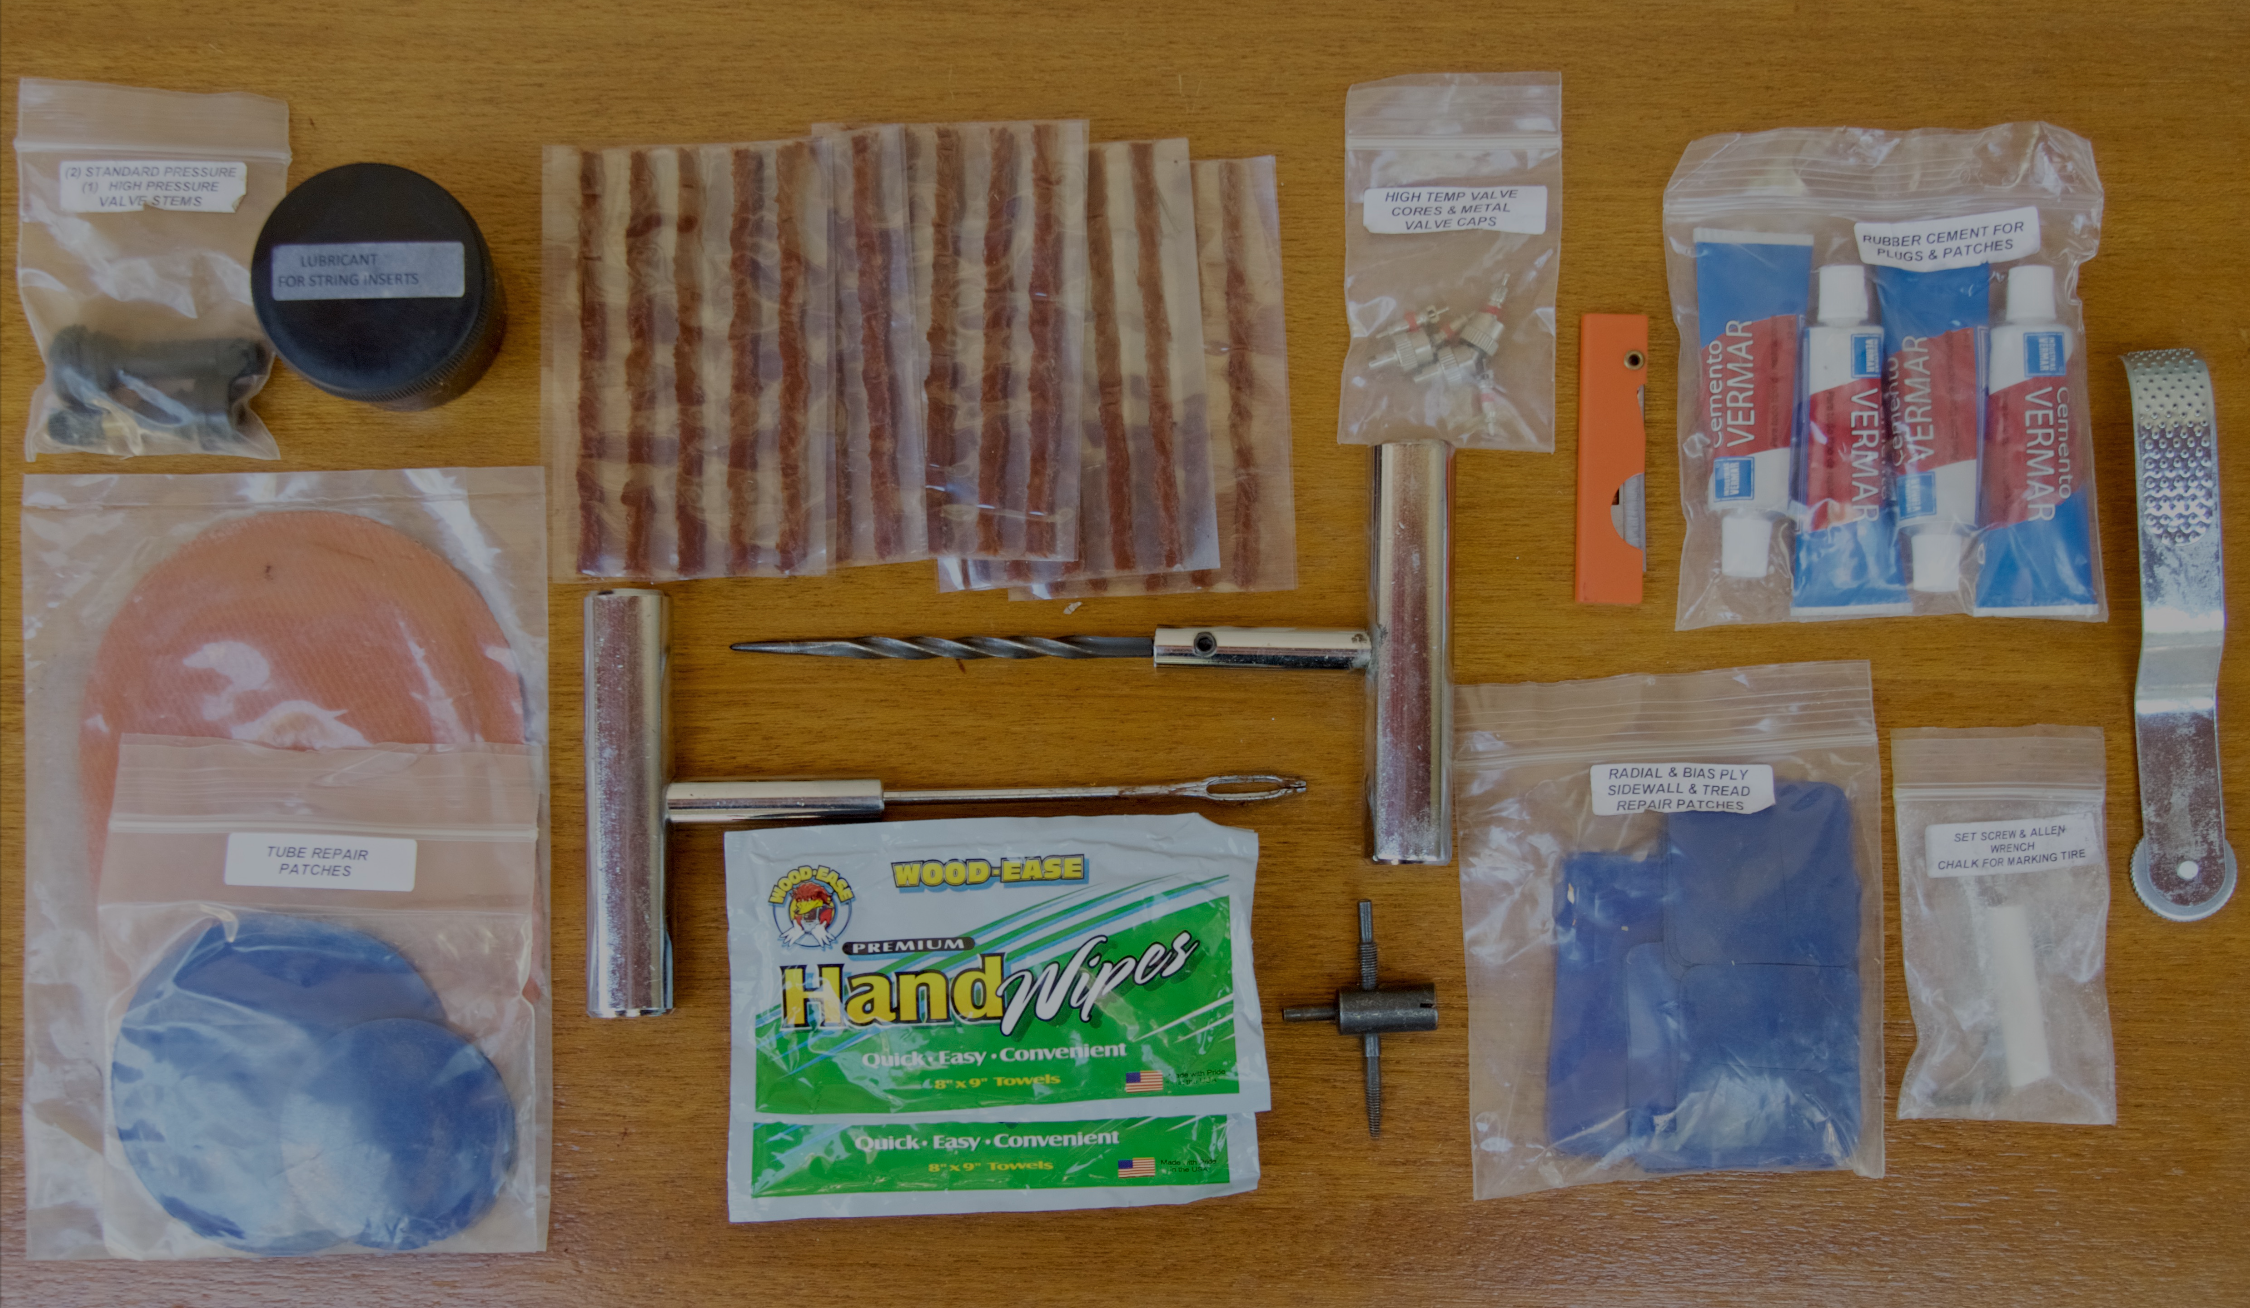
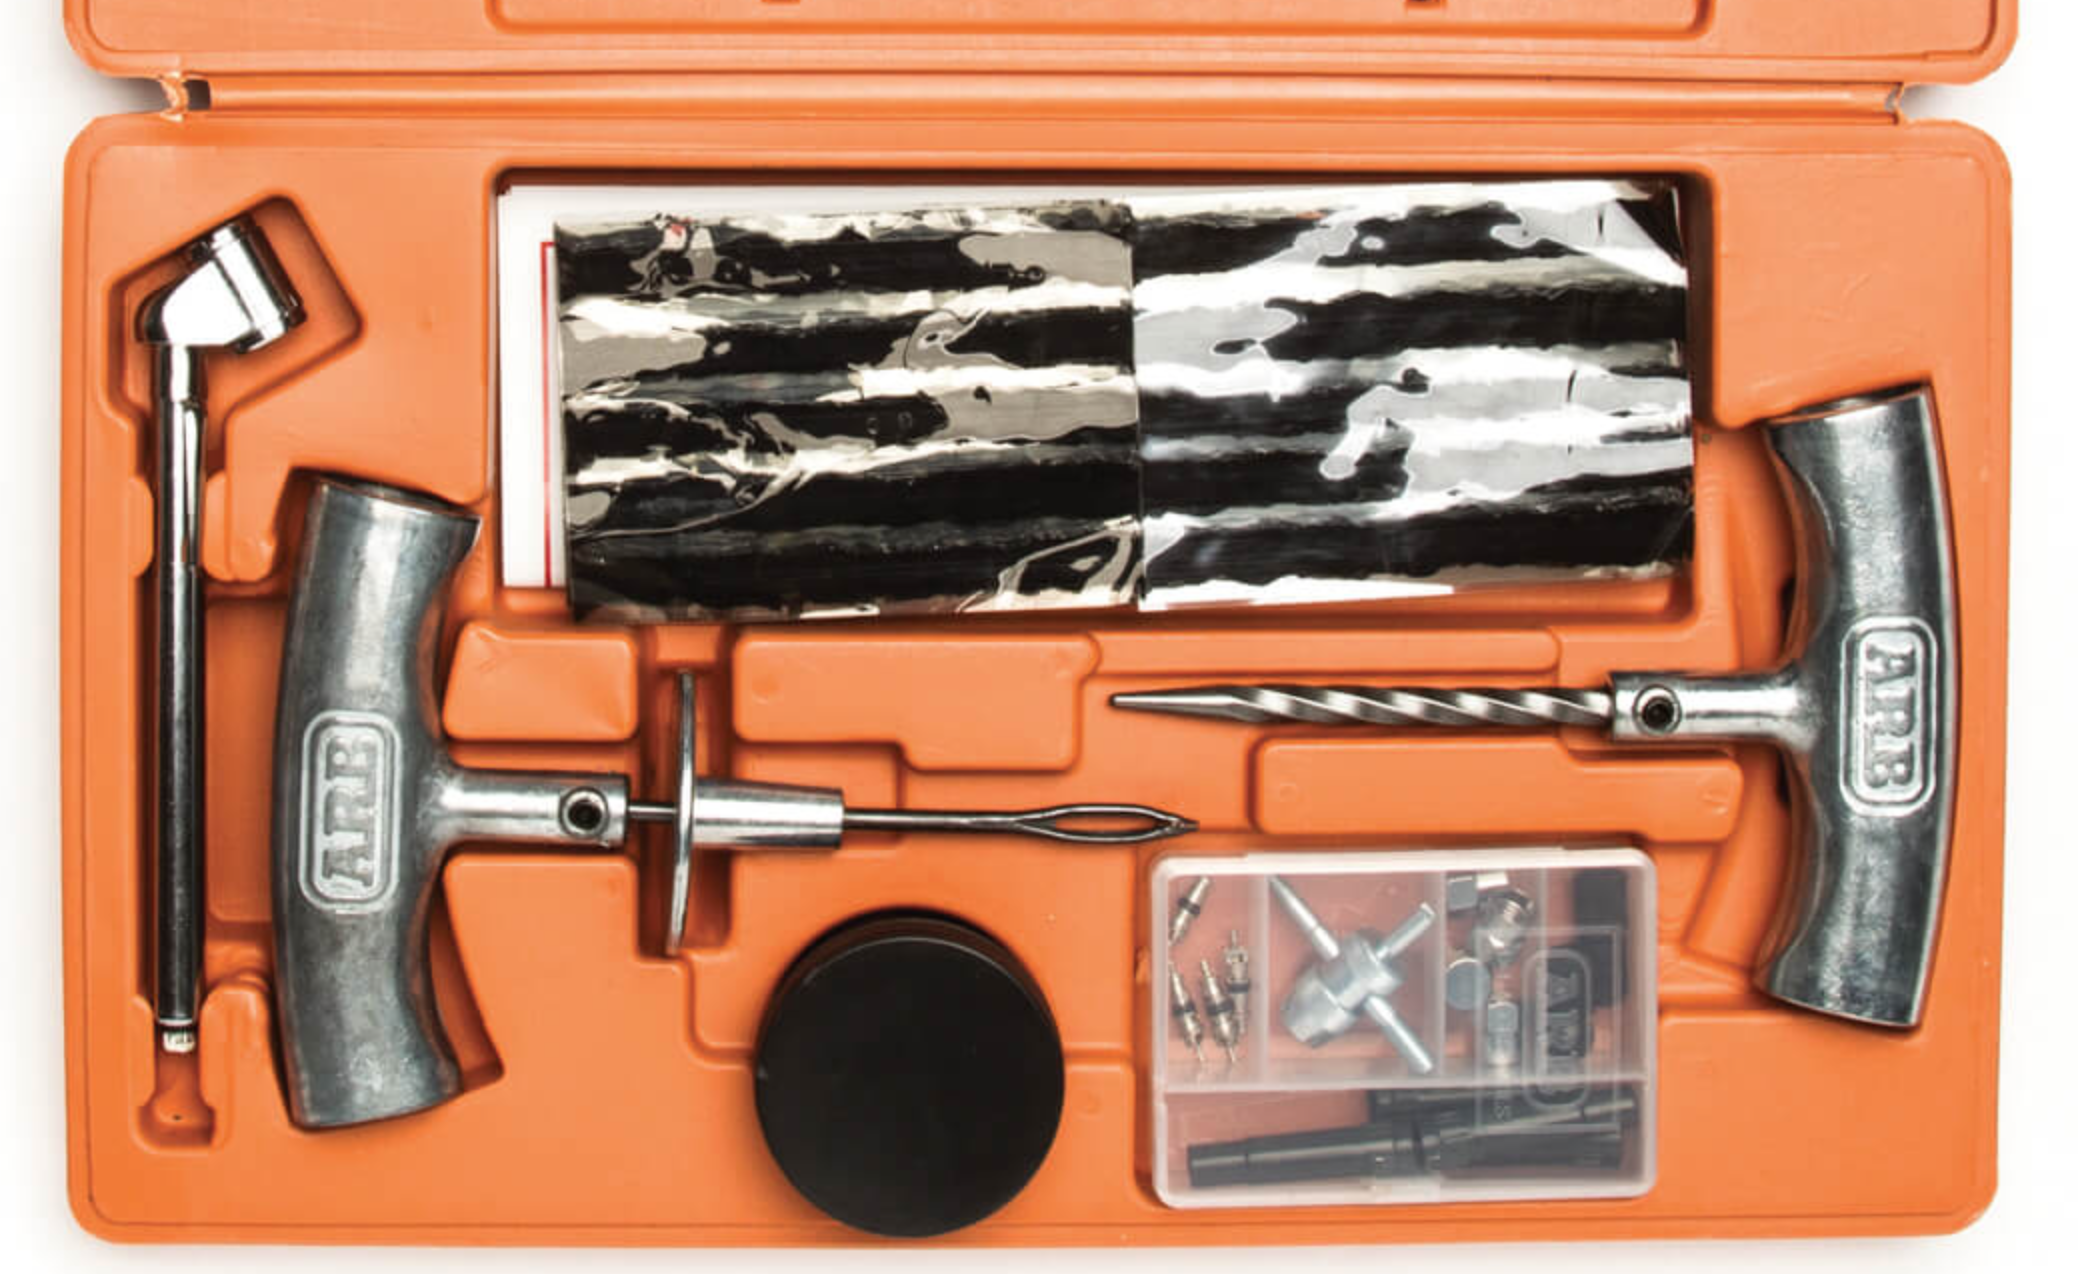
The easiest and quickest way to repair a simple puncture is with a plug kit (which is what we used in Nevada). A tire plug comprises a short length of rubber-adhesive-impregnated nylon yarn, which is inserted into the puncture with a special tool, after reaming the puncture with another tool. Cheap plug kits that include tools with plastic handles are available everywhere, but skip them—plugging involves a fair amount of force, and you don’t want to push very hard on a plastic-handled tool embedded with a steel rod. High-quality plug kits with sturdy tools and better plugs come from Safety Seal and ARB. By far the most comprehensive tire repair kit I’ve used is the Ultimate Puncture Repair Kit from Extreme Outback, which includes not only plugs but an exhaustive assortment of patches, spare valve cores, valve stems, a valve core tool—everything you’d need to be self-sufficient on any trip up to and including a global circumnavigation.
The basic tools in a plug kit comprise the plugs, a reamer resembling a round file, and an insertion tool that has a large, slotted eye at the end. How do they work?
High-quality plug tools from Extreme Outback.
Picture yourself at the side of the trail with your plug kit and a slowly collapsing tire. You can jack up the vehicle and remove the tire and wheel if access is limited, or leave it on and slowly roll the vehicle while looking and listening for the source of the leak. Let’s assume you spot a nail head embedded in the tread, and it is accessible. The first step to repair the hole is to prepare the plug in advance, to minimize leakage. Pull a plug free from its cellophane packaging—you’ll find it ridiculously difficult due to the adhesive, but surprisingly it doesn’t stick to your fingers. Pinch one end flat, and insert it into the eye of the insertion tool; pull through to its midpoint. You’ll have to pull quite strongly to get it in there. Your plug kit should come with a tub of lubricant; once the plug is positioned in the tool dunk the end in it to adhere a small glob to the plug right where it goes through the eye of the insertion tool.
Now you’re ready to prepare the hole. With a multitool or pliers, yank out the offending bit (the ARB kit thoughtfully incudes needle-nosed pliers). The next step is completely unintuitive: You’re going to make that hole bigger, so the plug can fit. Insert the reamer into the hole—it might take some real shoving—then work it in and out briskly a few times. Don’t be gentle; move it around and twist back and forth. If the puncture is in the tread area you’ll be able to hear and feel the steel belt as the reamer works through it. You’re not damaging the belt, merely pushing the steel strands apart enough to get the plug in.
Once it moves back and forth easily, set it aside. Insert the tip of the tool and the plug into the puncture. Again you’ll need a strong shove to get the tip and the doubled plug into the tire. Push until just a half inch or so of the tips of the plug shows above the tread, then pull the tool straight back out—no twisting on this. The split edge of the eye will first pull the middle of the plug back into the puncture, packing it tightly with vulcanizing material, then free the plug so the tool pulls out, leaving the plug in place and the puncture instantly sealed—no waiting for glue to dry. (The ARB insertion tool incorporates a collar that prevents you from accidentally shoving the plug all the way into the tire.) Trim the plug as flush as possible with a knife or razor blade, and you’re finished. The tire manufacturer will warn direly that this is a temporary repair, but I’ve known tires with just a few hundred miles on them repaired thusly that went on to live out their full tread life. If the tire has deflated enough so that pushing on the insertion tool just pushes in the face of the tire, add some air with your compressor to give it more resistance.
Push the plug in until the ends stand just clear of the tread.
What if the hole is larger in diameter than one plug will seal? Try two—or three, or four. My friend Tim once repaired a sidewall split with no fewer than five, and it got him back to civilization. While we’re on sidewalls, note that a plug repair there really should be considered an emergency fix only. The sidewall, even on a sturdy all-terrain tire, lacks the structural integrity of the belted tread area—it’s designed to flex, and can’t support the plug as well. Nevertheless, a sidewall plug repair should hold long enough to get you back. (Also note that, as excellent as plugs are, they won’t seal every puncture. Recently on a trip to Mexico a friend holed a tire with a sharp branch right at the corner of the tread and sidewall. The result was a flapped triangular hole that I simply could not get to seal, even with three plugs. It happens.)
Tim’s five-plug repair notwithstanding, a much better way to repair a sidewall split (sidewalls collect splits from rock gashes and pinching more often than they do simple punctures) is with a patch on the inside of the tire. To do that you’ll need access to the inside, which means you’ll need to break the bead, a procedure that sounds alarming but really doesn’t break anything.
The inside edges of an automobile tire, where they grip the rim of the wheel and seal the air inside, are each reinforced with a very stiff wire cable embedded in thick rubber—the bead. The wheel is made with a corresponding groove running around its inside and outside edge. When your local Discount Tire store tech mounts a tire, his fancy machine first levers the tire over the rim so the beads are inboard of the grooves. He then applies a sharp blast of high-pressure air, which pops both beads outward and into their respective grooves. The tire can then be fully inflated. The grooves hold the beads very tightly—even running for some time on a flat tire will rarely unseat them.
When your tech needs to remove a mounted tire, his machine pries the beads loose with a powerful automatic lever. In the field, you’ll need to be more creative. Trust me, just jumping up and down on a deflated tire won’t work. (Important note: Those of you with shiny alloy wheels—or shiny steel wheels for that matter—will find that some of the following techniques might scratch and gouge them. I hereby absolve myself from responsibility.)
The first step is to remove the valve core to ensure the tire is completely deflated and to easily let out additional air as you compress the carcass. Both the Extreme Outback and ARB kits come with a valve core removal tool. Mark the tire and wheel with chalk or anything handy, to make sure you re-install it in the same place and don’t mess up the balance (the EO kit includes chalk). To “break” the bead you need to apply inward force to the sidewall of the tire as close as possible to the edge of the rim, in order to force the bead out of its groove. One effective way to do so is to lay the tire and wheel on its side under your vehicle’s bumper, then position a Hi-Lift or bottle jack with the base plate on the tire and the lifting tongue or post under the bumper. Crank up the jack and the base plate will push the bead out of its groove. You generally only need to do this in one spot as the bead will easily pop out of the rest of the groove when stood on. Always break the bead on the outside of the wheel first; the groove on the inside has a ramp that makes it more difficult.
An elegant enhancement to the Hi-Lift technique is the Extreme Outback Beadbuster, which attaches to the jack’s base plate and incorporates a curved spade to precisely bear against the tire close to the rim, reducing stress on the sidewall. The opposite, cruder end of this spectrum is to lay the tire on the ground and simply drive over one edge of it with the help of a spotter. Effective, but a bit hard on the tire.
The Beadbuster makes beadbreaking with a Hi-Lift jack easier on the tire.
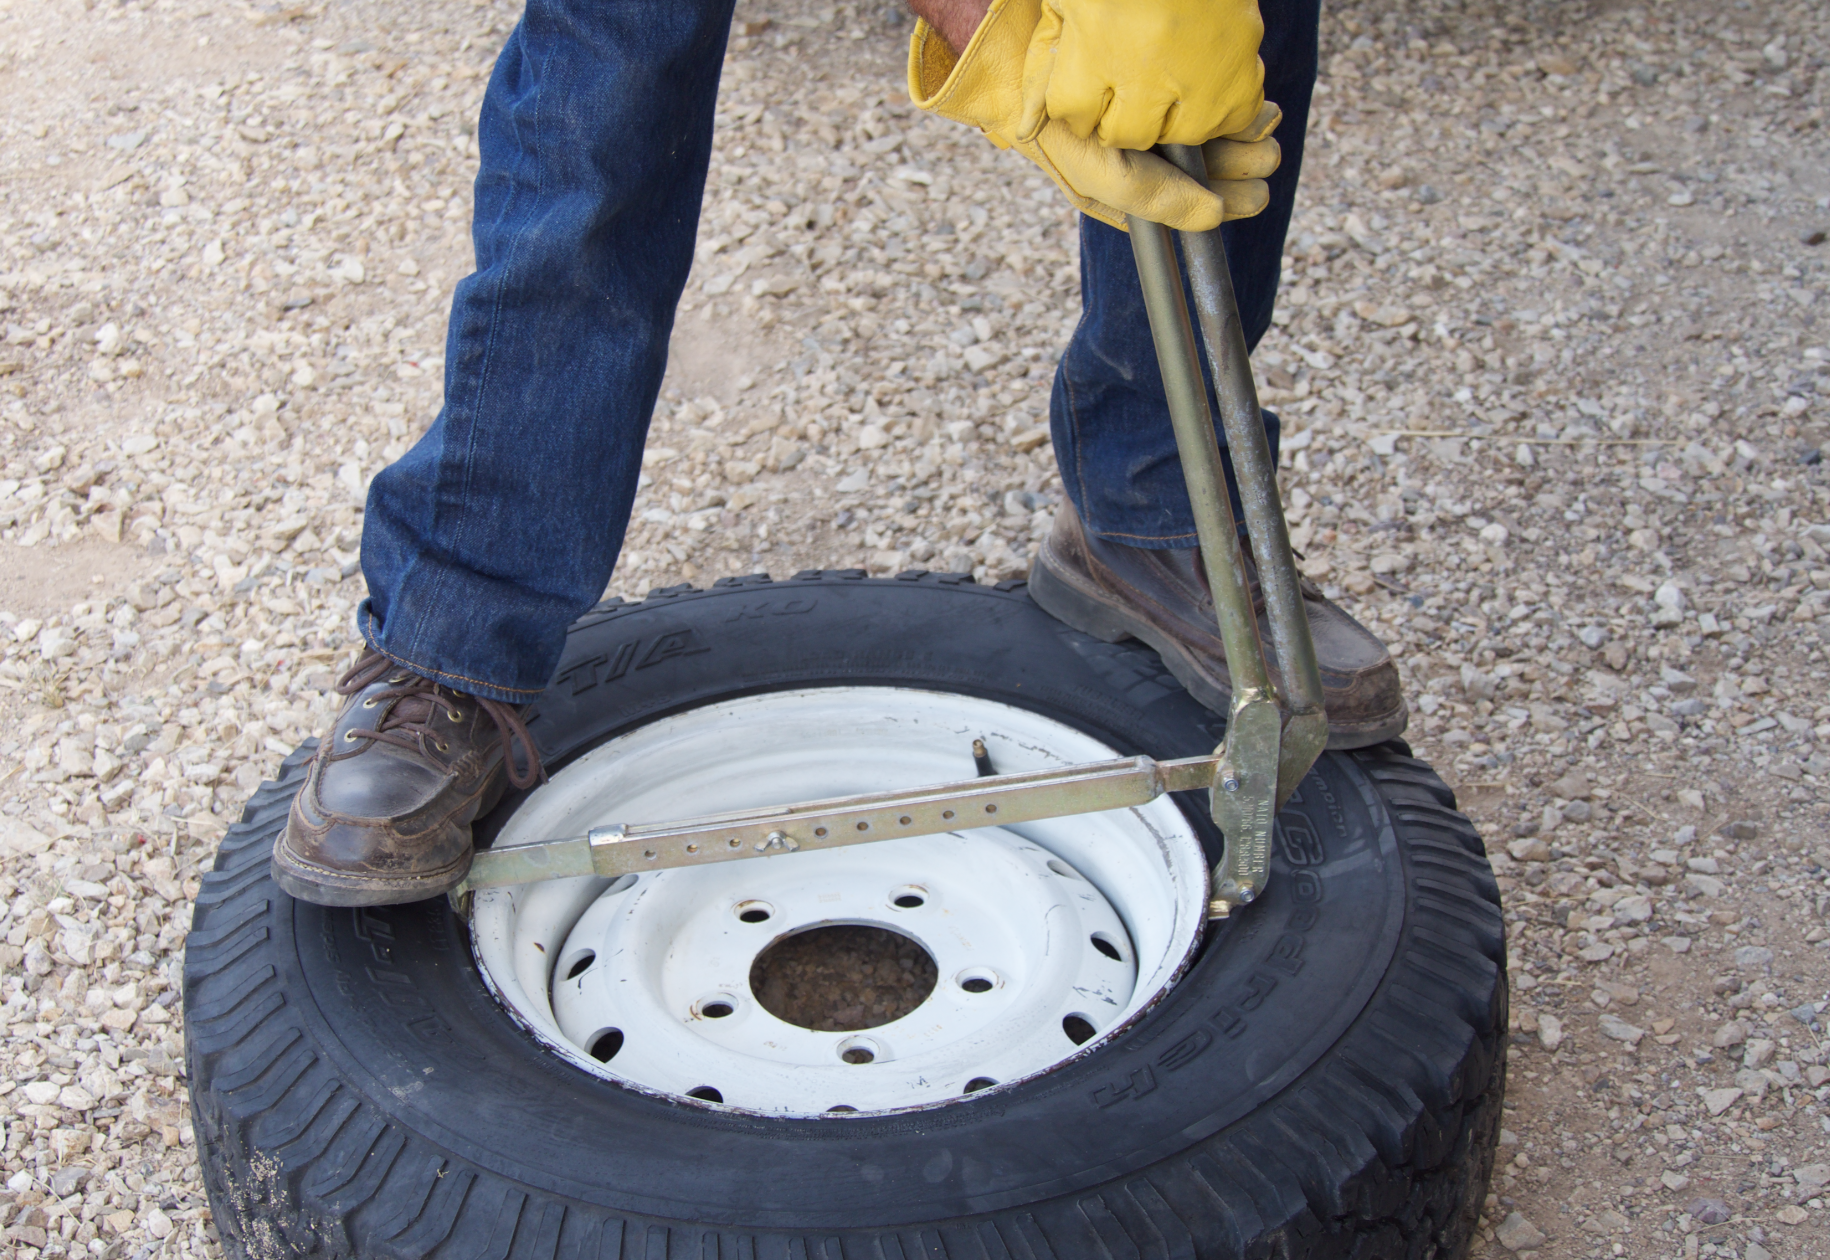
By far the quickest—and most stylish—way to break a bead is with the Australian-made Tyrepliers. This cunning tool, which adjusts to fit wheels up to 19 inches in diameter, frees the bead using good old Archimedean leverage. It’s nearly foolproof, and so universally respected that it carries a NATO stocking number. I’ve lost count of the onlookers and students I’ve amazed by popping the bead on a tire in about ten seconds flat. You stand on the tire and use one foot to push the fixed hook of the tool under one edge of the rim, then work the lever hook under the opposite side with the paired handles. Push down on the lever handle and voilá. It’s not only fast, you’re bearing only on the actual bead, so damaging the sidewall is virtually impossible.
First lever both hooks of the Tyreplier under the rim.
Then push down on the outside lever to force the bead out of its groove.
Once the first bit of bead pops free of the groove, it’s generally possible to stomp the rest of it out around the circumference of the rim. If that doesn’t work, reposition the jack or Tyreplier.
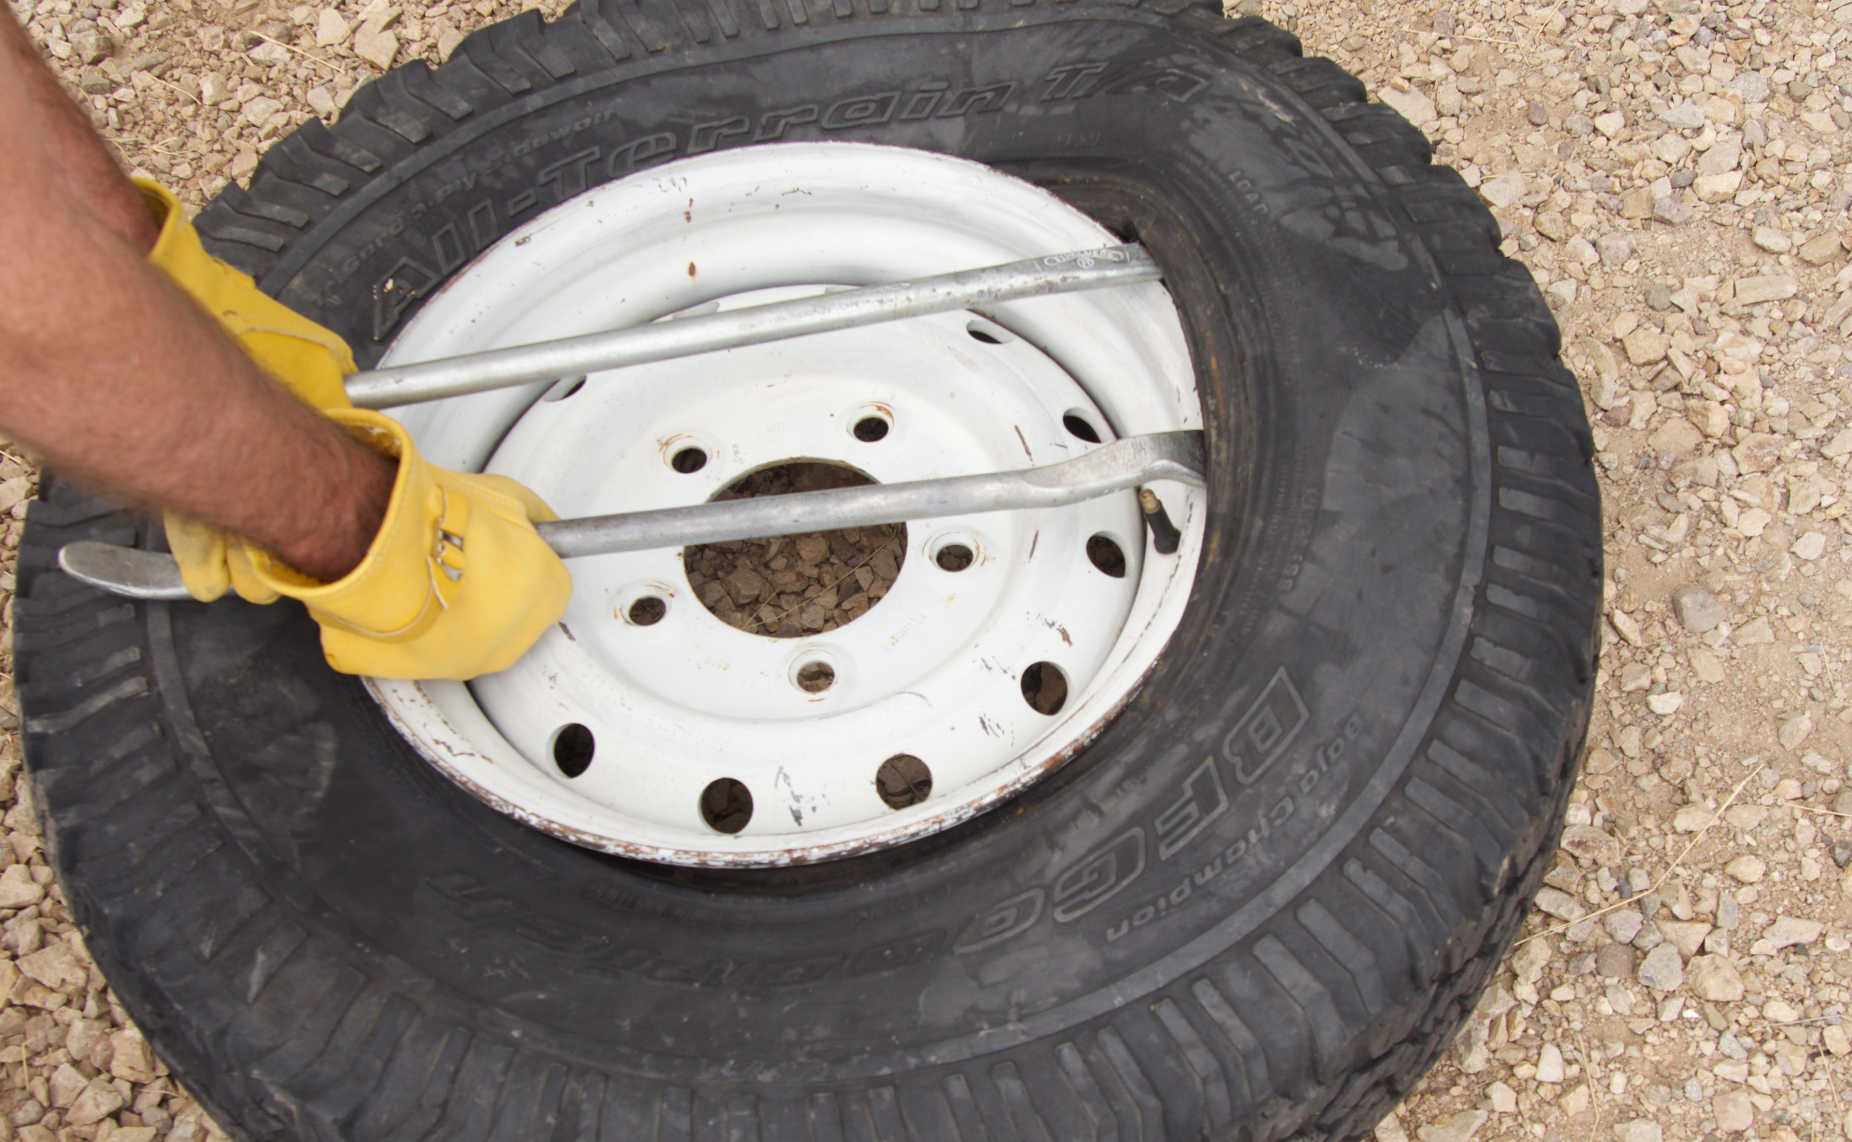
Once the outside bead is free, turn the tire over and do the same to the inside bead. The tire will now be loose in the well of the rim, but you still will not have access to the inside of the carcass. For that you’ll need a pair of automotive tire irons, which look like and are just butched-up bicycle tire irons about two feet long, and work exactly the same way. (Extreme Outback's Deluxe model is the best I've used.) Start near the valve stem (again, you’re working on the outside of the wheel), insert one iron and lever the tire over the wheel edge. Insert the next one near it and lever that section of the tire over. Leave the first iron in place as you proceed around the tire until it pops free. With one side of the tire off the rim, you’ll have adequate access for most repairs; if not, you can use a tire iron and a dead-blow hammer to take the tire completely off the wheel. But getting the second bead over the edge is significantly more difficult.
Using tire levers to pull the bead over the rim.
If the sidewall split is short, you can simply patch it from the inside; again think glorified bicycle repair. The patches in the Extreme Outback kit cover a range from small to terrifyingly huge. If the split is severe, you’ll want to stitch it to hold the edges together and reinforce the patch—yes, more or less like a surgeon would do with a bad cut. I use a cordless drill, or an awl with a cutting edge, to make a line of small holes on either side of the split, an inch or so apart and a quarter inch from the split, then stitch it together tightly with whatever is handy. Small-diameter, flexible wire works best; heavy fishing line works too but is difficult to knot. (I’ve heard of people using dental floss, which might work if it were tripled or quadrupled.) With the slice secured, you can roughen the area behind it, spread cement on both tire and patch, wait until dry, then apply (obviously your patch needs to cover the stitch holes). This is another repair to be considered only in a fix-it-or-walk-home situation, but I know of stitched tires surviving dozens of rough miles. Incidentally, if you have a tire off the rim and you’ve done any plug repairs, note that now is a good time to trim the plug and install a patch behind it for ultimate security.
Now you have to put everything back together. Starting this time opposite the valve, use the tire irons to pry the bead or beads over the rim and back into the well of the wheel, so you have a loose tire completely inside the rims. Remember the fancy machine the tire tech used to blast air into the tire and seat the beads? Again, we’re going to improvise.
There’s a long-standing myth that you need a very large volume of air (or hold-my-beer pyrotechnics with starting fluid; see below), to reseat beads. But I’ve done it with very small compressors and proper technique—as long as the wheel is not too wide for the tire. If you run showpiece alloy wheels ten or twelve inches (or more) in width, so your tires’ sidewalls barely protrude past them, you might have a devil of a time reseating beads in the field—and you’ll also stand a much greater chance of damaging a wheel rim on the trail, since there’s no protection offered by the sidewall. The steel wheels on our Land Rover 110 and FJ40 Land Cruiser are 6.5 inches wide, and I can easily reseat beads on 255/85/R16 BFG tires (higher-profile tires help as well, with their more flexible sidewalls).
I mentioned that I’d reseated beads with very small compressors, but the larger volume of air you have, the easier and quicker the process will be (see sidebar on compressors). A CO2 tank will work very well, but be aware that CO2 can leak out of tires over time.
Here’s how it’s accomplished. Stand the tire and wheel upright, and center the tire as evenly as possible in the wheel with your chalk marks aligned. If tire and wheel are well-matched the tire’s beads will naturally bear against the inside of the grooves and form a partial seal on their own. Use water, with some detergent in it if you have it, to thoroughly soak the perimeter of each bead—this functions more as a lubricant than a seal. In a pinch any liquid is better than nothing—my nephew reports that Keystone Light beer works well, which is as far as I’m concerned the best possible use for Keystone Light.
Your valve core is still out, right? Apply the air chuck to the valve and start inflating. (Note: You’ll need a chuck that doesn’t require the valve core to be in place to operate.) Check yours first. If the tire is not centered properly you’ll see a lot of bubbles in one spot; stop and reposition. If the seal is good you’ll see the tire’s walls expand slowly until, with a distinctly alarming metallic PING, they will seat in turn, usually the inside one first because of the ramp. Release the chuck—air will rush out but the beads will stay put. Re-insert the valve core, inflate, and you’re finished.
Some bush mechanics suggest running a ratchet strap around the circumference of the tire and tightening it prior to setting the beads, the idea being that it will push the beads outward and making sealing easier. I’ve tried it with and without and never noticed a difference, even with a big strap—and to me the strap just adds one potentially dangerous bit to fly off if something goes wrong. The other seating technique is the infamous starting-fluid routine, which involves spraying starting fluid or another flammable aerosol around the bead of the tire laying on the ground, then tossing in a match to create a minor explosion that blows the beads onto their grooves in a split second. When this works it is a crowd-pleasing spectacle, but search YouTube for videos and you’ll find plenty of crowd-pleasing, spectacular failures as well. I prefer the more civilized approach.
I only failed to reseat a bead once in public, at an Overland Expo. It was embarrassing, and I didn’t discover the reason until later. The wheel I was using was very rusty on the inside, and simply let too much air leak to re-seat no matter how hard I tried. Once I cleaned off the rust and repainted the wheel I never had trouble again.
There is another situation in which you might find it necessary to reseat a bead. Occasionally on very rough trails a rut or rock will catch the side of a tire with enough force to knock a bead loose and produce a startling whoosh as the tire deflates. This seems somewhat more likely to occur if you have aired down to enhance traction (or if you’ve been indulging in a bit of Baja 500 hooning). Frequently only one bead—usually the outside one—will be pushed off. While it is sometimes possible to reseat the bead with the wheel still on the truck, you might find it necessary to remove the wheel and actually unseat the opposite bead to get the tire to sit properly for reseating with an air compressor.
Once you’ve mastered the art of demounting tires and reseating beads in the field, dealing with simple punctures will seem like child’s play. That day in Nevada? If memory serves, we collected several more punctures before the day was out, and each one was repaired in a couple of minutes. We never even considered putting on the spare tire. That would have been way too much work.
Just part of the contents of the Extreme Outback Ultimate Puncture Repair Kit (about $100).
. . . and the also-excellent ARB kit, well-organized in a blow-molded case ($42).
One last note: The plugs that are included with the ARB kit are really too large in diameter for most punctures, and make the job more difficult than it needs to be. Do yourself a favor and look on Amazon for extra-thin Safety Seal plugs to augment the kit. They help with the Extreme Outback kit as well.
More on the OCTKL
Snap-on and JH Williams screwdrivers
The One-Case Tool Kit Lite (OCTKL) has been gathering dust the last few months. Trail dust, that is. It’s seen enough use that I thought a report was warranted, although I’m not sure the kit has assumed its final form. (See here and here for the initial articles.)
In many instances the contents simply migrated from the OCTKL’s 60-pound progenitor. But I wanted to try a few different things, and I explored a couple of new-to-me manufacturers. Here’s what I’ve been doing.
I go back and forth on screwdrivers. Sometimes I think Ace Hardware stuff is just fine. A 12-piece set there will run you $29. Snap-on charges $187 for seven pieces—four standard, three Phillips. That’s $26 each. Yes, they’re U.S.-made. Yes, the Snap-on items incorporate hex fittings so you can apply a wrench for extra torque, so they’re obviously durable. But seriously? I’m perfectly happy to drop $180 on a half-inch Snap-on ratchet, which might be the critical tool for a major repair. Less convinced I need the same commitment for screwdrivers.
Out of curiosity I started browsing Snap-on’s “Industrial Brands,” which comprise various subsidiaries that make tools for Snap-on in various countries of origin. One intriguing brand was JH Williams, which in at least some cases appears to manufacture tools equivalent to Snap-on tools of earlier generations. On Amazon I found a basic five-piece Williams screwdriver set, #100P-5MD—three slotted drivers and two Phillips—for $38.23. Also available was a comprehensive 19-piece assortment for $115. The Williams drivers appeared to be exact clones of the Snap-on screwdrivers I, er, actually bought about 15 years ago—right down to the hex fitting. The handles are identical—a rather slick black composite, which at first seems contra-indicated. However, they are shaped well for grip, and the finish makes them easy to clean up in the field—an important benefit in my book. I bought the basic kit as an experiment, and so far they’re performing perfectly.
I was surprised to see the Snap-on Industrial Brands website lists the origin of the Williams screwdrivers as the U.S. I figured they had been made offshore. As best I can determine, these are indeed identical to the previous generation Snap-on screwdrivers. Hmm . . . Seems like a bargain to me.
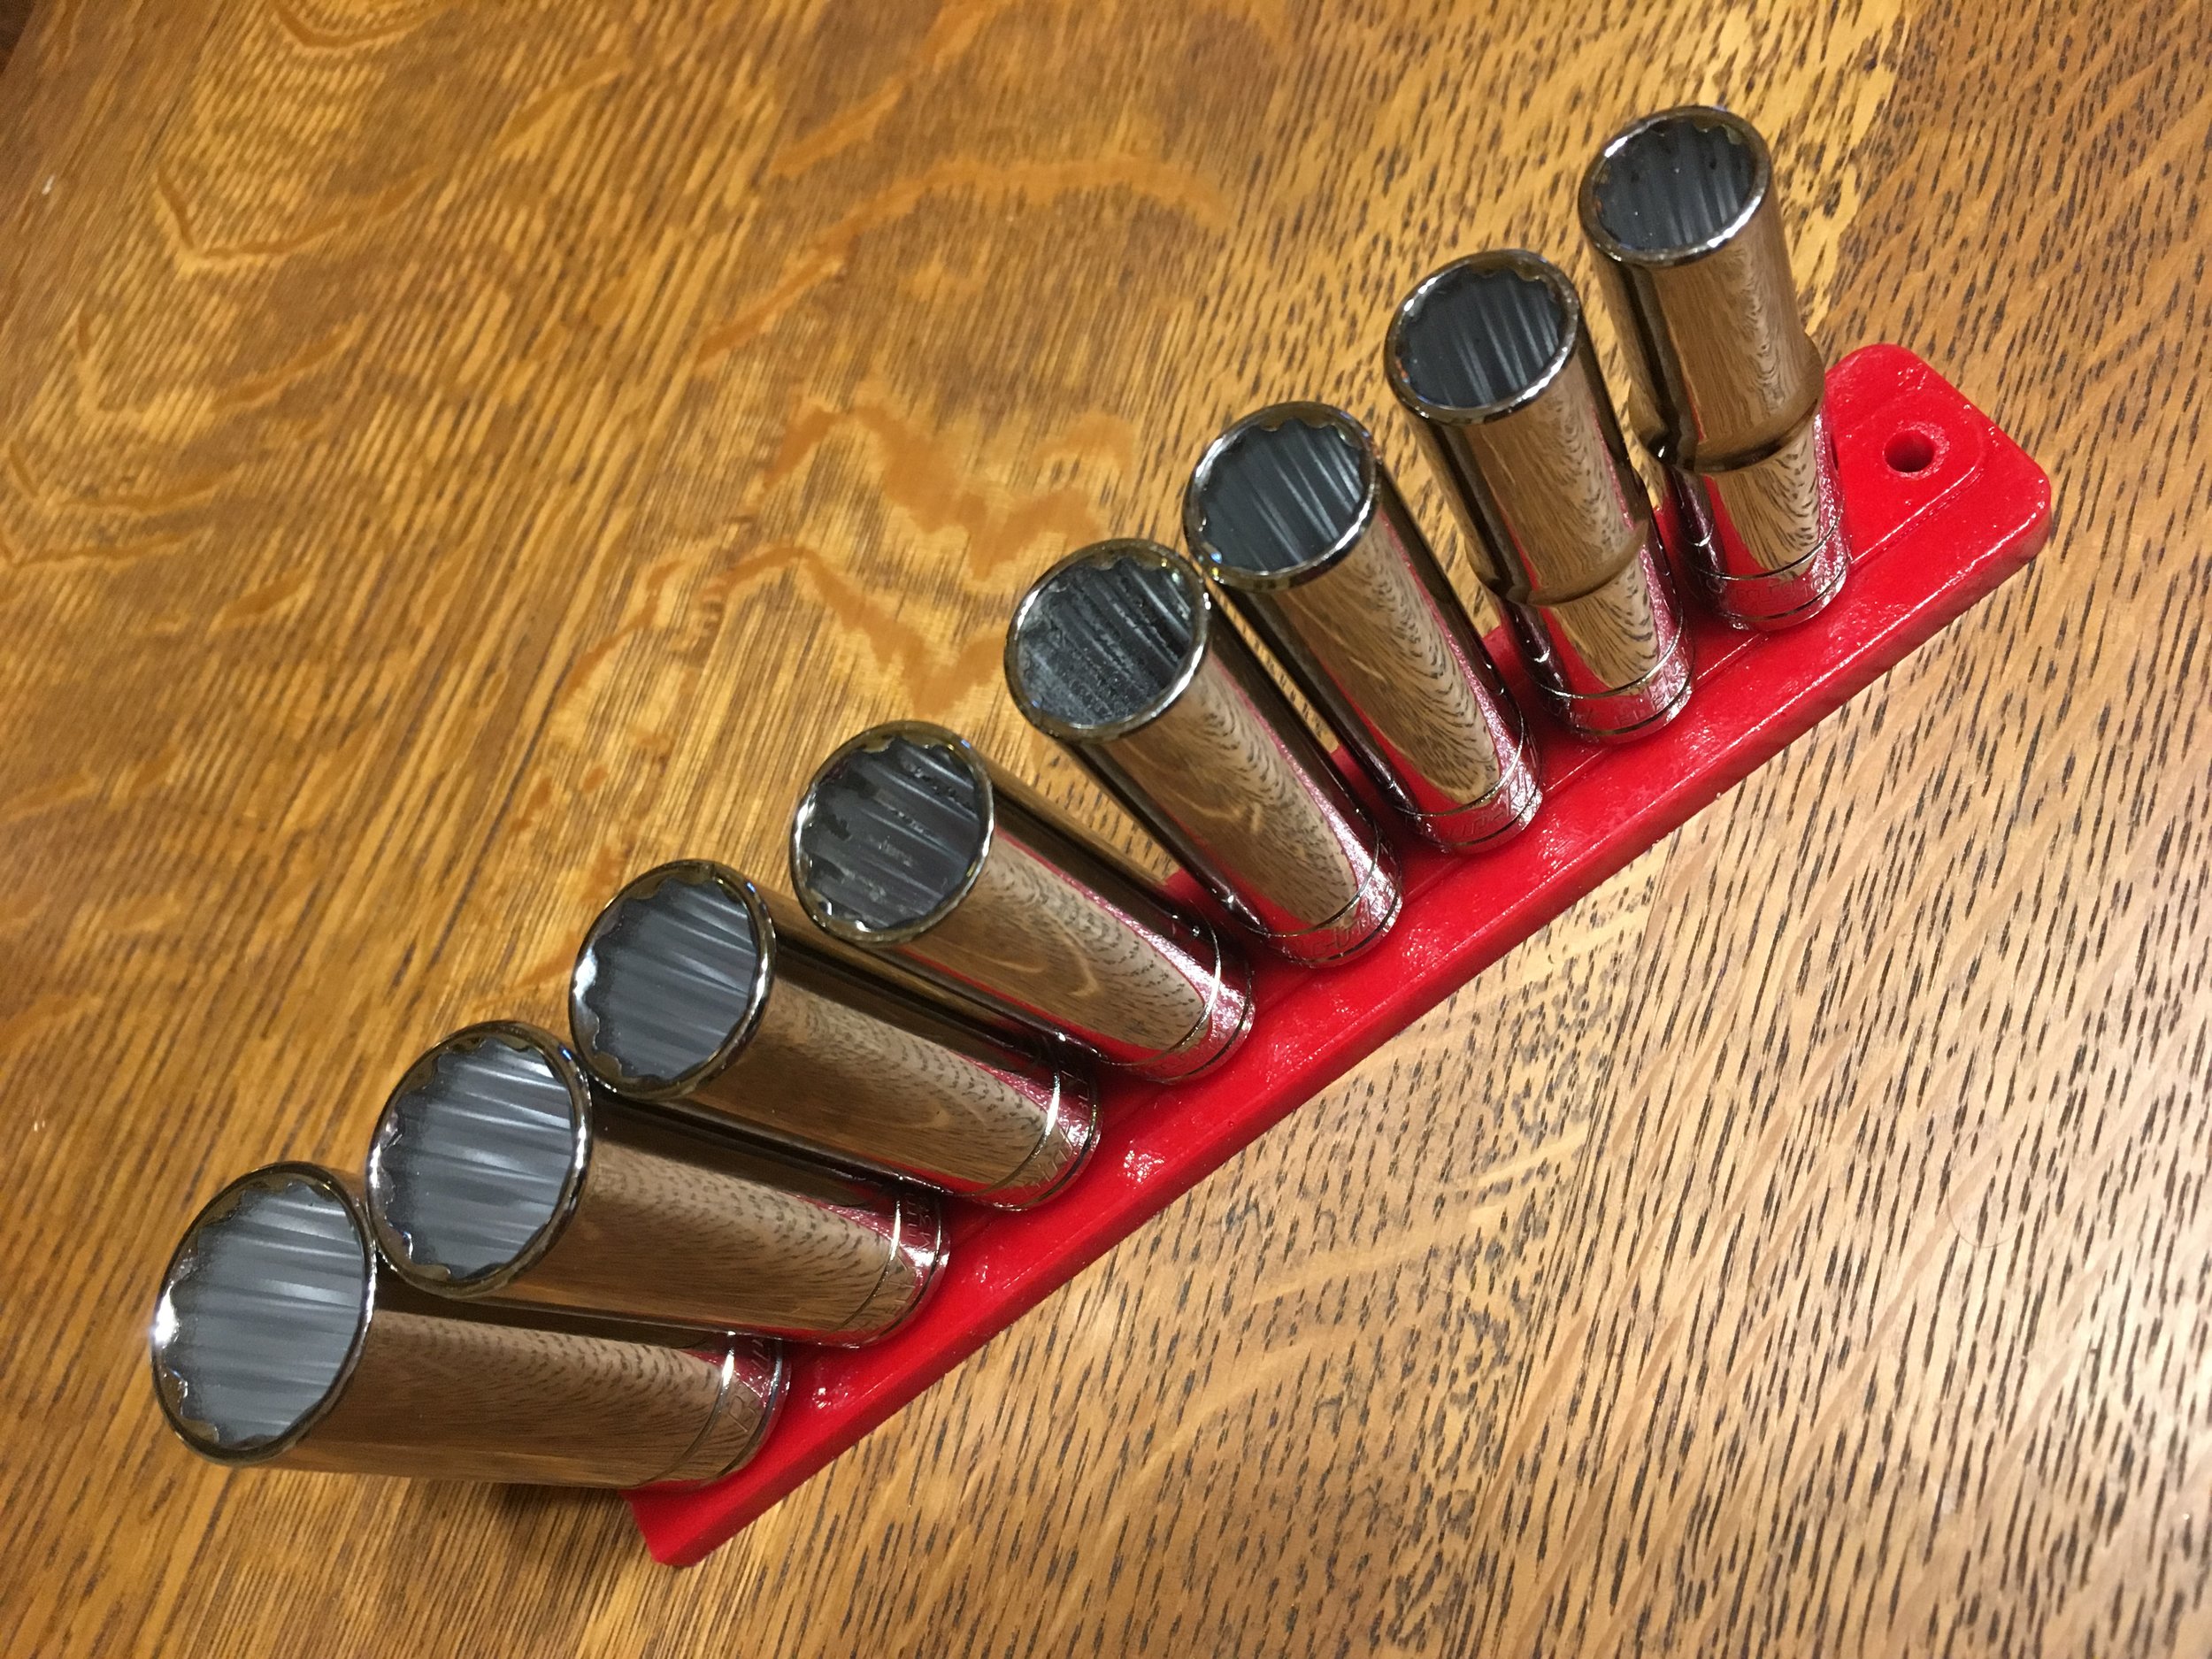
So . . . what about other Snap-on Industrial Brands? One that’s been around forever is Blue Point, which I seem to recall originally was used to label Snap-on’s power tools. Now Blue Point covers a wide range of products, including hand tools. I decided to try a set of 3/8ths inch, 12-point deep metric sockets, which seem to be impeccably made, and grip fasteners with every indication of the tight tolerance that is a hallmark of high-quality sockets. The Blue Point sockets are made in Taiwan, which has become the source for high-quality tools from several other companies such as Facom.
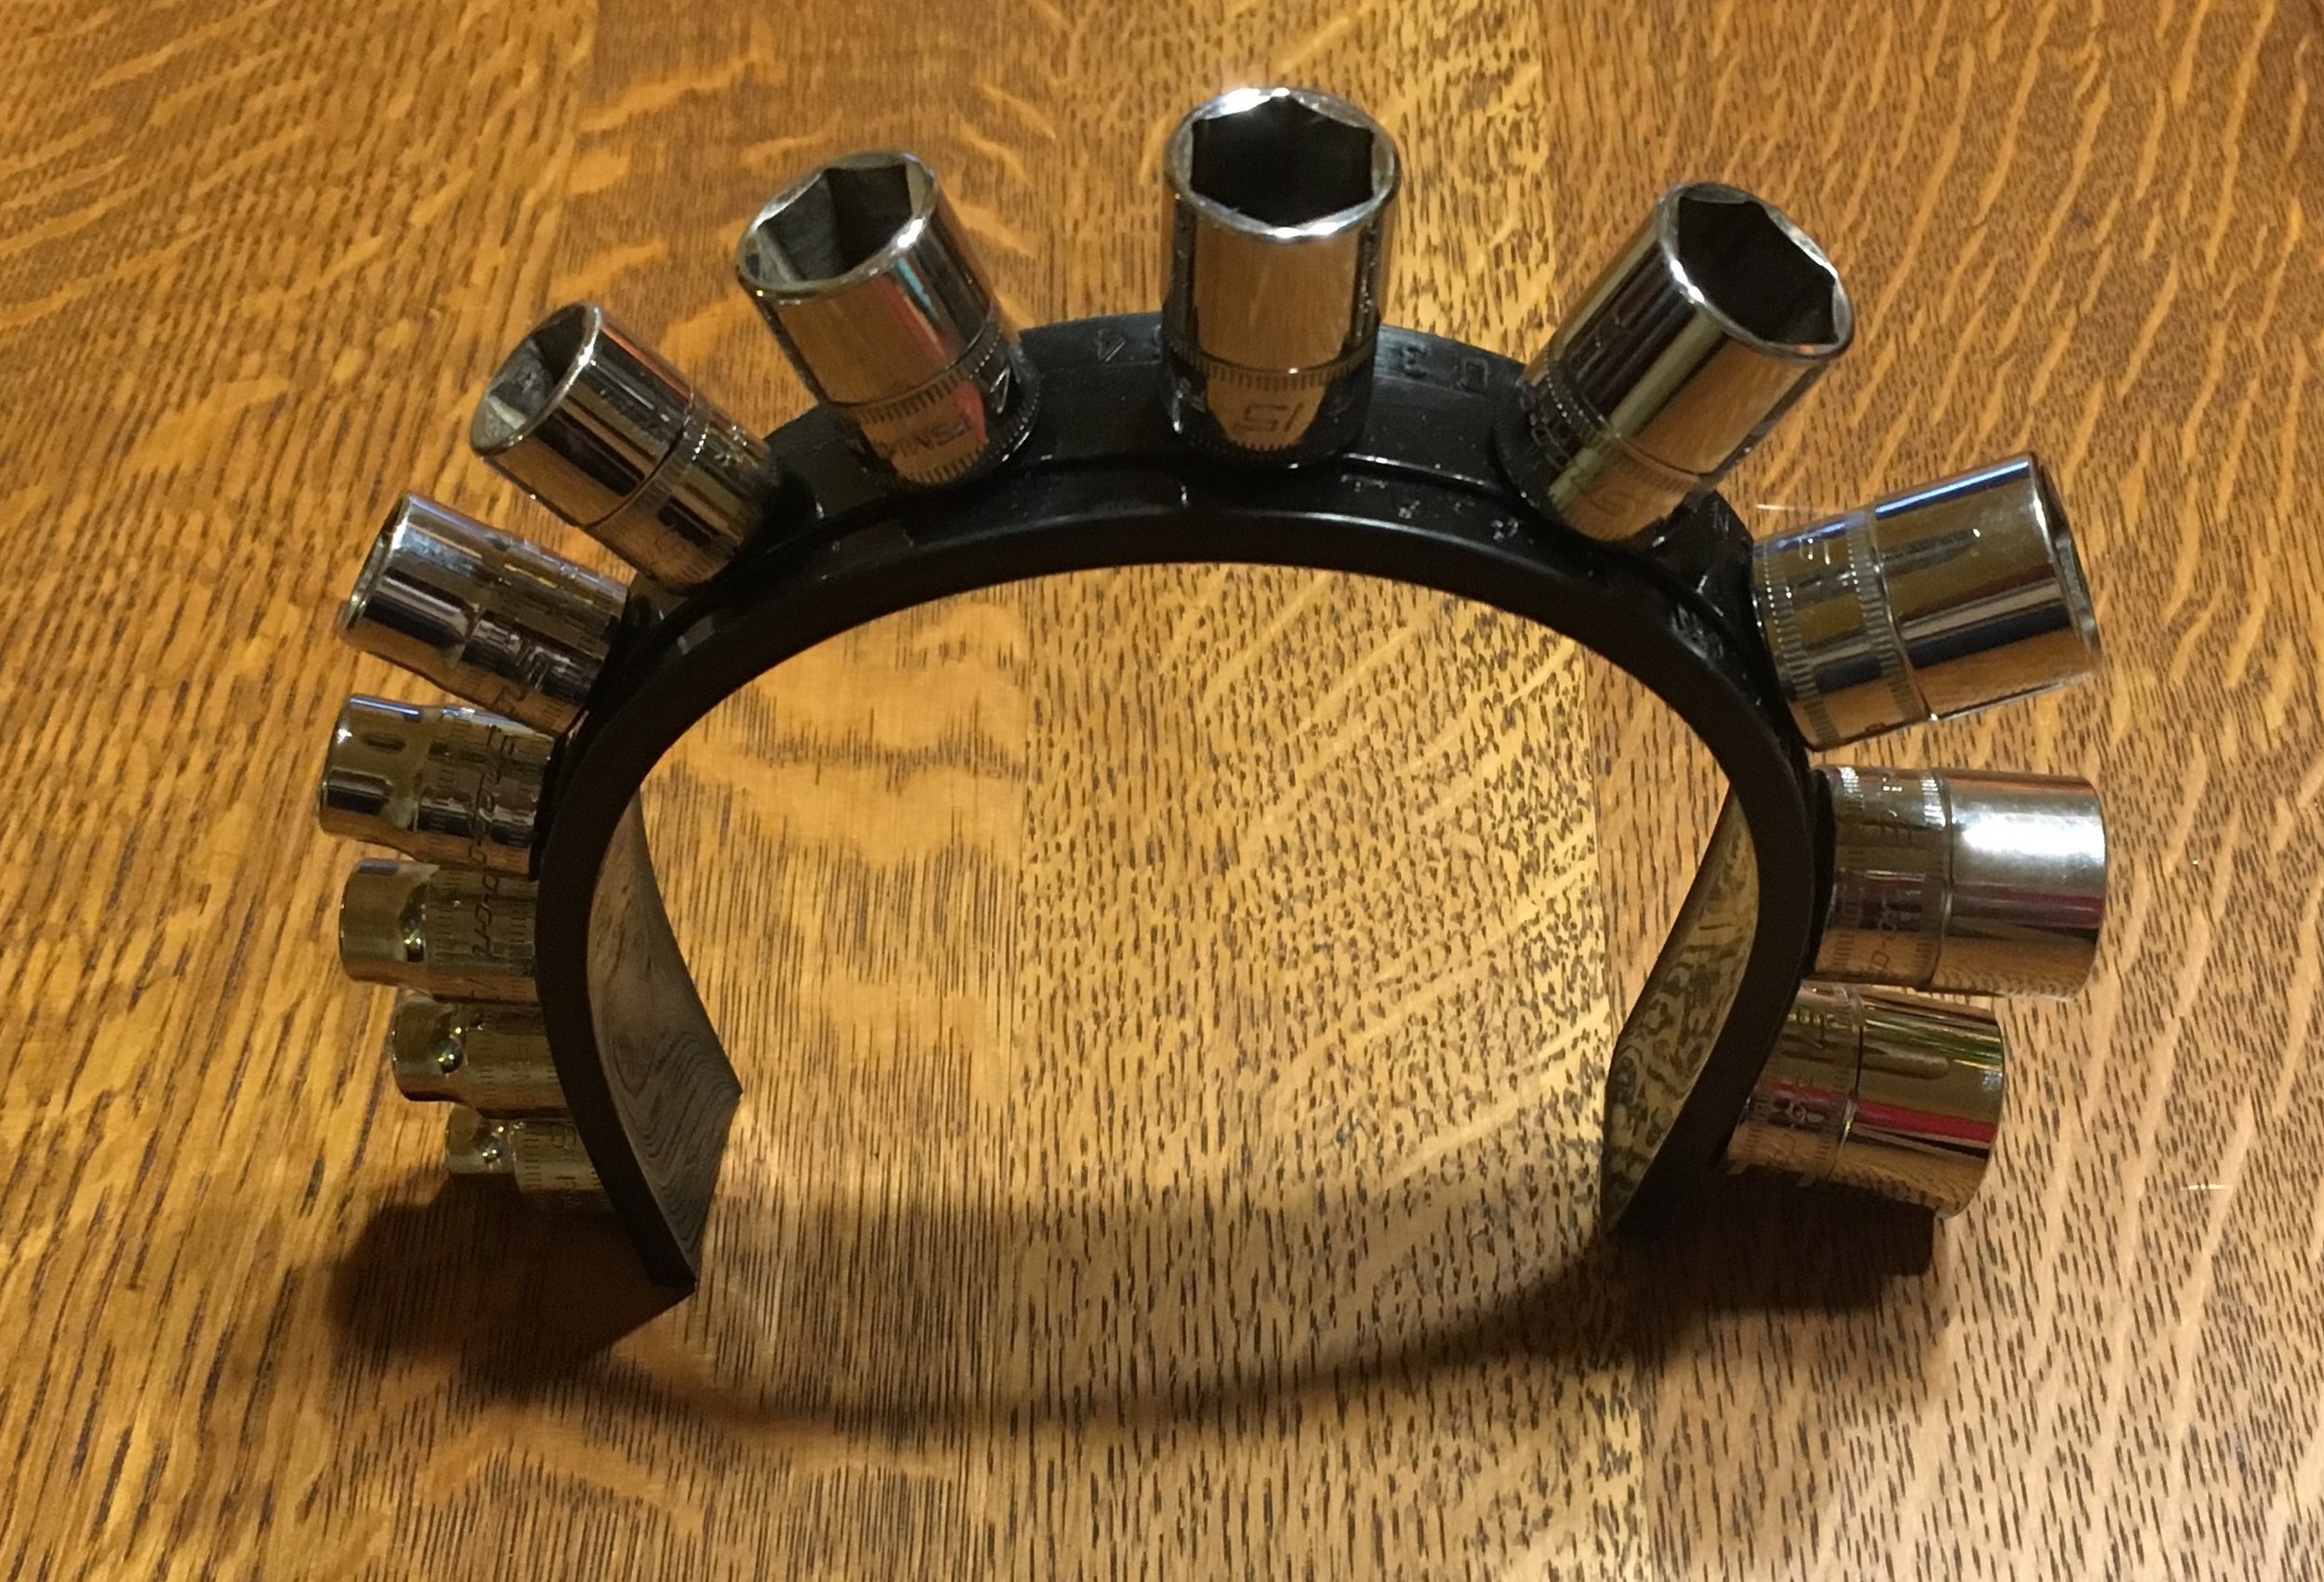
I wanted to keep the OCTKL compact and as light as possible, but I didn't want to simply dump my sockets into one of the pockets of the Blue Ridge Overland bag. So I ordered a set of flexible urethane socket rails from Off Road Trail Tools. They come in 1/4, 3/8, and 1/2-inch sizes, weigh next to nothing, and can be cut to length if you don’t need all 14 posts.
The ORTT urethane socket rails are flexible and trimable
On to . . . needle-nosed pliers? Yes. I find myself using these frequently, yet I’d never found a reasonably priced pair that I really liked—until I tried the ones pictured, from Park Tools, who are more or less considered the Snap-on of bicycle tool makers. Their NP-6 pliers have five different gripping, cutting, and crimping sections, fat and extremely comfortable and secure grips, and a gentle spring that keeps them open unless squeezed, meaning you only have to manipulate them in one direction. Well worth $25.
Open diffs, lockers, and traction control
Many years ago I was exploring a trail in the mountains east of Tucson, Arizona, in my FJ40, and came upon a couple in a shiny new 4x4 Toyota pickup. They had managed to high-center the transmission skid plate on a rock ledge, so that the right front and left rear tires of the truck hung just an inch or two in the air and spun uselessly when the fellow applied throttle. The couple, new to backcountry driving, was bewildered that their “four-wheel-drive” vehicle had been rendered completely immobile by such a minor obstacle, and were convinced something was wrong with the truck. I picked up a fist-sized rock from the side of the trail and kicked it solidly under the hanging rear tire. “Try it now,” I said—and the Toyota bumped free. They were astonished and even more bewildered—until I explained how a differential works.
When any four-wheeled vehicle makes a turn, each wheel needs to rotate at a different speed because it travels a different line than the others, and thus a different distance. If, for example, the two rear wheels were locked together with a solid axle, the tires would scrub horribly every time the vehicle turned, and handling would be affected dangerously. Thus we divide that axle in two and connect them with a differential—a system of gears that transfers power from the driveshaft to the wheels while allowing them to rotate at different speeds in a turn. In a four-wheel-drive vehicle we add another driveshaft and differential at the front, so those wheels can be driven as well.
But an open differential, as this is known, has a major inherent flaw, especially for those of us who own 4x4s: If one tire loses traction, the differential gears, in effect, route all power to that side of the axle. Thus if you stop with one wheel on a solid surface and the other in mud—or hanging in the air—the tire with grip will remain stubbornly motionless while the other just spins. (Technically both wheels are receiving the same amount of torque, but the amount required to spin the low-traction tire is not enough to move the vehicle with the other tire.) So my friends in the Toyota pickup found themselves in a situation in which the power being delivered to the front axle was expended on the tire that was off the ground, while the same thing happened in the rear. Once I stuffed that insignificant rock under the hanging rear tire, the full torque of the engine was available and the truck pulled itself free.
Ironically, the drawbacks of open differentials became more apparent with the advent of so-called full-time four-wheel-drive vehicles such as Land Rover’s Defender. In a part-time 4x4, the front and rear driveshafts are locked together at the transfer case when four wheel drive is engaged, so power is always equally distributed to both axles and therefore to at least one wheel in front and one in back—but you cannot drive on pavement with four-wheel drive engaged or the tires will scrub and the gears will bind. The Defender (along with other vehicles such as the Mercedes Benz G-Wagen) allows engine power to be directed to both ends of the vehicle, regardless of the surface, by employing a third differential in the transfer case to allow the front and rear driveshafts to turn at different speeds on pavement and prevent binding. To ensure equal power to both ends of the vehicle on trails, the center differential can be locked manually. But if that lock fails—as happened to me in a Defender 110 on a remote route up the west wall of Kenya’s Great Rift Valley—you are left with a one-wheel-drive vehicle. When my front axle unloaded on the steep grade, all power went to that axle through the open transfer-case diff, and as soon as one front wheel unloaded I was completely immobilized with a single tire spinning fruitlessly—on a scary 40-percent grade with a steep dropoff. (I was towed the rest of the way up the escarpment when, improbably, a battered Land Cruiser appeared driven by none other than Philip Leakey . . .)
Over the decades, various attempts have been made to allow the differential to function properly in turns while maintaining full traction when needed. Way back in 1932 the engineering firm ZF, at the request of Ferdinand Porsche, invented a “limited-slip” differential to prevent the high-powered Auto Union Grand Prix cars Porsche had designed from spinning their inside tires when exiting turns. In the succeeding decades, many American manufacturers installed limited-slip differentials in their trucks to help enhance traction on slippery surfaces, and several types were developed. Some used clutch packs to transfer power, others (Torsen, Quaife) used gears, and some—especially those designed to be installed in transfer cases—used hydraulic fluid.
But limited-slip diffs are just what their name implies—they cannot completely prevent loss of traction in challenging conditions. The best way to ensure full traction when it’s needed is to lock both halves of the axle together, thus ensuring ideal power delivery even if one wheel is off the ground. But once you do that you’re right back to our initial problem with tire scrub and gear windup. The trick, then is to have the differential lock only in conditions where it would be beneficial—or to have it locked all the time except when turning. This can be accomplished either automatically or manually.
In 1941 a fellow named Ray Thornton patented an automatic locking differential he called the Thornton NoSPIN Differential. It was manufactured by the Detroit Automotive Product Corporation and installed in many WWII military vehicles. The NoSPIN employed a series of clutch packs and a spring-loaded cam gear, which kept the axles locked together unless the vehicle was turning a corner, when the cam disengaged the clutch packs from the spider gears and allowed the wheels to rotate at different speeds. In the 1960s American truck manufacturers began installing the NoSPIN in light-duty trucks as an option—and it gained its nickname, the Detroit Locker. While extremely effective, the Detroit Locker suffered from noisy operation on pavement as the gears engaged and disengaged, and handling that could sometimes be jerky as power transferred between one and two wheels. (Later models have attenuated these characteristics somewhat, but the transition is still noticeable to the driver.) A similar product made by the Eaton Corporation was introduced on 1973 General Motors light trucks, and Eaton subsequently bought the parent company of the Detroit Locker.
The mechanism of the Detroit Locker and its relatives replaces a large part of the differential, requires precision resetting of pinion backlash, and is thus expensive and time-consuming to install as an aftermarket option. Not so with so-called “lunchbox” lockers such as the clever Lock-Right, which replace only the spider gears and can be installed in an afternoon by a competent home mechanic. The Lock-Right and its kin keep both axles locked together until the vehicle turns, at which point the internal drive plates ratchet past each other and allow the outside wheel to turn faster than the inside wheel. On the trail, full power is available to both wheels, even if one is airborne.
The Aussie Locker is typical of so-called "lunchbox lockers."
Opinions differ on the “lunchbox” nickname—some claim it’s because the unit will fit in a lunchbox, others because you can install one in the time it takes to eat a sandwich and chips (somewhat optimistic). Regardless, this type of locker is the most affordable and easy way to gain true diff-locking capability for your 4x4. However (there’s always a however), the Lock-Right-type lockers are restricted in strength depending on what the carrier is designed for, and are generally not recommended for tires over 33 inches in diameter. They can also be noisy on the street, as the ratcheting becomes noticeable around corners. And I would strongly dis-recommend them for installation in the front axle, as steering will be significantly affected (and, as with the Detroit Locker, they should never be installed in a front axle that does not have free-wheeling hubs).
Automatic lockers have their fans, but arguably the best locking differential is one the driver can control. The Australian company ARB popularized the air-activated locking differential after buying the rights to the Roberts Diff-Lock in 1987—and it transformed the capability of the Land Cruisers and Land Rovers in which it was first deployed. For most driving, a differential with an ARB unit installed acts as a normal open differential—no noise, no steering effects or increased tire wear. But when traction is lost—or, significantly, when the driver observes a spot ahead of the vehicle where traction might be lost—the locker can be engaged and the obstacle traversed smoothly and easily. Once back on a solid substrate the diff can be unlocked and returned to normal function. A small compressor (which can double for filling tires) activates the locker by pushing a sliding pin in the differential. The ARB locker is now available for a huge range of vehicles, and while its installation is as complex as that of the Detroit Locker (with the wince-inducing addition of needing to drill and tap a hole in the differential housing for the air line), its reliability and astounding capability has been proven over millions of miles.
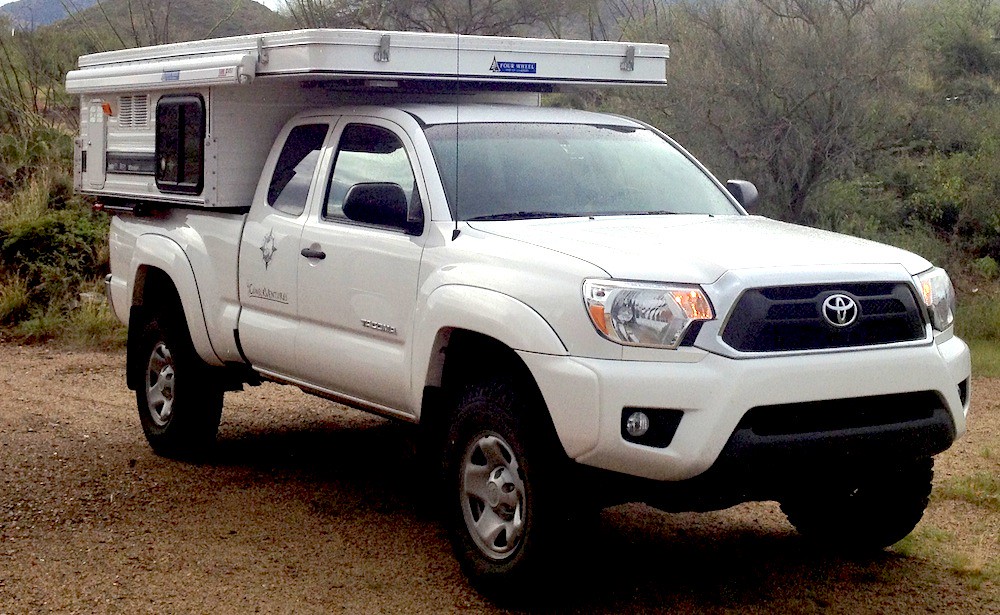
It took a few years, but vehicle manufacturers caught on to the benefits and capabilities of selectable diff locks. Toyota introduced an electrically operated rear differential lock in its TRD package for the Tacoma, and optional front and rear diff locks in the 70 and 80-series Land Cruisers. The Mercedes G-Wagen has front and rear locks, as does the Rubicon version of Jeep’s Wrangler, and the Ram Power Wagon, among other vehicles. Until you’ve climbed a 45-degree slope in a vehicle with both diffs locked—and, thus, true four-wheel drive—it’s difficult to imagine the gravity-defying traction available. Even experienced passengers gasp and scrabble for handholds as high-noon sun floods through the windshield. (Showoffs are advised to keep in mind that with the front diff locked steering is very difficult; it should only be employed when absolutely necessary and for as short a distance as possible.)
To explore the next step in making four-wheel-drive vehicles truly four wheel drive we need to do a 180-degree turn and look at . . . brakes: specifically anti-lock braking systems.
While ABS has been around in one form or another since 1929, when a primitive mechanical system was developed for aircraft, it was Mercedes Benz that introduced the first fully electronic, multi-channel four-wheel anti-lock braking system as an option in 1978. ABS relies on a deceptively simple system of sensors at each wheel, individual hydraulic pumps for the calipers, and a computer control. The sensors do nothing more than count the number of rotations per unit of time for each wheel. When one or more of the sensors detects a wheel turning slower than the others during braking—as when a tires locks and stops rotating altogether, increasing braking distance and hampering steering control—the computer reduces braking force to that wheel, pulsing the pressure many times a second to maintain static friction between tire and surface. Soon this system was exploited to provide electronic stability control (ESC), to help road cars maintain traction in slippery conditions.
And then—lucky for us—a light went on in an engineer’s head that this system could also be used to enhance traction in four-wheel-drive vehicles. It’s accomplished by exploiting the characteristics of the open differential.
Recall the offside wheels on that poor Toyota pickup spinning helplessly in the air. With an electronic traction-control (ETC) system, those versatile ABS sensors send that information to the computer, which applies braking force to the spinning tire or tires. The open differential is “tricked” into increasing torque to the tires on the ground, and the vehicle pulls itself free. Land Rover debuted ETC on its 1993 Range Rover, and off-road driving has never been the same. Advances in programming and technology have since brought us to the point that some vehicles can maintain forward progress with traction to only one wheel.
That would be miraculous on its own, but engineers weren’t finished yet. One of the most challenging conditions facing a driver on trails is a steep descent. In an older vehicle such as my FJ40, if you stomped on the brakes in a panic on a steep downhill section, the unloaded rear brakes would lock and the vehicle would instantly try to swap ends. Descending such slopes meant using first-gear-low-range engine braking and careful cadence foot-braking to make it down safely. In a vehicle with automatic transmission (and thus little engine braking) the situation was even dicier. Enter hill-descent control: Punch a button, point the vehicle downhill, and steer. The ABS and computer can selectively brake individual tires if necessary to maintain a steady walking pace and prevent lockup on truly hair-raising slopes. No driver, no matter how skilled, can equal that.
I remember my initial experience in a vehicle equipped with ETC and hill-descent control. At first the chattering, juddering progress up and down steep ridges was alarming—it sounded like something was seriously wrong. But I soon got used to it and realized how effortlessly I was conquering obstacles that had required all my attention in the FJ40.
Is electronic traction control, then, superior to manually lockable differentials? The definitive answer is: It depends. Remember that a skilled driver using manual diff locks can anticipate the need for extra traction and respond in advance, thus frequently avoiding drama of any kind. By comparison, a traction-control system must detect a difference in wheel speed before it reacts, and the computer must decide if action is required or if the driver is simply turning. In some vehicles I’ve driven a considerable amount of throttle—and trail-damaging wheelspin—is necessary before the system kicks in. Increasingly, however, manufacturers are incorporating driver-selectable, terrain-specific algorithms that quicken response when the vehicle is in low range, for example. These algorithms can also modify throttle response and shifting to suit conditions. Land Rover was a pioneer in this technology with their Terrain Response dial. Some vehicles, such as Jeep’s Wrangler Rubicon, incorporate both ETC and manual diff locks—the very best of both worlds.
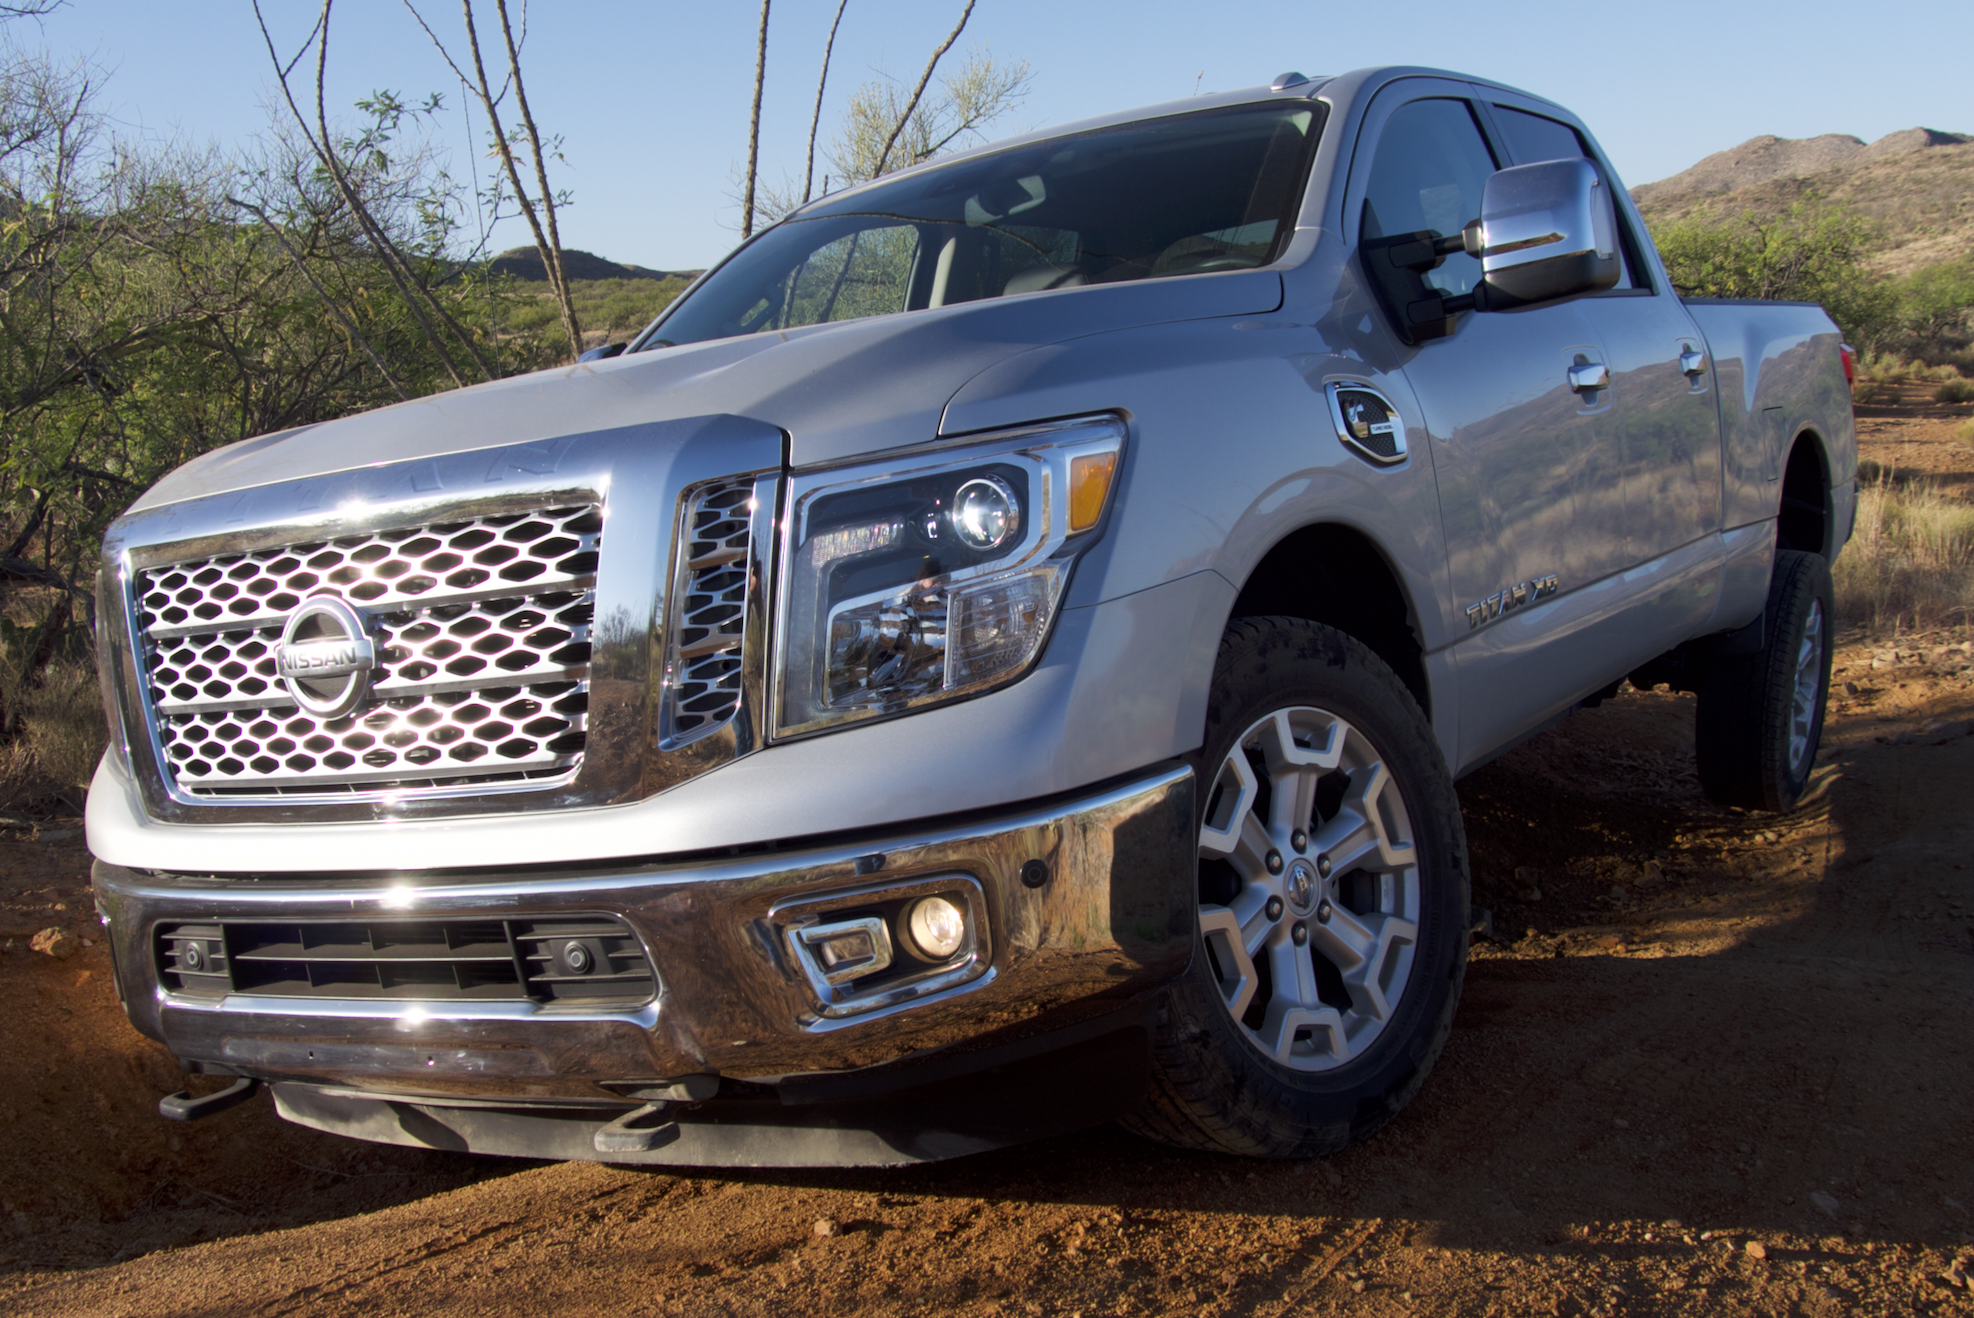
The Nissan Titan XD's traction control will pull it through situations such as this, but not without some wheel spin.
One could argue that these computer-controlled tricks reduce the skill formerly required of the driver. Indubitably true to an extent—surely I feel I paid my dues with my leaf-sprung, open-diffed 1973 Land Cruiser over the years. Yet in the sybaritic, climate-controlled cockpit of a Land Rover LR4 or Jeep Wrangler Rubicon I can traverse terrain that would have the FJ40 struggling. If technology makes it easier for new enthusiasts to get out and explore the backcountry, I’m all for it—even if I don’t get to show off as often getting them unstuck with a fist-sized rock.
Headlamp restoration
I hate plastic headlamps.
Mind you, I’m delighted with the output and beam pattern of most modern headlamp* assemblies, which are as far ahead of sealed-beam technology as sealed beams were ahead of acetylene. But plastic is plastic, and while you might argue that polymer headlamp lenses are more resistant to stone chips than glass lenses, they eventually will discolor, renedering them semi-opaque and compromising their otherwise excellent performance—and also making them look like crap.
Our 2002 Tacoma Prerunner’s lamps were already well into the jaundiced phase when we took it over from my brother, and I recently decided to do something about it. So I went to the Griot’s Garage site.
I remember the early days of Griot’s, when most of their offerings were exotic and superb tools not available at Sears. My first exposure to Facom and USAG tools were through Griot’s. However, as time went on, Richard Griot (pronounced gree-oh) obviously discovered that the real money was in boutique car-care products such as cleaners, waxes, polishers, clay bars, and a myriad of accessories down to the level of oversize Q-tips for cleaning those pesky crevices in your alloy wheels. Only a few token mechanic’s tools remain among the latest offerings, but you can choose from among no fewer than five power buffers.
Still, any product I’ve bought from Griot’s has been first rate, so I ordered their headlamp restoration kit and set out one afternoon to see how it worked.
And it did, excellently. The entire process—masking the surrpunding trim, wet-sanding the headlamp lenses until the slurry turned from yellow to white, drying them off and prepping with an alcohol pad, and spraying on the new coating—took less than 30 minutes, and it was satisfying to watch the lenses, alarmingly cloudy-white from the wet sanding, turn sparklingly clear under the coating (said to be good for 24 months).
Was it worth $29.95? In terms of sheer results and ease of application, sure. Yet I found myself bemused by the contents of the box, which totalled:
One two-sided sanding pad, helpfully labelled “driver side” and “passenger side”
A couple of lint-free paper towels
Three alcohol prep pads
One 1.5-ounce spray can of the magic coating, good for exactly one set of headlamps
Coating aside, it would be stretching it to claim there was a dollar’s worth of material in the box. That leaves twenty nine bucks for an ounce and a half of coating. It works, but I suspect Griot’s is printing money on this kit.
*As an aside, technically the correct term for the device that lights the road in front of your vehicle is headlamp, not headlight.
Griot's Garage is here.
Quality camping gear: when (and when not) to economize
A recent Facebook dialogue regarding the post “OCTK Lite part 2,” and its comparison of quality in outwardly similar tools, reminded me of a column I published in OutdoorX4 some time ago regarding equipment quality in general. I thought it was worth revisiting. Herewith:
I’ve been reviewing outdoor equipment for 30 years now, and using it for a lot longer, in conditions ranging from 115ºF Sonoran Desert summers to Beaufort Sea storms. In a few situations I’ve felt the sharp realization that my life was quite possibly hanging on the quality of my equipment—lost in a winter storm skiing the North Rim of the Grand Canyon, caught seven miles offshore in a sea kayak in a Sea of Cortez chubasco—but in the overwhelming majority of circumstances it’s only been comfort, or the lack thereof, that has been affected by the gear I was using.
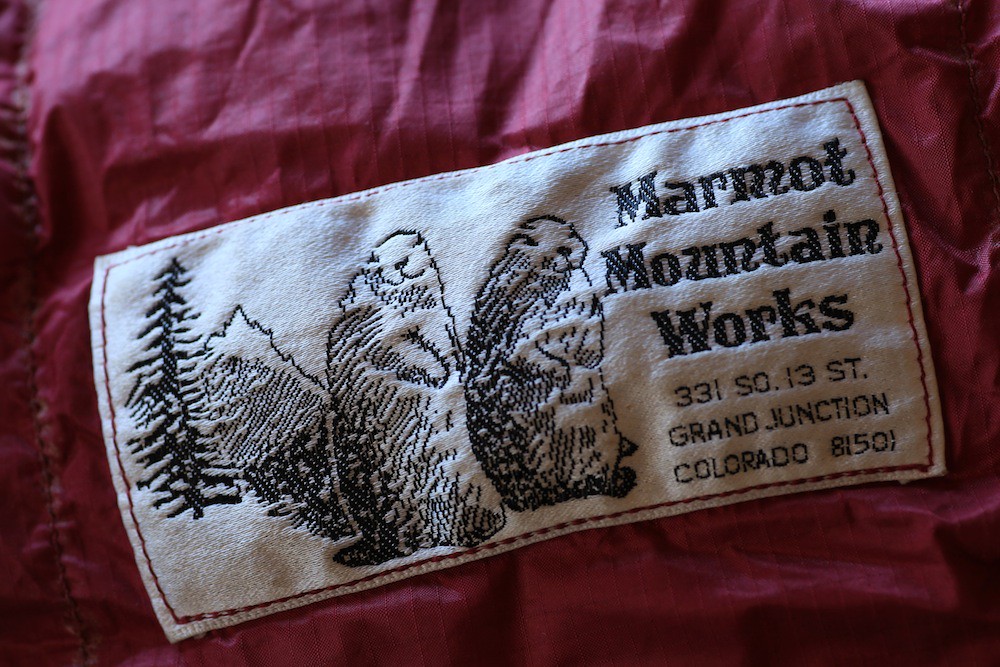
Nevertheless, in that time I’ve become convinced of the near-universal truth of this axiom: The best gear is also the least expensive in the long run. Spend more in the beginning on a quality piece of gear, and it will not only perform better, enhancing your comfort (and potentially your safety), it will also last longer, justifying its price over and over. Just one example is the Marmot Gore-Tex Grouse goose-down sleeping bag I bought in 1983. Scandalously expensive at the time on a penurious college-student budget, it has since seen untold nights of use, and has lost, as best I can estimate, perhaps a half inch of loft. I could go on with many other examples.
Okay, as I’ve been adminished many times, that’s fine in theory. But what if one simply does not have, say, $500 to spend on a sleeping bag, and $200 on a stove, and $50 on a double-wall titanium coffee cup? Am I suggesting that person stay home and leave travel to those who can afford bespoke equipment?
Not at all. My overriding goal in being in this business is to encourage people to get out exploring. One can only truly appreciate something if it is experienced in person, and if we are to preserve the most beautiful parts of our country and the world, we need people there seeing those parts and developing a bond of stewardship. And traveling and experiencing other cultures is the best way to stave off the xenophobia and isolationism that seems to be gripping our country these days.
Thus when I offer equipment advice to those just starting out, or looking at replacing worn out gear, and who are on a budget, I emphasize a strategy of priority. There are areas where economizing can be done without much compromise in comfort (or safety), and others where compromising would be foolish. Here are my ideas of where you should and shouldn’t economize.
Tent: This is the big one. While traveling and camping your tent is your home—your last line of defense against rain, snow, wind, and bugs. You can survive with a cheap sleeping bag, but if your $39.95 dome tent leaks in a shower, or collapses in a breeze, the best sleeping bag in the world won’t keep you comfortable—or safe. Whether you’re after a lightweight backpacking tent for motorcycle or bicycle travel, or a room-sized, stand-up model to carry in a vehicle, buy the best tent you can afford, and care for it well. (For an in-depth look at how to choose a good lightweight tent, see here.)
This Hilleberg is a good tent.
These are not good tents.
Sleeping bag: I own an exquisite, U.S.-made Western Mountaineering Sycamore MF sleeping bag stuffed with superb 850-plus fill-power goose down. It’s spacious, has a waterproof shell, is rated to 25ºF, and weighs barely two pounds. It cost $460, and I fully expect it to last the rest of my life. Yet, quite frankly, the $55 synthetic-fill Blue Jay bag from Wenzel, rated to the same temperature, would be just as warm, and cozier given the flannel lining. No, it won’t last as long, and it weighs over five pounds, which would be an issue if you’re motorcycling or pedaling, but for tossing in the back of the Tacoma, it’ll work just fine.
Sleeping pad: Yes, that $130 Thermarest LuxuryMap inflatable mattress is a dream to sleep on. But for about $70 you can buy a queen-size three-inch-think memory foam pad on eBay and cut two 30-inch wide sleeping pads from it.
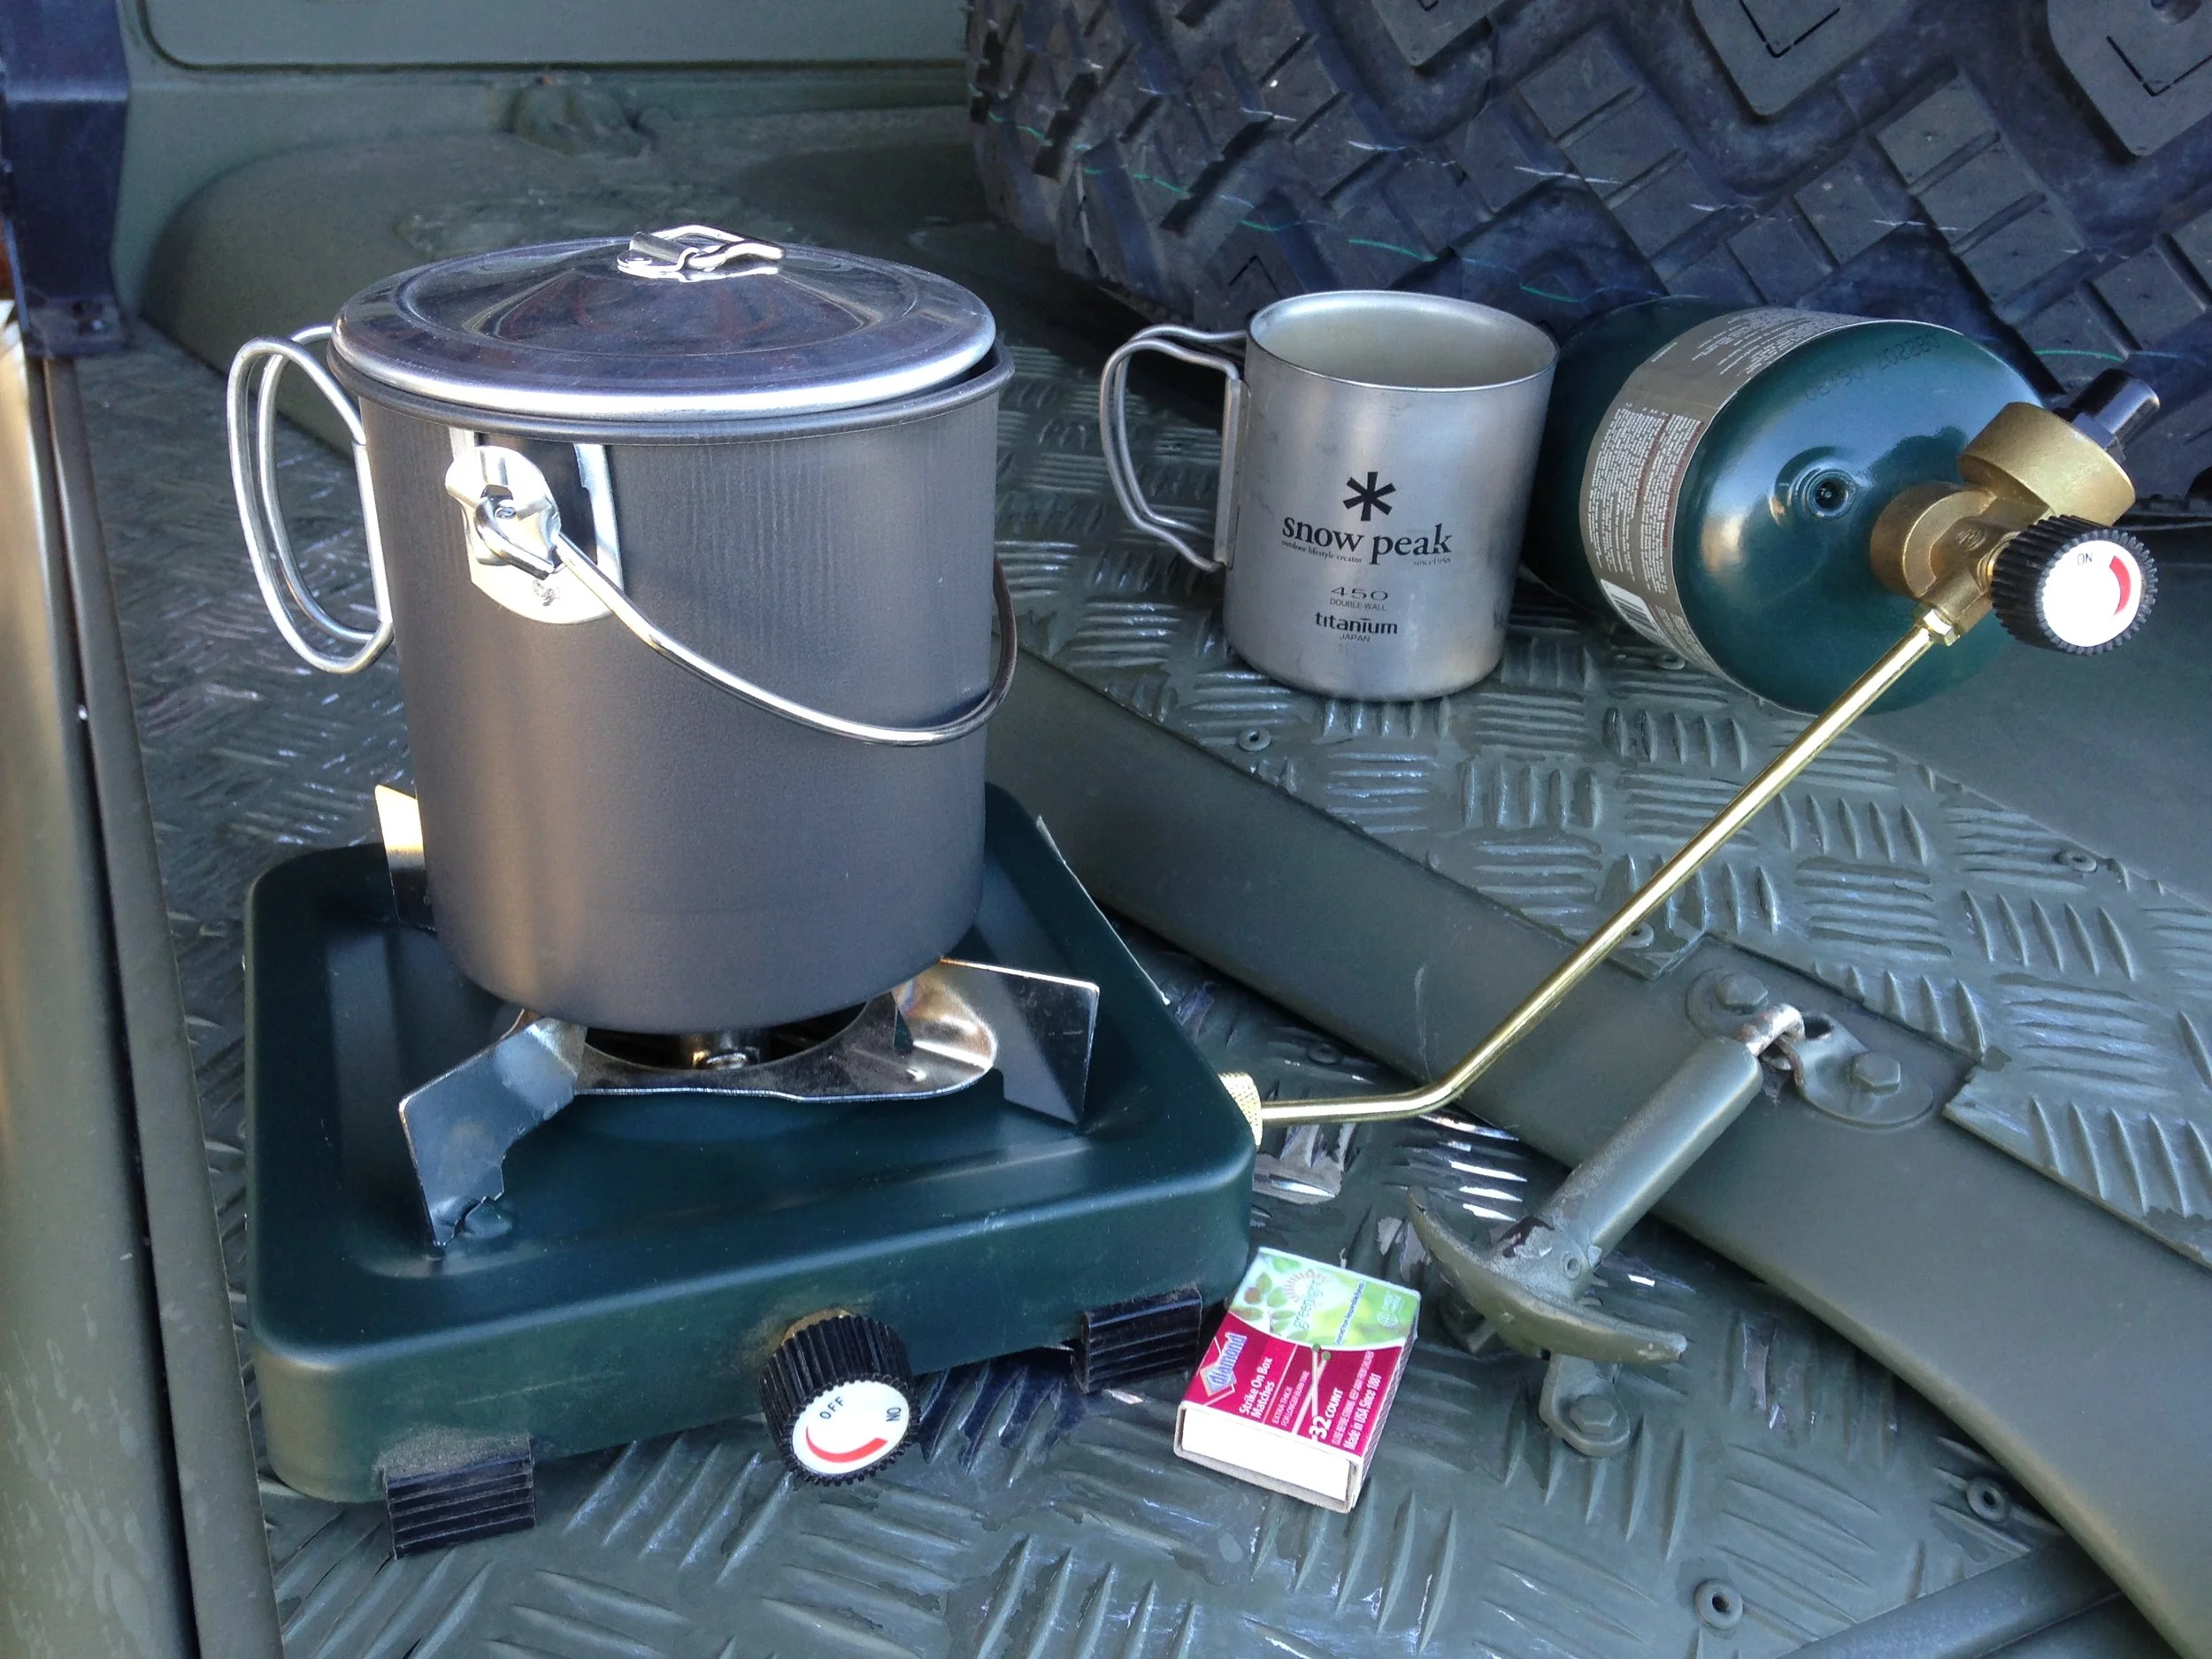
Stove: Connoisseurs of outdoor cooking swear by the dual-burner Partner Steel stoves, made to survive professional river guide abuse and stout enough to be employed secondarily as a tire ramp for working under your vehicle. But in my FJ40 I keep a single-burner Stansport propane stove that cost me $12.50 ten years ago and is still going strong.
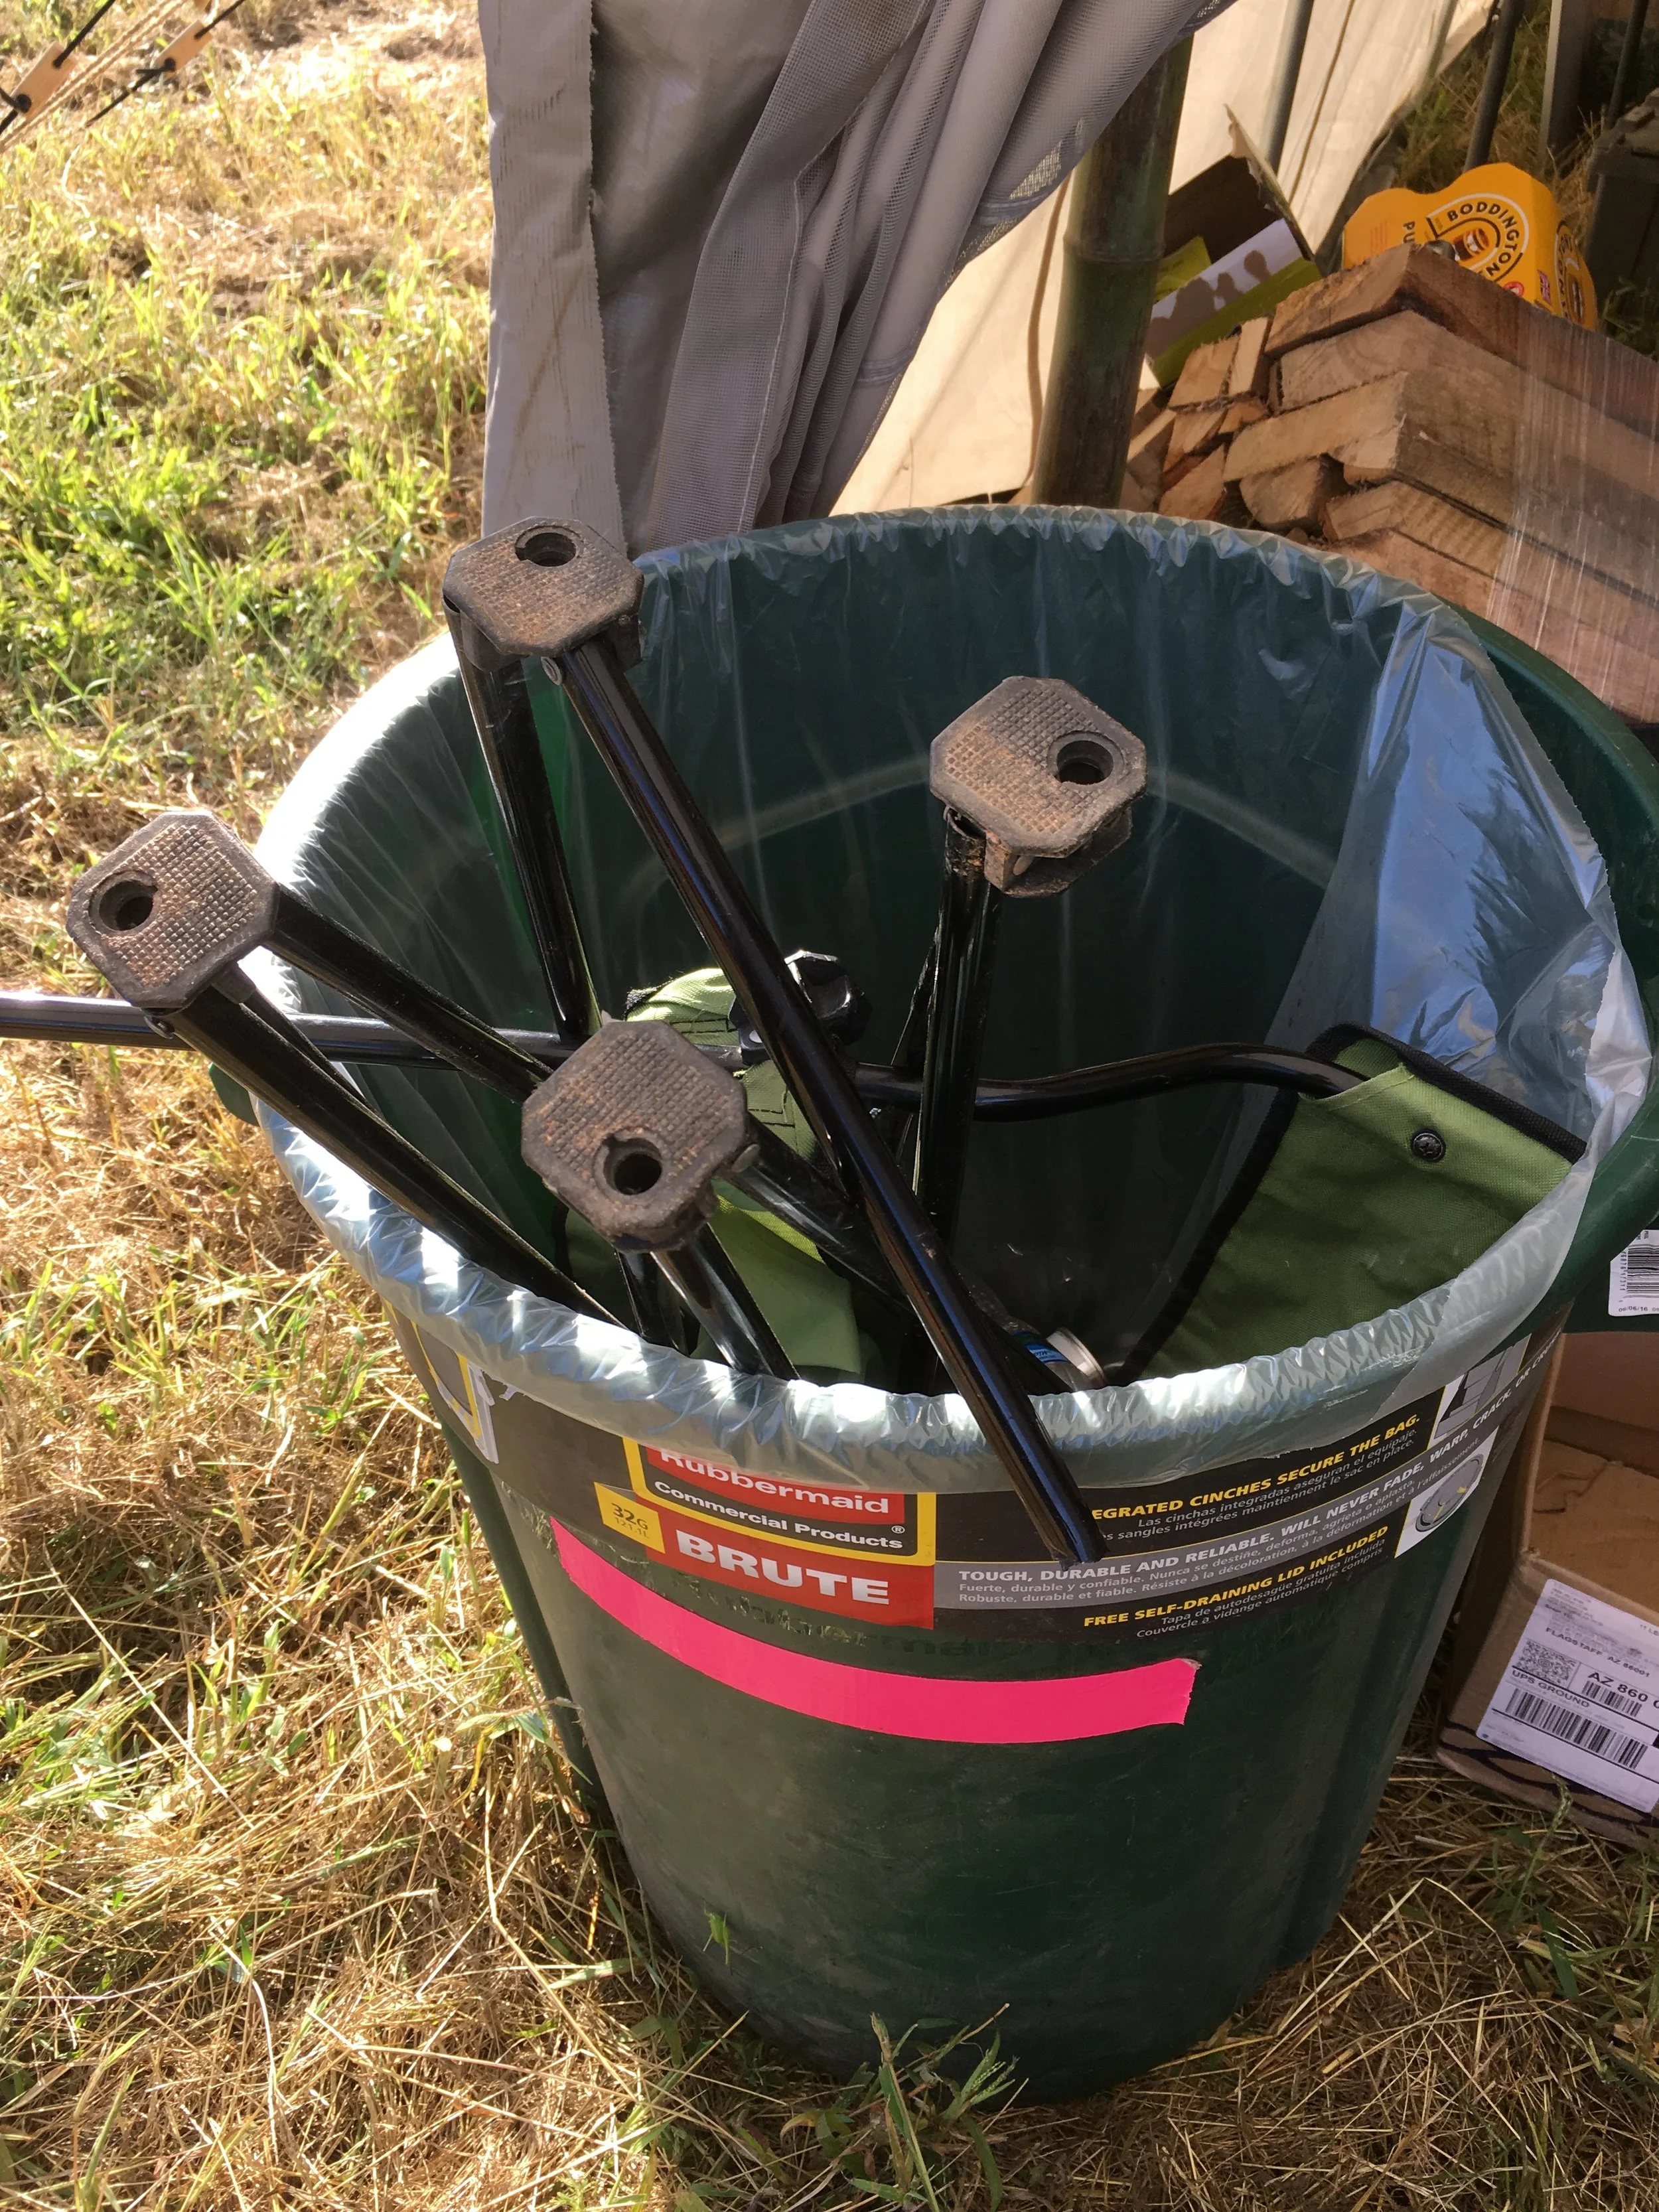
Camp chair: No matter how active you are, you’ll spend a lot of time in camp sitting. Do yourself a favor and skip the $20 specials with 30 plastic joints on them. I’ve lost count of the broken ones I’ve encountered—cleaning up after each Overland Expo we always find a half-dozen of them in dumpsters, a criminal waste of the planet’s resources. Look at the brilliant (and handsome), made in the U.S. Kermit Chair, which can be carried on a motorcycle or transformed into a full-size chair, the fine GCI Pico, or the bulkier but sturdy Picnic Time Sport Chair with its built-in cocktail table.
Coffee mug: Motorcycling or bicycling? Go for that Snow Peak titanium model. Driving a truck? If you spent more than $10 you’re just showing off.
Stove: $12.50. Mug: $45
Two kits that will (almost) breakdown-proof your vehicle
Our modern four-wheel-drive vehicles, virtually without exception, are far, far better machines than those we traveled with 30 or 40 years ago, the rose-tinted recollections of some of us nothwithstanding. (See here for a direct comparison.) Yes, they are vastly more complex: The average car today has between 25 and 50 electronic control units or ECUs (the Bentley Bentayga has 90)—some linked, some independent—controlling everything from shock absorber adjustment to accident-avoidance braking. But those complex systems have brought us more power, better fuel economy, a huge improvement in safety, and cleaner air—all at once.
Despite this complexity, vehicles in general are more reliable than ever. Solid-state ECUs are incredibly stable and durable; precision design and manufacturing processes and advances in metallurgy have made engines and other drivetrain components much longer-lasting. A car with 100,000 miles on the odometer used to be noteworthy; these days, beater pizza-delivery Civics with 200,000-plus under their faded paint are as common as Domino’s outlets. When something does go wrong, the car will quite likely be able to tell the mechanic what is is. How long will it be before a car can sense a part about to fail, then automatically log onto Amazon and have the piece waiting at the shop when the self-drive function reroutes you there?
These advances have made overland travel easier and safer as well, even if—to be fair to those rose-tinted recollections—if something does go wrong in the bush you won’t be regapping the points with a matchbook cover if the dwell shifts, or disassembling the carburetor and popping in a rebuild kit if a gasket goes bad. (But since we no longer have points or carburetors . . .)
One thing has not changed, and that is the two types of problems behind the vast majority of issues in the backcountry that bring a vehicle to a halt: tire punctures and dead batteries. (Number three—at least on the road—according to the AAA? Locking the keys in the car.)
While tires and batteries have also been improved significantly in the last few decades, both are wear items and are subject to the whims of chance, whether it be a jagged root holing a tire or any number of things draining a battery.
What this means, however, is that with just two kits in your vehicle you can fix the vast majority of things that are likely to go wrong in the backcountry.
- A backup for the starting battery
- An air compressor and tire repair kit
Let’s, er, start with the battery. A lot of people now have dual-battery systems in their overlanding vehicles, so the auxiliary can be used to power fridges, etc. without draining the starting battery. Most of these systems have a switch that will tie in the auxiliary to the starting circuit when needed, thus solving the problem of a dead main battery in a few seconds. If there is no switch, the auxiliary can be physically swapped with the main battery. Since the chances of two batteries dying simultaneously—at least when installed with a proper isolating system—are scant, you’re more or less immune to battery woes.
A dual-battery system with an automatic isolator, such as this excellent National Luna, will virtually guarantee starting power for your engine
If you have only a single battery for all your systems, I have just one word for you: Microstart. These have been around for several years now and I’ve been preaching their gospel to the point of fanaticism, but I still run into people who have never heard of the product and are blown away when I jump-start their dead 3/4-ton pickup with a battery the size of a VHS tape. I have used and abused a half-dozen of them (we keep one in every vehicle) and they’ve performed perfectly. Early on in their history, master fabricator Tim Scully and I wondered if they could be used for field welding. We duly hooked up three in series and produced several excellent beads, after which the trio continued to work perfectly for their intended use. When I called Scott Schafer at Antigravity Batteries he expressed mingled astonishment and horror at what we had accomplished. (Current Microstarts include an overload device that prevents such shenanigans. Blame Tim and me.) In any case, a Microstart will that ensure a dead starting battery will not leave you stranded. Buy the XP-1 if you have a gasoline-engined mid-size SUV, or the XP-10 if you have a big diesel-powered truck, and top it up (on either AC or DC) every four or five months.
The only real alternative to safeguard a single battery is a low-voltage cutout, which will shut off current flowing from the battery if it senses voltage dropping to levels that would make the vehicle difficult to start. While this might be fine as a backup, I've found that a lot of people who install them are overburdening their battery to begin with, for example by running a fridge while still relying on the battery to turn a high-amperage starter. Better to go with a dual-battery system if you have that much draw.
That leaves tires. As with batteries, they’re a lot tougher and longer-wearing than in years past, but still vulnerable to damage, especially when driven on rough roads and trails. Yet I’m surprised at how many overlanders confine their backup tire kit to a single spare and perhaps a can of Fix-a-Flat. We can do better, and all it takes is a compressor and a proper tire-repair kit.
The repair kit is easy. At its most basic you want a plug kit, which will handle the majority of punctures within the tread area, usually without even needed to remove the wheel and tire from the car. But skip the Pep Boys versions and get a good one. This isn’t just tool snobbery talking: plugging a tire involves shoving pretty hard on the reaming tool and the plug-inserting tool. You do not want a cheap plastic-handled tool breaking during the procedure. ARB makes an excellent plug kit with everything you need for most simple punctures. If you want to step up from that and be prepared to handle virtually any tire problem short of a carcass-shredding blowout (including sidewall splits and broken valve stems), get the Exptreme Outback Ultimate Puncture Repair Kit. It’s expensive at $99, but you’ll never have to buy anything else to repair tires as long as you live.
The ARB Speedy Seal kit includes a proper metal-handled reamer and plug inserter.
Once the tire is repaired you’ll need to re-inflate it. While there are air compressors available from $19.95 on up, skip the cheap ones. They fail with miserable frequency, and even when working are so slow that you could hike out, buy a better unit, and be back before your tire is properly inflated. At a bare minimum get one of the ubiquitous Super Flow MV50 units, which are available from around $60. The MV50s have their issues but in general are reliable and reasonably fast, and if you’re a tinkerer there are dozens of web articles detailing worthwhile hacks for the product.
Personally I prefer buying a better compressor to start with, both for repairing tires and for the much more frequently needed function of airing all four tires back up after airing them down for trail driving. To step up in quality look at the Viair units and anything from Extreme Outback. My current favorite compressor is the blindingly fast ARB Twin, expensive but worth every penny. Use the Twin to air up and you’ll be finished with your own vehicle and a friend’s before someone with an MV50 has done two tires.
The ARB Twin is available either as the portable kit shown here,which includes an air tank for operating air tools, or as a stand-alone unit for hard mounting in the vehicle.
Part of what defines overlanding is self-sufficiency. Making sure battery and tire troubles can’t bring you to a halt will go a long way toward guaranteeing that self-sufficiency—and if you travel far off the beaten track might just save you a sat-phone call and a very expensive recovery.
What causes those %#@**! corrugations?
. . . or washboard, as they're known (only?) in the U.S. I've been asked this many times, but this time I'll give a nod to the people at Practical Motoring 4x4 in Australia, who explained it perfectly here.
Of course, knowing how they're formed doesn't make them any less infuriating, especially after 40 or 50 unrelenting kilometers of them has loosened every fastener on the truck and every neural connection in your brain, rendering the slightest first-world problem cause for scarlet-faced rage—such as when the iPhone RAM Mount suction cup pops off the windscreen AGAIN and you catch yourself seriously contemplating heaving the whole assembly out the window.
The only defense short of an airlift out by Chinook is to find that sweet spot speed at which the tires are more or less skipping from one crest to the next. It isn't effective enough to use the word relief, but there is a minor lowering of the rage threshold. Beware, however: With the tires in contact with the earth only about 40 percent of the time, the chances for sudden snap-oversteer on a curve or when braking are compounded. And don't think your suspension is getting the relief you are; it's still being punished.
The Holy Grail of FJ40 wheels and tires?
I’ve owned my FJ40 long enough to have gone through several generations of tire and wheel combinations. When I bought it it still had the factory steel 15 x 5.5-inch rims (with hubcaps), and absurdly skinny and short 215-series tires of a brand I do not recall, but which were genuinely tiny enough to hamper its performance on trails.
Santa Catalina Mountains, 1978
As soon as I could afford it I bought a set of then-de rigueur 15 x 8 white spoke steel wheels, and mounted larger Armstrong Norseman tires. Big improvement, although I could feel the increase in steering effort through the non-boosted box. At the same time I gave away those factory wheels and hubcaps—dumb move.
And there it stayed until the late 1980s, when I was starting to be aware of how things were done in other parts of the world. I became convinced that split-rim wheels were the absolute ultimate way to go—after all, you could break down a wheel and repair a tire anywhere, right? They were still standard equipment on Land Cruisers in Africa and Australia, right? So at some considerable expense I ordered a set of Toyota factory 16 x 5.5 split rims. When they arrived I was somewhat put off by their mass—they made the eight-inch steel white spokers seem light—but duly had mounted a set of LT 235/85 16 BFG All-Terrains.
In short order two tire-shredding blowouts revealed that something was not right. It developed that the tire retailer had installed improper liners in the wheels. That was corrected, and despite shaken confidence I began employing the Land Cruiser as a support vehicle while leading sea kayaking trips from remote beaches in Mexico. And indeed it was true: I could break down a wheel and repair a puncture anywhere. Clients were impressed. Several times.
With a split-rim wheel and tubed tire, any puncture means completely breaking down the wheel to patch the tube. A nail hole that could be fixed in five minutes with a plug kit required 45 minutes of hard labor. The romance was wearing thin. By this time I was chalking up some experience in Africa with split-rim-equipped vehicles, and noticed a difference there. First—purely personal theorizing here—the economy of most African countries meant that random nails and screws lying on roads simply didn’t exist. They were too valuable. Also, the tires employed there are typically eight or ten-ply bias-belted 7.50 x 16 beasts that seem more or less immune to simple thorn punctures. I was experiencing fewer punctures on the back roads of developing-world countries—both in vehicles I drove and those in which I was driven while on assignment—than I was in the U.S. and Mexico.
African Firestone tire on a split rim.
By now I had replaced the three-speed transmission in the FJ40 with an H41, a four-speed with a low, 4.9:1 first gear. I thought that would allow me to install a slightly taller tire—and I was ready to dump the split rims and try alloy wheels. So on went a set of American Racing Outlaw II 16 x 7-inch wheels, and LT255/85 16 BFG Mud-Terrain tires. Given the two-inch OME lift on the vehicle, this was the outer limit of what would fit without clearance issues or ghastly body-cutting and cheesy riveted-on fender flares. Indeed at full left lock the left tire slightly contacted the steering box link. But otherwise the tires worked fine, and the combination stayed on for over a decade.
Still . . .
Two things began to nibble at my subconscious. First was the memory of those BFG All-Terrains in 235/85 16. So many things about the size seemed perfect. They were tall enough to noticeably benefit ground clearance, yet their narrow tread width made steering easy. Also, by this time the Land Cruiser had become something of a classic rather than just an old four-wheel-drive “jeep,” and I was kind of missing the whimsical look of those factory hubcaps. It would be easy to buy a replacement set of Toyota 15 x 5.5-inch wheels and hubcaps—but there was no tire size in BFG’s 15-inch lineup equivalent to the 235/85 16. For a while BFG sold a 9.5 x 33-inch All-Terrain that would have worked, but it was discontinued. Some owners (and, by now, professional restorers), were squeezing 31 x 10.5 All-Terrains on factory wheels, but those were not quite tall enough and not quite narrow enough to suit. (The size is also technically far too wide for a 5.5-inch wheel.)
What I needed was a 16 x 5.5-inch wheel with clips for the factory hubcaps—and out of the blue a few months ago my friend Tim Hüber sent me a link to exactly that, available from Japan. They were . . . expensive, eye-wateringly so. And would additionally need to be powder-coated a proper gray, adding even more expense. But it was exactly the Holy Grail for which I had been searching.
Ordered, delivered, powder-coated, mounted. And . . . indeed, perfect. The ideal all-around tire size for an FJ40, and the amusingly perfect retro pukka look, too.
One genuine surprise: I assumed going to a steel wheel from an alloy—even with a smaller tire—would add significant unsprung weight. Not so. One alloy wheel and 255/85 16 Mud-Terrain tipped my hanging scale at 73.2 pounds. The steel wheel and 235/85 16 All-Terrain? Seventy four pounds even.
Never say never, but I predict this will be the final solution to the Land Cruiser’s footwear.
Left: 16 x 7 Alloy and 255/85 16 MT. Right: 16 x 5.5 steel and 235/85 16 AT. Same weight.
Hint: When using “Search,” if nothing comes up, reload the page, this usually works. Also, our “Comment” button is on strike thanks to Squarespace, which is proving to be difficult to use! Please email me with comments!
Overland Tech & Travel brings you in-depth overland equipment tests, reviews, news, travel tips, & stories from the best overlanding experts on the planet. Follow or subscribe (below) to keep up to date.
Have a question for Jonathan? Send him an email [click here].
SUBSCRIBE
CLICK HERE to subscribe to Jonathan’s email list; we send once or twice a month, usually Sunday morning for your weekend reading pleasure.
Overland Tech and Travel is curated by Jonathan Hanson, co-founder and former co-owner of the Overland Expo. Jonathan segued from a misspent youth almost directly into a misspent adulthood, cleverly sidestepping any chance of a normal career track or a secure retirement by becoming a freelance writer, working for Outside, National Geographic Adventure, and nearly two dozen other publications. He co-founded Overland Journal in 2007 and was its executive editor until 2011, when he left and sold his shares in the company. His travels encompass explorations on land and sea on six continents, by foot, bicycle, sea kayak, motorcycle, and four-wheel-drive vehicle. He has published a dozen books, several with his wife, Roseann Hanson, gaining several obscure non-cash awards along the way, and is the co-author of the fourth edition of Tom Sheppard's overlanding bible, the Vehicle-dependent Expedition Guide.


