Overland Tech and Travel
Advice from the world's
most experienced overlanders
tests, reviews, opinion, and more
It's not a "sway bar!"
Sometimes it is a heavy burden to be an uncompromising linguist. I recently saw a meme that resonated profoundly: “My life is a constant struggle between the need to correct grammar and the desire to have friends.” While I never, ever criticize or correct others in public—well, virtually never—anyone who has ever submitted an article to me discovered quickly that I did not let sloppy grammar, spelling, or usage slide. Queries that failed to employ even a smidgen of proper English went straight to the trash.
Certain things in particular set me off. I’ll fight to my grave the now-embedded acceptance of “their” to indicate a singular person, or the use of “altitude” when “elevation” is the correct term. Apostrophes in a plural? Mandatory jail time, I say. Or how about . . .
Sorry. Where was I? Right: Overland Tech and Travel. Let’s continue.
Many modern vehicles are equipped with an auxiliary suspension component, sometimes on the front suspension, sometimes on both front and rear. The component is in essence a spring—a rod usually shaped like an “E” without the middle horizontal. Each end is connected to one side of the suspension, usually by a link that can pivot slightly. The middle is connected to the chassis. When the vehicle enters a turn at speed and begins to lean toward the outside of the turn, the rod resists twisting and thus reduces the amount of lean.
This device is called an anti-roll bar, because the proper term for the “lean” a vehicle experiences in a turn is “roll.” Refer to the above graphic.
Unfortunately, the anti-roll bar is frequently referred to as a “sway bar”—an utterly incorrect term as you can see from the graphic. An anti-roll bar will in fact do nothing to control sway.
So ingrained is the mis-use that the switch for the brilliant and useful driver-disconnectable anti-roll bar on the Jeep Rubicon is labelled “Sway bar.” Aargh.
Anyway, please join me in insisting on the proper term.
Now, about those comma splices . . .
Accu-Gage customer service
For many years my go-to tire gauge has been the Accu-Gage from G.H. Meiser & Co. (even though, yes, the “Gage” bit makes the editor in me wince). They come in different ranges and configurations, and I’ve always found them to be absolutely consistent and reliable. I must have at least five or six; I’m not even sure.
A few months back I managed to crack the plastic face of the one on the left here. It sat in my desk for weeks before I finally emailed the company to ask if I could either purchase a new face, or send it in for repair. I wasn’t expecting much given such things these days, but I got back an immediate reply saying simply, “What’s your address?”
A week lated a new face showed up. No charge. Nice.
G.H. Meiser is here. Needless to say, highly recommended.
Hack your tire plug kit for more versatility
There are two tire plug kits I recommend above all others I’ve tried: The Extreme Outback Ultimate Puncture Repair Kit, and ARB’s Speedy Seal kit.
Each has its advantages. The ARB kit comes in a snap-in, well-organized blow-molded case, so everything you need is easy to access and nothing you don’t need is in the way. The reamer and plug insertion tool are stoutly made with solid aluminum handles—critical for working on tough all-terrain tires. (Never, ever buy plastic-handled plug tools.) Included are pliers for pulling out whatever has holed your tire, a razor for trimming the inserted plug, lube to ease insertion (no wise cracks please!), a tire gauge, and a kit containing spare valves and valve cores, valve caps, and a valve tool. Finally, 40 plugs are included, which should suffice for a very long time—except see below.
The Extreme Outback Ultimate Puncture Repair Kit is the one you want if you are heading out to drive around the world, or you are a professional leading self-drive tours, or if you just want to guarantee that you can repair any tire issue short of a carcass-shredding blowout. In addition to everything in the ARB kit (except the pliers), the EO kit includes an exhaustive selection of patches and rubber cement to repair seriously large punctures or even sidewall tears from the inside out, once you have broken the bead and removed one side of the tire from the rim. There are even thread and needles to sew up sidewall tears before patching them, and such thoughtful additions as a piece of chalk to mark where your tire and rim meet, so when you remount the tire your balance will not be lost, and packets of hand wipes. The one downside not shared by the ARB kit is that all this stuff is crammed into a heavy-duty zippered nylon case. It’s amazingly compact, but you need to pull just about everything out to accomplish even the simplest plug job.
Also included are plenty of plugs—but, as with the ARB, there is a problem.
I’ve always maintained that the plugs in the ARB kit, which are about 8mm in diameter, are far too large for the average nail or screw hole. They are extremely difficult to insert in such a hole in any tire with a tough carcass, especially a stout E-rated AT, even after a vigorous reaming.
Up until recently, the Extreme Outback kit included two sizes of plugs, about 6mm and 4mm. The 4mm plugs were perfect for most small holes—in fact, when teaching tire repair and actually drilling 3/16th-inch holes in tires for students to practice on, the thin plugs were all I used. Only when demonstrating more challenging situations did I need the larger sizes.
Now, however, the EO kit only comes with 6mm plugs, which, while easier to insert than the ARB’s, are still problematic for many repairs. Case in point: At the last Expo I was having students plug tires after I drilled holes in them. The first volunteer was a woman, and she simply could not get a plug from the EO kit inserted, even with plenty of lube and while putting virtually all her body weight on it. Finally Mark Kellgren, who was teaching with me, took over—and had nearly as hard a time getting the thing in there. Finally I realized I had unwittingly run out of the 4mm plugs and had substituted one of the thicker ones, which was clearly too large for such a hole.
Left to right: ARB, Extreme Outback thick and thin, and Safety Seal Slim tire plugs. (The Safety Seal plugs are slightly flattened and look thicker than they are.)
I called George Carousos, who owns Extreme Outback, and he told me the kits were no longer available with the thinner plugs. So I decided it was time to hack all our ARB and EO kits. I looked up Safety Seal, a company that has been making tire repair products for half a century, and ordered a box of their slim plugs. At a listed 3.2mm these should be smaller than the old thin EO plugs, but if anything they look a tiny bit thicker. Nevertheless they should suffice for those smaller holes. So I’ve replaced half the thicker plugs in all our kits with thinner versions, which should make each kit far more versatile.
The (more) versatile ARB jack base
Nearly everyone I know who owns a Hi-Lift jack also owns one of the ubiquitous red plastic base plates, which hugely enhance flotation in soft sand or mud. Recently ARB introduced their own base plate, which is of course designed to accept the rounded base of the ARB hydraulic jack. However, ARB cleverly molded the recess so it will also accept a Hi-Lift, and furthermore I found it fits many bottle jacks as well, which the red Hi-Lift base plate will not. So if you have a Hi-Lift but haven’t yet bought a base for it, consider the more versatile ARB version. Bonus: If you ever decide to spring for that pricey but superb ARB Jack, you’ll be ahead of the game.
Securing lug nuts—the pro way
Confession: I came late to the discipline of properly torqueing the lug nuts on my vehicles—and checking them regularly.
Very late.
For years I never gave them a thought except when I had a puncture or I was reinstalling a wheel after maintenance or a repair. And when I put them back on I simply cranked really hard on my T-handled lug wrench and called it good.
I had a wake-up call a few years ago, when Roseann and I were hauling a pair of Expo cargo trailers to Flagstaff. I was driving my FJ40 and pulling a 14-foot box trailer that probably weighed 3,000 pounds or so. Only a couple of days before I’d had new tires installed at a local tire store. We’d decided to go the back route to Flagstaff: from Tucson to Globe via Highway 77, then to Payson via 188, then through Pine and Strawberry on 260 and up 87 to Mormon Lake Road. We stopped in Payson for fuel, and as I pulled in at low speed I heard a distinct clicking sound coming from the left rear of the Land Cruiser. A short search led to the source: lug nuts on that wheel that were barely finger tight and the wheel was shifting fractionally back and forth.
I shudder to think what could have happened if I’d experienced a catastrophic failure on the steep, winding mountain road uphill from Strawberry. I tightened the lug nuts on that wheel, checked all the others (which were fine)—and changed my attitude. Now I include checks of the lug nuts in my normal maintenance routine, especially when traveling in the backcountry on rough roads.
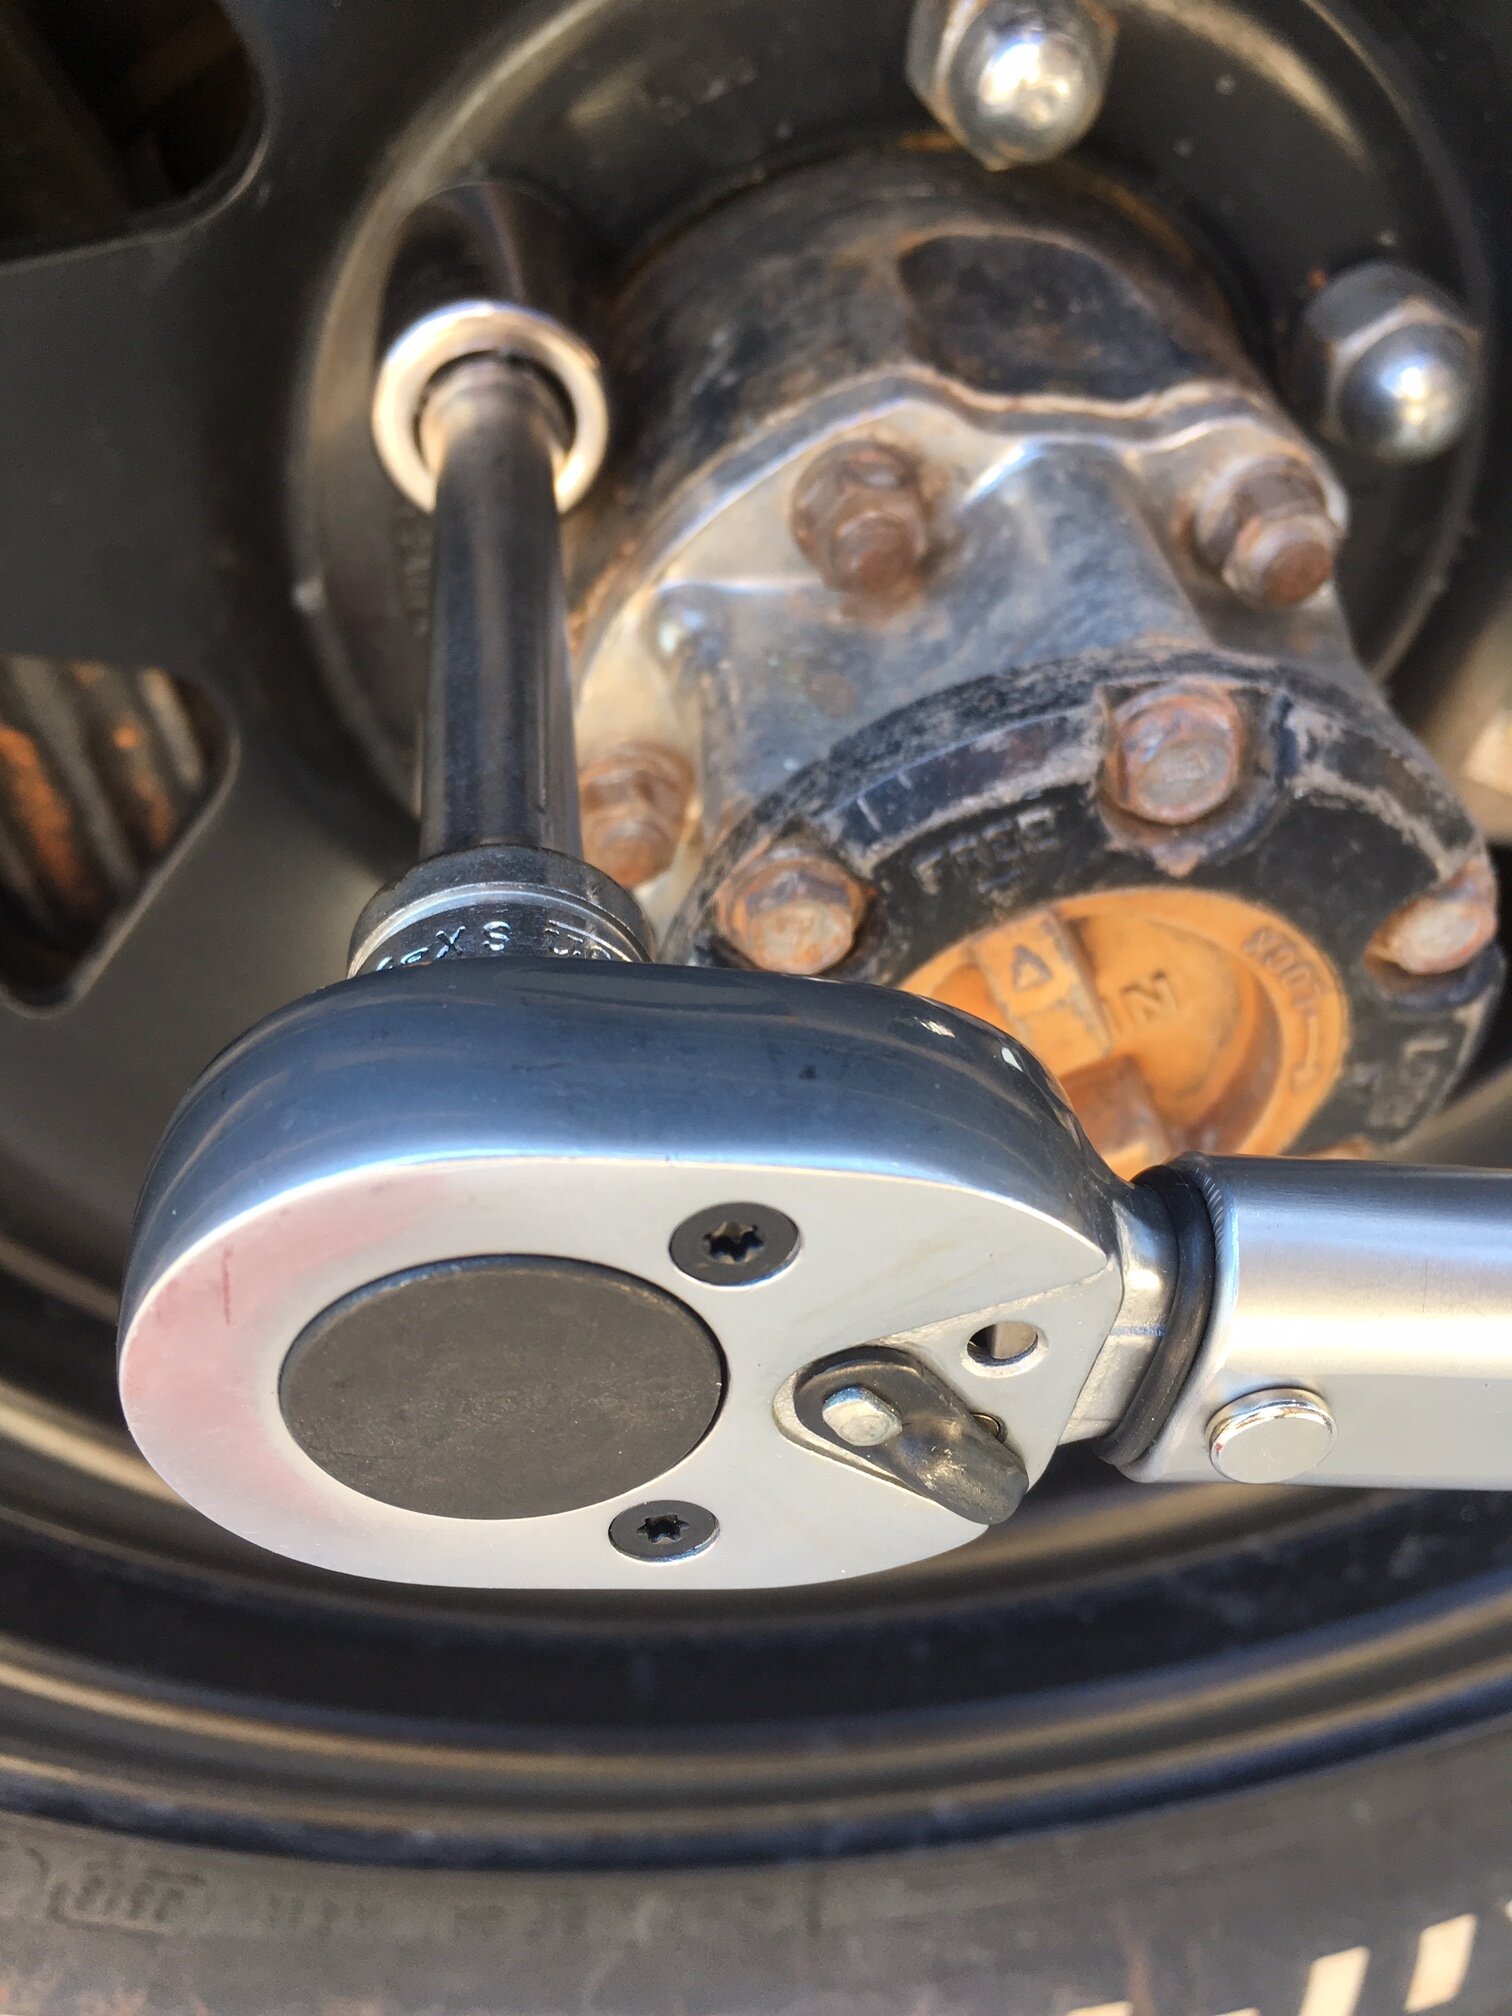
While I was changing my attitude I decided to change my approach as well, and use a proper torque wrench to ensure correct and even tension on the nuts. I know, I know: I already admitted I was behind the curve on this.
Checking torque at home is easy: I have a superb Snap-on digital torque wrench worth about a zillion dollars, which a company PR rep simply gave me when I was doing another article that involved torque settings. (That rep, sadly, is no longer with the company, probably in large part due to all the tools he sent me whenever I emailed him that I had a new article coming out. It was a great ride while it lasted.)
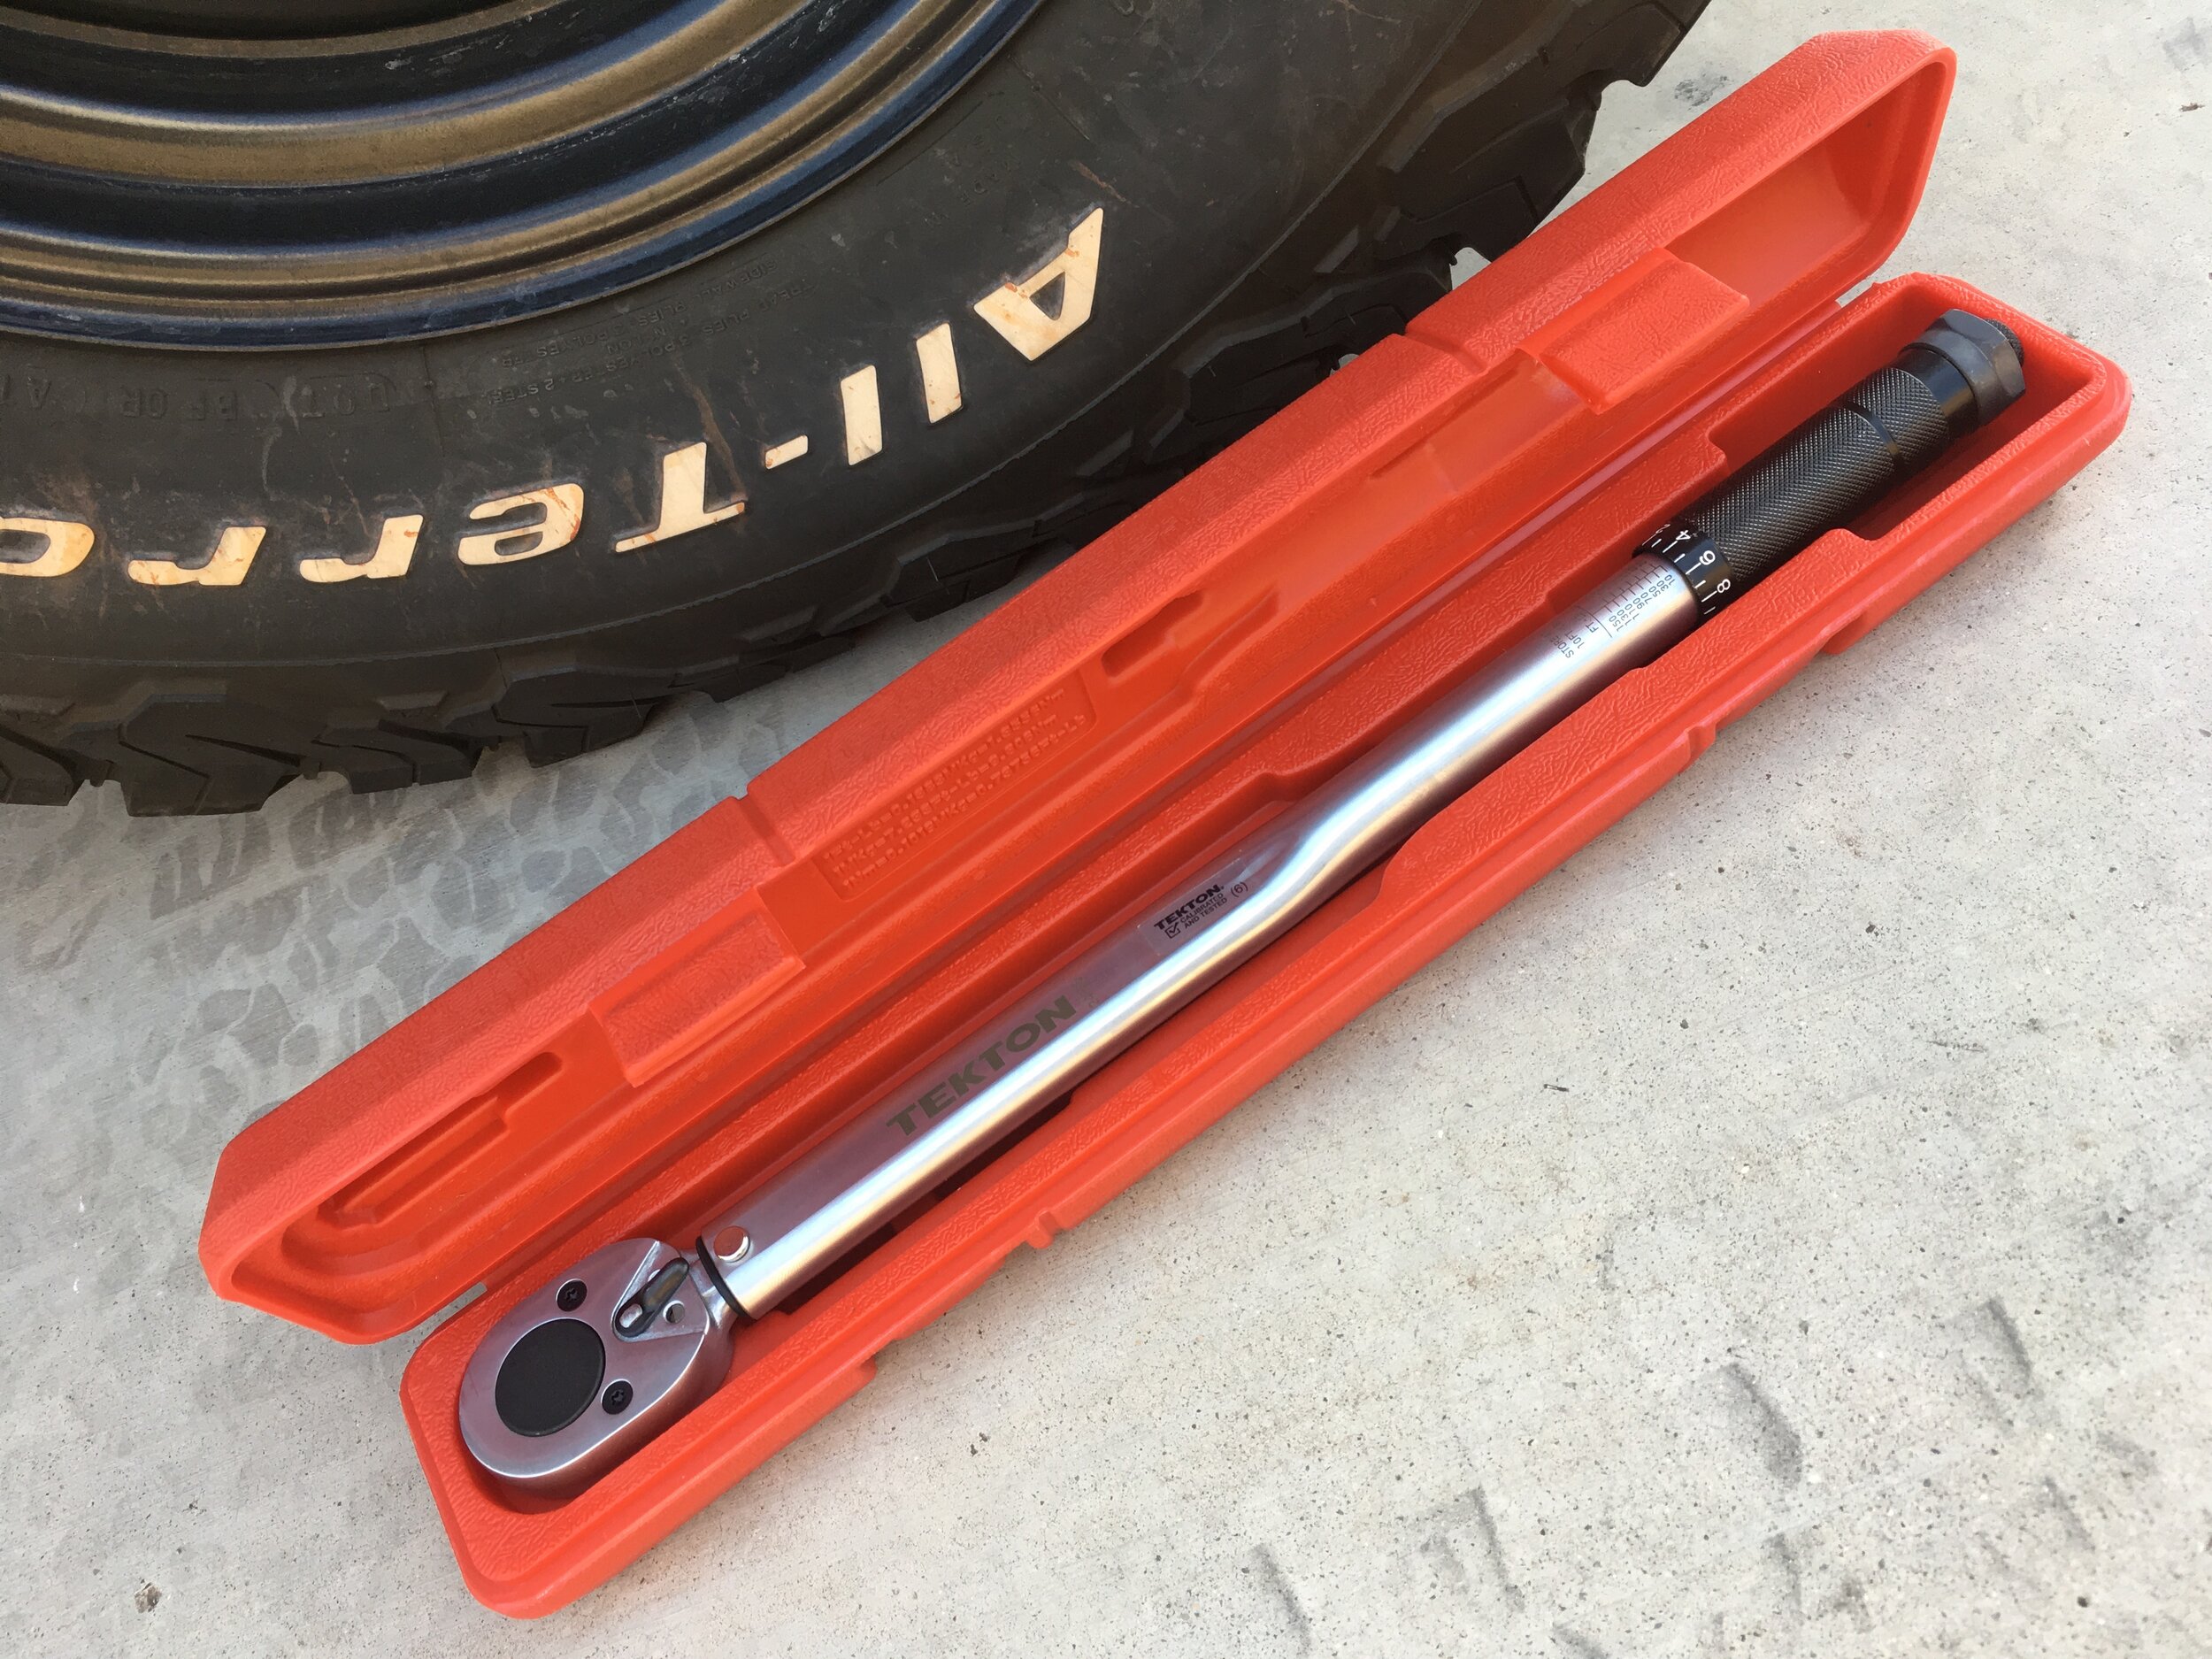
However, the Snap-on wrench is a full 24 inches long, and simply overkill for a traveling tool kit, even though a torque wrench has many uses in the field besides tightening lug nuts. A simple mechanical torque wrench would more than suffice, but I wanted decent quality without spending, well, a zillion dollars. And I found what I needed at Tekton Tools.
I became aware of Tekton by accident when I stumbled on their booth at the west Expo last year. As a self-appointed tool connoisseur/snob (take your pick), I approached the brand like a sommelier sniffing an unfamiliar cabernet. And came away impressed.
The Tekton website offers more detailed information on the company’s tools than any other site I’ve seen—including Snap-on’s. The page for their 3/8ths inch socket and ratchet set, for example (here), informs you of not just features, but each socket’s minimum failure point compared to ANSI specifications. The country of origin—in this case, Taiwan—is also clearly stated. (The quality of Taiwanese-made tools is excellent in my experience.) They note that the set does not skip any sizes—one of my pet peeves about many sets I’ve tried. The ratchet is a fine, 90-tooth unit, and the ANSI measurements are published for that as well. Nice.
So, on to Tekton’s 1/2-inch torque wrench, which employs a simple but precise rotating handle adjustment and click/bump alert when the selected value is reached. The company claims plus or minus four percent accuracy, which is more than adequate for any task including engine assembly. In the hand it compared favorably to my memory of a similarly configured Sears Craftsman American-made torque wrench I had decades ago, which if I recall cost more even back then. The first thing I did was to compare it to the Snap-on wrench at identical settings on the same nut; the two were within the probability of error of my ability to respond to either the click of the Tekton or the beep and buzz of the Snap-on. Like all mechanical torque wrenches, it is important to reset the wrench to its minimum value in between uses to avoid stressing the mechanism and throwing off the accuracy (this is not necessary with digital wrenches). It’s also important to remember that a torque wrench—whether Tekton or Snap-on—is not a breaker bar; it should be used only for tightening nuts or bolts to a specified setting. The Tekton wrench is all-steel, so I expect it to be durable. And at $40 for the 18-inch 10 to 150 ft-lb version it is an outstanding bargain.
Back to my lug nuts. What exactly is the correct setting? Good luck obtaining the figure from your vehicle manufacturer. Obviously proper setting vary with the vehicle and the wheel size, but as a very general rule, for vehicles in the general mid-size overlanding category—Land Cruisers, Land Rovers, pickups, etc.—about 80-90 ft-lb is proper for a steel wheel. If you prefer to go by stud size, here is a chart.
Alloy wheels are more problematic. Some charts I’ve seen list higher torque than for steel wheels torque—around 100 ft-lb. Others list lower figures—70-75 ft-lb. Why the higher figure? I have yet to find a definitive answer, but possibly it is because steel wheel lug nut holes are typically raised a tiny bit and thus retain fractional elasticity to grip the nut more effectively, while alloy wheels must be clamped flat against the hub. For both steel and alloy wheels the primary effect you are achieving with tightening is to fractionally stretch the threaded lug itself, creating a powerful clamping mechanism.
Lug nuts should always be tightened (or loosened) in an alternating sequence across the wheel, thusly:
Like so many other habits I’ve adopted, being lug-nut conscientious makes me feel like I’m approaching travel in a serious, professional manner, and adds just one more layer of peace of mind to any journey.
Edit: A question came up regarding using anti-seize lubricant on lug-nut threads, as many people do who live in areas where snow and salted roads are common. While manufacturers—and thus I—recommend installing lug nuts on clean, dry threads, this chart from Fastenal shows that effective torque increases if one lubes the threads (or if those threads are zinc-plated). Note that if used, anti-seize compound should only be applied sparingly to the threads, not to any mating surfaces of the wheel or nut.
Instrument clusters, good and not so good
You’d think that, 120-odd years into the history of the motorcar, manufacturers would have pretty much nailed legible instrumentation by now. In many cases they have; in others, I’ve found, not so much.
Consider the cluster on the Porsche 911 above. This one happens to be on a 1982 911SC, but it’s virtually identical to any 911 spanning four decades. Porsche gives you the most critical instrument in a sports car—the tachometer—front, center, and huge. White numbers on a black background, because nothing contrasts better than white on black. You don’t even need to take your eyes off the road to monitor progress through the gears. To the right is a slightly smaller but equally legible speedometer, and to the left the important engine-monitoring gauges (for an oil-cooled vehicle) of oil pressure and temperature. Those gauges that do not need to be read instantly, such as the clock and fuel gauge, are off to the side where you might need to move your head a bit, but not at a moment’s notice.
The 911’s cluster is angled directly at the driver, and inset a distance perfect for preventing overhead glare while not shading them too much. In fact I’ve never found myself in a position in which incoming sunlight or artificial light obscured the instruments beyond easy reading.
One might expect such perfection from the über engineers at Porsche, but in fact the prosaic chrome-ringed Smith’s instruments on my old Triumph TR6 are nearly as good: Tach and speedometer big and up front, auxiliary gauges on the side. (Plus the added charm of that walnut veneer, of course.) The Smith’s have shiny glass fronts that seem to reflect a bit more than those on the Porsche. But notice the same eminently legible white on black motif. And they’re shaded just deeply enough that no sun coming through the windshield can hit them.
I found a similarly flawless instrument cluster in the Mercedes Benz 300D we owned for a few years. Again: white on black, important stuff up front—in this case the speedometer, so we could keep track of the needle’s slow crawl across its arc as we floored the accelerator pedal and waited patiently for results. I’m not even sure why Mercedes bothered with a tachometer on the automatic-equipped cars; a calendar would have been better at recording progress.
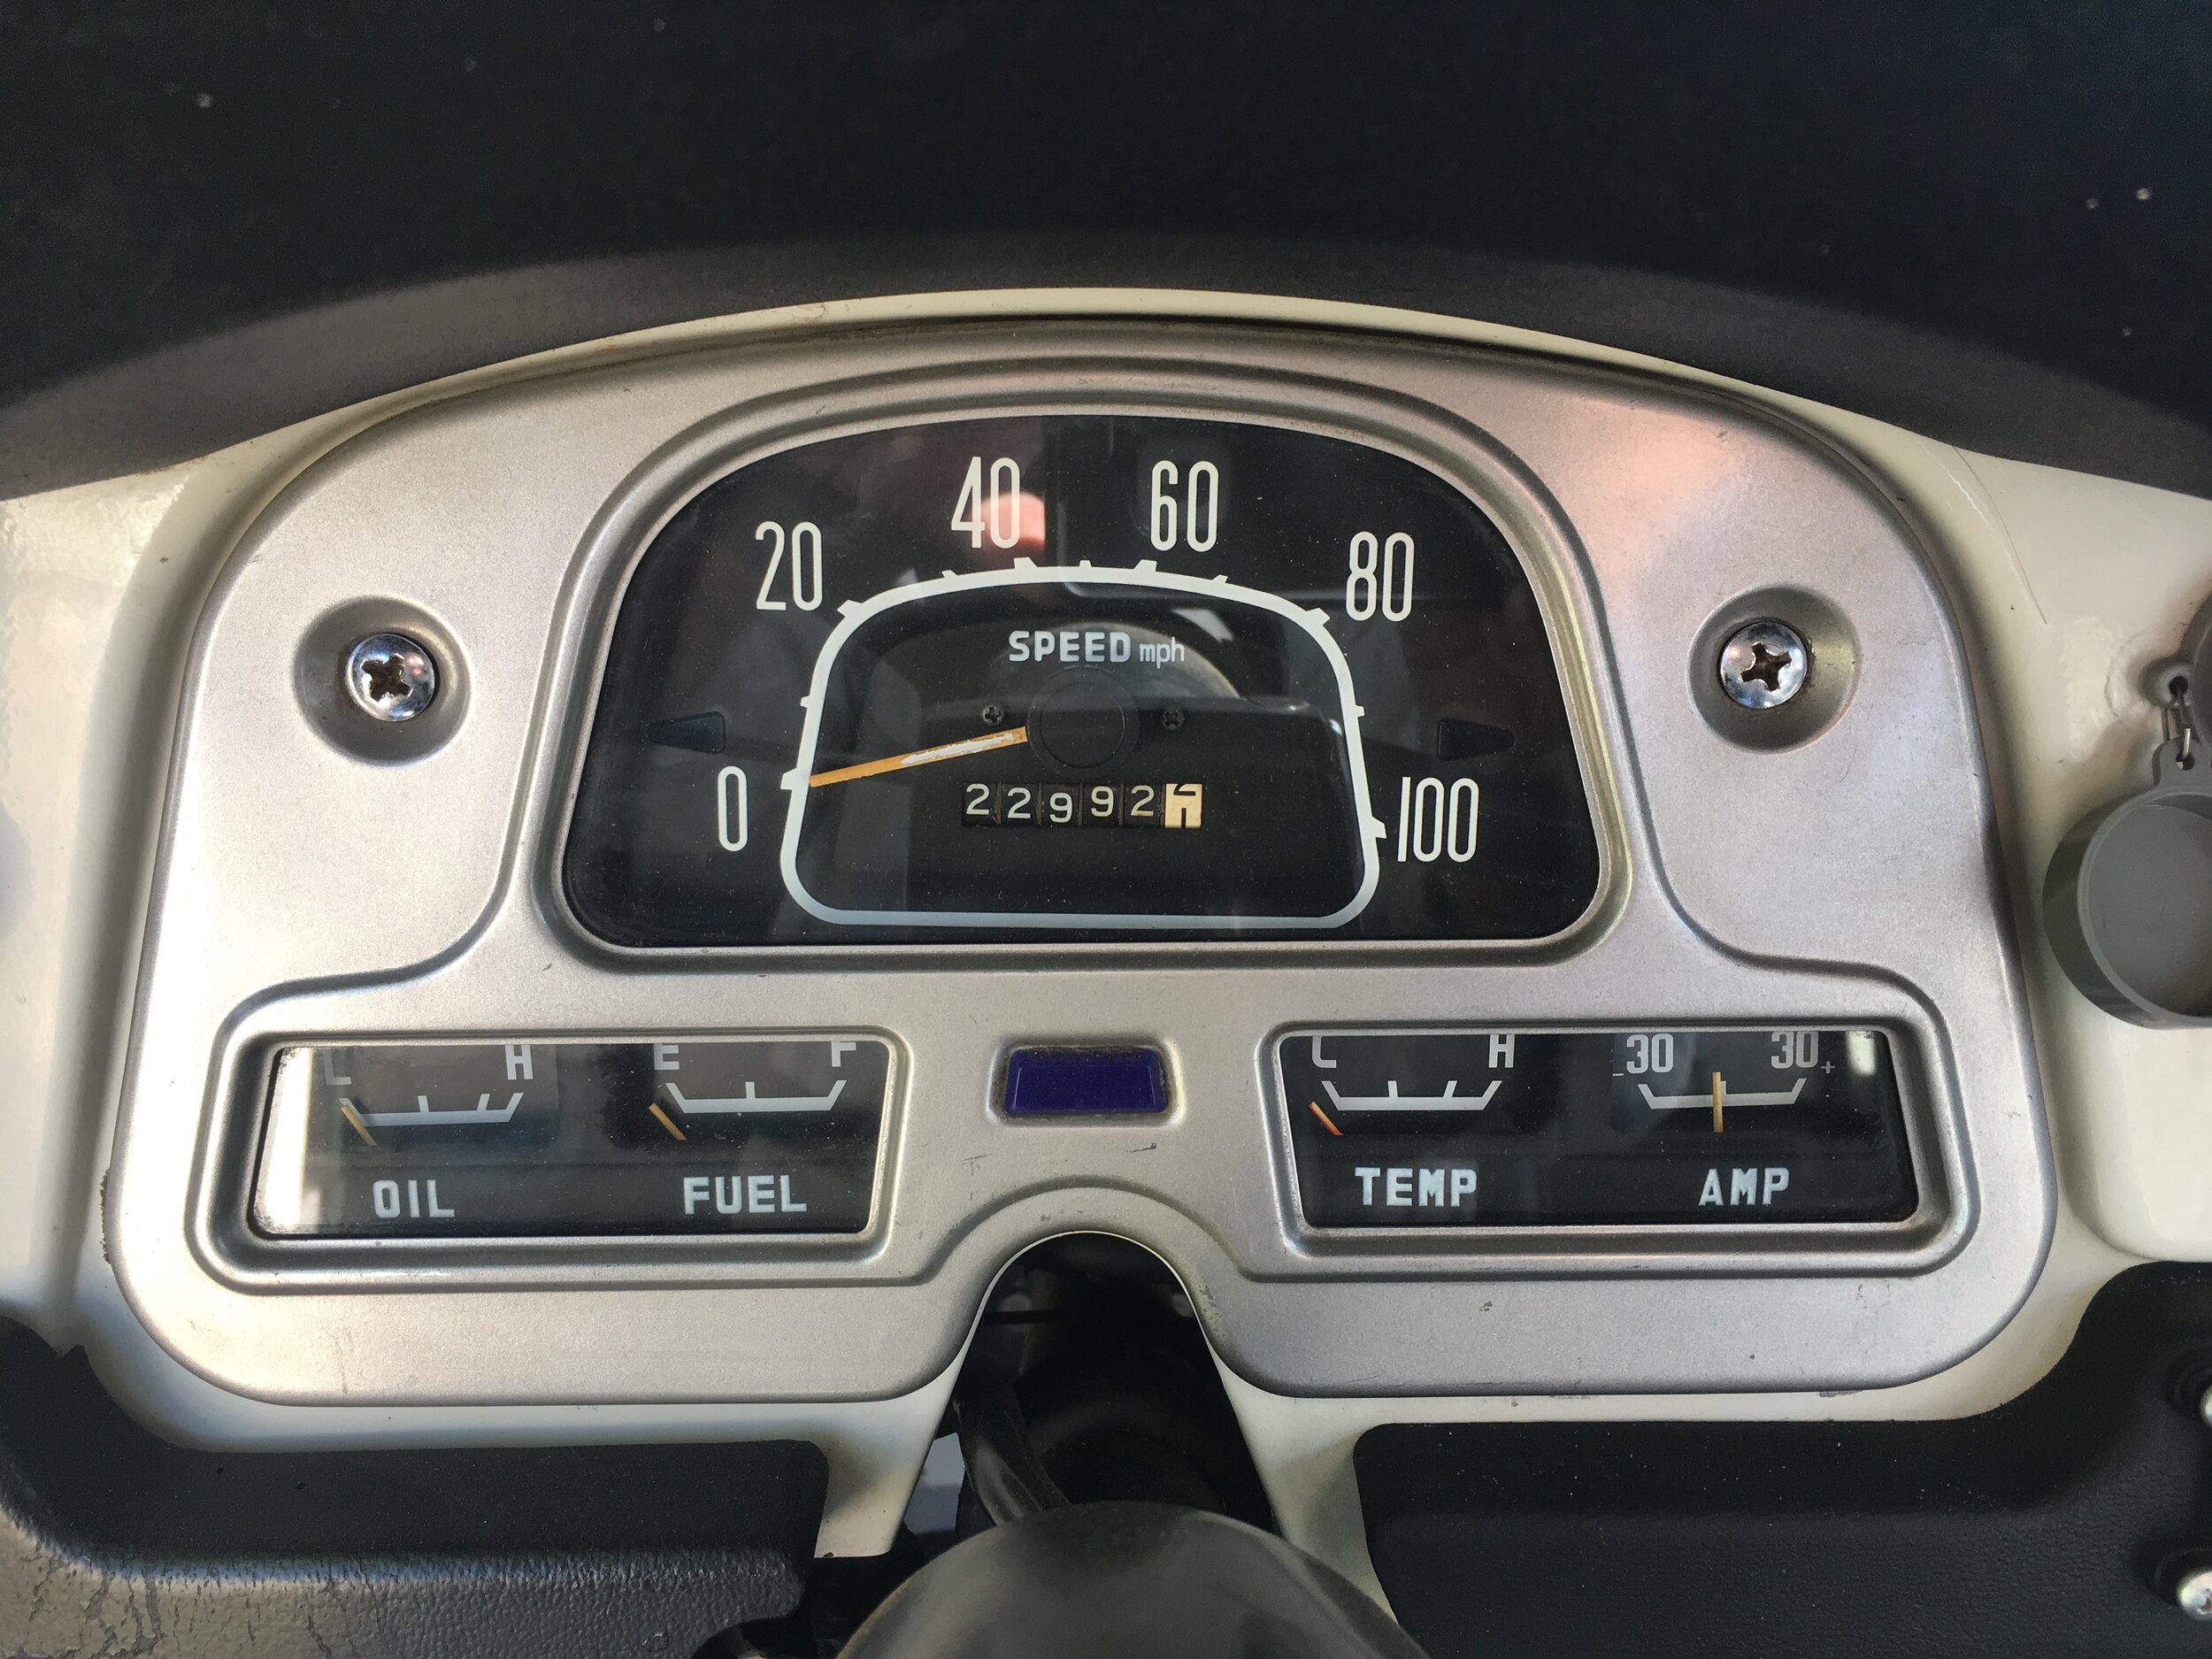
Moving on to four-wheel-drive vehicles, the 45-year-old industrial gauge panel in my FJ40 is nevertheless peerless in function and legibility. Again, white on black. The only sign of age on this panel, after four decades and 320,000 miles, is the peeling orange paint on the speedometer needle. (Note, too, in all the examples so far, the comprehensive nature of the information offered, from oil pressure to amperage. Sadly gone on most vehicles now, although some electronic dashes allow you to call it up on a side menu.)
In contrast to all these examples is the instrument cluster on our 2012 Toyota Tacoma, shown here in ideal light:
At first glance, it doesn’t look bad. But notice that, instead of simple white lettering on a black background, as on all our previous examples, Toyota introduced a black background with a white band around the perimeter and black lettering, as well as a spurious “carbon-fiber” looking pattern on the black background. The gauges are also so deeply inset that, even in this photograph, you can see the shade partially obscuring the figures on the left of each gauge. Note as well the extremely poor contrast of the red kilometer markings, completely invisible on the left of the speedometer.
Now look at the same cluster in partial sun from the side, and through the lens of a pair of sunglasses.
Not only do the numbers on both speedometer and tach become nearly illegible, the red needles also disappear against the black background, and even their tips show poorly in the white since you can only see about a half inch of each.
I noticed this characteristic shortly after we bought the truck, and it has annoyed me ever since. I constantly find myself turning my head a bit to look around my sunglasses to see what my speed is. Even turning on the headlamps (and thus instrument lights) doesn’t help. I have the feeling this arrangement was configured on a designer’s computer screen and never actually tested before it went into production.
Fashion is all well and good, but it should never interfere with function.
Designers: White on black. Please. And don’t put the gauges in a cave.
Simply brilliant: Rennstands
If you have ever done repair or maintenance work under a vehicle, you’ve run into this problem: You need to jack up the vehicle at the appropriate spot on its chassis or axles—but, quite frequently, that same spot is the best or even the only place to subsequently support the vehicle safely on jack stands.
On a vehicle with solid axles, such as my FJ40, this isn’t much of an issue as there is generally enough leeway to jack in one spot under the axle tube and place a jack stand adjacent to it. But on trucks with independent suspension it’s different, and if working on a unibody sedan there are often very specific spots under the pinch weld that are the only recommended spots to put either a jack or a jack stand.
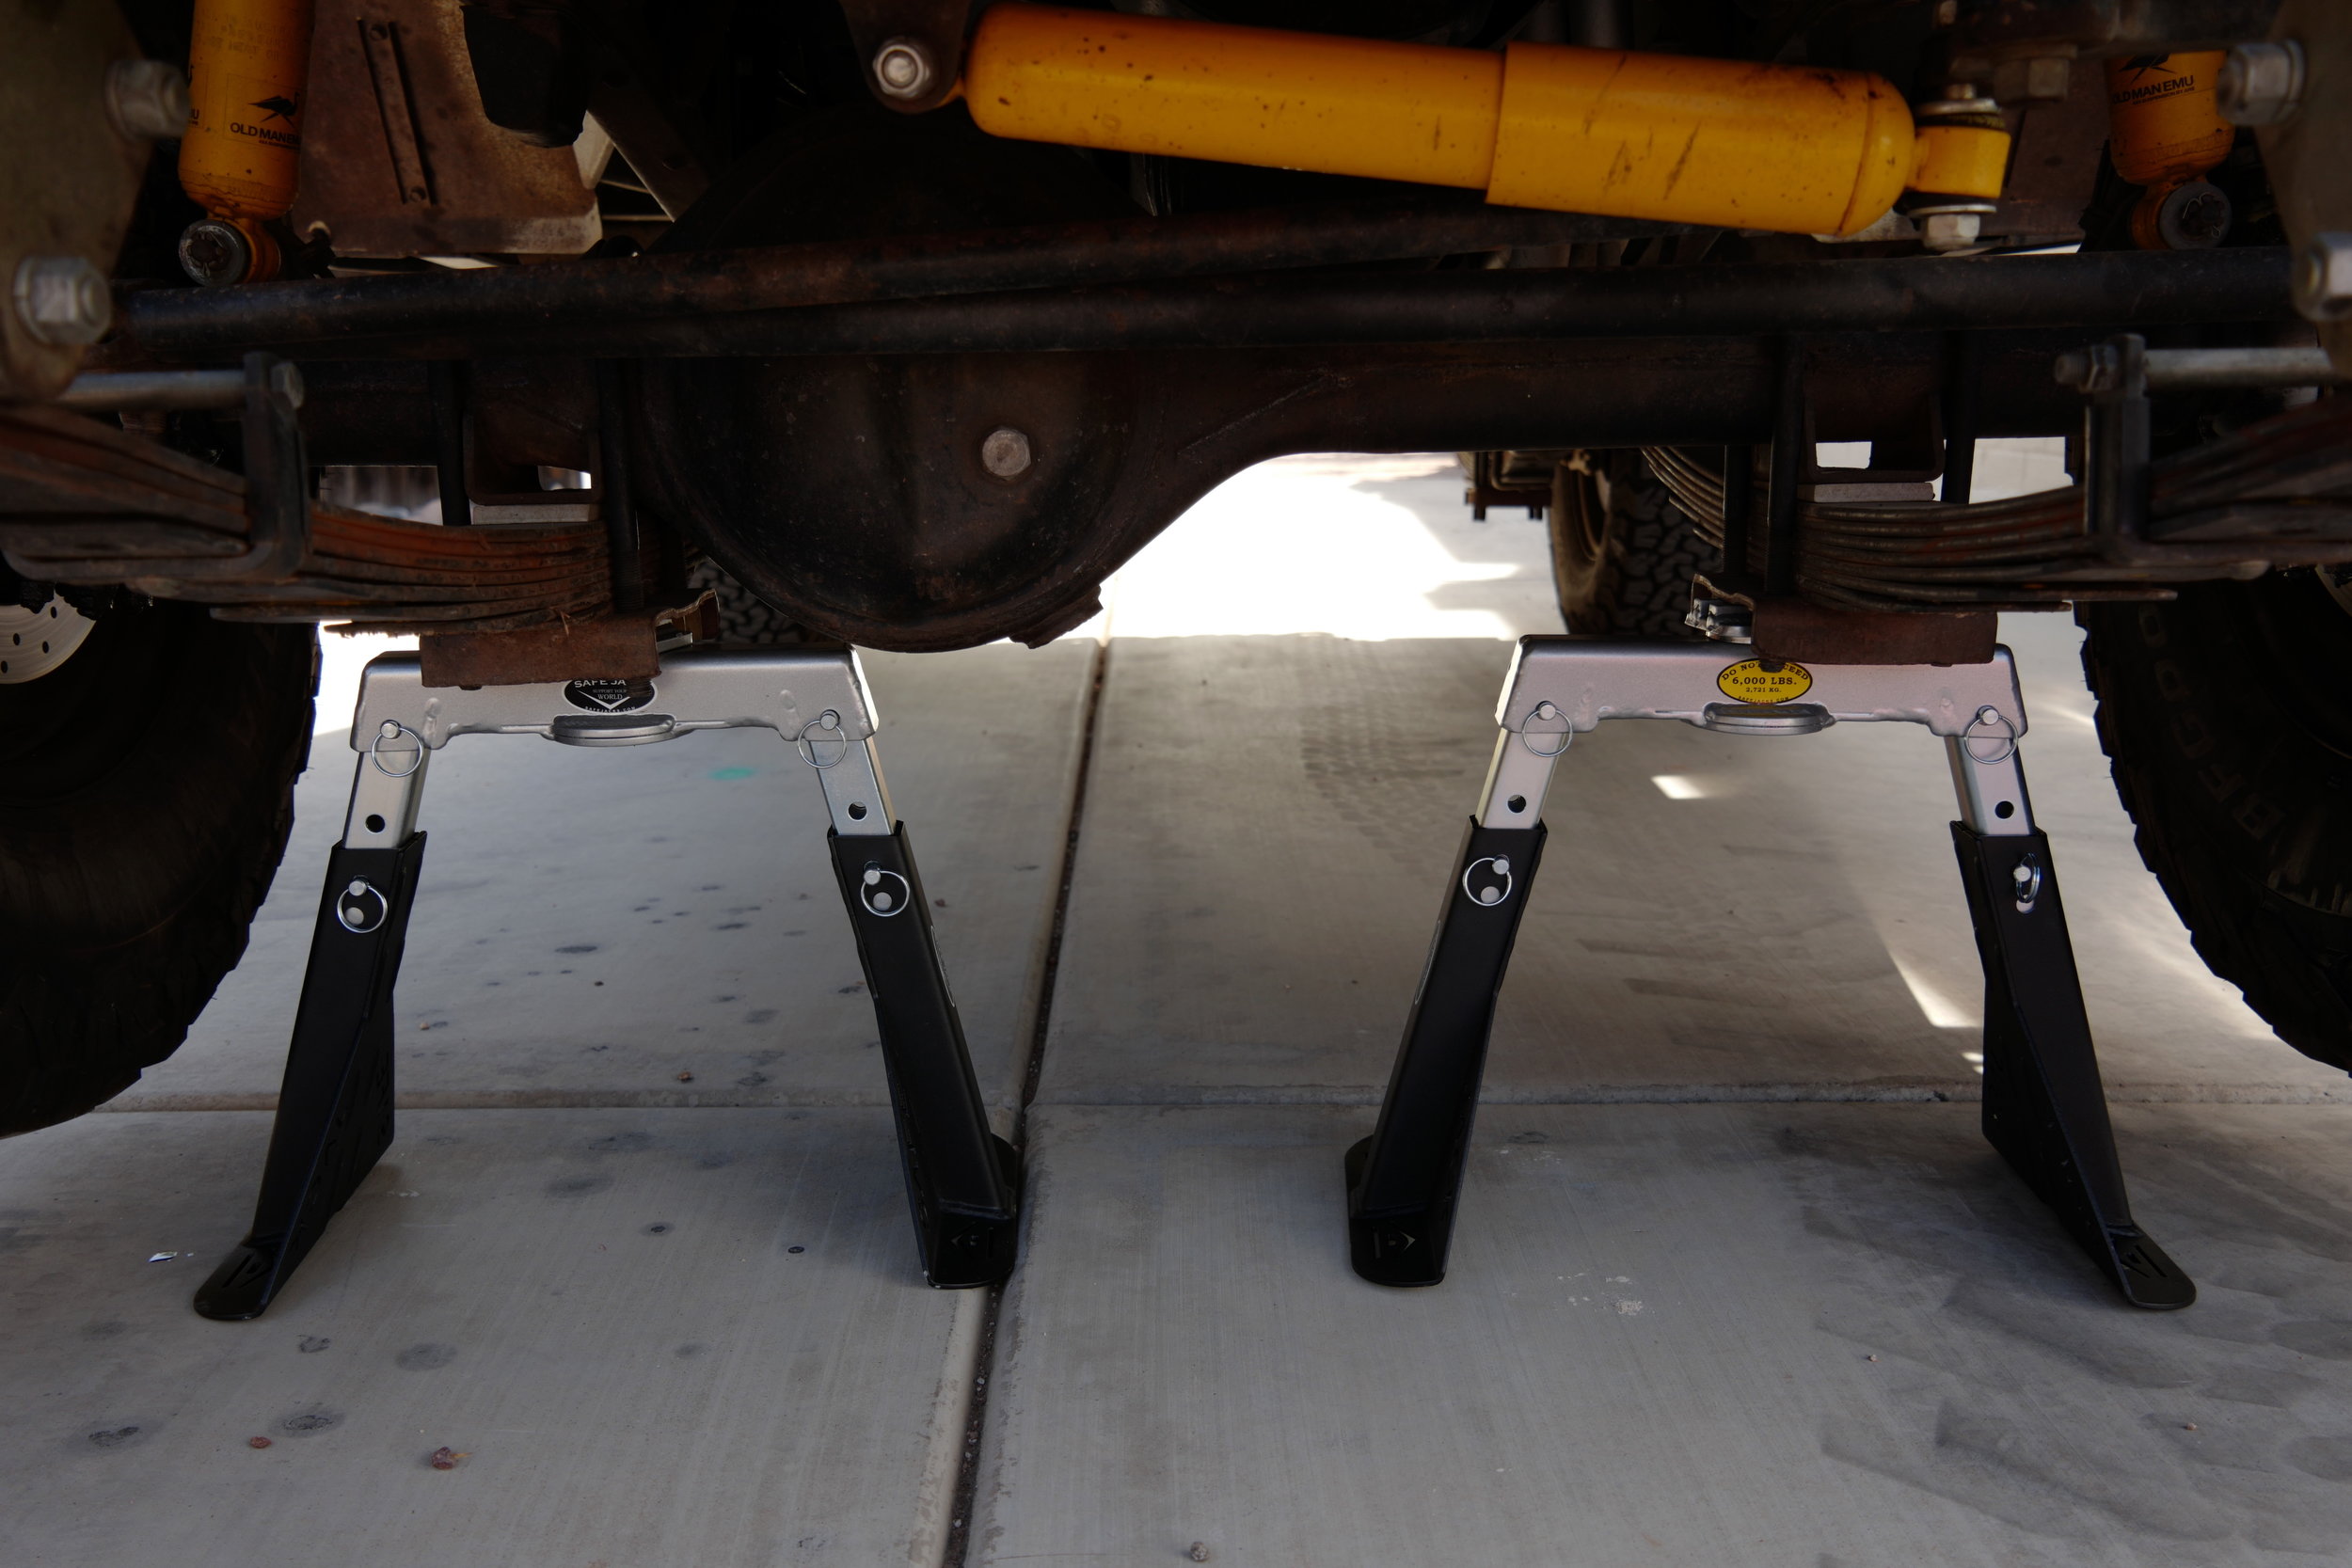
Problem solved, thanks to Richard Bogert of Bogert Engineering, the same people who make the excellent Safe Jack systems. The Rennstand allows you to jack up your vehicle at the correct point and then secure it in the same spot on a three-ton stand, all in one operation.
Operation is simple. Position the Rennstand’s crossbeam on your floor jack’s pad (it will also work with a bottle jack with an adapter) and insert the appropriate cradle for your vehicle, whether a model-specific pinch-weld bracket, a flat plate, or a dished cradle. Jack up the vehicle at the appropriate spot.
Insert the Rennstand’s adjustable legs into the crossbeam’s sockets and insert the locking pins, then pull the locking pins on the lower section ot the legs, adjust them to length, and re-insert the pins. Lower the jack and you’re finished.
The crossbeam adds just under two inches to the lowest height of your floor jack, which could present issues with some sedans or sports cars if you don’t have a low-profile jack. The Rennstand is also wider than many “normal” jack stands, which I suppose might be an issue in certain situations, but not one I’ve run into. The upside of that width is that it is reassuringly stable. The three-ton working load limit (WLL) means that a pair of Rennstands will easily support the front end of a very heavy vehicle indeed (They’ve been tested to 150 percent of that according to ASME standards). The lowest setting on its legs is 11.5 inches, the tallest is 16.5. Bogert plans to introduce taller models for lifted vehicles.
Using the Rennstands on our Tacoma was eye-opening, as I’d always struggled to fit both a floor jack and standard jack stands under suitable sections of the front chassis. Not any more. In fact it made the job easier even on the FJ40. In the past I had to place the jack fairly far inboard on the axle in order to leave room for the stand. This made jacking more difficult since I was lifting more of the vehicle, and undoubtedly put more stress on the axle (not that Land Cruiser axle tubes are exactly weak).
Of course, it should be obvious that the Rennstands can be employed as standard jack stands as well.
I remember testing Richard’s early products, especially the original Safe Jack for Hi-Lift jacks, and being impressed with his imagination and ability to engineer seemingly simple solutions to problems no one seemed to be able to solve before. The Rennstand (which is patented), is yet another great idea.
You can find Rennstands here. Note that production is currently running about two weeks behind demand. If you order you’ll be placed in the queue and the stands will be shipped as soon as they’re made.
The latest Defender teaser video . . .
While it’s tempting to try to infer more technical or performance details than we already know for certain, I’m not going to. Why? Because this is a teaser—a promotional video produced by Land Rover. It should be obvious that it’s not going to show us the vehicle in anything but the very best light. So of course the performance in this carefully edited sequence is going to look excellent.
Sure, there are certain things anyone who’s paying attention can see. The new Defender—particularly the two-door 90 version—appears to have class-leading approach and departure angles. Suspension compliance looks to be excellent, as we would expect. The wheel diameter seems to be larger than I would have preferred—certainly larger than the Jeep Wrangler Rubicon’s 17-inch versions—but the glimpses of brake discs indicate there might be room for smaller-diameter wheels to allow more tire sidewall. Impossible to say.
The point that struck me most forcefully was the marketing approach taken by Land Rover. Ads for the original Series vehicles stressed their utility, their strength, their versatility. Not any more. This time it’s all about a pseudo-Paris-Dakar, high-performance, high-environmental-impact attitude. More than half the tracking shots of the vehicle show it at various degrees of side slip, and there’s a whole lot of sand being spewed and snow being flung. That indicates clearly where the company believes its sales lie, even if it actually tells us very little about the vehicle’s everyday utility, strength, or versatility.
The new Defender will be a unibody vehicle with all-independent suspension and a high degree of reliance on electronic traction aids to gain what the company promises will be a new high in all-terrain capability for a Land Rover.
It will be an entirely different vehicle than its predecessors.
I suspect most of its customers will also be entirely different.
Hint: When using “Search,” if nothing comes up, reload the page, this usually works. Also, our “Comment” button is on strike thanks to Squarespace, which is proving to be difficult to use! Please email me with comments!
Overland Tech & Travel brings you in-depth overland equipment tests, reviews, news, travel tips, & stories from the best overlanding experts on the planet. Follow or subscribe (below) to keep up to date.
Have a question for Jonathan? Send him an email [click here].
SUBSCRIBE
CLICK HERE to subscribe to Jonathan’s email list; we send once or twice a month, usually Sunday morning for your weekend reading pleasure.
Overland Tech and Travel is curated by Jonathan Hanson, co-founder and former co-owner of the Overland Expo. Jonathan segued from a misspent youth almost directly into a misspent adulthood, cleverly sidestepping any chance of a normal career track or a secure retirement by becoming a freelance writer, working for Outside, National Geographic Adventure, and nearly two dozen other publications. He co-founded Overland Journal in 2007 and was its executive editor until 2011, when he left and sold his shares in the company. His travels encompass explorations on land and sea on six continents, by foot, bicycle, sea kayak, motorcycle, and four-wheel-drive vehicle. He has published a dozen books, several with his wife, Roseann Hanson, gaining several obscure non-cash awards along the way, and is the co-author of the fourth edition of Tom Sheppard's overlanding bible, the Vehicle-dependent Expedition Guide.


