Overland Tech and Travel
Advice from the world's
most experienced overlanders
tests, reviews, opinion, and more
Quality camping gear: when (and when not) to economize
A recent Facebook dialogue regarding the post “OCTK Lite part 2,” and its comparison of quality in outwardly similar tools, reminded me of a column I published in OutdoorX4 some time ago regarding equipment quality in general. I thought it was worth revisiting. Herewith:
I’ve been reviewing outdoor equipment for 30 years now, and using it for a lot longer, in conditions ranging from 115ºF Sonoran Desert summers to Beaufort Sea storms. In a few situations I’ve felt the sharp realization that my life was quite possibly hanging on the quality of my equipment—lost in a winter storm skiing the North Rim of the Grand Canyon, caught seven miles offshore in a sea kayak in a Sea of Cortez chubasco—but in the overwhelming majority of circumstances it’s only been comfort, or the lack thereof, that has been affected by the gear I was using.
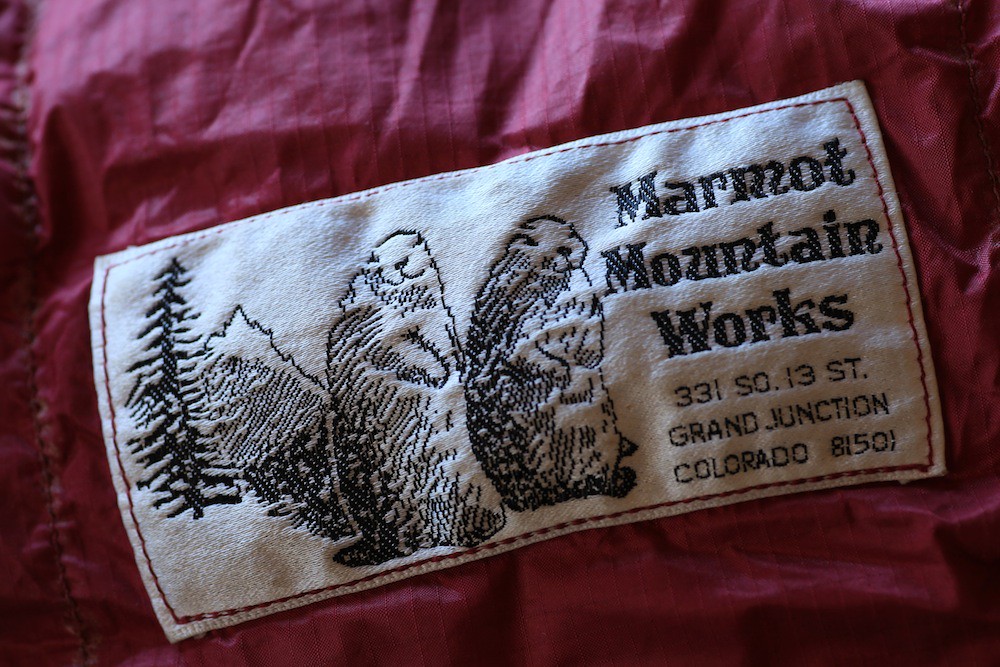
Nevertheless, in that time I’ve become convinced of the near-universal truth of this axiom: The best gear is also the least expensive in the long run. Spend more in the beginning on a quality piece of gear, and it will not only perform better, enhancing your comfort (and potentially your safety), it will also last longer, justifying its price over and over. Just one example is the Marmot Gore-Tex Grouse goose-down sleeping bag I bought in 1983. Scandalously expensive at the time on a penurious college-student budget, it has since seen untold nights of use, and has lost, as best I can estimate, perhaps a half inch of loft. I could go on with many other examples.
Okay, as I’ve been adminished many times, that’s fine in theory. But what if one simply does not have, say, $500 to spend on a sleeping bag, and $200 on a stove, and $50 on a double-wall titanium coffee cup? Am I suggesting that person stay home and leave travel to those who can afford bespoke equipment?
Not at all. My overriding goal in being in this business is to encourage people to get out exploring. One can only truly appreciate something if it is experienced in person, and if we are to preserve the most beautiful parts of our country and the world, we need people there seeing those parts and developing a bond of stewardship. And traveling and experiencing other cultures is the best way to stave off the xenophobia and isolationism that seems to be gripping our country these days.
Thus when I offer equipment advice to those just starting out, or looking at replacing worn out gear, and who are on a budget, I emphasize a strategy of priority. There are areas where economizing can be done without much compromise in comfort (or safety), and others where compromising would be foolish. Here are my ideas of where you should and shouldn’t economize.
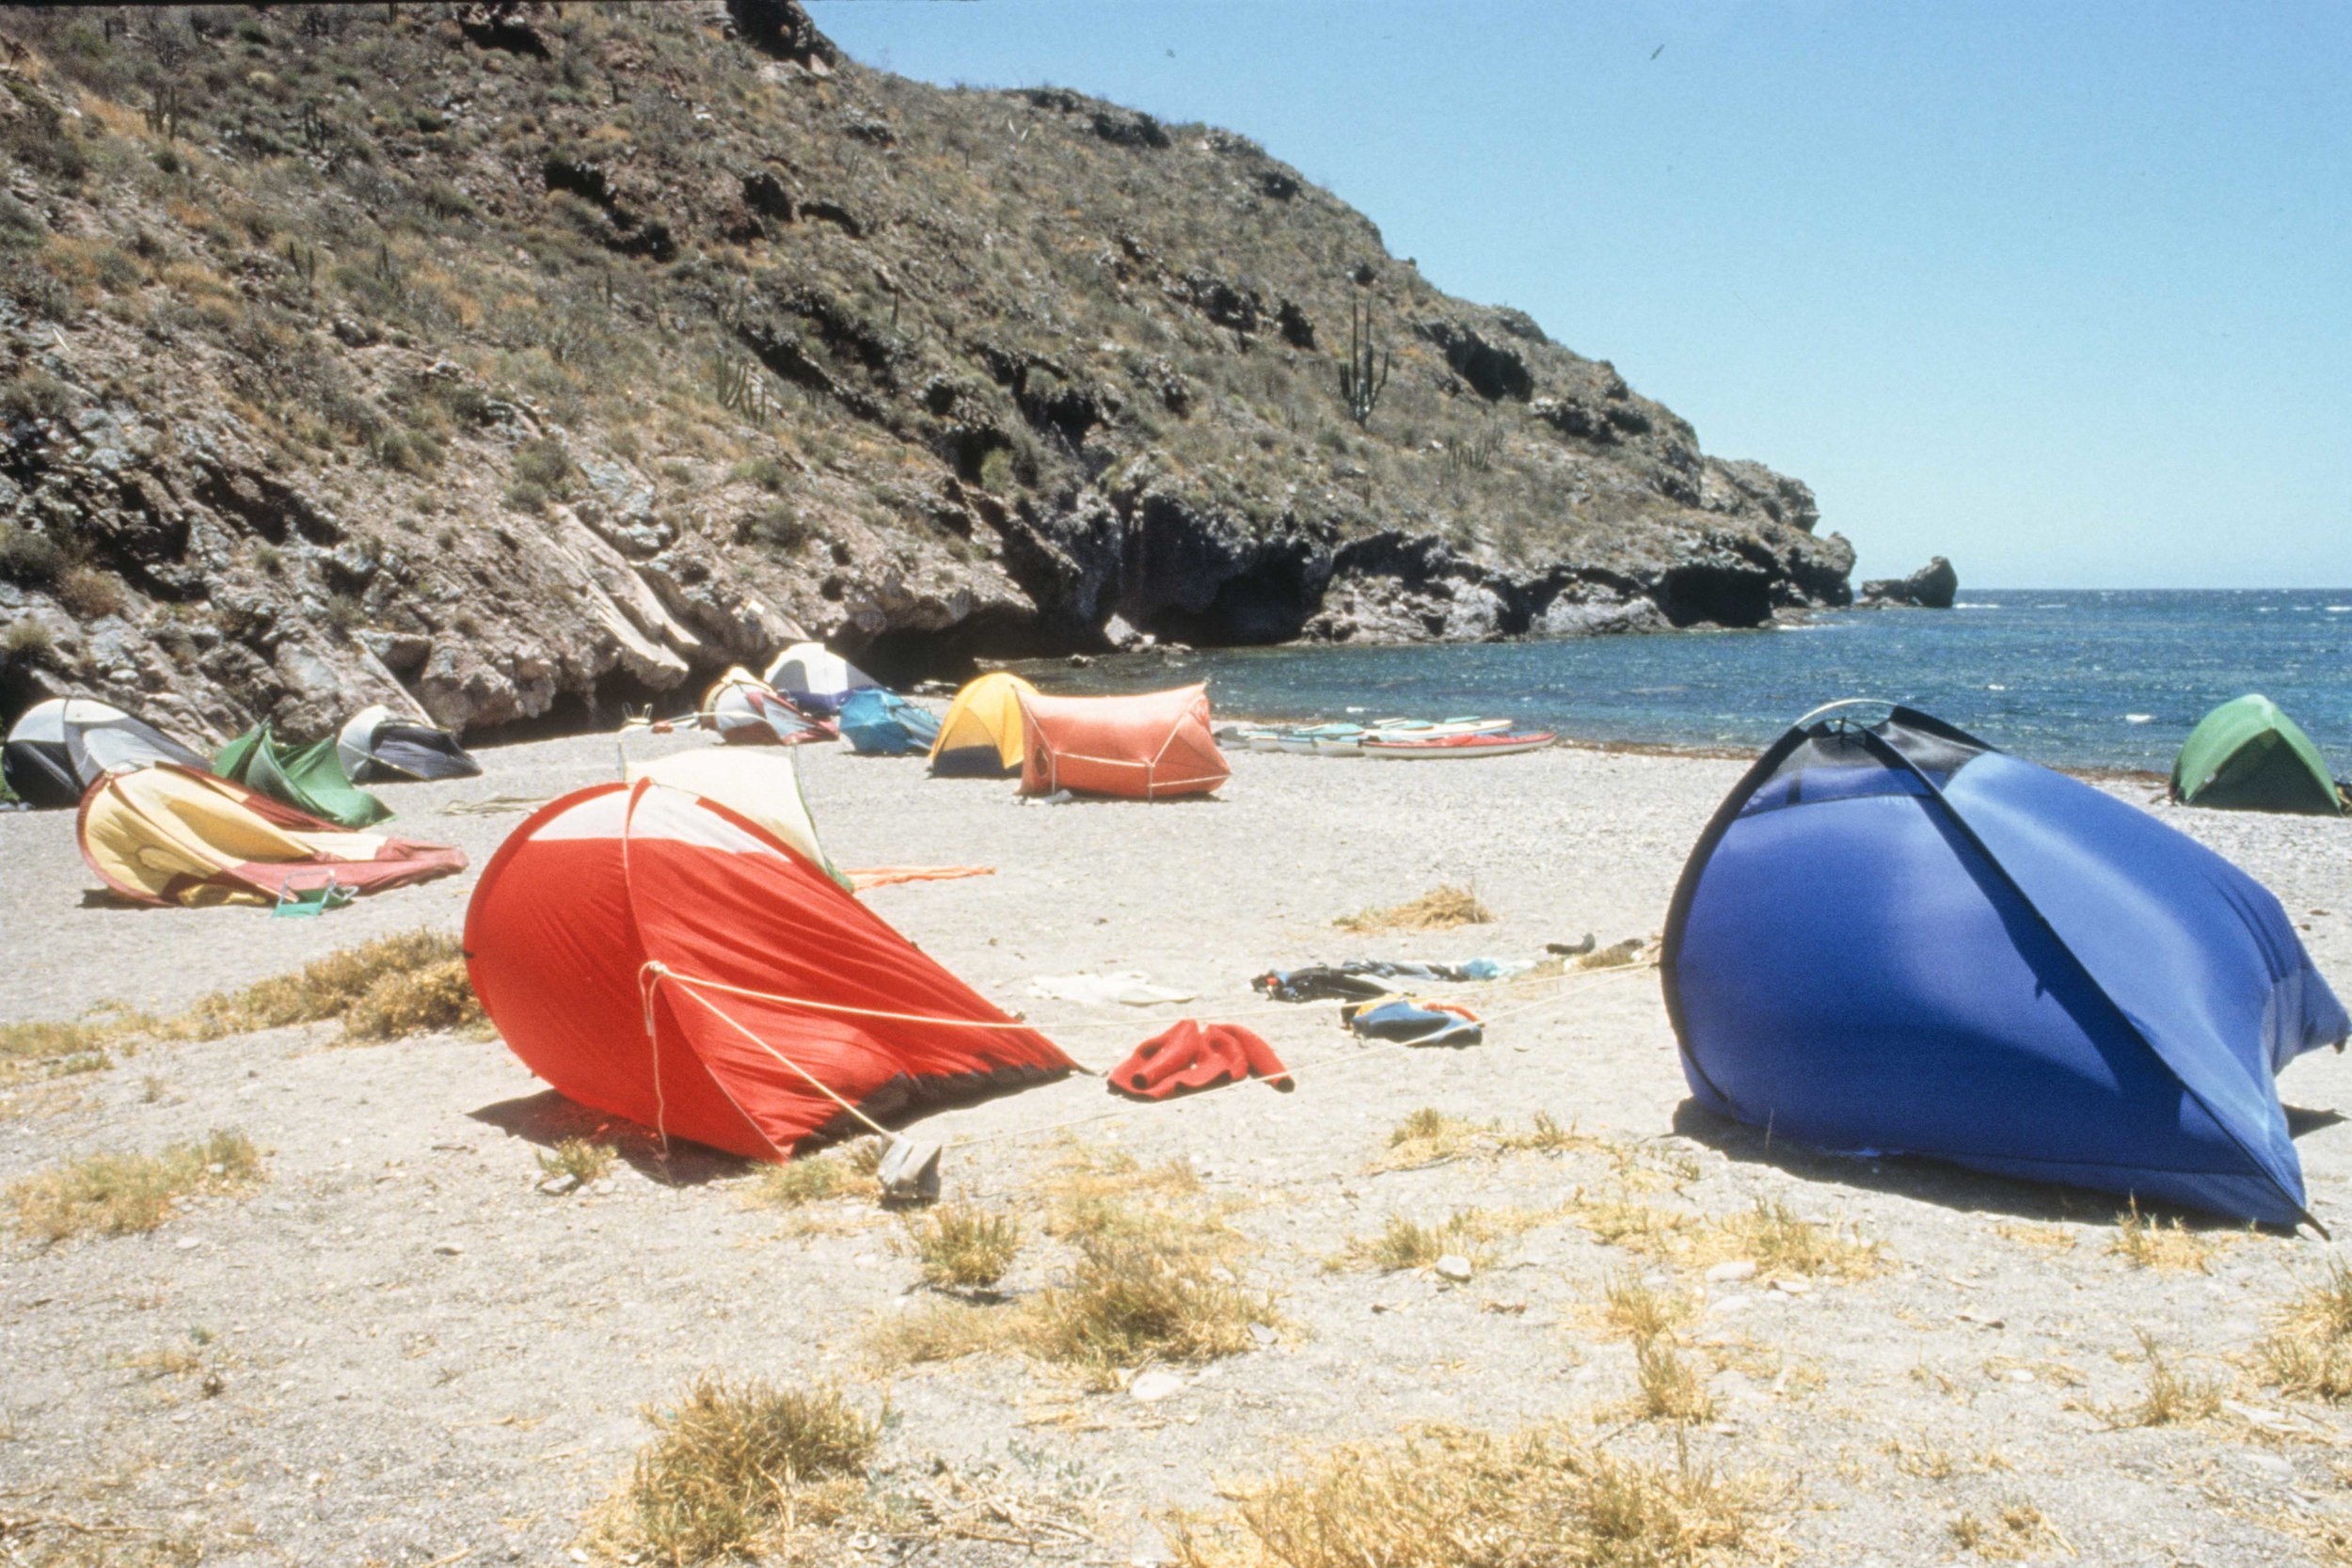
Tent: This is the big one. While traveling and camping your tent is your home—your last line of defense against rain, snow, wind, and bugs. You can survive with a cheap sleeping bag, but if your $39.95 dome tent leaks in a shower, or collapses in a breeze, the best sleeping bag in the world won’t keep you comfortable—or safe. Whether you’re after a lightweight backpacking tent for motorcycle or bicycle travel, or a room-sized, stand-up model to carry in a vehicle, buy the best tent you can afford, and care for it well. (For an in-depth look at how to choose a good lightweight tent, see here.)
This Hilleberg is a good tent.
These are not good tents.
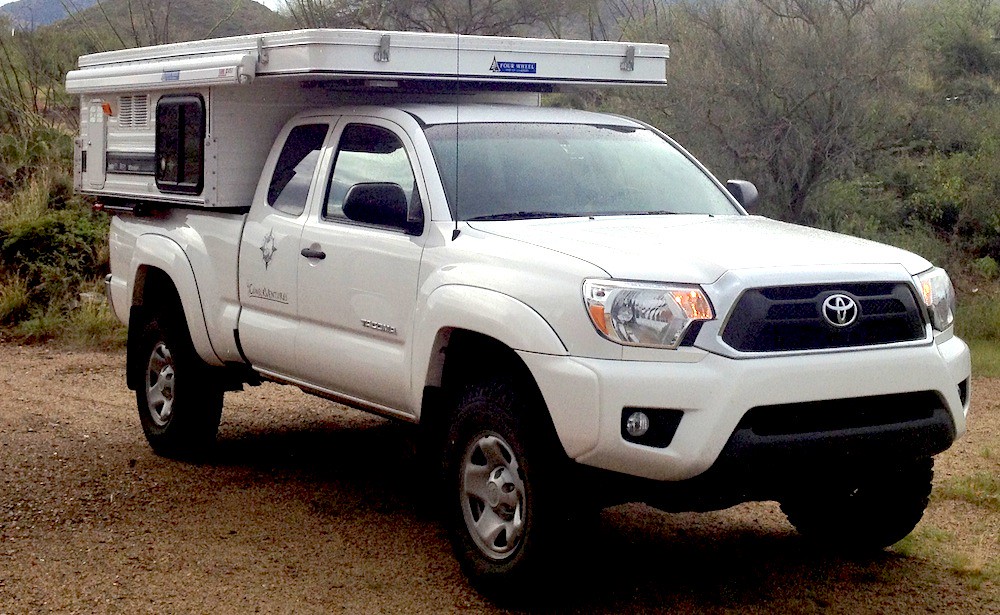
Sleeping bag: I own an exquisite, U.S.-made Western Mountaineering Sycamore MF sleeping bag stuffed with superb 850-plus fill-power goose down. It’s spacious, has a waterproof shell, is rated to 25ºF, and weighs barely two pounds. It cost $460, and I fully expect it to last the rest of my life. Yet, quite frankly, the $55 synthetic-fill Blue Jay bag from Wenzel, rated to the same temperature, would be just as warm, and cozier given the flannel lining. No, it won’t last as long, and it weighs over five pounds, which would be an issue if you’re motorcycling or pedaling, but for tossing in the back of the Tacoma, it’ll work just fine.
Sleeping pad: Yes, that $130 Thermarest LuxuryMap inflatable mattress is a dream to sleep on. But for about $70 you can buy a queen-size three-inch-think memory foam pad on eBay and cut two 30-inch wide sleeping pads from it.
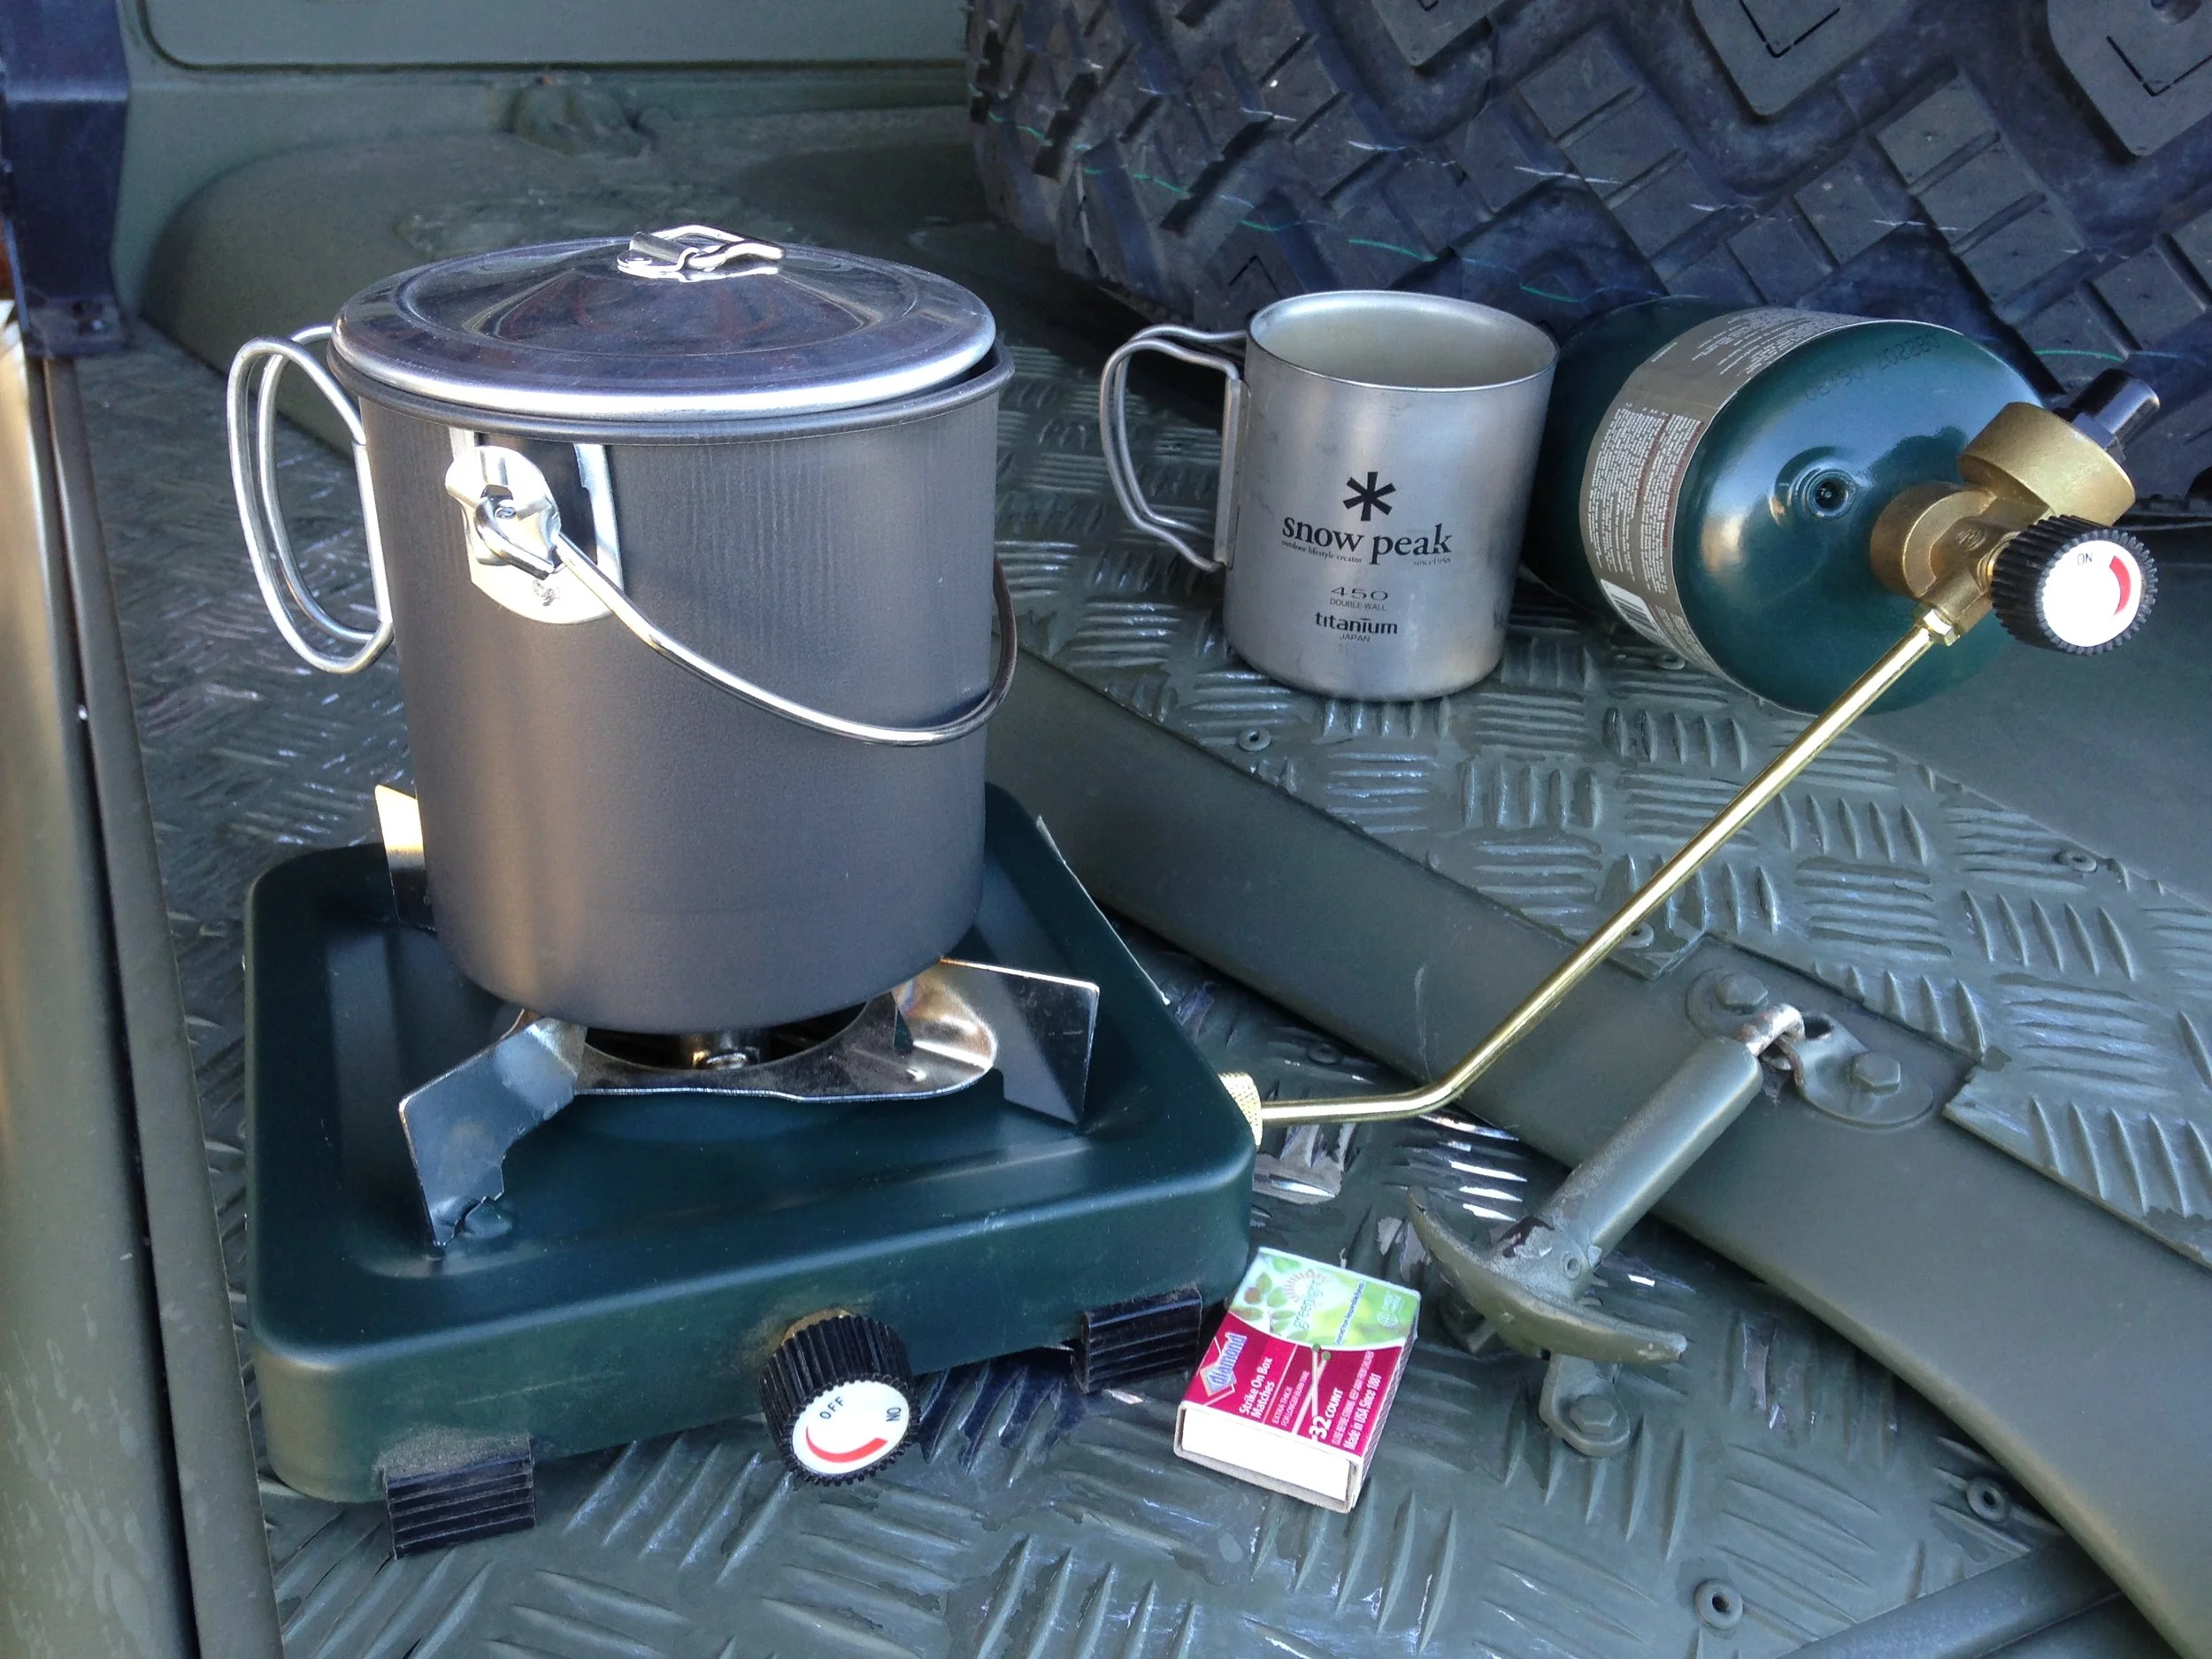
Stove: Connoisseurs of outdoor cooking swear by the dual-burner Partner Steel stoves, made to survive professional river guide abuse and stout enough to be employed secondarily as a tire ramp for working under your vehicle. But in my FJ40 I keep a single-burner Stansport propane stove that cost me $12.50 ten years ago and is still going strong.
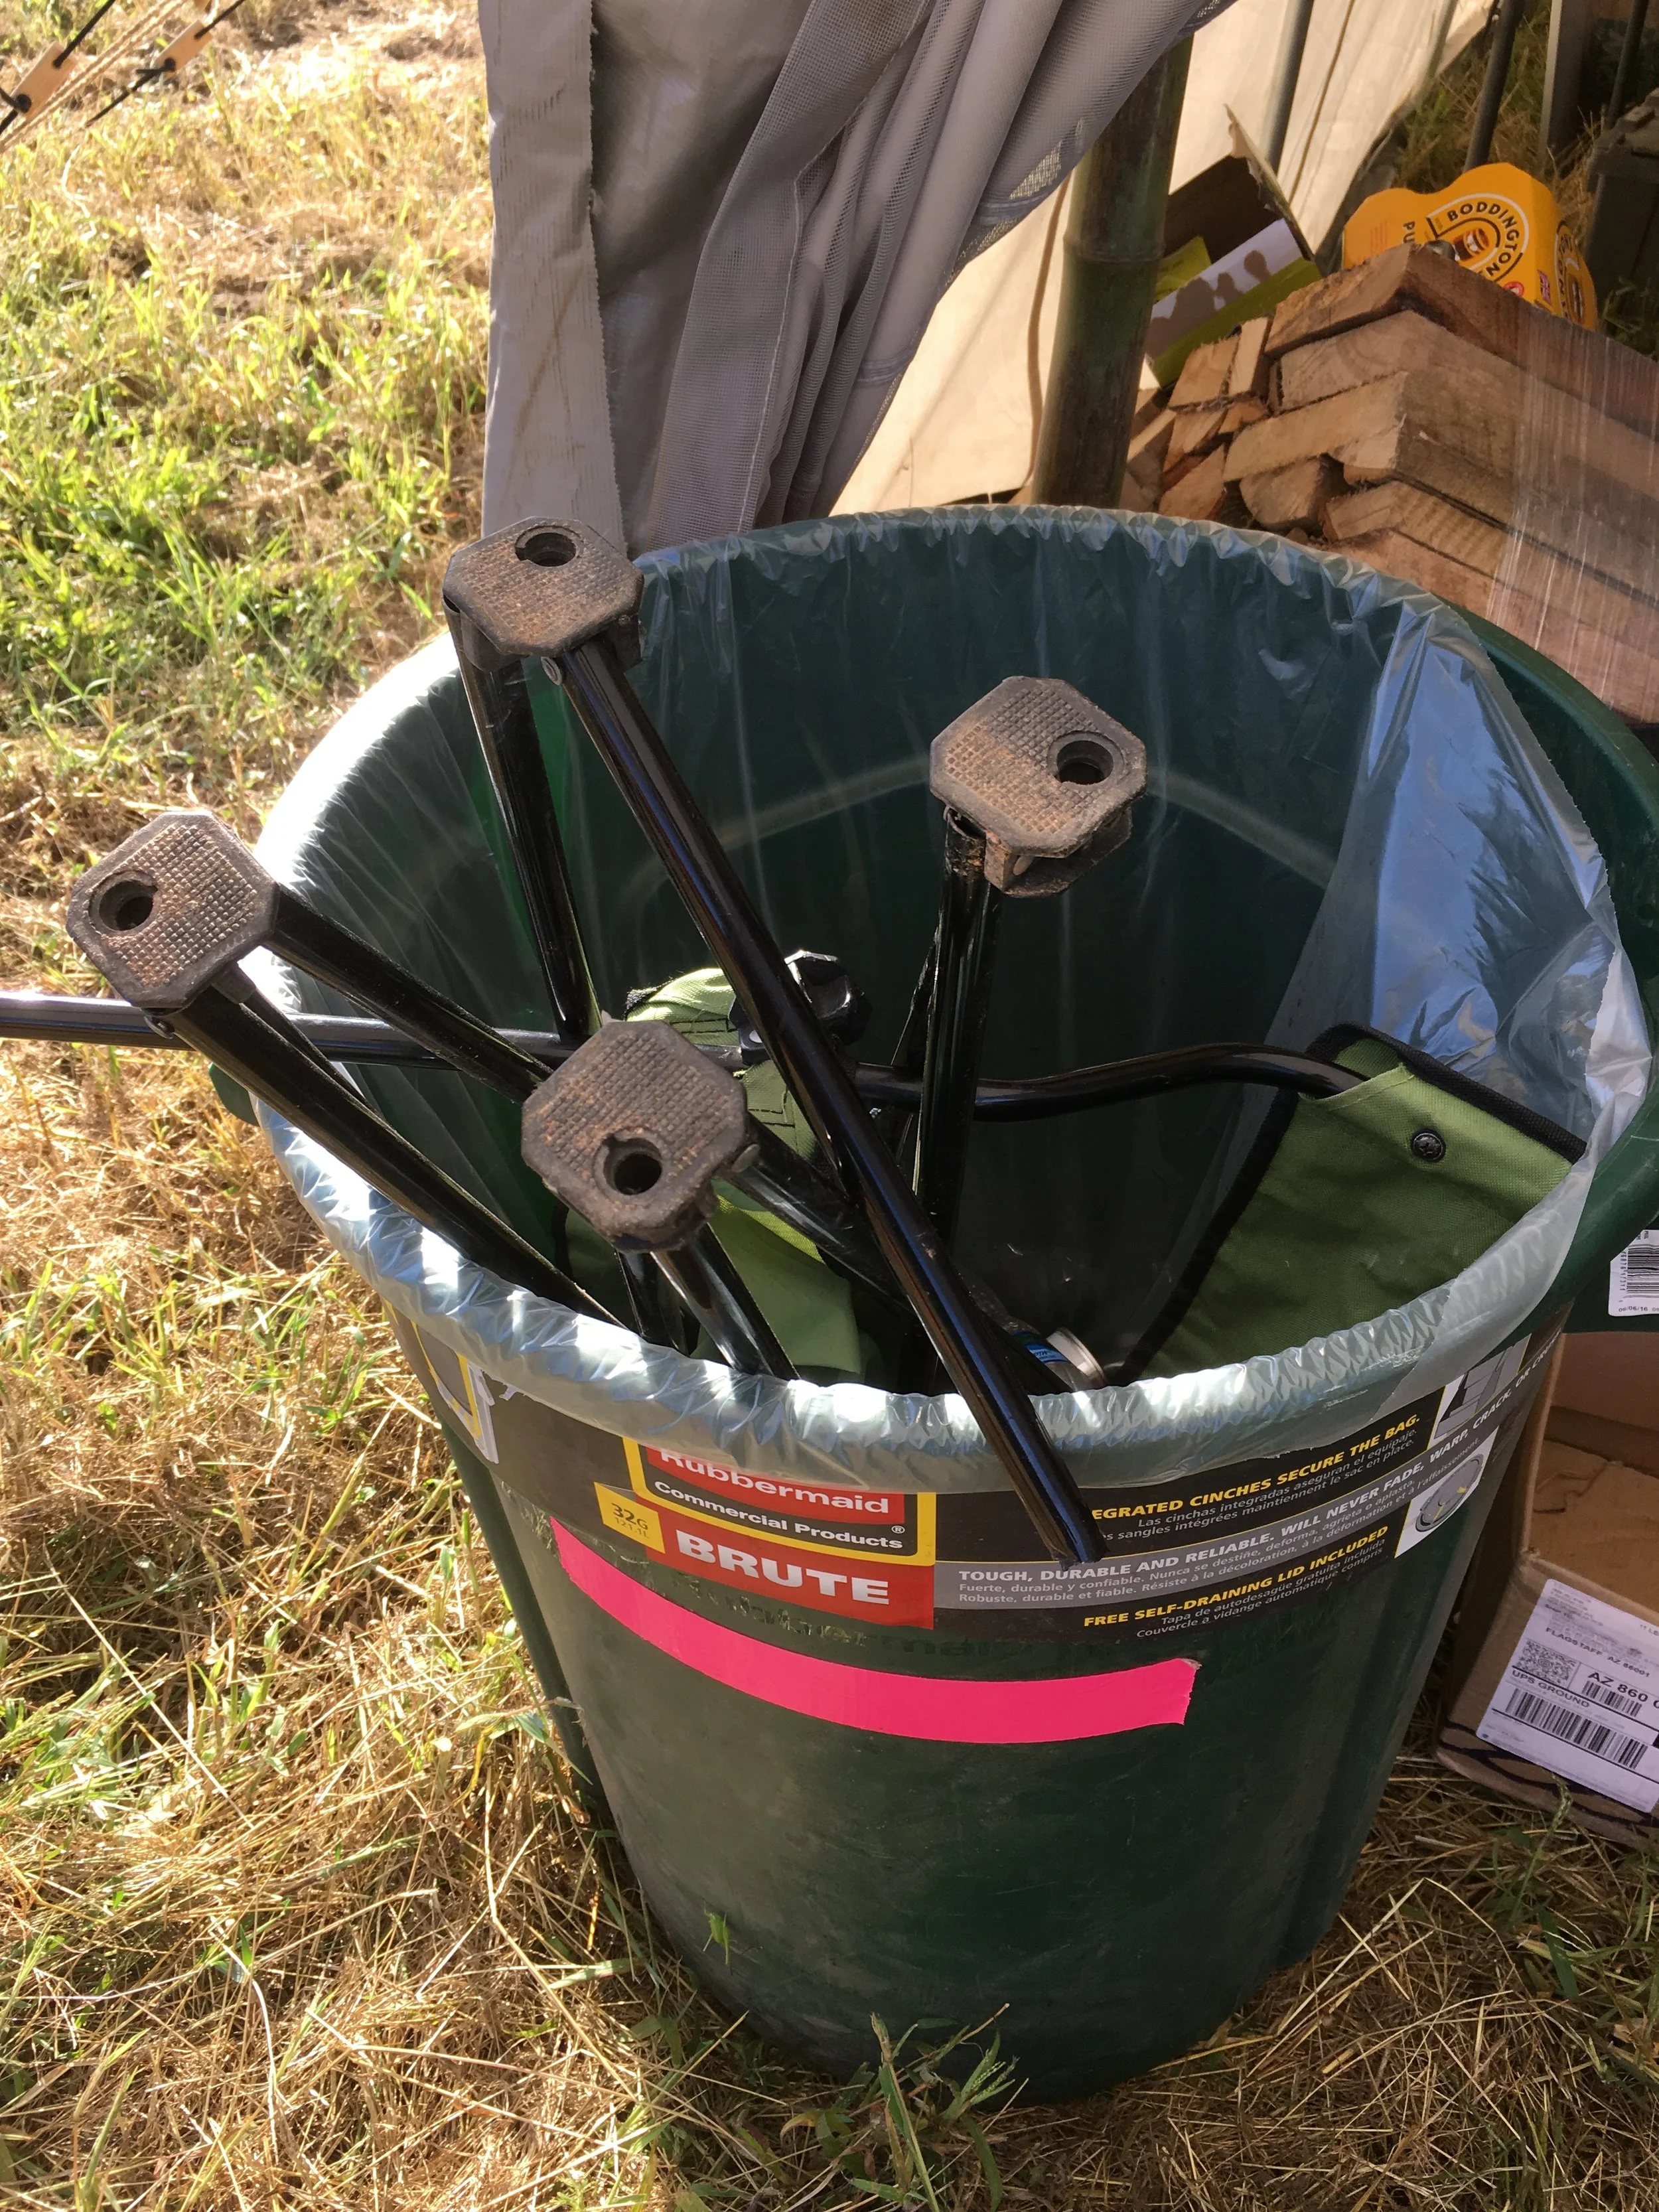
Camp chair: No matter how active you are, you’ll spend a lot of time in camp sitting. Do yourself a favor and skip the $20 specials with 30 plastic joints on them. I’ve lost count of the broken ones I’ve encountered—cleaning up after each Overland Expo we always find a half-dozen of them in dumpsters, a criminal waste of the planet’s resources. Look at the brilliant (and handsome), made in the U.S. Kermit Chair, which can be carried on a motorcycle or transformed into a full-size chair, the fine GCI Pico, or the bulkier but sturdy Picnic Time Sport Chair with its built-in cocktail table.
Coffee mug: Motorcycling or bicycling? Go for that Snow Peak titanium model. Driving a truck? If you spent more than $10 you’re just showing off.
Stove: $12.50. Mug: $45
P3 Solar—power an iPhone or an Expo
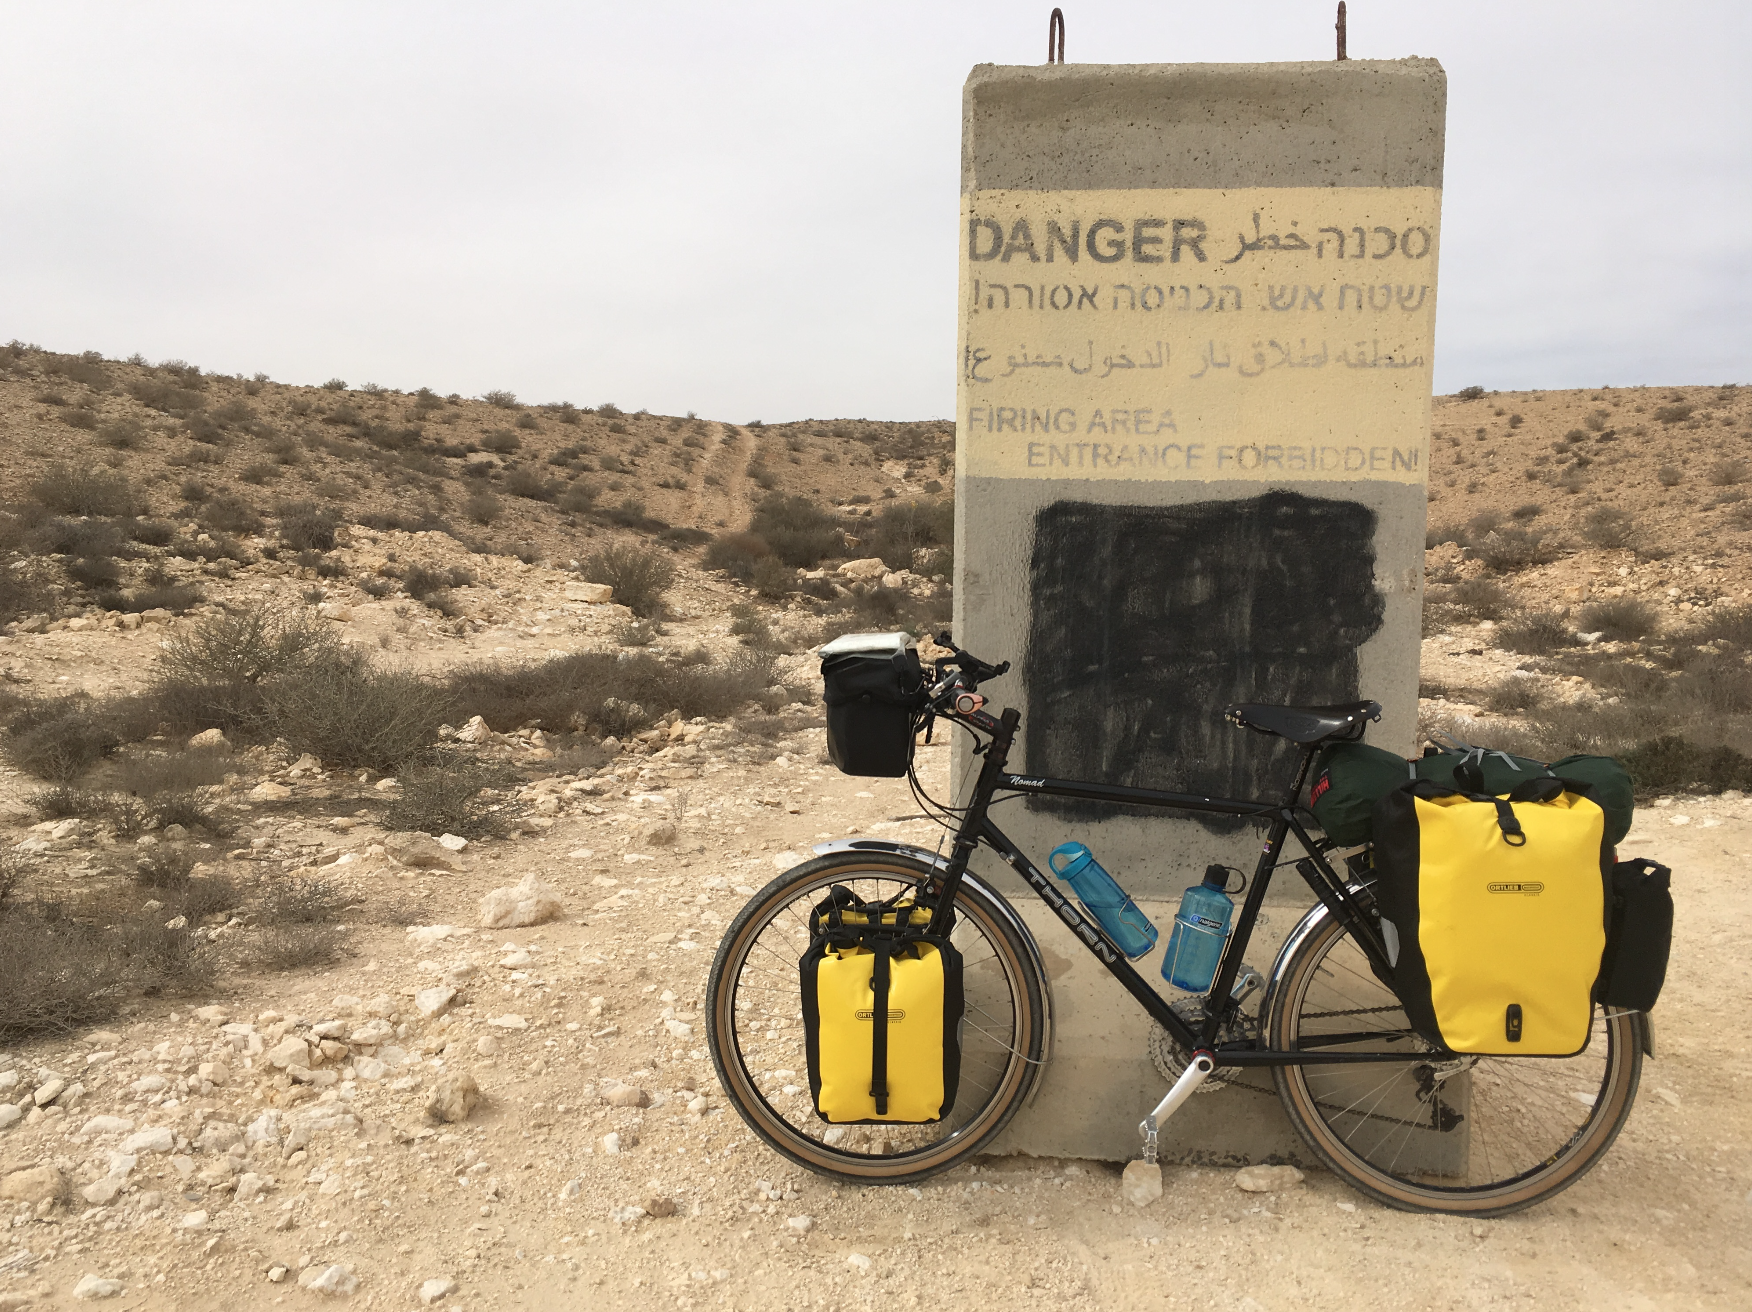
Even the most back-to-basics overland trips rely heavily on electronic equipment these days. Last fall I bicycled the length of Israel—about as back-to-basics as you can get short of walking—yet I still carried an iPhone to log the route and an iPad for taking notes.
Most of the time I was far from wilderness, but I planned to spend time in the Negev Desert, and also just wanted to be as independent as possible from the usual juggling act with outlets in hotel rooms. So I borrowed a Dynamo solar power pack kit from P3 Solar.
The Dynamo kit comprised a folding 20-watt PV panel, a 16,800 mAh lithium-ion battery pack, connectors for various devices, a set of alligator clips to jump an auto battery, and both 12VDC and AC units to recharge the battery from other sources if needed.
The P3 panel soaking up early morning Negev Desert sun.
I originally intended to see if I could secure the open PV panel to the tops of my panniers behind me to get constant charge, but quickly realized that, since 90 percent of my route was trending southward, I’d be shading the panel most of the time. So I was mostly restricted to laying it out in the morning and evening to charge the power pack.
I needn’t have worried. The pack retained enough juice to keep the iPhone navigating and recording all day, and regained full charge easily with just a few hours of exposure. I rode all the way from the Lebanon border to the Red Sea praying I’d come across a motorist with a dead battery, so I could whip the P3 pack out of my handlebar pack and jump his car, but alas, Israelis apparently maintain their vehicles well despite being among the planet’s worst drivers.
The Dynamo kit nestled securely under my tent between the rear panniers.
With connectors pared down to only those I needed, the P3 kit with power pack added just 2.3 pounds to my load (I could have reduced that further if I'd left the case at home). Perfectly manageable on a bicycle, it would be virtually unnoticeable on a motorcycle. The kit is now called the Dynamo Plus and incorporates a 25-watt panel, so recharging devices will be even quicker.
P3 Solar offers an array of products up to an impressive 200-watt rollable panel—available with a folding mount to secure and angle it properly—that will power a fully equipped overland vehicle campsite, fridge included. We used a pair of them along with two of P3’s Dynamo AC600 battery/sine-wave inverter pack to run the entire Overland Expo headquarters at the Biltmore last year, including lights, computers, and a printer. Check out the entire line here.
OCTK Lite part 2
Buying good hand tools isn’t as easy as it used to be. Not that many years ago, if you wanted top-quality stuff you bought American-made brands—Snap-on or Mac if you had the money, Sears Craftsman if not. Done. (If you were British you bought Britool; if French, Facom; if Italian, USAG: and if Australian; Sidchrome.)
Now it’s not so simple. Not only is there a bewildering array of brands available, manufacturing is now global. No longer does brand loyalty or even knowing the country of origin necessarily guarantee quality. Most Craftsman tools are currently manufactured in Taiwan, and it isn’t even Sears any more. Tool behemoth Stanley/Black&Decker now owns the Craftsman line, and Mac and Proto as well, plus the (formerly) British Britool, the (formerly) French Facom, the (formerly) Italian USAG, and the (formerly) Australian Sidchrome. Sheesh.
You can’t just go by materials and manufacturing process. Socket sets from $19.95 Harbor Freight specials on up to apparently identical boutique assortments costing ten times as much advertise chrome vanadium steel and forged construction. There’s simply no way for a consumer to determine the actual composition or quality of the alloy.
You might think you could at least trust the guarantee, but I’m not so sure. A chain auto-parts-store Torx bit I bought out of immediate necessity recently was made in China and has a lifetime replacement warranty. But is that because the tool is of such high quality that the company has confidence it will never fail, or because it is so cheap to manufacture that the company can afford to replace bits for the few people who actually stress and break them? I strongly suspect the latter. Sure, you’ll get a new tool free, but if it breaks when you’re attempting a repair 20 miles down a dirt track and 150 miles from the nearest outlet, that’s not of much immediate value.
You can of course still guarantee superior quality by sticking to the ultra-premium makers such as Snap-on or Mac. Otherwise, I’ve gone back to a rather old-fashioned approach to estimating quality in a tool: I handle it and inspect it. That might seem flippant, but really, your eyes and hands can tell you a lot about a tool—particularly in the finish. As an example I give you the Britool SAE/metric ratchet and socket set I bought years ago. It was actually manufactured in Taiwan, but the quality was excellent. The finish was a perfectly even satin, absolutely consistent from socket to ratchet to extension. The roll markings on the sockets were crisp, as was the knurling on the extensions. The ratchet had a 72-tooth head, this requiring less swing to engage when working in tight quarters than one with fewer teeth. The extensions had hex fitting so you could apply a wrench if for some reason you couldn’t get the ratchet on it.
A superb set of tools—and if I’d known then what I know now I would have bought ten of them, because soon Britool changed all their sets to blue-boxed “Expert” stuff that was a steep plunge off a cliff in quality. Thick, uneven chrome and much simplified accessories, clearly now built to a price rather than a standard. Can one help suspecting the same cost-control measures were applied where it isn’t as obvious?
On the other hand, consider the 1/4-inch ratchet I picked up at a Napa Auto Parts the other day. It’s the chain’s own brand, Carlyle, aimed, they say, at professional mechanics. Manufactured in Taiwan, each piece carries a lifetime guarantee (although, importantly, I understand you must show the original receipt, unlike the similar guarantee offered by Snap-on, Mac, and even Craftsman).
Ignoring for the moment the de rigueur Snap-on-esque handle shape also ripped off by a zillion other brands, consider that the Carlyle ratchet retails for 18 dollars, while the U.S.-made Snap-on item above it goes for a nickel less than a hundred. To be accurate, note that the Snap-on ratchet has a quick-release button; the equivalent Carlyle ratchet (which the store did not have on hand) lists for $25. So let’s call the Carlyle one quarter the price.
In terms of finish, I could see absolutely no difference between the two. Both are fully polished, and the chrome is even and betrays no machining marks. The head on the Carlyle is actually a bit lower-profile than the Snap-on item, but that might be due to the lack of a quick-release mechanism. Each is rebuildable; Carlyle lists the kit number right on the ratchet.
So far the decision of which to choose seems easy. However, differences become obvious with manipulation. First, the Carlyle ratchet has a 60-tooth head—not bad, but the Snap-on has 72, again, less swing in those tight spots. And Snap-on’s “Dual-80” head technology is known for its immense strength. Nod to Snap-on. Next, the reversing lever, which on the Carlyle is flat, sharp-edged, and rather stiff to operate, while the Snap-on’s rounded lever flicks back and forth effortlessly. Also, the Carlyle’s lever rocks a bit when moved, indicating looser tolerances, while the Snap-on lever simply pivots. Another nod to Snap-on.
With the faceplate off each tool, the differences become more stark. Note, first, the significantly larger diameter of the anvil gear on the Snap-on (bottom here); then the dual drive pawls versus the single Carlyle piece. I’m not about to test a $100 tool to failure, but I’d be happy to bet someone more than that that the Snap-on would take far more torque before it failed. Even the lubrication was a contrast: The Carlyle seemed to have been anointed with a few drops of oil; the Snap-on was liberally infused with a light grease.
So there is little doubt the Snap-on ratchet is functionally superior to the Carlyle, and certainly far more durable. The question is, is it four times better? I think the answer to that depends on your own situation and attitude. First, let’s be blunt: At least $25 of the extra price of the Snap-on is in that name and the status of those high-profile trucks. (I dream of winning a contest: Five minutes inside the truck; anything I can throw out in that time I get to keep.) But another $25 probably represents the extra cost of producing the tool in the U.S. Still, we’re left with a disparity. The Carlyle definitely offers a lot for the price.
If I were a professional mechanic there’d be no hesitation, but I’m not, and I’m also not rich, so it’s more complicated. However, I still trust my Prime Directive for a field tool kit:
If you’ve brought out the tool kit far from home, something has already gone wrong. Why risk compounding the problem by using cheap tools to try to fix it?
My approach to adhering to this axiom on a less-then-unlimited budget is two-fold, as I’ve written before:
First: Spend the most on the most critical tools, the ones you’ll need for the most critical repairs, then economize on the rest. Top of the list is your ratchet and socket set.
Second: eBay. I’ve haunted online auctions and snagged excellent deals, especially on sets missing one or two items, which I then shop for individually. Your local Craigslist can also be a good source. Since premium tools are the most durable, buying used is generally safe unless they have been seriously abused.
Thus, the first items I chose for the One-Case Tool Kit Lite were the 1/4-inch Snap-on ratchet dissected here, and its big brother, a flex-head Snap-on FRLF80 3/8ths ratchet. I have sockets and extensions from the same company for each; however, I’m investigating some alternatives as less-expensive options.
The OCTK Lite
Some years ago I had an idea: to see if it would be possible to fit a selection of tools in a Pelican 1550 case comprehensive enough to handle virtually any field repair on a vehicle—from simple tasks such as replacing a radiator hose up to major operations like removing a transmission or swapping out suspension components. I documented the process of trial and error in several magazine articles and a series on Overland Tech and Travel.
Once sorted, the One-Case Tool Kit performed as well as I had hoped. I was rarely stumped on having the right tool for both my own work and that of others, although a couple of gentlemen of British origin who will remain nameless still rib me about a single failure to produce an 8mm hex bit, because the hex bit set had been purloined for a task and not returned (annoyingly, by me).
Despite its success, the OCTK had an issue: weight. At 62 pounds all up it was not the easiest thing to carry or secure, and for many, if not most, tasks the exhaustive and tightly packed assortment was simply overkill. Roseann took to referring to it as the One-Hernia Tool kit. Ha ha. Not that she minded me fixing stuff with it.
So for some time I’ve been musing on a sequel, which for now I’ll call the OCTK Lite. This one is not intended to be comprehensive. However, my hope is that it will suffice for a majority of regular maintenance tasks and light repairs, and will be light and compact enough to be carried and secured easily and accessibly.
The first decision to be made was regarding the container. I decided not to go with a smaller version of the 1550 Pelican case, partially because the Pelican, for all its toughness and weatherproofness, is pretty heavy for the volume, and partially because I just wanted to try something different. So this kit will be going into a Blue Ridge Overland Gear Tool Bag, a zip-open Cordura bag that cleverly incorporates six individual zippered pouches, each of which secures inside the bag with a Velcro strip. Thus if, for example, you just need the ratchet and socket set for a particular job, you can rip that pouch out of the bag and take it where needed.
Like all Blue Ridge products, the Tool Bag is made in Virginia, and the quality is absolutely first-rate (they’ve been making the attendee bags for the Overland Expo for several years now). One side of the exterior has a pair of mesh pockets that would be good for holding nitrile gloves and/or a tube of hand cleaner; the other side has a suite of Molle-style loops if you'd like to attach a small external pouch (or they will hold frequently needed tools such as screwdrivers or pliers), and a Velcro panel where to which you can stick your tactical Snap-On patches.
We'll investigate what’s going inside the bag in the next few weeks.
Two kits that will (almost) breakdown-proof your vehicle
Our modern four-wheel-drive vehicles, virtually without exception, are far, far better machines than those we traveled with 30 or 40 years ago, the rose-tinted recollections of some of us nothwithstanding. (See here for a direct comparison.) Yes, they are vastly more complex: The average car today has between 25 and 50 electronic control units or ECUs (the Bentley Bentayga has 90)—some linked, some independent—controlling everything from shock absorber adjustment to accident-avoidance braking. But those complex systems have brought us more power, better fuel economy, a huge improvement in safety, and cleaner air—all at once.
Despite this complexity, vehicles in general are more reliable than ever. Solid-state ECUs are incredibly stable and durable; precision design and manufacturing processes and advances in metallurgy have made engines and other drivetrain components much longer-lasting. A car with 100,000 miles on the odometer used to be noteworthy; these days, beater pizza-delivery Civics with 200,000-plus under their faded paint are as common as Domino’s outlets. When something does go wrong, the car will quite likely be able to tell the mechanic what is is. How long will it be before a car can sense a part about to fail, then automatically log onto Amazon and have the piece waiting at the shop when the self-drive function reroutes you there?
These advances have made overland travel easier and safer as well, even if—to be fair to those rose-tinted recollections—if something does go wrong in the bush you won’t be regapping the points with a matchbook cover if the dwell shifts, or disassembling the carburetor and popping in a rebuild kit if a gasket goes bad. (But since we no longer have points or carburetors . . .)
One thing has not changed, and that is the two types of problems behind the vast majority of issues in the backcountry that bring a vehicle to a halt: tire punctures and dead batteries. (Number three—at least on the road—according to the AAA? Locking the keys in the car.)
While tires and batteries have also been improved significantly in the last few decades, both are wear items and are subject to the whims of chance, whether it be a jagged root holing a tire or any number of things draining a battery.
What this means, however, is that with just two kits in your vehicle you can fix the vast majority of things that are likely to go wrong in the backcountry.
- A backup for the starting battery
- An air compressor and tire repair kit
Let’s, er, start with the battery. A lot of people now have dual-battery systems in their overlanding vehicles, so the auxiliary can be used to power fridges, etc. without draining the starting battery. Most of these systems have a switch that will tie in the auxiliary to the starting circuit when needed, thus solving the problem of a dead main battery in a few seconds. If there is no switch, the auxiliary can be physically swapped with the main battery. Since the chances of two batteries dying simultaneously—at least when installed with a proper isolating system—are scant, you’re more or less immune to battery woes.
A dual-battery system with an automatic isolator, such as this excellent National Luna, will virtually guarantee starting power for your engine
If you have only a single battery for all your systems, I have just one word for you: Microstart. These have been around for several years now and I’ve been preaching their gospel to the point of fanaticism, but I still run into people who have never heard of the product and are blown away when I jump-start their dead 3/4-ton pickup with a battery the size of a VHS tape. I have used and abused a half-dozen of them (we keep one in every vehicle) and they’ve performed perfectly. Early on in their history, master fabricator Tim Scully and I wondered if they could be used for field welding. We duly hooked up three in series and produced several excellent beads, after which the trio continued to work perfectly for their intended use. When I called Scott Schafer at Antigravity Batteries he expressed mingled astonishment and horror at what we had accomplished. (Current Microstarts include an overload device that prevents such shenanigans. Blame Tim and me.) In any case, a Microstart will that ensure a dead starting battery will not leave you stranded. Buy the XP-1 if you have a gasoline-engined mid-size SUV, or the XP-10 if you have a big diesel-powered truck, and top it up (on either AC or DC) every four or five months.
The only real alternative to safeguard a single battery is a low-voltage cutout, which will shut off current flowing from the battery if it senses voltage dropping to levels that would make the vehicle difficult to start. While this might be fine as a backup, I've found that a lot of people who install them are overburdening their battery to begin with, for example by running a fridge while still relying on the battery to turn a high-amperage starter. Better to go with a dual-battery system if you have that much draw.
That leaves tires. As with batteries, they’re a lot tougher and longer-wearing than in years past, but still vulnerable to damage, especially when driven on rough roads and trails. Yet I’m surprised at how many overlanders confine their backup tire kit to a single spare and perhaps a can of Fix-a-Flat. We can do better, and all it takes is a compressor and a proper tire-repair kit.
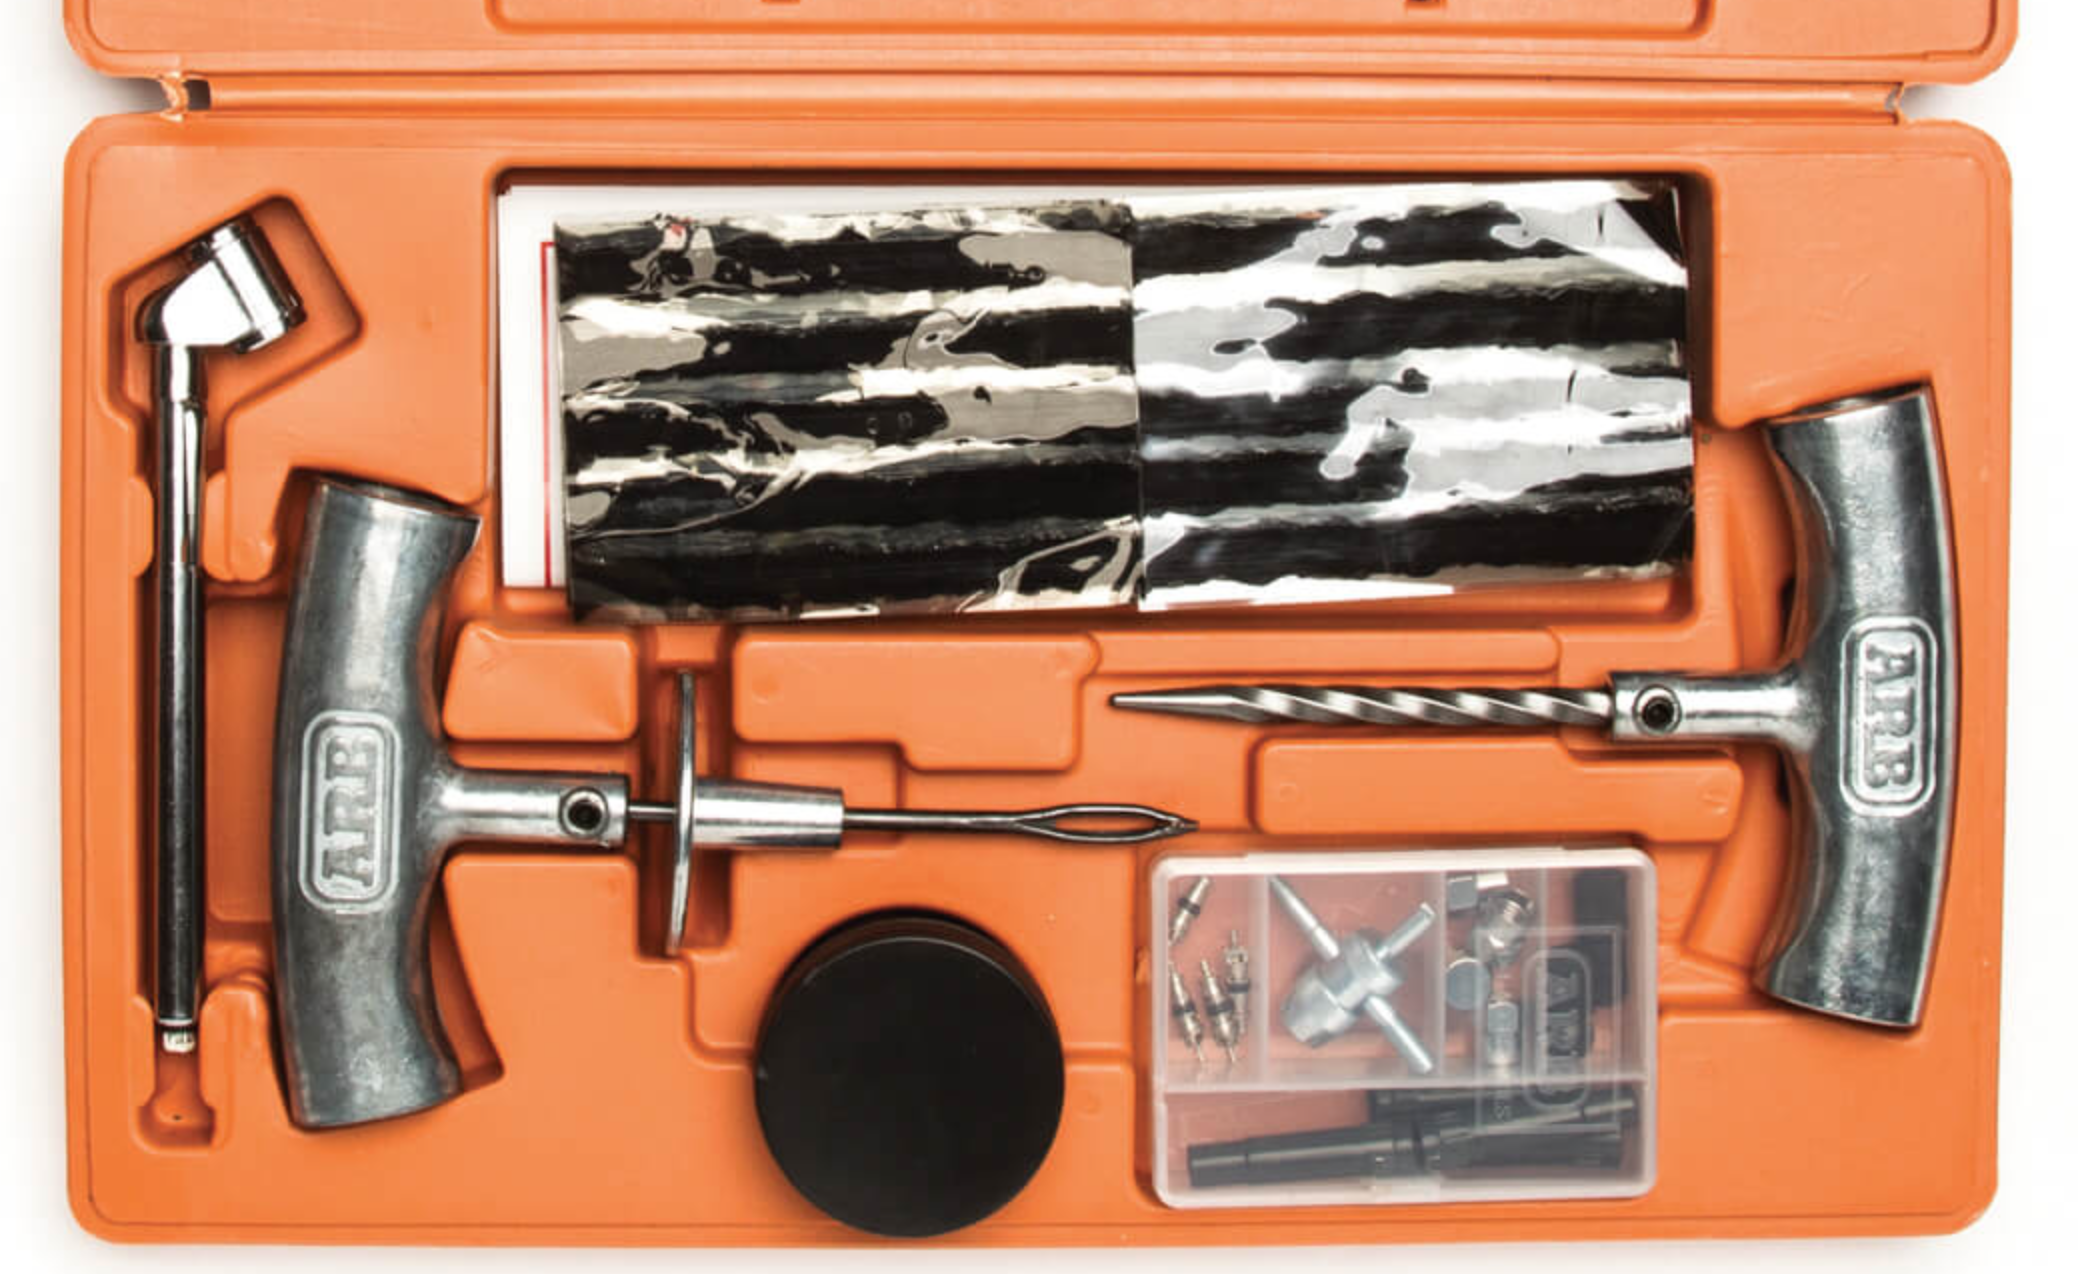
The repair kit is easy. At its most basic you want a plug kit, which will handle the majority of punctures within the tread area, usually without even needed to remove the wheel and tire from the car. But skip the Pep Boys versions and get a good one. This isn’t just tool snobbery talking: plugging a tire involves shoving pretty hard on the reaming tool and the plug-inserting tool. You do not want a cheap plastic-handled tool breaking during the procedure. ARB makes an excellent plug kit with everything you need for most simple punctures. If you want to step up from that and be prepared to handle virtually any tire problem short of a carcass-shredding blowout (including sidewall splits and broken valve stems), get the Exptreme Outback Ultimate Puncture Repair Kit. It’s expensive at $99, but you’ll never have to buy anything else to repair tires as long as you live.
The ARB Speedy Seal kit includes a proper metal-handled reamer and plug inserter.
Once the tire is repaired you’ll need to re-inflate it. While there are air compressors available from $19.95 on up, skip the cheap ones. They fail with miserable frequency, and even when working are so slow that you could hike out, buy a better unit, and be back before your tire is properly inflated. At a bare minimum get one of the ubiquitous Super Flow MV50 units, which are available from around $60. The MV50s have their issues but in general are reliable and reasonably fast, and if you’re a tinkerer there are dozens of web articles detailing worthwhile hacks for the product.
Personally I prefer buying a better compressor to start with, both for repairing tires and for the much more frequently needed function of airing all four tires back up after airing them down for trail driving. To step up in quality look at the Viair units and anything from Extreme Outback. My current favorite compressor is the blindingly fast ARB Twin, expensive but worth every penny. Use the Twin to air up and you’ll be finished with your own vehicle and a friend’s before someone with an MV50 has done two tires.
The ARB Twin is available either as the portable kit shown here,which includes an air tank for operating air tools, or as a stand-alone unit for hard mounting in the vehicle.
Part of what defines overlanding is self-sufficiency. Making sure battery and tire troubles can’t bring you to a halt will go a long way toward guaranteeing that self-sufficiency—and if you travel far off the beaten track might just save you a sat-phone call and a very expensive recovery.
Vice-Grip hack
My Friend Bruce sent me this photo of his friend's Vise-Grip pliers with an eye bolt substituted for the standard knurled adjusting knob. I can think of several reasons why this is clever. At its simplest it makes it easier to adjust the pliers while wearing gloves. However, with the pliers clamped to something you could use the eye to hang something such as a work light or lantern. It would work as a temporary (emergency only!) tie-down point. You could even tie a length of paracord to the eye and use the pliers as a weight to toss over a branch to rig a bear-proof food hanger.
Outback mystery . . . or tragedy?
Here’s something I’ve concluded over three trips to Australia and a cumulative 15,000 kilometers or so of driving: Ninety percent of the time, 90 percent of Australia’s great historic tracks are more or less simply very, very long dirt roads that traverse vast expenses of bush and desert—terrain that can be considered strikingly beautiful or forbiddingly barren, depending on your sense of aesthetics. (Count me firmly in the former group.)
All that changes when it rains and many of those tracks become simply undriveable, and a few routes (such as driving east to west on the Madigan Line) require skill and frequent four-wheel-drive use even in optimal conditions, but otherwise such legendary routes as the Birdsville Track can easily be driven in a Subaru Outback—or a Corolla. The world-class corrugations (washboard) you’ll find will test the structural integrity of the stoutest chassis, but your Land Cruiser’s dual lockers and low range will go unused.
With that said, one aspect of travel in central and western Australia has never been exaggerated: It is a very, very remote region. Even on the Oodnadatta Track—one of the most popular routes in the Outback—we sometimes drove for hours without seeing another vehicle. On other tracks, such as the Madigan Line, you can go a week not knowing if all other humans on the planet have been raptured away. So while ultimate capability might not be a critical requirement in your outback conveyance, reliability surely is, along with your ability to repair likely problems if you travel solo.
Tales of epic repairs, jury-rigged and otherwise, abound in outback literature—and video: If you’ve seen Bush Mechanics on YouTube you’ve been exposed to the wackier side of this skill, but real, and sometimes desperate, examples abound.
However, I found myself wondering if the owner of the vehicle whose parts I found in the Australian desert had the skills, and the spare components, to recover it.
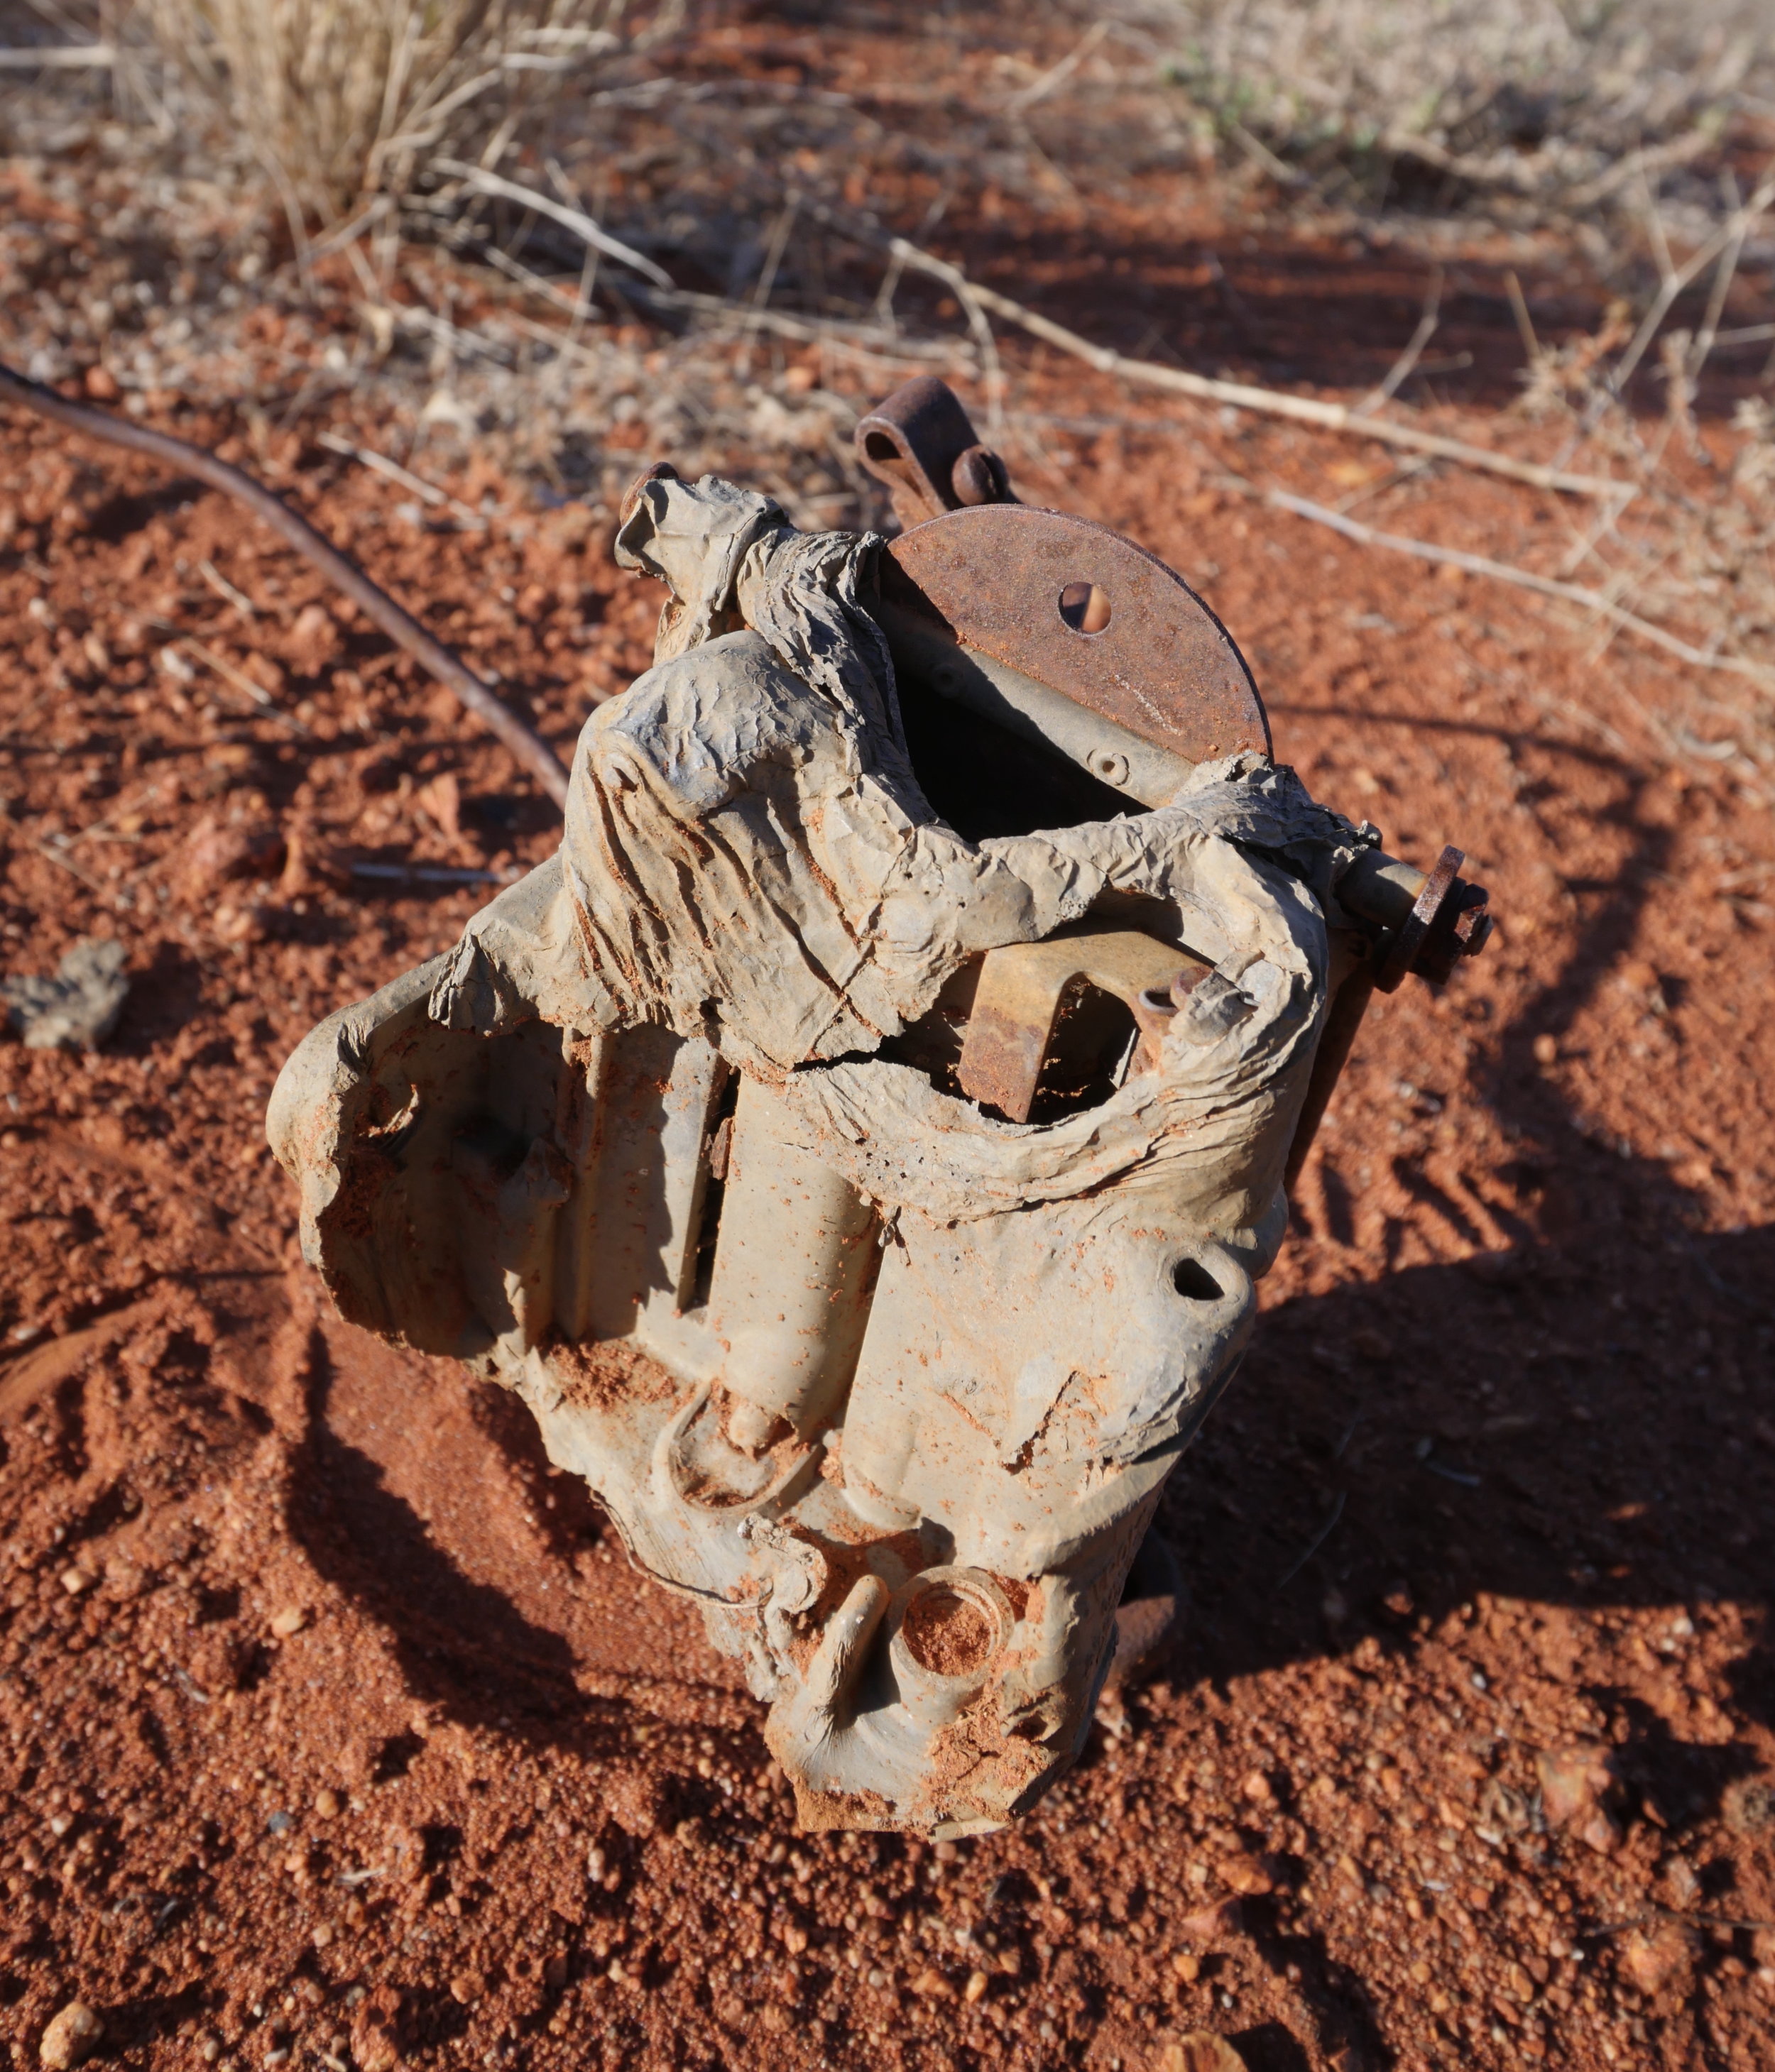
We were camped in a wash off Mulga Park Road, actually a renamed section of Australian legend Len Beadell’s Gunbarrel Highway, about 150 kilometers southeast of Uluru (aka Ayers Rock). I was wandering through the scrub with my binoculars in pursuit of a new bird (which, if you’re curious, turned out to be a western bowerbird, a prime find), when I caught a dull glint of metal among the grass. A closer look revealed it to be an ancient single-barrel carburetor—one side of which was melted aluminum slag, the obvious result of a serious engine-compartment fire. The choke plate was locked in place by wrinkled solidified rivulets of non-ferrous metal; where the float bowl had been was an amorphous gray blob. The aluminum base appeared to be fine, leading me to think the fire might have been contained relatively quickly. However, the cast iron throttle plate housing was still attached to the bottom, as was linkage. If my broken-down fellow traveler had access to a spare carburetor I would have thought the ancillary fittings would have been swapped out.
Then the mystery deepened considerably—a few meters away I found an entire rear axle assembly, almost certainly from the same vehicle as the carb, judging by its configuration. Nothing else within a subsequent search circle of 50 meters or more—just an orphaned carburetor and axle from a vehicle at least a half century old, if not much older.
The carb on its own suggested a straightforward breakdown scenario. The addition of the axle left me scratching my head. I’m afraid this mystery will remain one.
More VDEGs have arrived . . . now includes photo addendum
We've finally received a new shipment of the Vehicle-dependent Expedition Guide. It is essentially the same book as edition 4, with a few minor updates here and there and, importantly, the inclusion of the Expedition Photo Gear addendum, which was formerly a small separate publication. Printed in color (the first time color has appeared in a VDEG edition since the original, collector's-item hardcover), the 16-page addendum is a brief guide to choosing an expedition camera system—and getting the most from it. The price of this "Edition 4.1" will stay $75, despite the additional color section.
Hint: When using “Search,” if nothing comes up, reload the page, this usually works. Also, our “Comment” button is on strike thanks to Squarespace, which is proving to be difficult to use! Please email me with comments!
Overland Tech & Travel brings you in-depth overland equipment tests, reviews, news, travel tips, & stories from the best overlanding experts on the planet. Follow or subscribe (below) to keep up to date.
Have a question for Jonathan? Send him an email [click here].
SUBSCRIBE
CLICK HERE to subscribe to Jonathan’s email list; we send once or twice a month, usually Sunday morning for your weekend reading pleasure.
Overland Tech and Travel is curated by Jonathan Hanson, co-founder and former co-owner of the Overland Expo. Jonathan segued from a misspent youth almost directly into a misspent adulthood, cleverly sidestepping any chance of a normal career track or a secure retirement by becoming a freelance writer, working for Outside, National Geographic Adventure, and nearly two dozen other publications. He co-founded Overland Journal in 2007 and was its executive editor until 2011, when he left and sold his shares in the company. His travels encompass explorations on land and sea on six continents, by foot, bicycle, sea kayak, motorcycle, and four-wheel-drive vehicle. He has published a dozen books, several with his wife, Roseann Hanson, gaining several obscure non-cash awards along the way, and is the co-author of the fourth edition of Tom Sheppard's overlanding bible, the Vehicle-dependent Expedition Guide.

