Overland Tech and Travel
Advice from the world's
most experienced overlanders
tests, reviews, opinion, and more
Securing lug nuts—the pro way
Confession: I came late to the discipline of properly torqueing the lug nuts on my vehicles—and checking them regularly.
Very late.
For years I never gave them a thought except when I had a puncture or I was reinstalling a wheel after maintenance or a repair. And when I put them back on I simply cranked really hard on my T-handled lug wrench and called it good.
I had a wake-up call a few years ago, when Roseann and I were hauling a pair of Expo cargo trailers to Flagstaff. I was driving my FJ40 and pulling a 14-foot box trailer that probably weighed 3,000 pounds or so. Only a couple of days before I’d had new tires installed at a local tire store. We’d decided to go the back route to Flagstaff: from Tucson to Globe via Highway 77, then to Payson via 188, then through Pine and Strawberry on 260 and up 87 to Mormon Lake Road. We stopped in Payson for fuel, and as I pulled in at low speed I heard a distinct clicking sound coming from the left rear of the Land Cruiser. A short search led to the source: lug nuts on that wheel that were barely finger tight and the wheel was shifting fractionally back and forth.
I shudder to think what could have happened if I’d experienced a catastrophic failure on the steep, winding mountain road uphill from Strawberry. I tightened the lug nuts on that wheel, checked all the others (which were fine)—and changed my attitude. Now I include checks of the lug nuts in my normal maintenance routine, especially when traveling in the backcountry on rough roads.
While I was changing my attitude I decided to change my approach as well, and use a proper torque wrench to ensure correct and even tension on the nuts. I know, I know: I already admitted I was behind the curve on this.
Checking torque at home is easy: I have a superb Snap-on digital torque wrench worth about a zillion dollars, which a company PR rep simply gave me when I was doing another article that involved torque settings. (That rep, sadly, is no longer with the company, probably in large part due to all the tools he sent me whenever I emailed him that I had a new article coming out. It was a great ride while it lasted.)
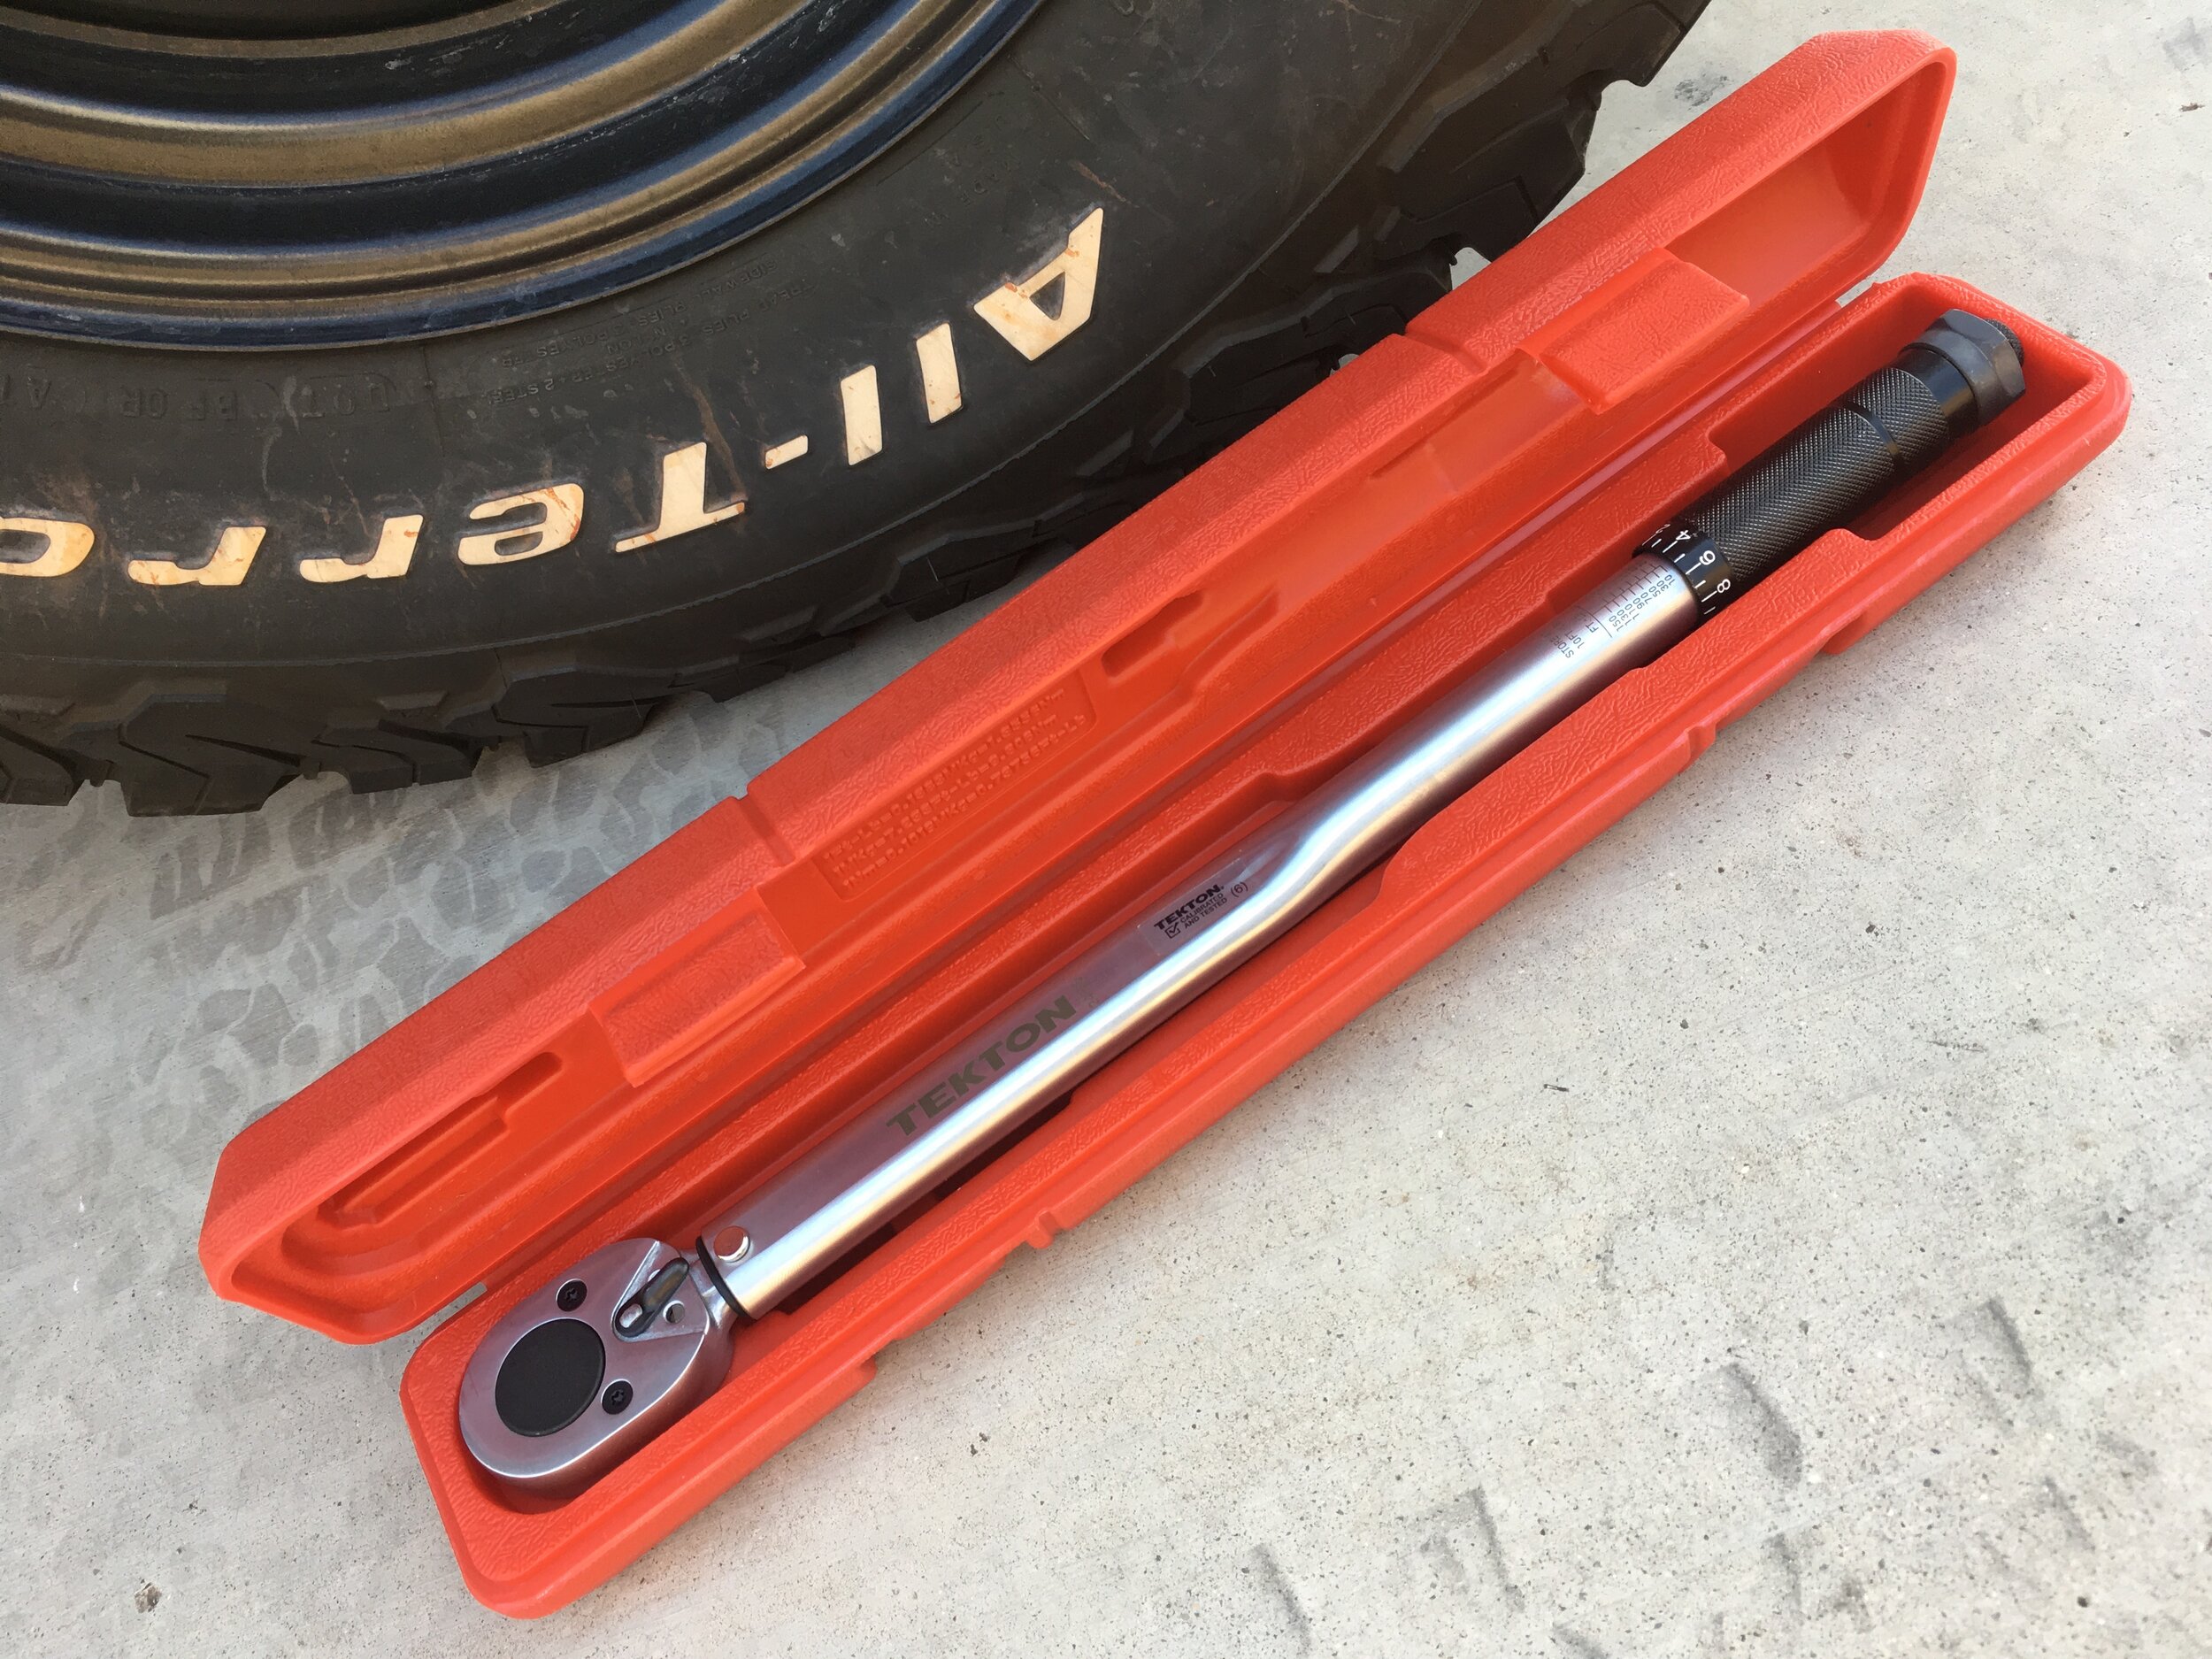
However, the Snap-on wrench is a full 24 inches long, and simply overkill for a traveling tool kit, even though a torque wrench has many uses in the field besides tightening lug nuts. A simple mechanical torque wrench would more than suffice, but I wanted decent quality without spending, well, a zillion dollars. And I found what I needed at Tekton Tools.
I became aware of Tekton by accident when I stumbled on their booth at the west Expo last year. As a self-appointed tool connoisseur/snob (take your pick), I approached the brand like a sommelier sniffing an unfamiliar cabernet. And came away impressed.
The Tekton website offers more detailed information on the company’s tools than any other site I’ve seen—including Snap-on’s. The page for their 3/8ths inch socket and ratchet set, for example (here), informs you of not just features, but each socket’s minimum failure point compared to ANSI specifications. The country of origin—in this case, Taiwan—is also clearly stated. (The quality of Taiwanese-made tools is excellent in my experience.) They note that the set does not skip any sizes—one of my pet peeves about many sets I’ve tried. The ratchet is a fine, 90-tooth unit, and the ANSI measurements are published for that as well. Nice.
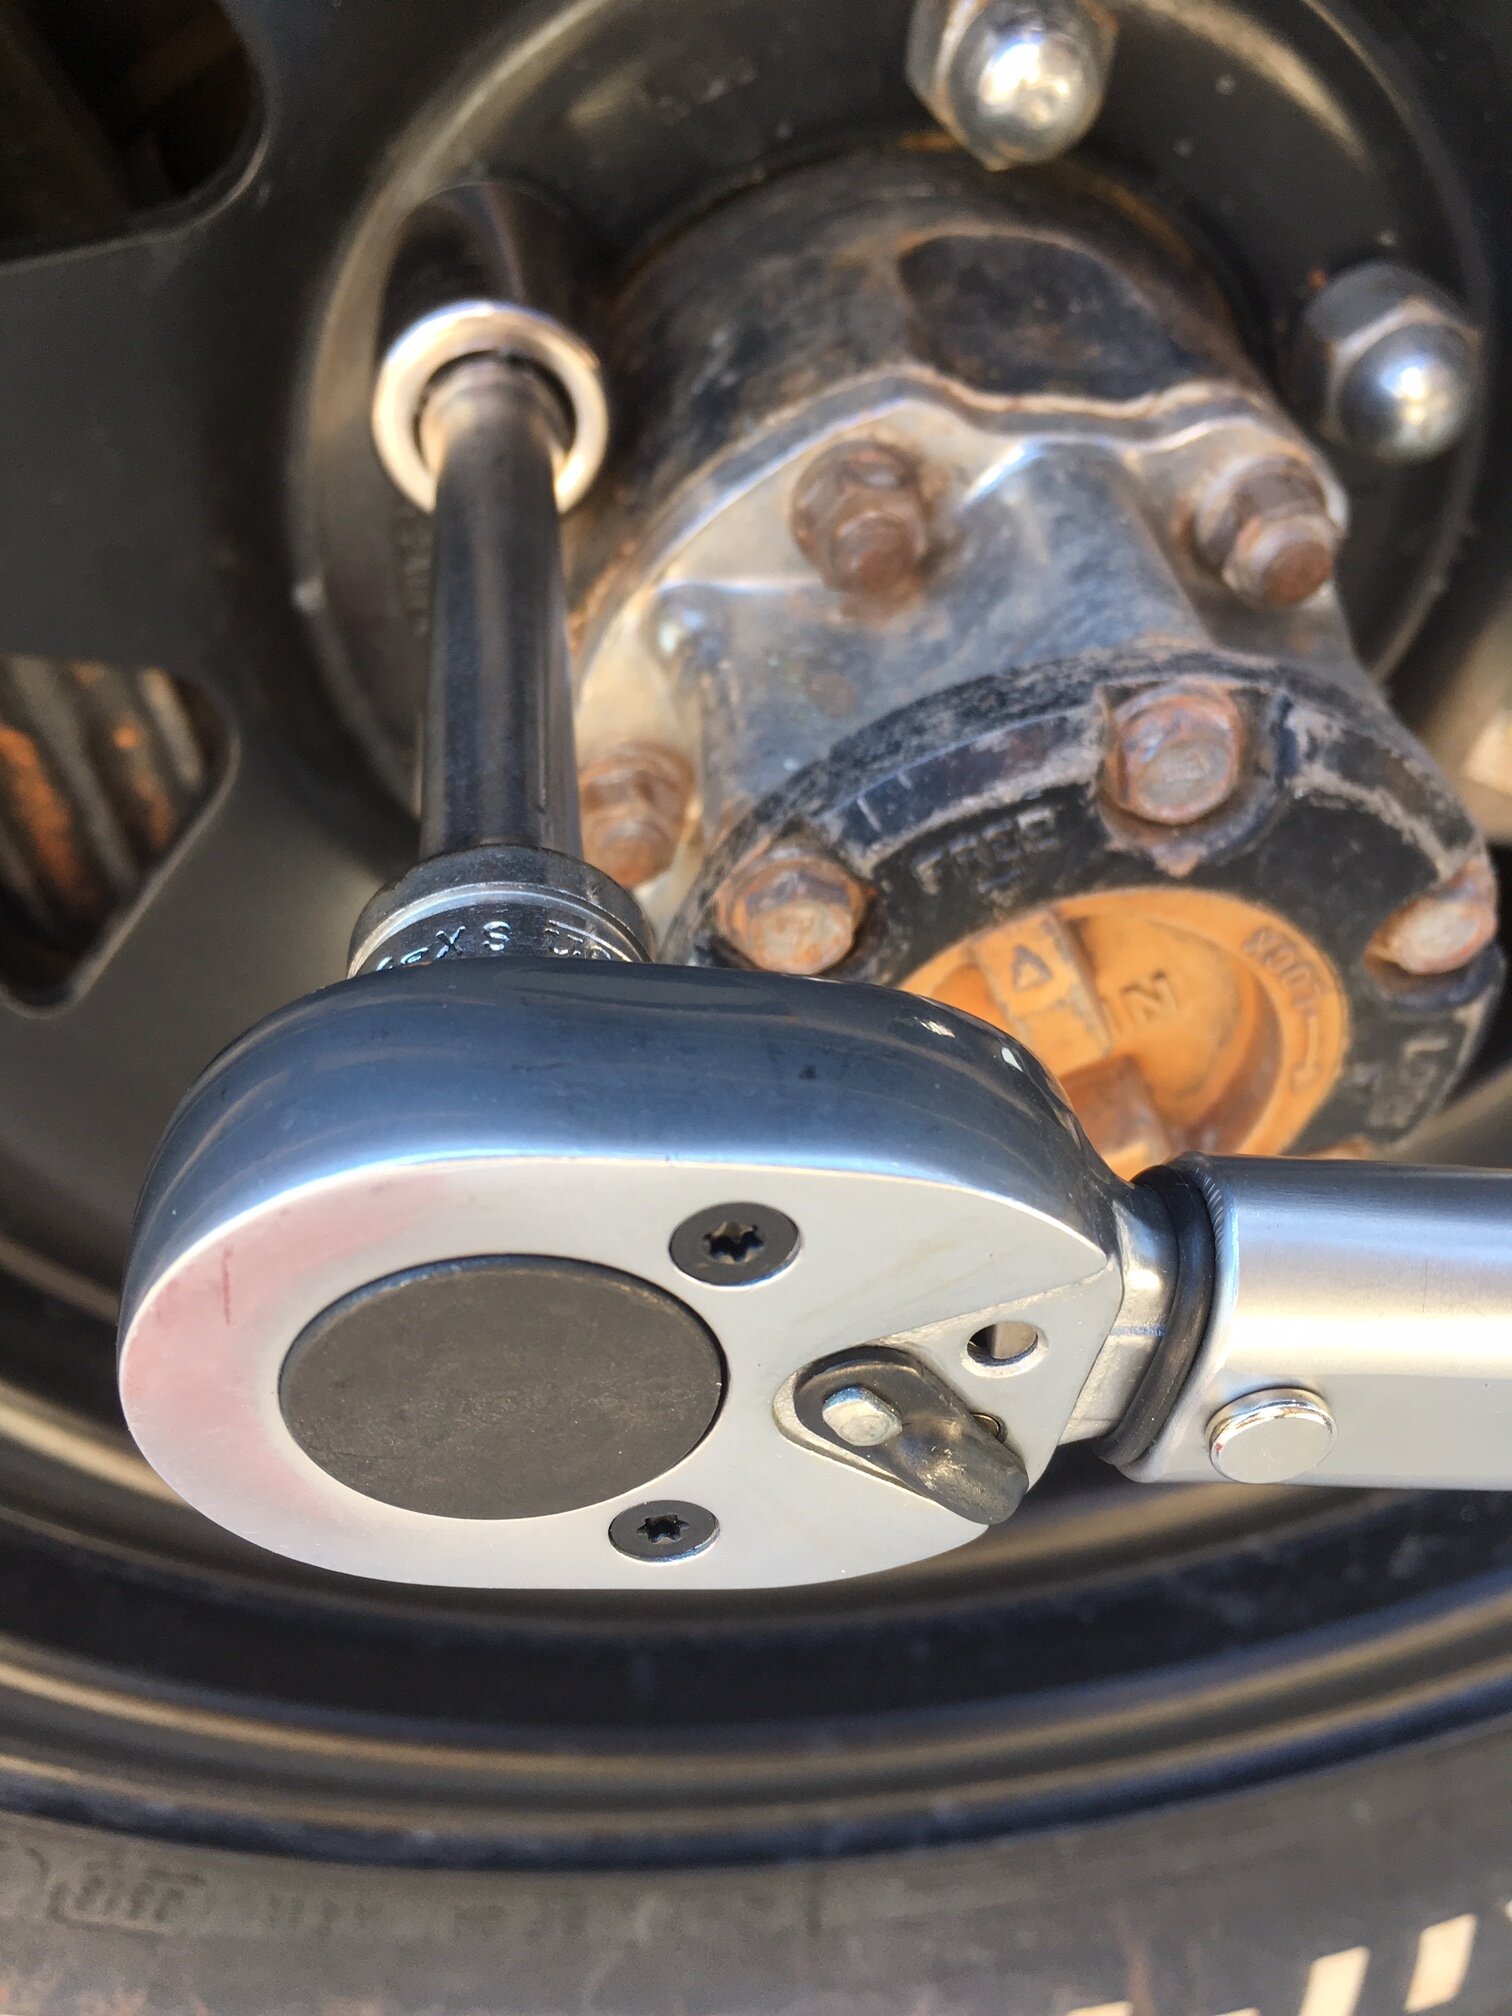
So, on to Tekton’s 1/2-inch torque wrench, which employs a simple but precise rotating handle adjustment and click/bump alert when the selected value is reached. The company claims plus or minus four percent accuracy, which is more than adequate for any task including engine assembly. In the hand it compared favorably to my memory of a similarly configured Sears Craftsman American-made torque wrench I had decades ago, which if I recall cost more even back then. The first thing I did was to compare it to the Snap-on wrench at identical settings on the same nut; the two were within the probability of error of my ability to respond to either the click of the Tekton or the beep and buzz of the Snap-on. Like all mechanical torque wrenches, it is important to reset the wrench to its minimum value in between uses to avoid stressing the mechanism and throwing off the accuracy (this is not necessary with digital wrenches). It’s also important to remember that a torque wrench—whether Tekton or Snap-on—is not a breaker bar; it should be used only for tightening nuts or bolts to a specified setting. The Tekton wrench is all-steel, so I expect it to be durable. And at $40 for the 18-inch 10 to 150 ft-lb version it is an outstanding bargain.
Back to my lug nuts. What exactly is the correct setting? Good luck obtaining the figure from your vehicle manufacturer. Obviously proper setting vary with the vehicle and the wheel size, but as a very general rule, for vehicles in the general mid-size overlanding category—Land Cruisers, Land Rovers, pickups, etc.—about 80-90 ft-lb is proper for a steel wheel. If you prefer to go by stud size, here is a chart.
Alloy wheels are more problematic. Some charts I’ve seen list higher torque than for steel wheels torque—around 100 ft-lb. Others list lower figures—70-75 ft-lb. Why the higher figure? I have yet to find a definitive answer, but possibly it is because steel wheel lug nut holes are typically raised a tiny bit and thus retain fractional elasticity to grip the nut more effectively, while alloy wheels must be clamped flat against the hub. For both steel and alloy wheels the primary effect you are achieving with tightening is to fractionally stretch the threaded lug itself, creating a powerful clamping mechanism.
Lug nuts should always be tightened (or loosened) in an alternating sequence across the wheel, thusly:
Like so many other habits I’ve adopted, being lug-nut conscientious makes me feel like I’m approaching travel in a serious, professional manner, and adds just one more layer of peace of mind to any journey.
Edit: A question came up regarding using anti-seize lubricant on lug-nut threads, as many people do who live in areas where snow and salted roads are common. While manufacturers—and thus I—recommend installing lug nuts on clean, dry threads, this chart from Fastenal shows that effective torque increases if one lubes the threads (or if those threads are zinc-plated). Note that if used, anti-seize compound should only be applied sparingly to the threads, not to any mating surfaces of the wheel or nut.
PakMule hitch-mounted cargo basket
A few years ago I was chatting with a group of people about various aspects of long-distance travel—in particular the proper loading, positioning, and lashing of cargo—and I happened to mention a Chevy Tahoe I’d spotted recently that had a hitch-mounted cargo basket with several cases and duffels strapped to it. To be perfectly honest, I was a bit scornful that owners of a vehicle that size would need extra cargo capacity.
One of the guys in the group asked, “Do you travel with children?”
Um, no.
He just looked at me, raised one eyebrow, and smiled.
Point taken. I’ve never gratuitously criticized an auxiliary cargo carrier again. And when I was asked to review PakMule’s aluminum hitch basket, I was prepared to do so objectively.
Clearly, if it is possible to fit all your gear inside the vehicle, you should do so for all the obvious reasons. But if there is stuff that absolutely, positively needs to go outside, where is best? The most common choice is on a roof rack, which has the advantage of middling resistance to theft and the fact that it doesn’t change the vehicle’s dimensions in terms of parking or maneuvering. But overhead clearance is an easy-to-forget factor, and whatever weight you put up there—added to the weight of the roof rack itself—compromises the center of gravity and plays havoc with aerodynamics. Plus the gear is just as much of a pain for you to unload as it is for a would-be thief.
Enter the hitch-mounted cargo basket. No effect on CG. Significantly reduced effect on aerodynamics. A breeze to load and unload. Hmm . . .
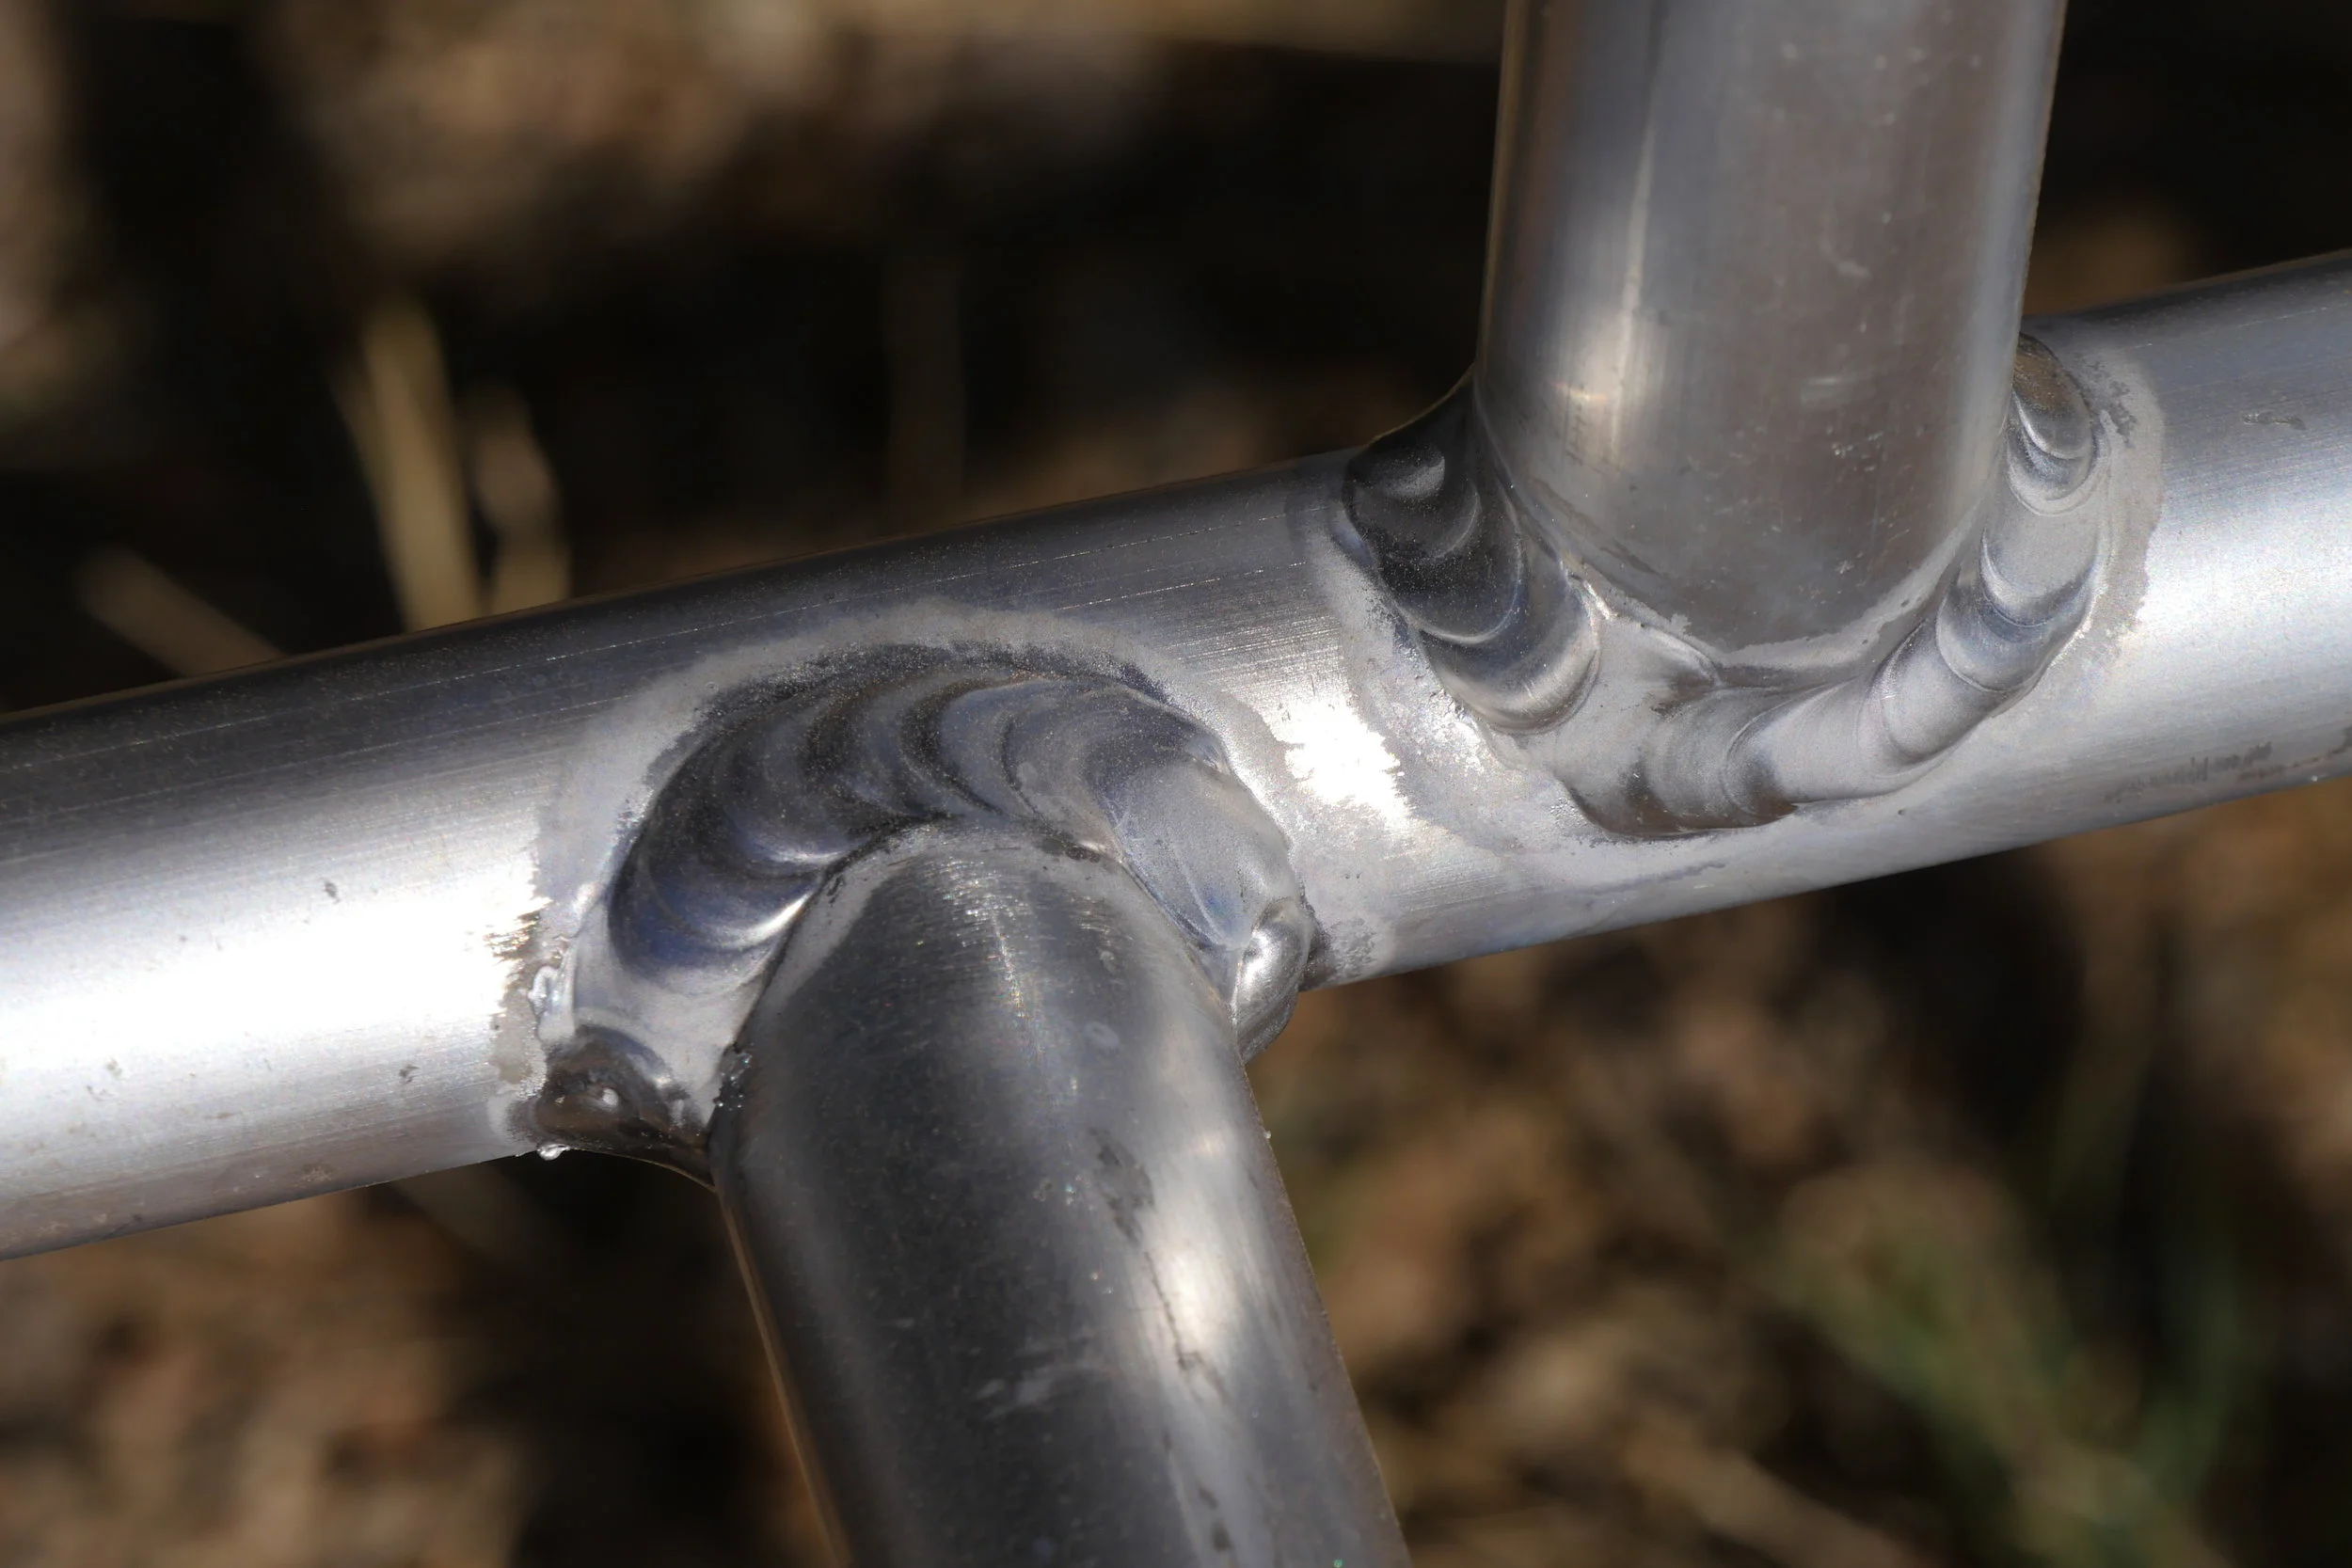
The PakMule cargo basket arrived in a huge box that, awkwardness aside, was surprisingly easy to lift. That’s because the basket itself, despite having interior dimensions of 67 by 26 inches—a full 12 square feet—is 100-percent tig-welded aluminum and weighs just 42 pounds. The workmanship of those welds, while not up to the concentric perfection of that found on high-end bicycles, is even and solid. And there is no paint or powder coating to inevitably chip and scratch.
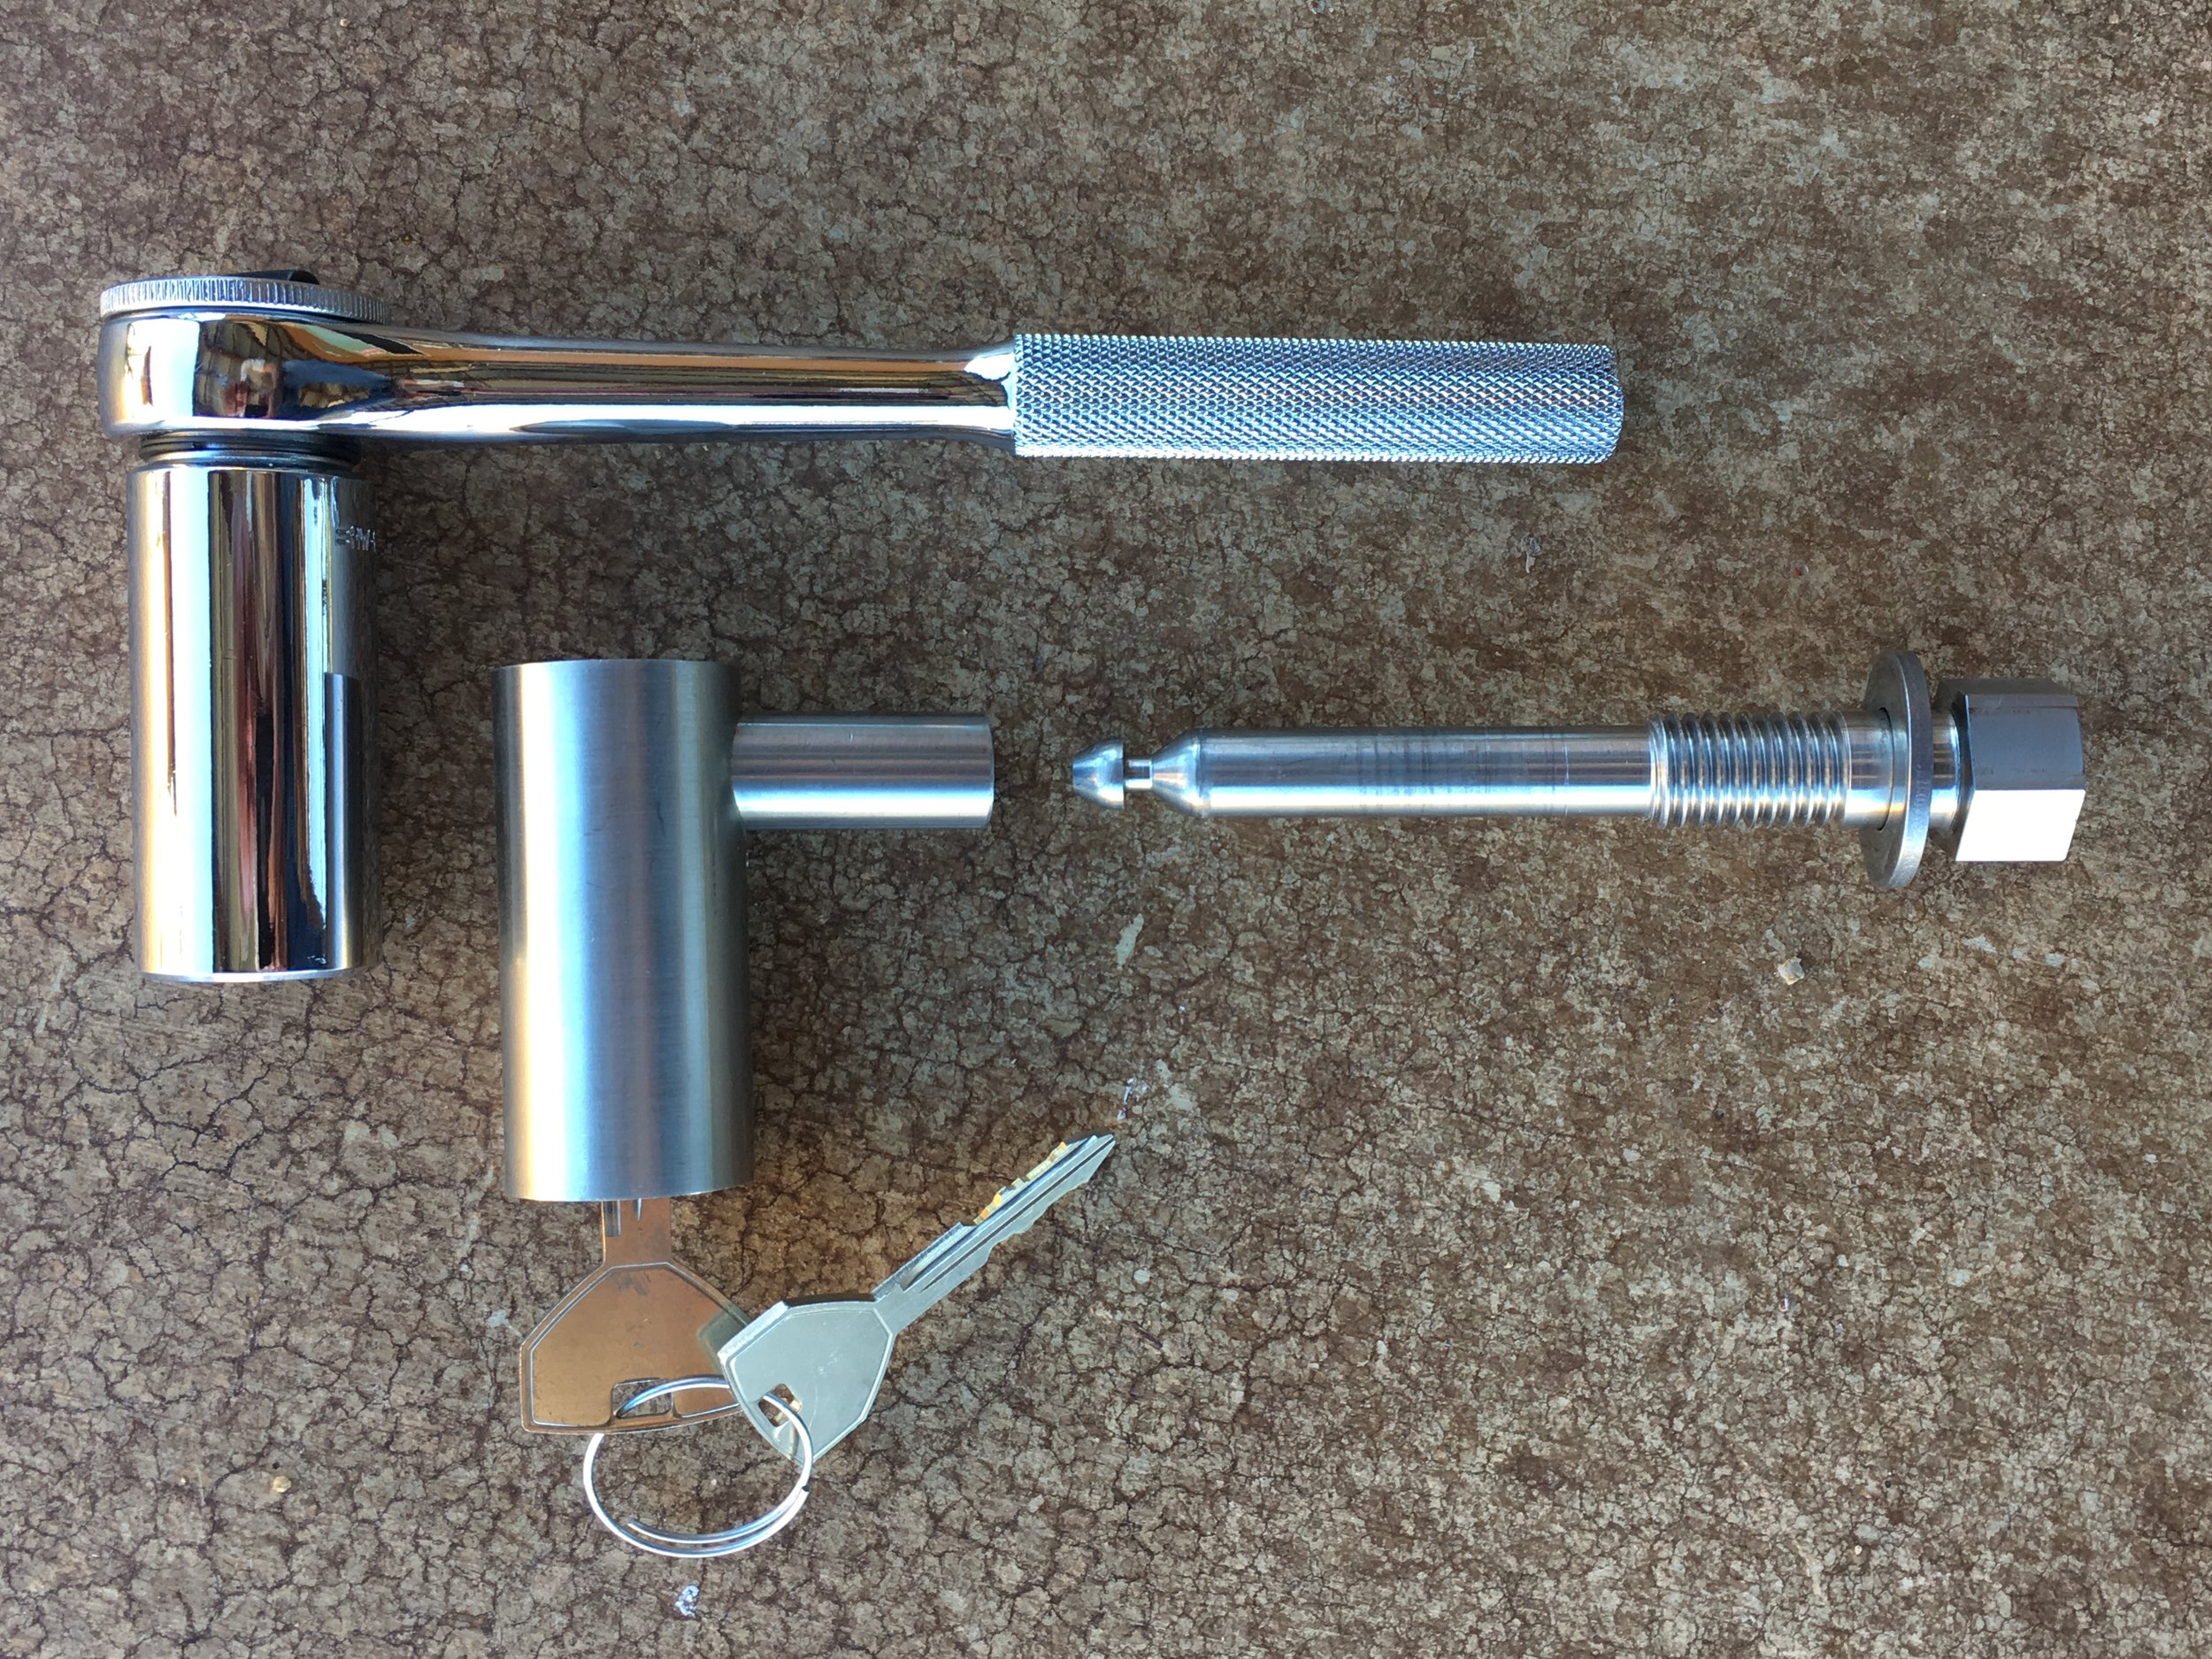
Installing the PakMule is simplicity itself: Slide the basket’s shaft into your receiver, insert the threaded pin and snug it with a 7/8th-inch socket or wrench—or, if you’re a heathen, an adjustable wrench or (wincing here) slip-joint pliers—then attach the keyed locking assembly, which snaps on without the use of the key. (The company offers as an accessory an American-made ratchet and 7/8ths socket—for me that’s practically enough to stop right there and give the whole product a five-star review.) The entire process takes about 60 seconds and presto, you’ve got a generous trunk’s worth of extra cargo space.
It must be said that moving an external load from the roof to behind the bumper comes with its own caveats. Reversing in tight quarters becomes, first, a function of remembering the damn thing is back there, and then being extra, extra cautious with distance and swing clearances. (I suspect gear strapped to it will block the rear-view cameras of many vehicles.) Also, while the PakMule is rated for an impressive 500 pounds, you’d be smart to keep the total load well below that, as the stress on your rear suspension is magnified considerably with the additional leverage of weight hung out that far behind the springs and shocks. There’s certainly no issue regarding strength of the structure: I stood on a back corner of the basket and bounced up and down with scant effect.
What about off-pavement driving? Not that you couldn’t have figured this out on your own, but the PakMule will pretty much obliterate your departure angle in sharp dips and transitions to steep climbs. It’s simply the nature of the beast, and something you’ll have to consider when choosing routes and picking individual lines. A spotter will be a great help. And it’s easier to unload and remove the basket than it is to unload and reload a roof rack when you need clearance under a low limb. I was pleased to note the basket cleared a few dips I predicted it wouldn’t, but as soon as the trail entered real 4x4 territory that clearance ran out pretty quickly.
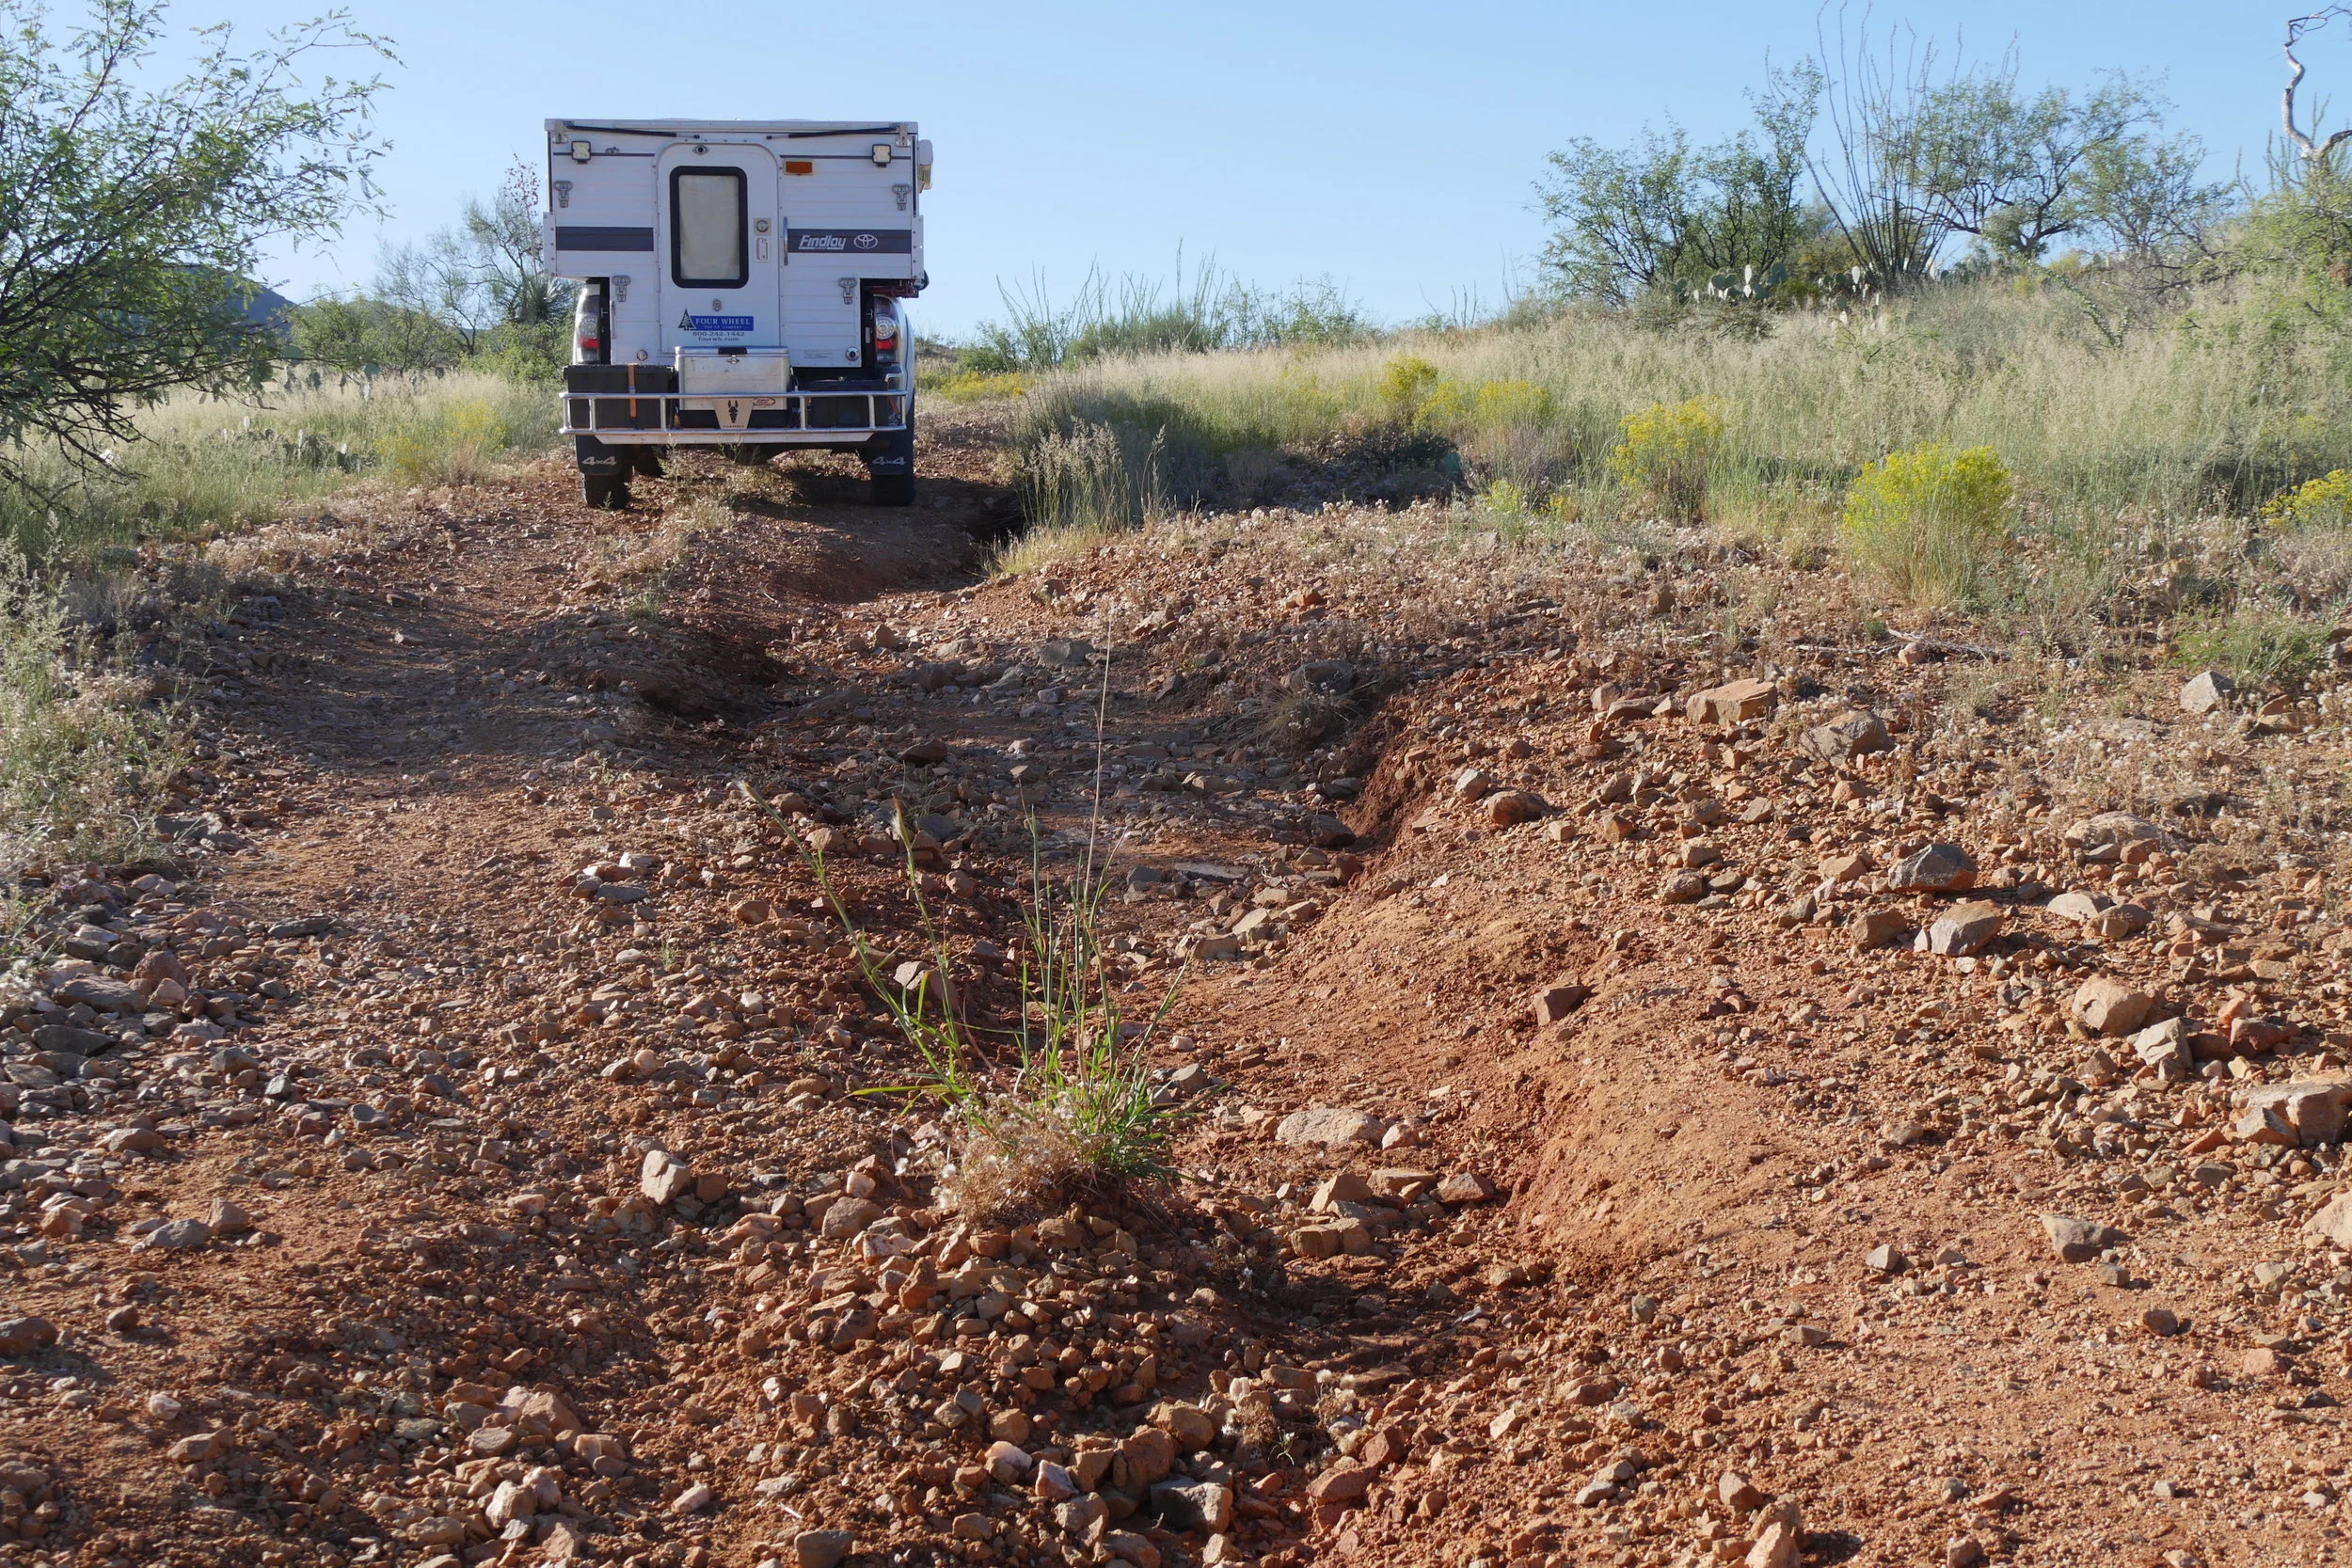
No clearance issues on trails like this . . .
I certainly didn’t worry about stability. I’ve lost count of the times I’ve followed vehicles fitted with receiver-mount bicycle or cargo racks that rocked back and forth quite alarmingly. The threaded tightening pin on the PakMule eliminates that almost completely, although it’s a good idea to load your heaviest item in the center of the basket to reduce the rocking moment as much as possible. Securing cargo is easy since the frame and floor of the basket are constructed of round tubing and one can attach a ratchet strap almost anywhere. I did notice that, after seven miles on a rough dirt road, the threaded locking pin had loosened somewhat. It’s a good idea to check it every once in a while. I cranked on the ratchet more purposefully the second time around, and it remained tight on the way back.
. . . but on sharper dips it goes away quickly.
Accessing the stuff in the basket is a cinch, but what about getting to the rest of the gear in the back of the vehicle? That depends on the vehicle, and how high you have stuff stacked in the rack. If you have an SUV with a two-piece tailgate and an upper section that lifts, it’s possible to reach some items by standing on the basket and leaning in over the lower gate. When the unit was mounted on our Toyota Tacoma with its Four Wheel Camper and side-hinged door, there was 15 inches of clearance between the basket floor and the door—plenty to clear Wolf Packs but not quite enough to clear the Coleman ice chest I borrowed for the test. (I was amused to realize I don’t even own an ice chest any more. DC fridge/freezers are somewhat addictive.) Even with cargo removed, the 8.25-inch height of the standard basket might not clear some side-swing tailgates; for those vehicles the company offers a basket with the same floor space but a lower, four-inch height.
These three things didn’t even come close to filling the basket.
The best strategy for employing the PakMule is to use it for the stuff you naturally load last and need—or can conveniently set aside—first.
As a safety issue, I was surprised to see not even red reflector strips on the back of the PakMule to alert inattentive drivers that the rear end of your vehicle is actually two and a half feet behind the brake lights. A clip-on LED running/brake-lamp kit that would plug into a standard trailer socket would be an inexpensive but worthwhile option. Between us, my wife and I have been rear-ended four times (once very severely for her), so I’m sensitive to the issue, but such an accessory might prevent even a minor crunch. I was certainly hyper-aware of vehicles coming up behind me at red lights in traffic.
On another suggestion-box note, I wonder if the company has any plans to introduce a bicycle-carrier attachment for the basket. It seems like it would be an easy thing to engineer.
I’m not going to abandon my philosophy that all one’s gear should go inside the vehicle if possible. But for those times when it simply won’t, the PakMule is worth considering as a temporary solution. Its lightweight construction makes installation easy, and it would store on a garage wall or carport ceiling when not in use. Yet stability is excellent, and securing gear properly is effortless. So if you were the folks in the Tahoe with kids and the shaky cargo basket, take a look at the PakMule site, right here.
New Defender = new life for the Land Cruiser 70 Series?
The old Land Rover Defender is dead. Long live the new Defender.
Thoroughly, exhaustively, irretrievably modernized, the new Defender appears poised to take on the duties of an upscale recreational 4x4 vehicle—more comfortable, more efficient, even in many ways more capable than its predecessor.
But will the new, unibody, independently suspended, 40-some-microprocessor Defender live as a stalwart conveyance for biologists, explorers, or UN and NGO personnel in developing-world countries? Will it be modified by fundies in Tanzania and Zambia to carry a dozen or more tourists on safaris, day in and day out? Will it be hacked by militants in the Middle East and elsewhere to mount Dushka heavy machine guns? Will it be serially abused by mining and oil companies? Will it be adopted—even by loyal Commonwealth countries—as their basic military personnel transport?
My guess is no.
For how much longer?
The core of the new Defender is a vastly complex aluminum structure that combines chassis and body into one assembly, ensuring a torsionally stiff vehicle—far more so, in fact, than any separate body-on-frame vehicle can match—while maintaining carefully calibrated crush zones for elevated crash protection. However, that structure will not lend itself to shade-tree cutting and welding. I’m willing to bet there will never be a pickup version offered from the factory.
No: The new Defender is going to be an SUV, period. The so-called Commercial version might work for, well, commercial purposes, as well as for those wishing a no-frills platform to modify as an overlanding vehicle, but winch bumpers, roof racks, and the like will probably be the extent of practical alterations.
That leaves the existing pool of original Defenders to soldier on in traditional roles. Yes, they are straightforward to repair, and everything down to that elegant (but rust-prone) separate chassis can be replaced. But sooner or later, sheer attrition from wear and accidents is going to negatively affect the practicality of relying on that pool, particularly for government/military entities, NGOs, and businesses requiring reliable and well-maintained transportation. Where will they turn if their needs cannot be met by the new model?
There is really only one answer: The Toyota Land Cruiser 70 Series. (Well, in some cases, particularly for the U.N., also the 100 Series. But let’s just stick with one line here.)
One could mention Toyota’s under-rated underdog competitor, the Nissan Patrol, and the über Mercedes Gelandewagen, the former never quite matching the Land Cruiser’s reputation for reliability or durability, the latter simply priced out of most utilitarian markets. Neither has a chance of cutting into Toyota’s sales.
Interestingly, Toyota has more than once mulled discontinuing 70-Series production. Sales of the three body styles in the line—Ute (pickup), station wagon, and troop carrier—pale in comparison to the Hilux and other vehicles, and production is archaically labor-intensive. The Australian mining industry—a huge and loyal market for the 70 Series—is largely responsible for the latest updates, especially enhanced safety features such as Vehicle Stability Control (VSC), Electronic Brake-force Distribution, and front and side-curtain air bags for driver and passenger. Increased sophistication also arrived in the form of piezo injectors for the single-turbo, 4.5-liter V8 diesel, and increased luxury for the GXL version in the form of, gasp, electric windows and—into the realm of science fiction here—an electrically retractable antenna.
But the basics of the vehicle remain as if ticked off on a bespoke order form for explorers, guides, professional hunters, scientists, military operatives, and the odd jihadist: massive, separate, fully boxed chassis, mighty beam axles on mighty coil and leaf springs, huge fuel and load capacity, front and rear cross-axle diff locks, raised air intake, and a cargo area in the troop carrier voluminous enough to return echoes. (My wife and I and many other owners have built houses inside these things.)
Land Cruisers at Toyota Gibraltar Stockholdings awaiting far-flung postings.
It’s a completely outdated vehicle in numerous ways, yet utterly perfect for its intended use. It will be interesting to see what becomes of the 70 Series Land Cruiser in the next few years.
Not April first.
Given Volkswagen’s recent history, I thought this headline was some sort of joke. Nope: as NewsPress reports, the company’s Wolfsburg plant received an environmental award for its “efficient and sustainable production methods.” Presumably the plant is no longer producing vehicles that cheat when tested for emissions . . .
So the new Defender isn't butch enough for you? How about a Grenadier?
A what, you say?
A new, body-on-frame, beam-axled, full-time-four-wheel-drive, made-in-England utility 4x4, that’s what.
At least, if the plans of billionaire British businessman Jim Ratcliffe come to pass.
A couple of years ago, Ratcliffe, the CEO of Ineos, and several friends were chatting over pints in their favorite pub, the Grenadier, lamenting the demise of the Land Rover Defender and its likely metamorphosis into something entirely different. One idea led to another, and soon Ratcliffe—the owner of several Defenders— had a plan in place to carry on the spirit and function of the original. Those plans are near enough to completion that a test mule is reportedly being thrashed in the Austrian Alps, and an introduction is planned for mid-2020 with sales starting in early 2021.
The specs for the Grenadier are enough to make a die-hard “classic” Defender fan swoon. In addition to the characteristics listed above, the vehicle will employ a steel chassis and alumin(i)um body panels. The center differential will lock, and cross-axle diff locks are promised—something Land Rover stubbornly eschewed throughout the lifespan of the original.
In fact, so often and so specifically has Ratcliffe referred to the original Defender that, reportedly, the current Indian owners of Land Rover are watching the proceedings very closely indeed, waiting to pounce if it appears the Grenadier is nothing more than a thinly disguised continuation of their late product.
Ratcliffe, center, and the Grenadier team, with inspiration
Ineos Motors has confirmed the sourcing of BMW power plants for the new vehicle, a 3.0-litre petrol and a 3.0-litre turbodiesel. It has also confirmed intention to build several body styles including a pickup—a configuration notably lacking on the new unibody Defender.
This might sound like just another pie in the sky fantasy if Sir Ratcliffe were not reportedly England’s wealthiest man, and were a factory not already being built in Bridgend, South Wales. Intriguingly, commercial director Mark Tennant has made several references to “the U.S. market.”
Stay tuned.
Exploratory coast-to-coast Africa trip June-July 2020
In collaboration with 7P Overland we are investigating an exploratory Africa recce in 2020—driving overland from one coast of Africa to the other. If you are interested in helping with the reconnaisance, please let us know and we'll put you on an interest list. Requirements: about 4–6 weeks' time available June-July; ability to rent or ship your own 4WD vehicle to Namibia; desire to explore the finest wild places on the continent of Africa, from Namibia to Tanzania; a profound sense of adventure and willingness to help design an ultimate safari.
Instrument clusters, good and not so good
You’d think that, 120-odd years into the history of the motorcar, manufacturers would have pretty much nailed legible instrumentation by now. In many cases they have; in others, I’ve found, not so much.
Consider the cluster on the Porsche 911 above. This one happens to be on a 1982 911SC, but it’s virtually identical to any 911 spanning four decades. Porsche gives you the most critical instrument in a sports car—the tachometer—front, center, and huge. White numbers on a black background, because nothing contrasts better than white on black. You don’t even need to take your eyes off the road to monitor progress through the gears. To the right is a slightly smaller but equally legible speedometer, and to the left the important engine-monitoring gauges (for an oil-cooled vehicle) of oil pressure and temperature. Those gauges that do not need to be read instantly, such as the clock and fuel gauge, are off to the side where you might need to move your head a bit, but not at a moment’s notice.
The 911’s cluster is angled directly at the driver, and inset a distance perfect for preventing overhead glare while not shading them too much. In fact I’ve never found myself in a position in which incoming sunlight or artificial light obscured the instruments beyond easy reading.
One might expect such perfection from the über engineers at Porsche, but in fact the prosaic chrome-ringed Smith’s instruments on my old Triumph TR6 are nearly as good: Tach and speedometer big and up front, auxiliary gauges on the side. (Plus the added charm of that walnut veneer, of course.) The Smith’s have shiny glass fronts that seem to reflect a bit more than those on the Porsche. But notice the same eminently legible white on black motif. And they’re shaded just deeply enough that no sun coming through the windshield can hit them.
I found a similarly flawless instrument cluster in the Mercedes Benz 300D we owned for a few years. Again: white on black, important stuff up front—in this case the speedometer, so we could keep track of the needle’s slow crawl across its arc as we floored the accelerator pedal and waited patiently for results. I’m not even sure why Mercedes bothered with a tachometer on the automatic-equipped cars; a calendar would have been better at recording progress.
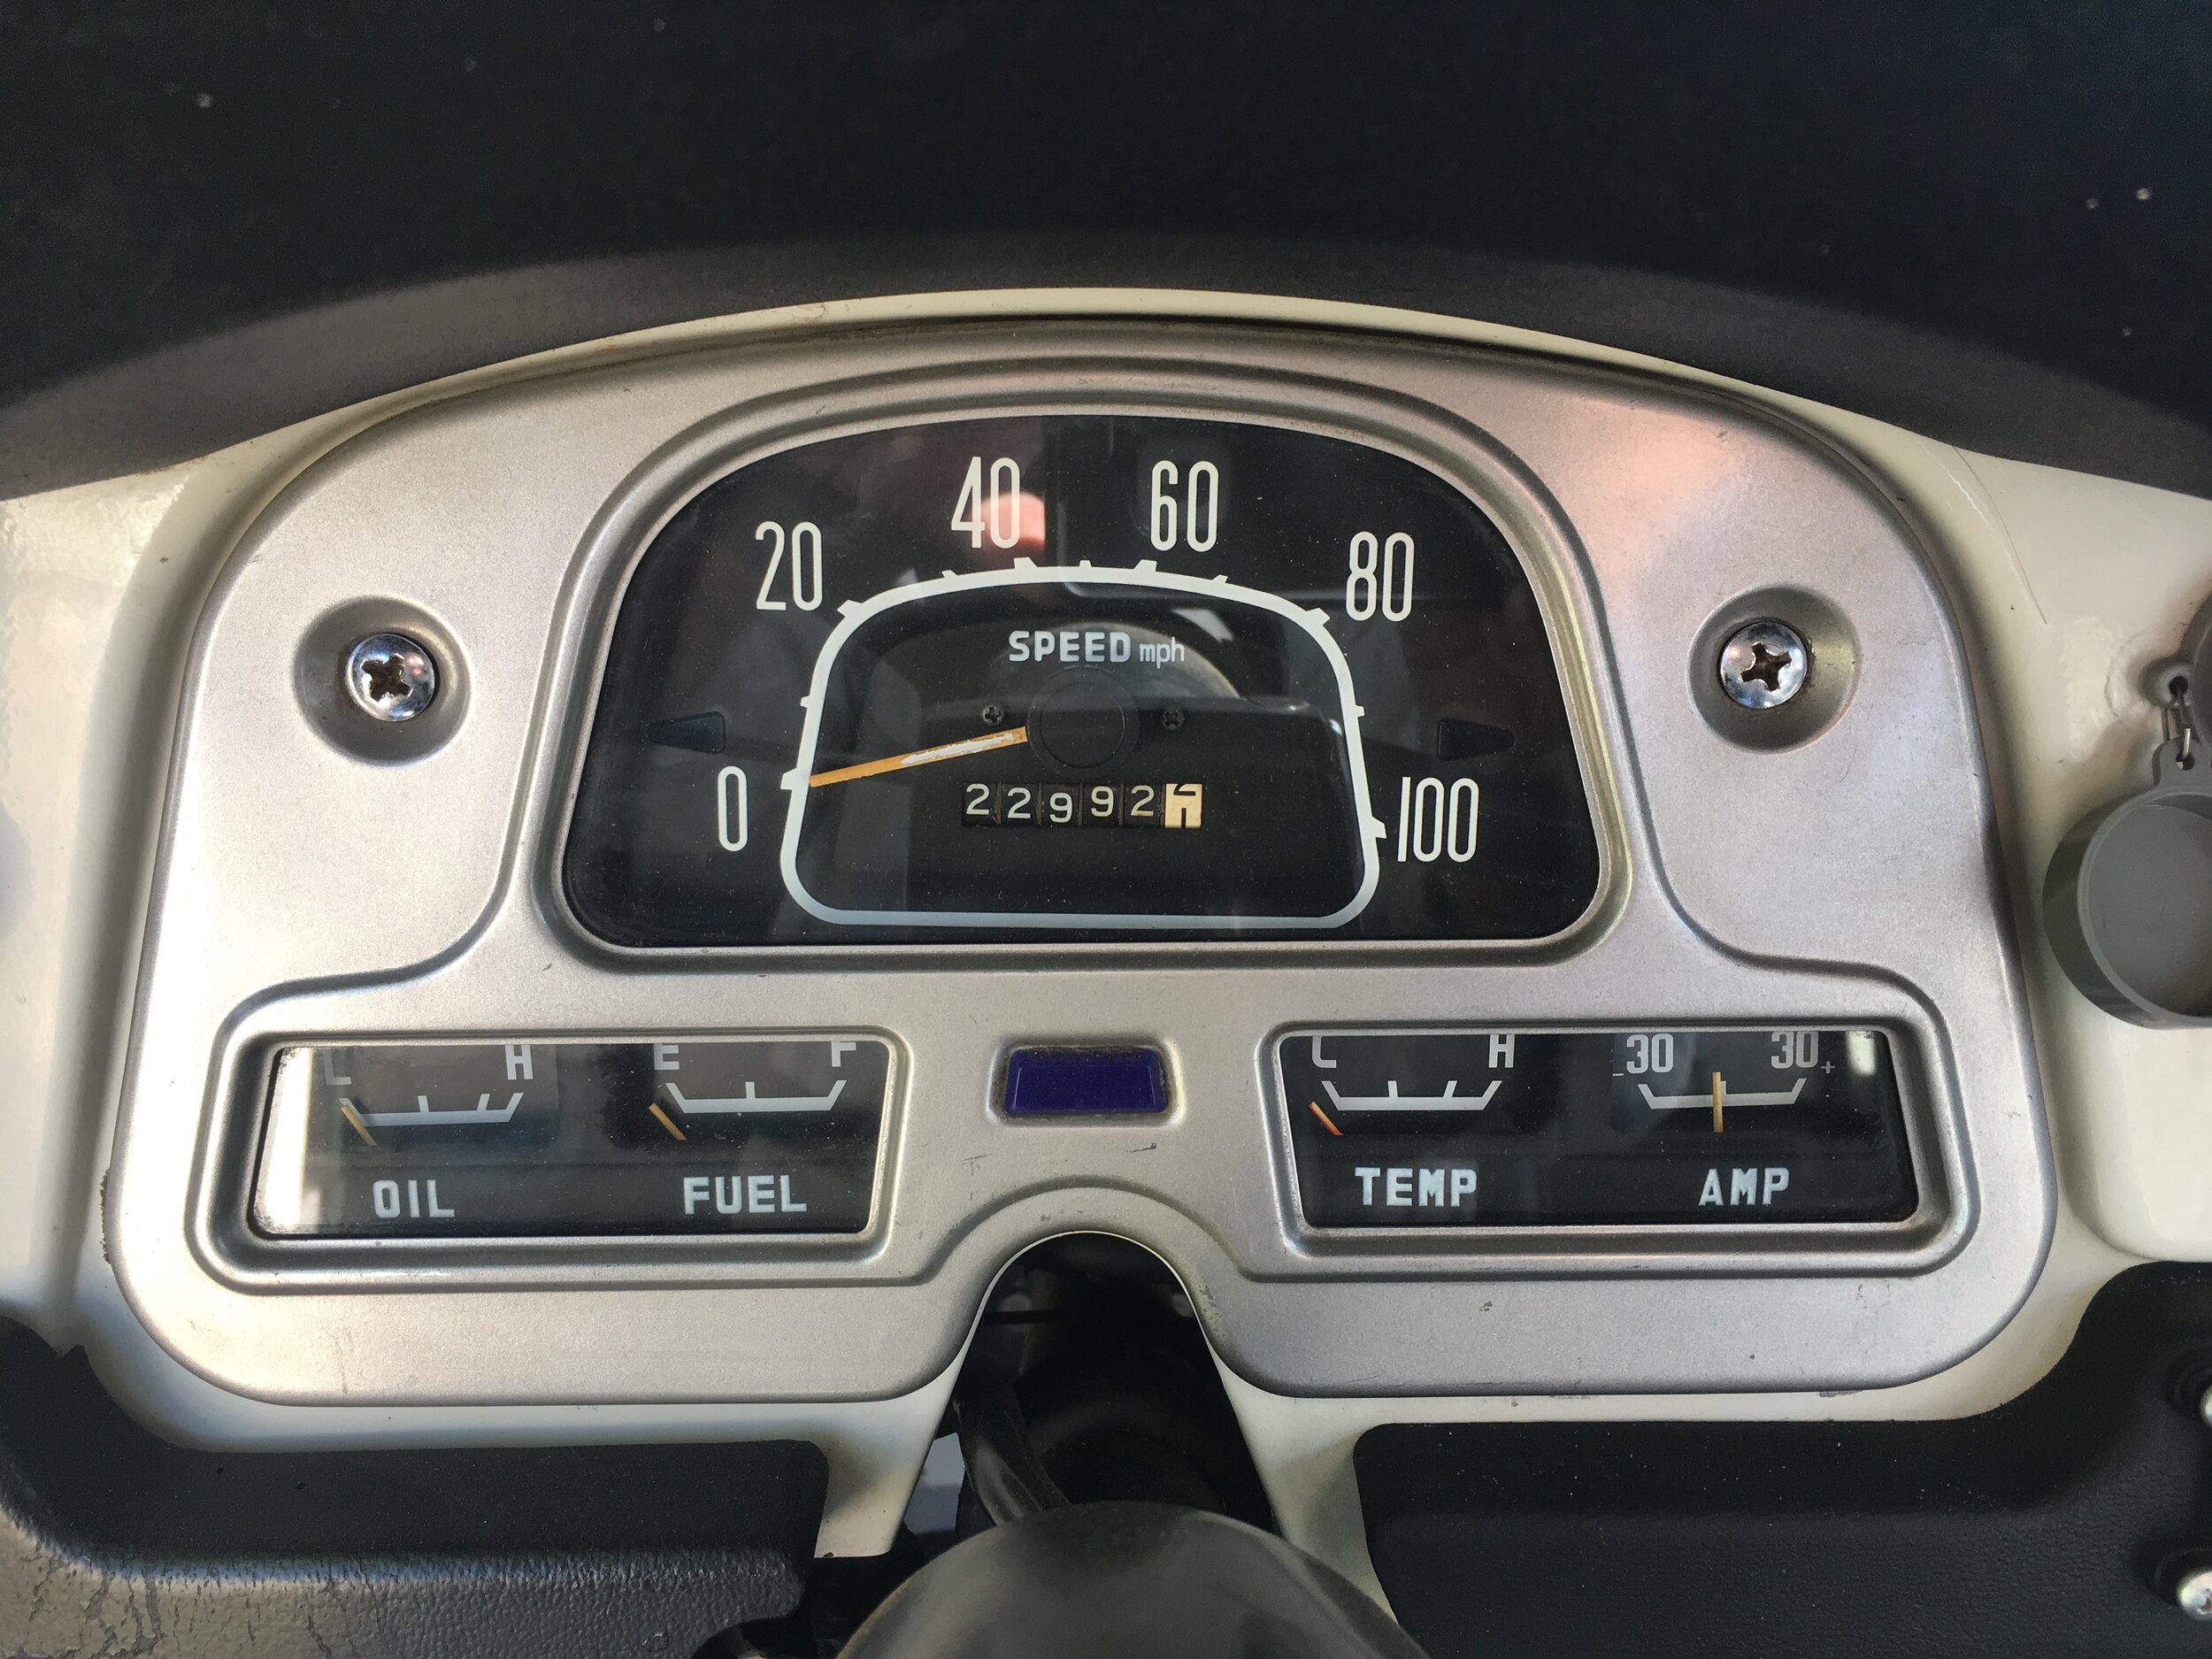
Moving on to four-wheel-drive vehicles, the 45-year-old industrial gauge panel in my FJ40 is nevertheless peerless in function and legibility. Again, white on black. The only sign of age on this panel, after four decades and 320,000 miles, is the peeling orange paint on the speedometer needle. (Note, too, in all the examples so far, the comprehensive nature of the information offered, from oil pressure to amperage. Sadly gone on most vehicles now, although some electronic dashes allow you to call it up on a side menu.)
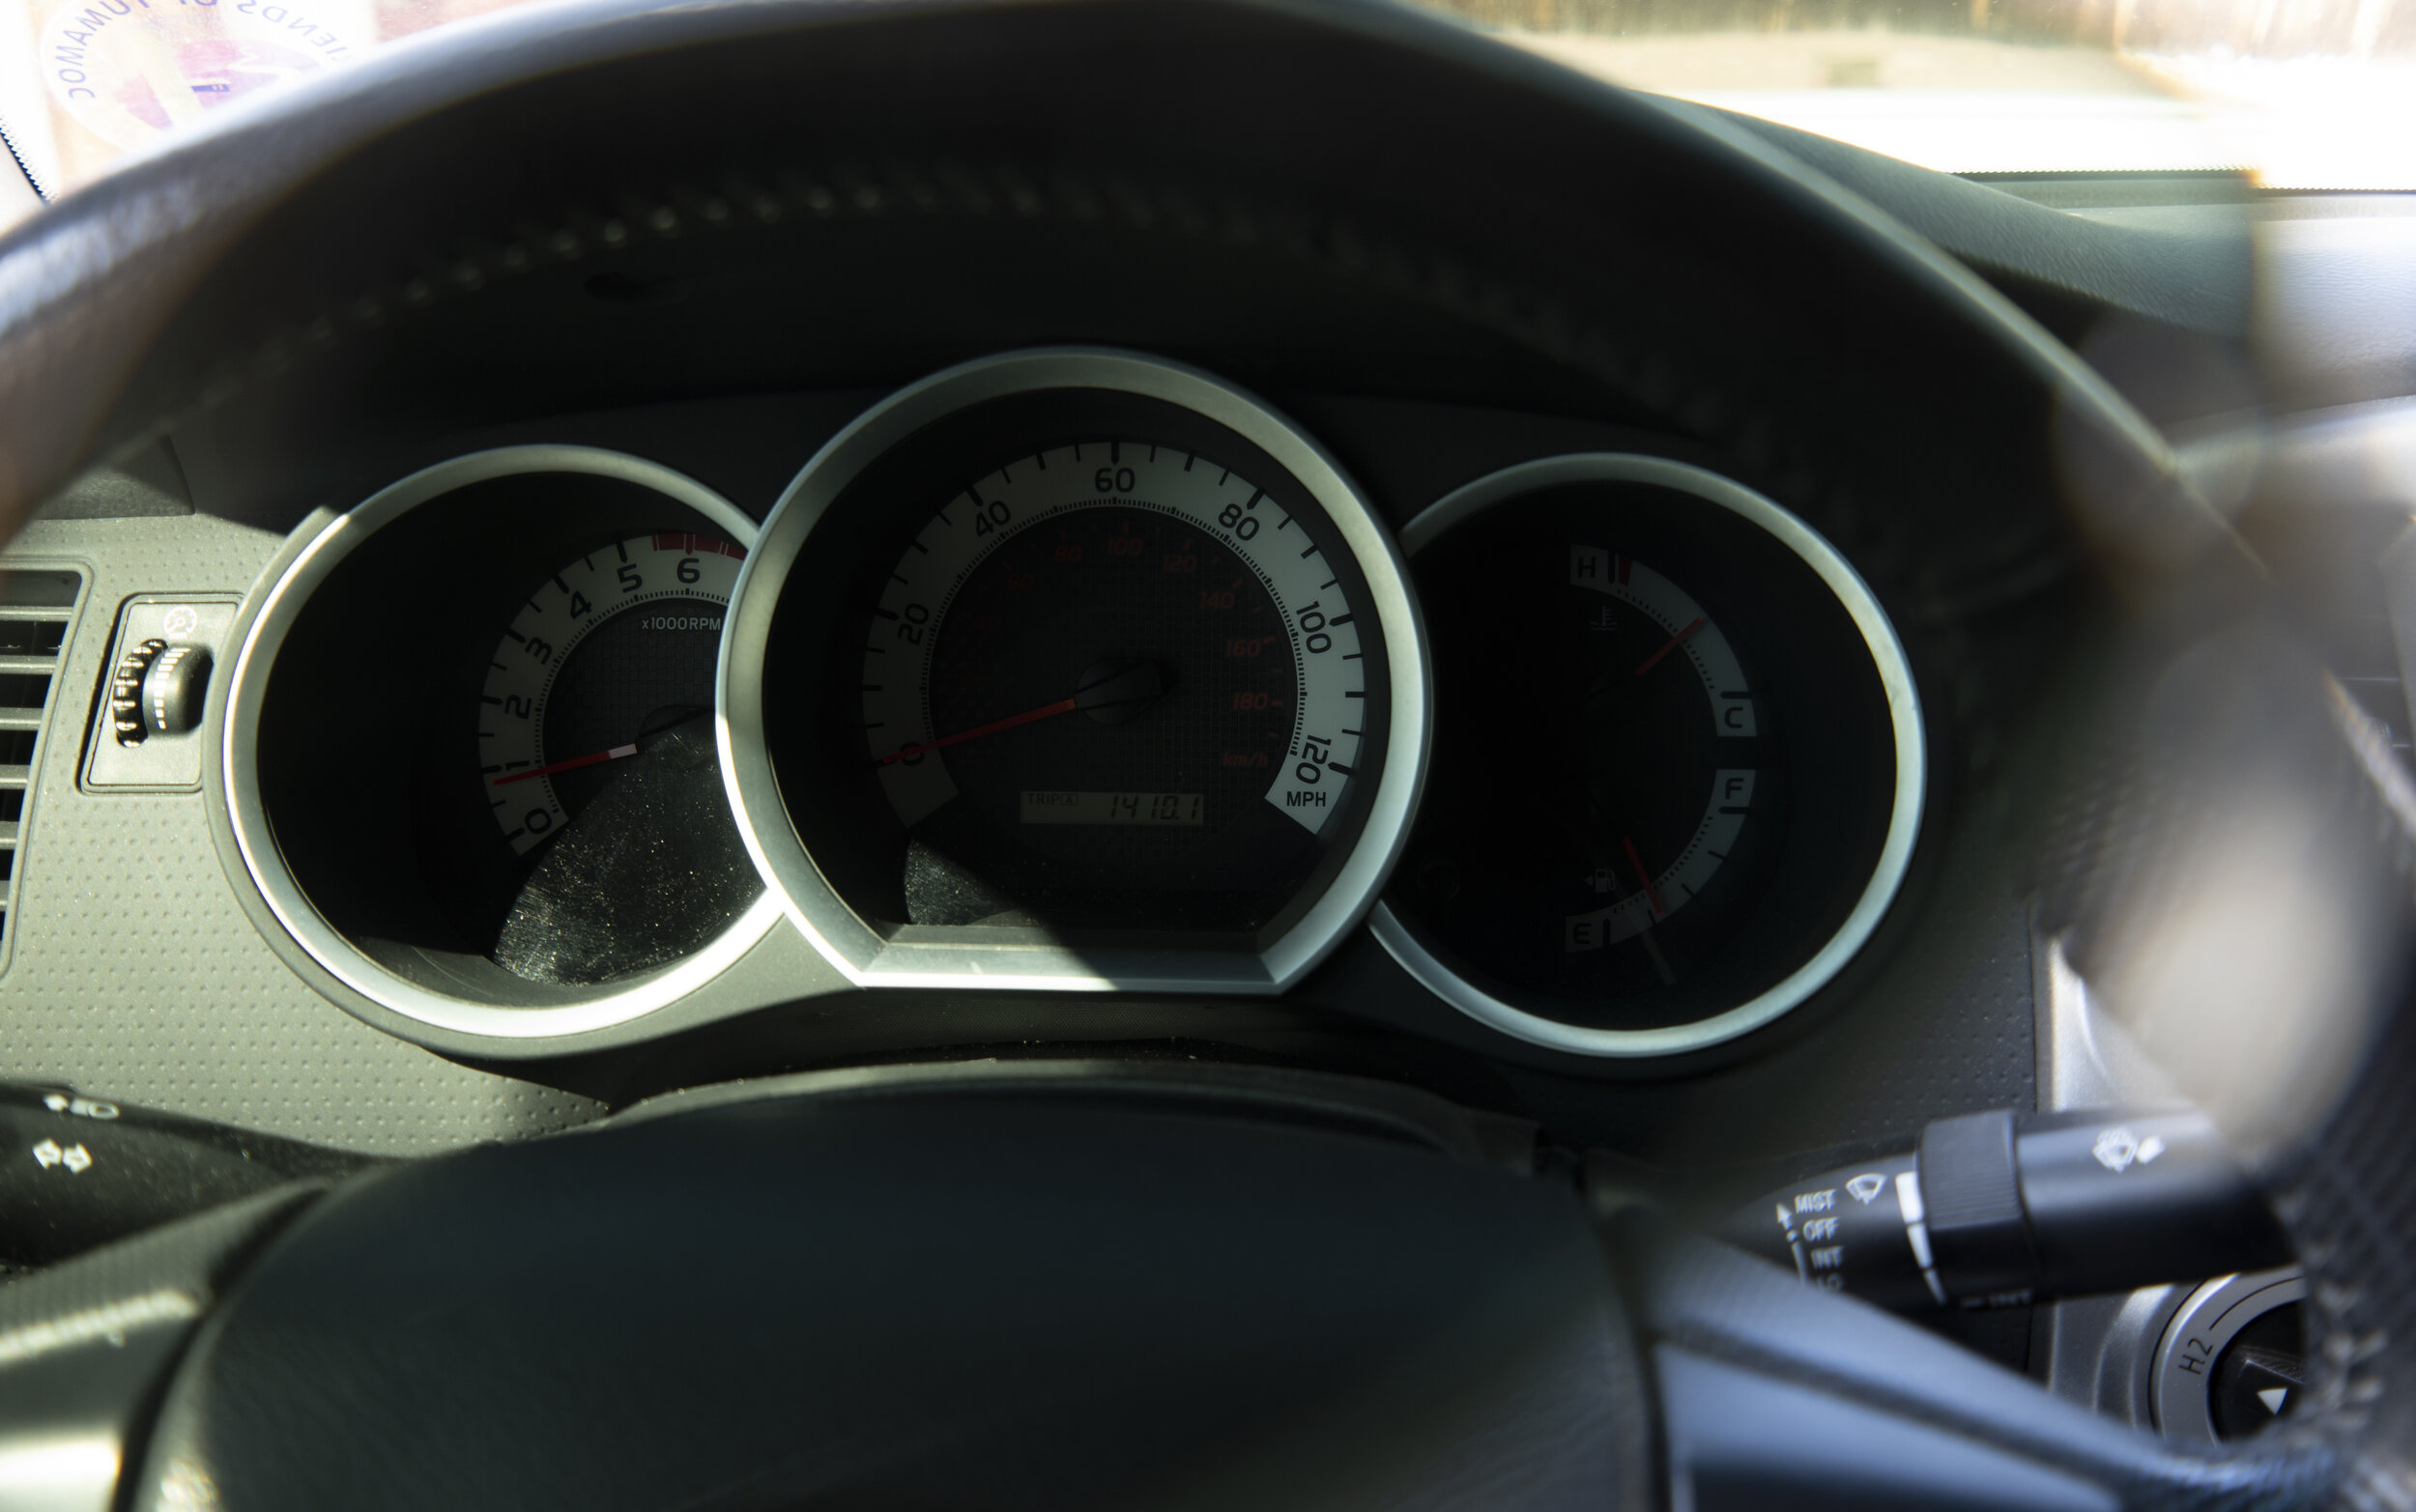
In contrast to all these examples is the instrument cluster on our 2012 Toyota Tacoma, shown here in ideal light:
At first glance, it doesn’t look bad. But notice that, instead of simple white lettering on a black background, as on all our previous examples, Toyota introduced a black background with a white band around the perimeter and black lettering, as well as a spurious “carbon-fiber” looking pattern on the black background. The gauges are also so deeply inset that, even in this photograph, you can see the shade partially obscuring the figures on the left of each gauge. Note as well the extremely poor contrast of the red kilometer markings, completely invisible on the left of the speedometer.
Now look at the same cluster in partial sun from the side, and through the lens of a pair of sunglasses.
Not only do the numbers on both speedometer and tach become nearly illegible, the red needles also disappear against the black background, and even their tips show poorly in the white since you can only see about a half inch of each.
I noticed this characteristic shortly after we bought the truck, and it has annoyed me ever since. I constantly find myself turning my head a bit to look around my sunglasses to see what my speed is. Even turning on the headlamps (and thus instrument lights) doesn’t help. I have the feeling this arrangement was configured on a designer’s computer screen and never actually tested before it went into production.
Fashion is all well and good, but it should never interfere with function.
Designers: White on black. Please. And don’t put the gauges in a cave.
Withholding judgement, but . . . flying a drone in Iran?
I hesitate to jump to conclusions until we have more information, but all accounts I’ve seen so far indicate that this Australian couple, Jolie King and Mark Firkin, were arrested in Iran after they were caught flying a drone near Tehran, possibly close to a military base. They’d been traveling in a Toyota Land Cruiser and blogging their journey until communication stopped in July. Details have just emerged, including in the Guardian, here.
Need I comment on the inadvisability of anyone from a Western power flying a drone in a country at odds with Western powers?
Hint: When using “Search,” if nothing comes up, reload the page, this usually works. Also, our “Comment” button is on strike thanks to Squarespace, which is proving to be difficult to use! Please email me with comments!
Overland Tech & Travel brings you in-depth overland equipment tests, reviews, news, travel tips, & stories from the best overlanding experts on the planet. Follow or subscribe (below) to keep up to date.
Have a question for Jonathan? Send him an email [click here].
SUBSCRIBE
CLICK HERE to subscribe to Jonathan’s email list; we send once or twice a month, usually Sunday morning for your weekend reading pleasure.
Overland Tech and Travel is curated by Jonathan Hanson, co-founder and former co-owner of the Overland Expo. Jonathan segued from a misspent youth almost directly into a misspent adulthood, cleverly sidestepping any chance of a normal career track or a secure retirement by becoming a freelance writer, working for Outside, National Geographic Adventure, and nearly two dozen other publications. He co-founded Overland Journal in 2007 and was its executive editor until 2011, when he left and sold his shares in the company. His travels encompass explorations on land and sea on six continents, by foot, bicycle, sea kayak, motorcycle, and four-wheel-drive vehicle. He has published a dozen books, several with his wife, Roseann Hanson, gaining several obscure non-cash awards along the way, and is the co-author of the fourth edition of Tom Sheppard's overlanding bible, the Vehicle-dependent Expedition Guide.

