Overland Tech and Travel
Advice from the world's
most experienced overlanders
tests, reviews, opinion, and more
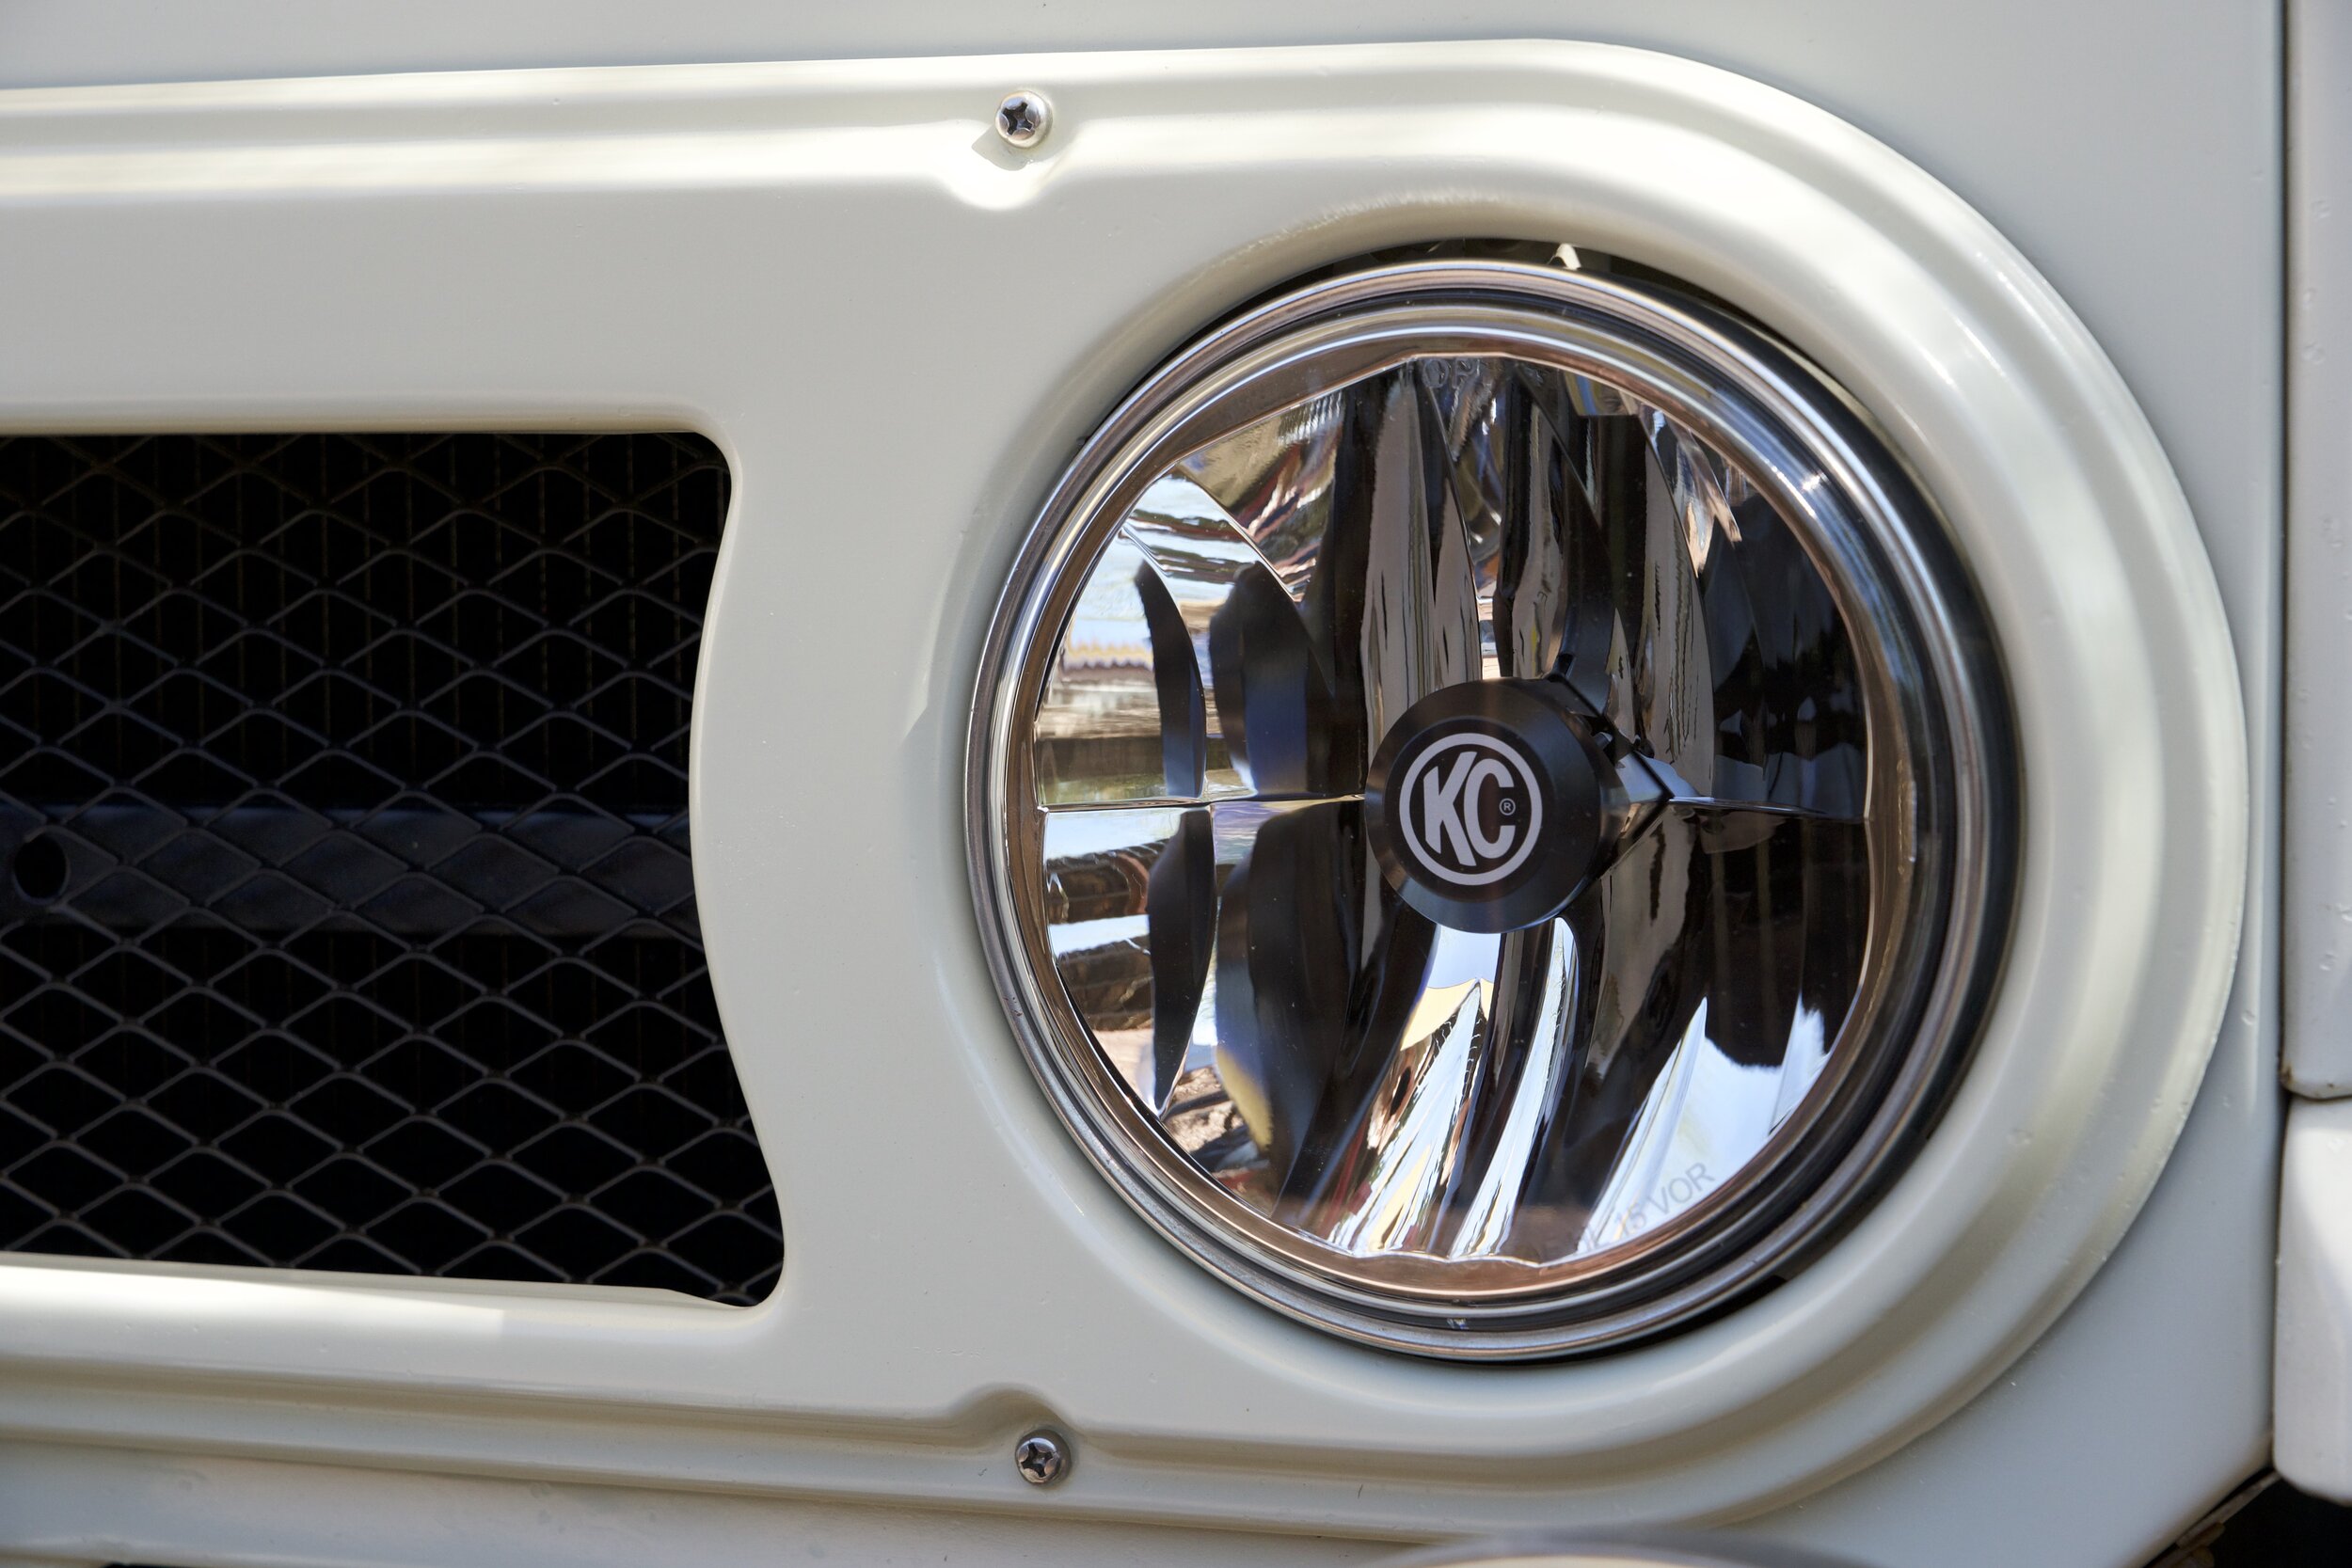
7-inch universal LED headlamps from KC HiLites (yes, THAT KC HiLites)
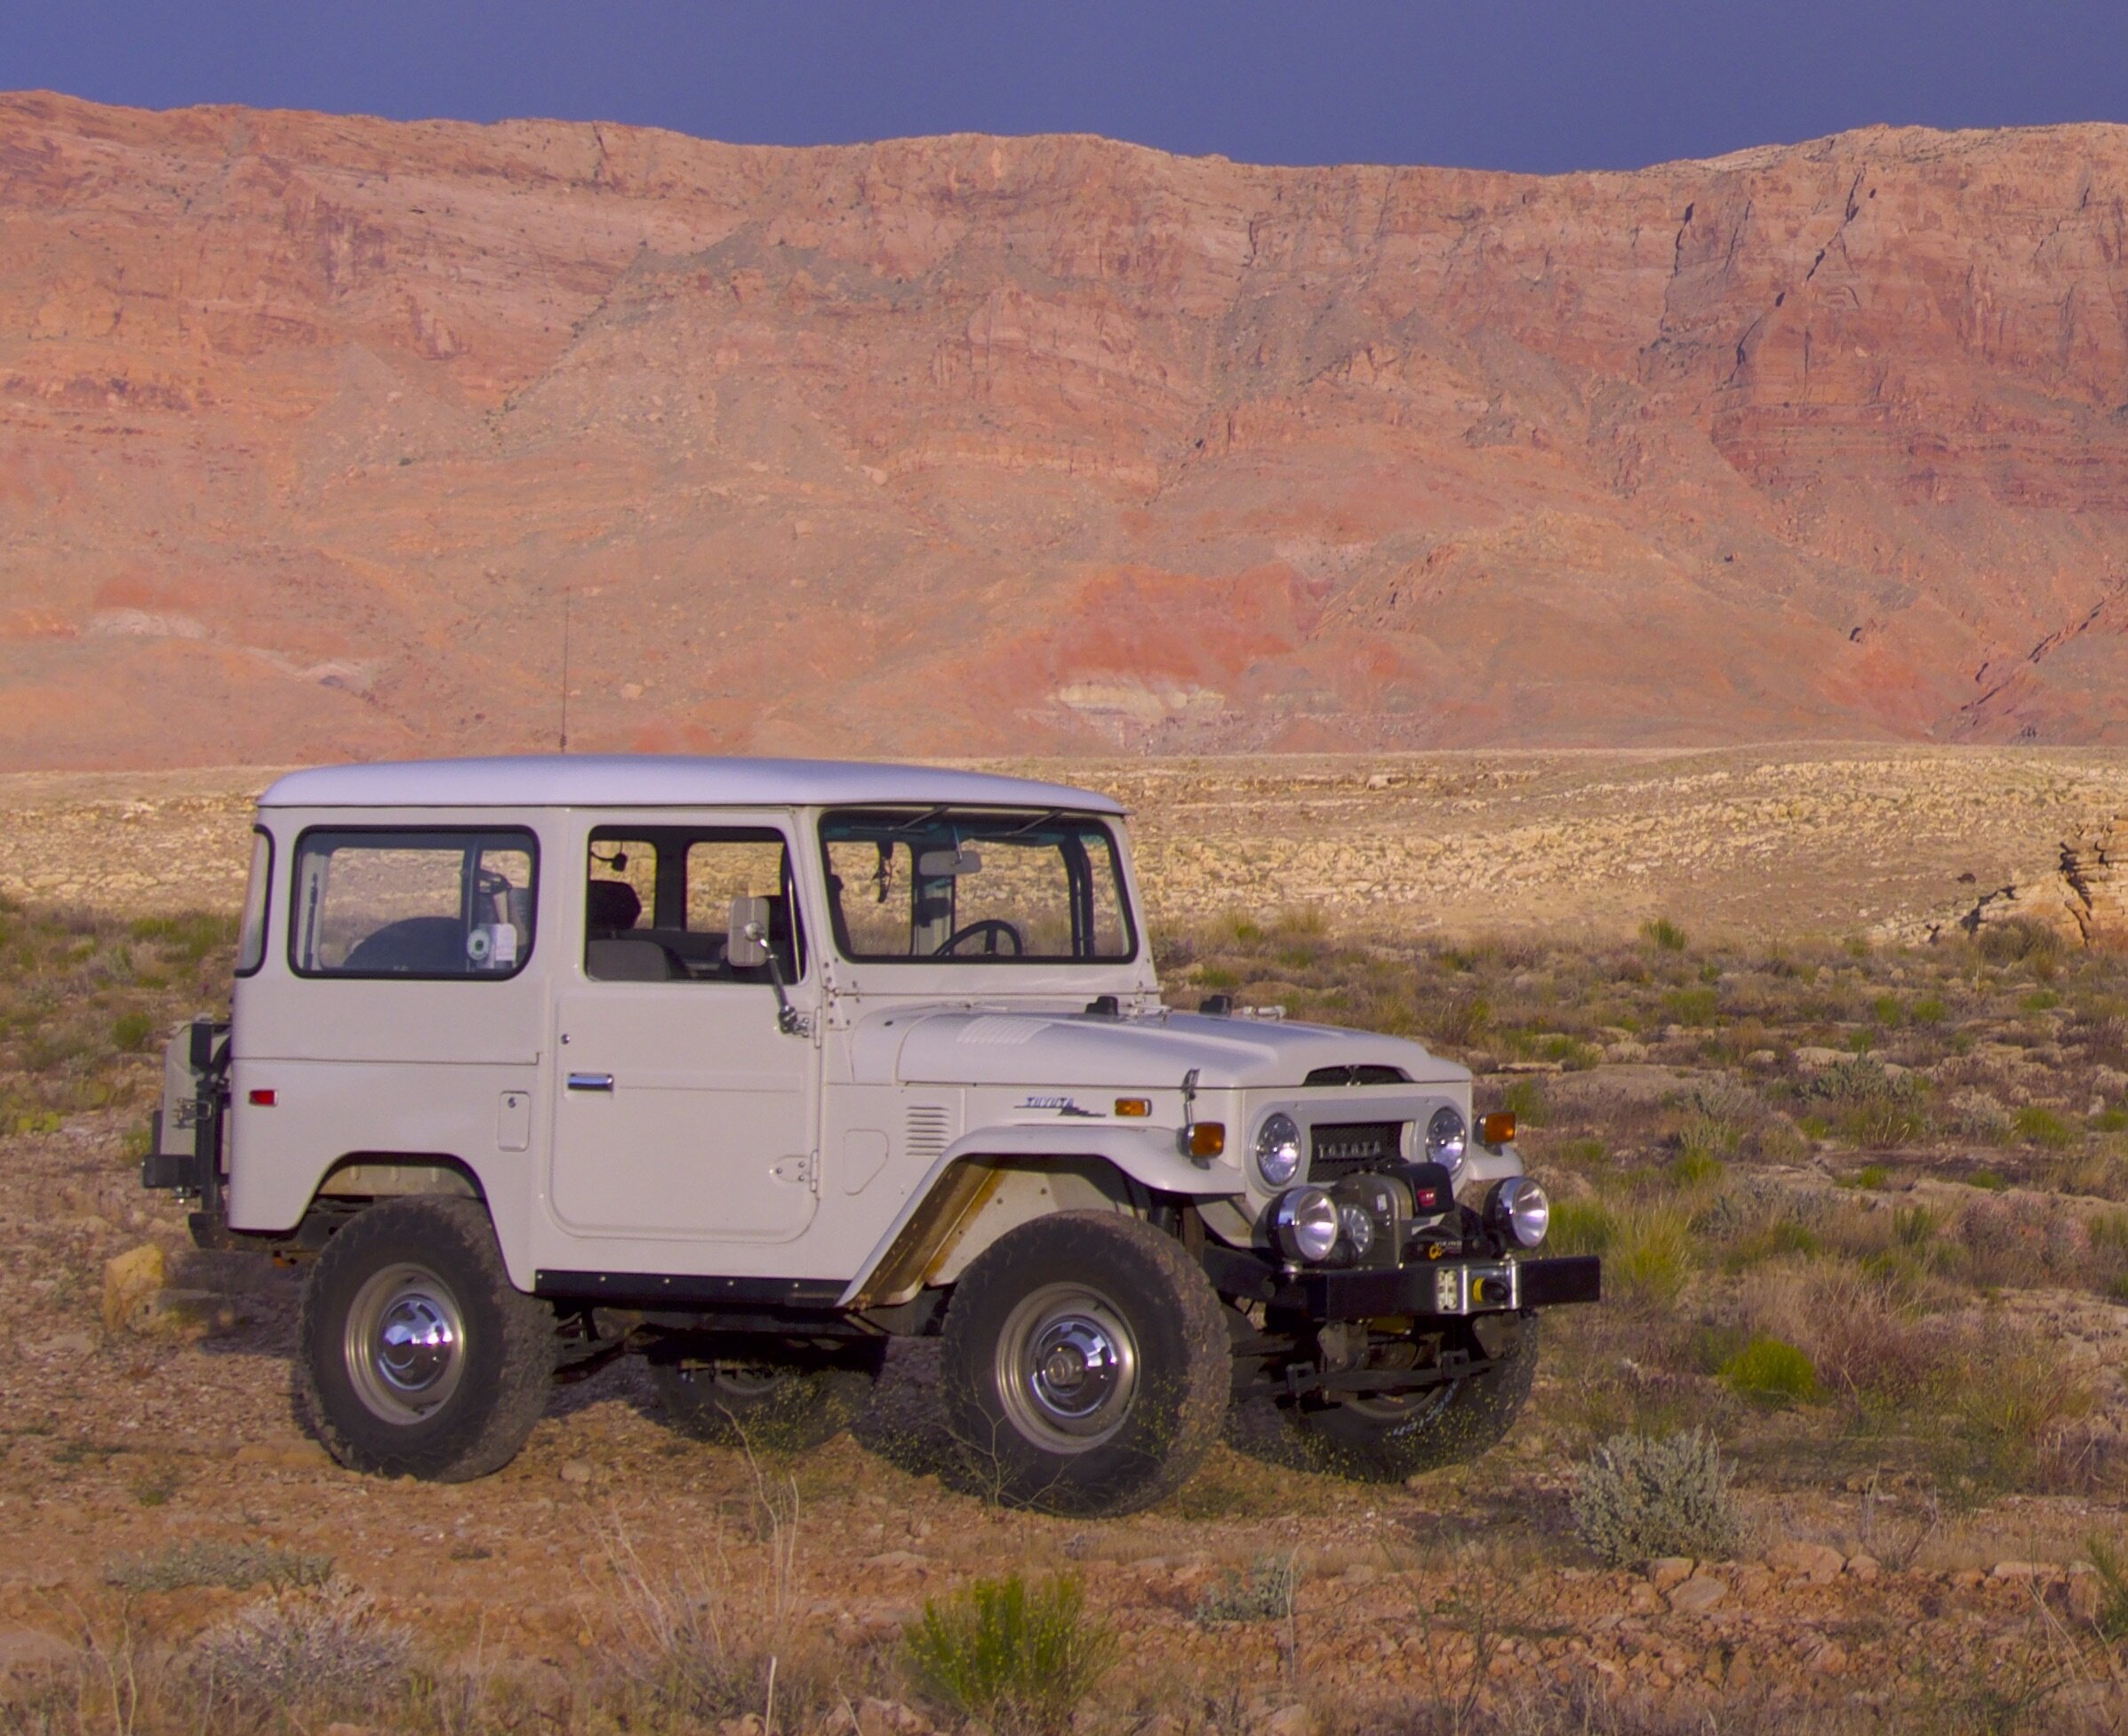
Over four decades of ownership, I’ve made a number of significant modifications to my 1973 FJ40—a different (but still Land Cruiser) transmission, a drop-down tailgate to replace the mini swing doors, post 1975 single-piece front doors to reduce rattles, late-model European mirrors, and a few others. I’ve also added several aftermarket accessories—a Stout Equipment rear swingaway tire/jerry can carrier (brilliant, and no longer made), the Warn 8274 winch, Old Man Emu suspension, and, at various times, a roof rack and front brush guard.
Through all the years, however, I’ve tried to maintain more or less a semblance of a period look to the vehicle. After running alloy wheels for several years, I reverted to aftermarket but correct non-USA 16 x 6-inch steel wheels that accept the factory hubcaps—and nothing says quirky original Land Cruiser styling than those hubcaps. I stuck with the factory seats but had them re-upholstered in more comfortable fabric than the sweaty—and shamefully cheap—factory vinyl. (Quality upholstery was the last aspect of manufacturing Toyota mastered.) I stuck with the stock, 17-inch diameter hula hoop of a steering wheel but stitched a one-piece leather cover on it for a bit of extra grip. Power steering? Never.
In one aspect I never hesitated to alter the factory components or look: safety. I installed a full front roll cage and three-point inertia-reel lap and shoulder harnesses, replacing the original lap belts. I added late-model head restraints (interestingly the seat backs had provision for them). And I swapped out the four-wheel drum brakes for four-wheel discs. Much of this did nothing but slightly update the apparent model year of my FJ40, since the 40-series body remained virtually the same right through the end of production in 1983.
Another critical safety consideration was lighting. Shortly after buying the 40 I installed a set of Cibié’s superb Z-beam halogen headlamps, vastly superior to the 1940’s technology sealed-beam originals. Some time later I added a pair of Cibié Super Oscar driving lamps, at the time the pinnacle of automotive lighting technology and virtually standard equipment on rally cars and Paris-Dakar racers at the time. The combination served me well when I was guiding in Mexico, where livestock on even major highways is a common hazard, and later when Roseann and I lived on several remote properties, on the dirt roads to which cattle, deer, and coyotes made occasional suicidal forays.
I used the Super Oscars until they were completely sand-blasted and the reflectors had finally oxidized, and replaced them (yes, I threw them away!) with an equally effective if considerably less romantic set from IPF. The Z-Beams had also gone, replaced with Hellas that, while excellent, never seemed to have quite the same perfect beam control or even spread of light. After the Arizona and Mexico desert sands wore out the Hellas (I’ve owned this vehicle a long time) I installed a pair of Trucklite halogen lamps with complex reflectors and clear lenses, which were probably better than the Cibiés. This eased me away from the traditional faceted lenses of earlier headlamps, but still looked reasonably period.
Trucklite complex-reflector halogen headlamps—excellent for a halogen lamp
Then the LED revolution happened. And the look of driving lamps and headlamps changed forever.
Even after testing several brands of LED driving lamps, I couldn’t bring myself to install them on the FJ40. They just looked too . . . modern. Too much bling compared to the simple reflectors of the IPFs. And the early replacement 7-inch round LED headlamps I reviewed left much to be desired, evidencing massive purple fringing and blotchy patterns.
One salient thing nibbled at the back of my brain however: My FJ40 has a 55-amp alternator (compared to the 120-plus amps of modern alternators), and it is difficult to upgrade because all the power from the alternator runs through the ammeter via a single wire (a rare dumb design from Toyota). When I flicked on the IPFs and their 125-watt bulbs, they sucked up 21 amps of that output, and with the halogen headlamps on high beam, that was another 16 amps. It was a wonder there was power left to get to the spark plugs. Those LED driving lamps required a fraction of the power to produce the same light.
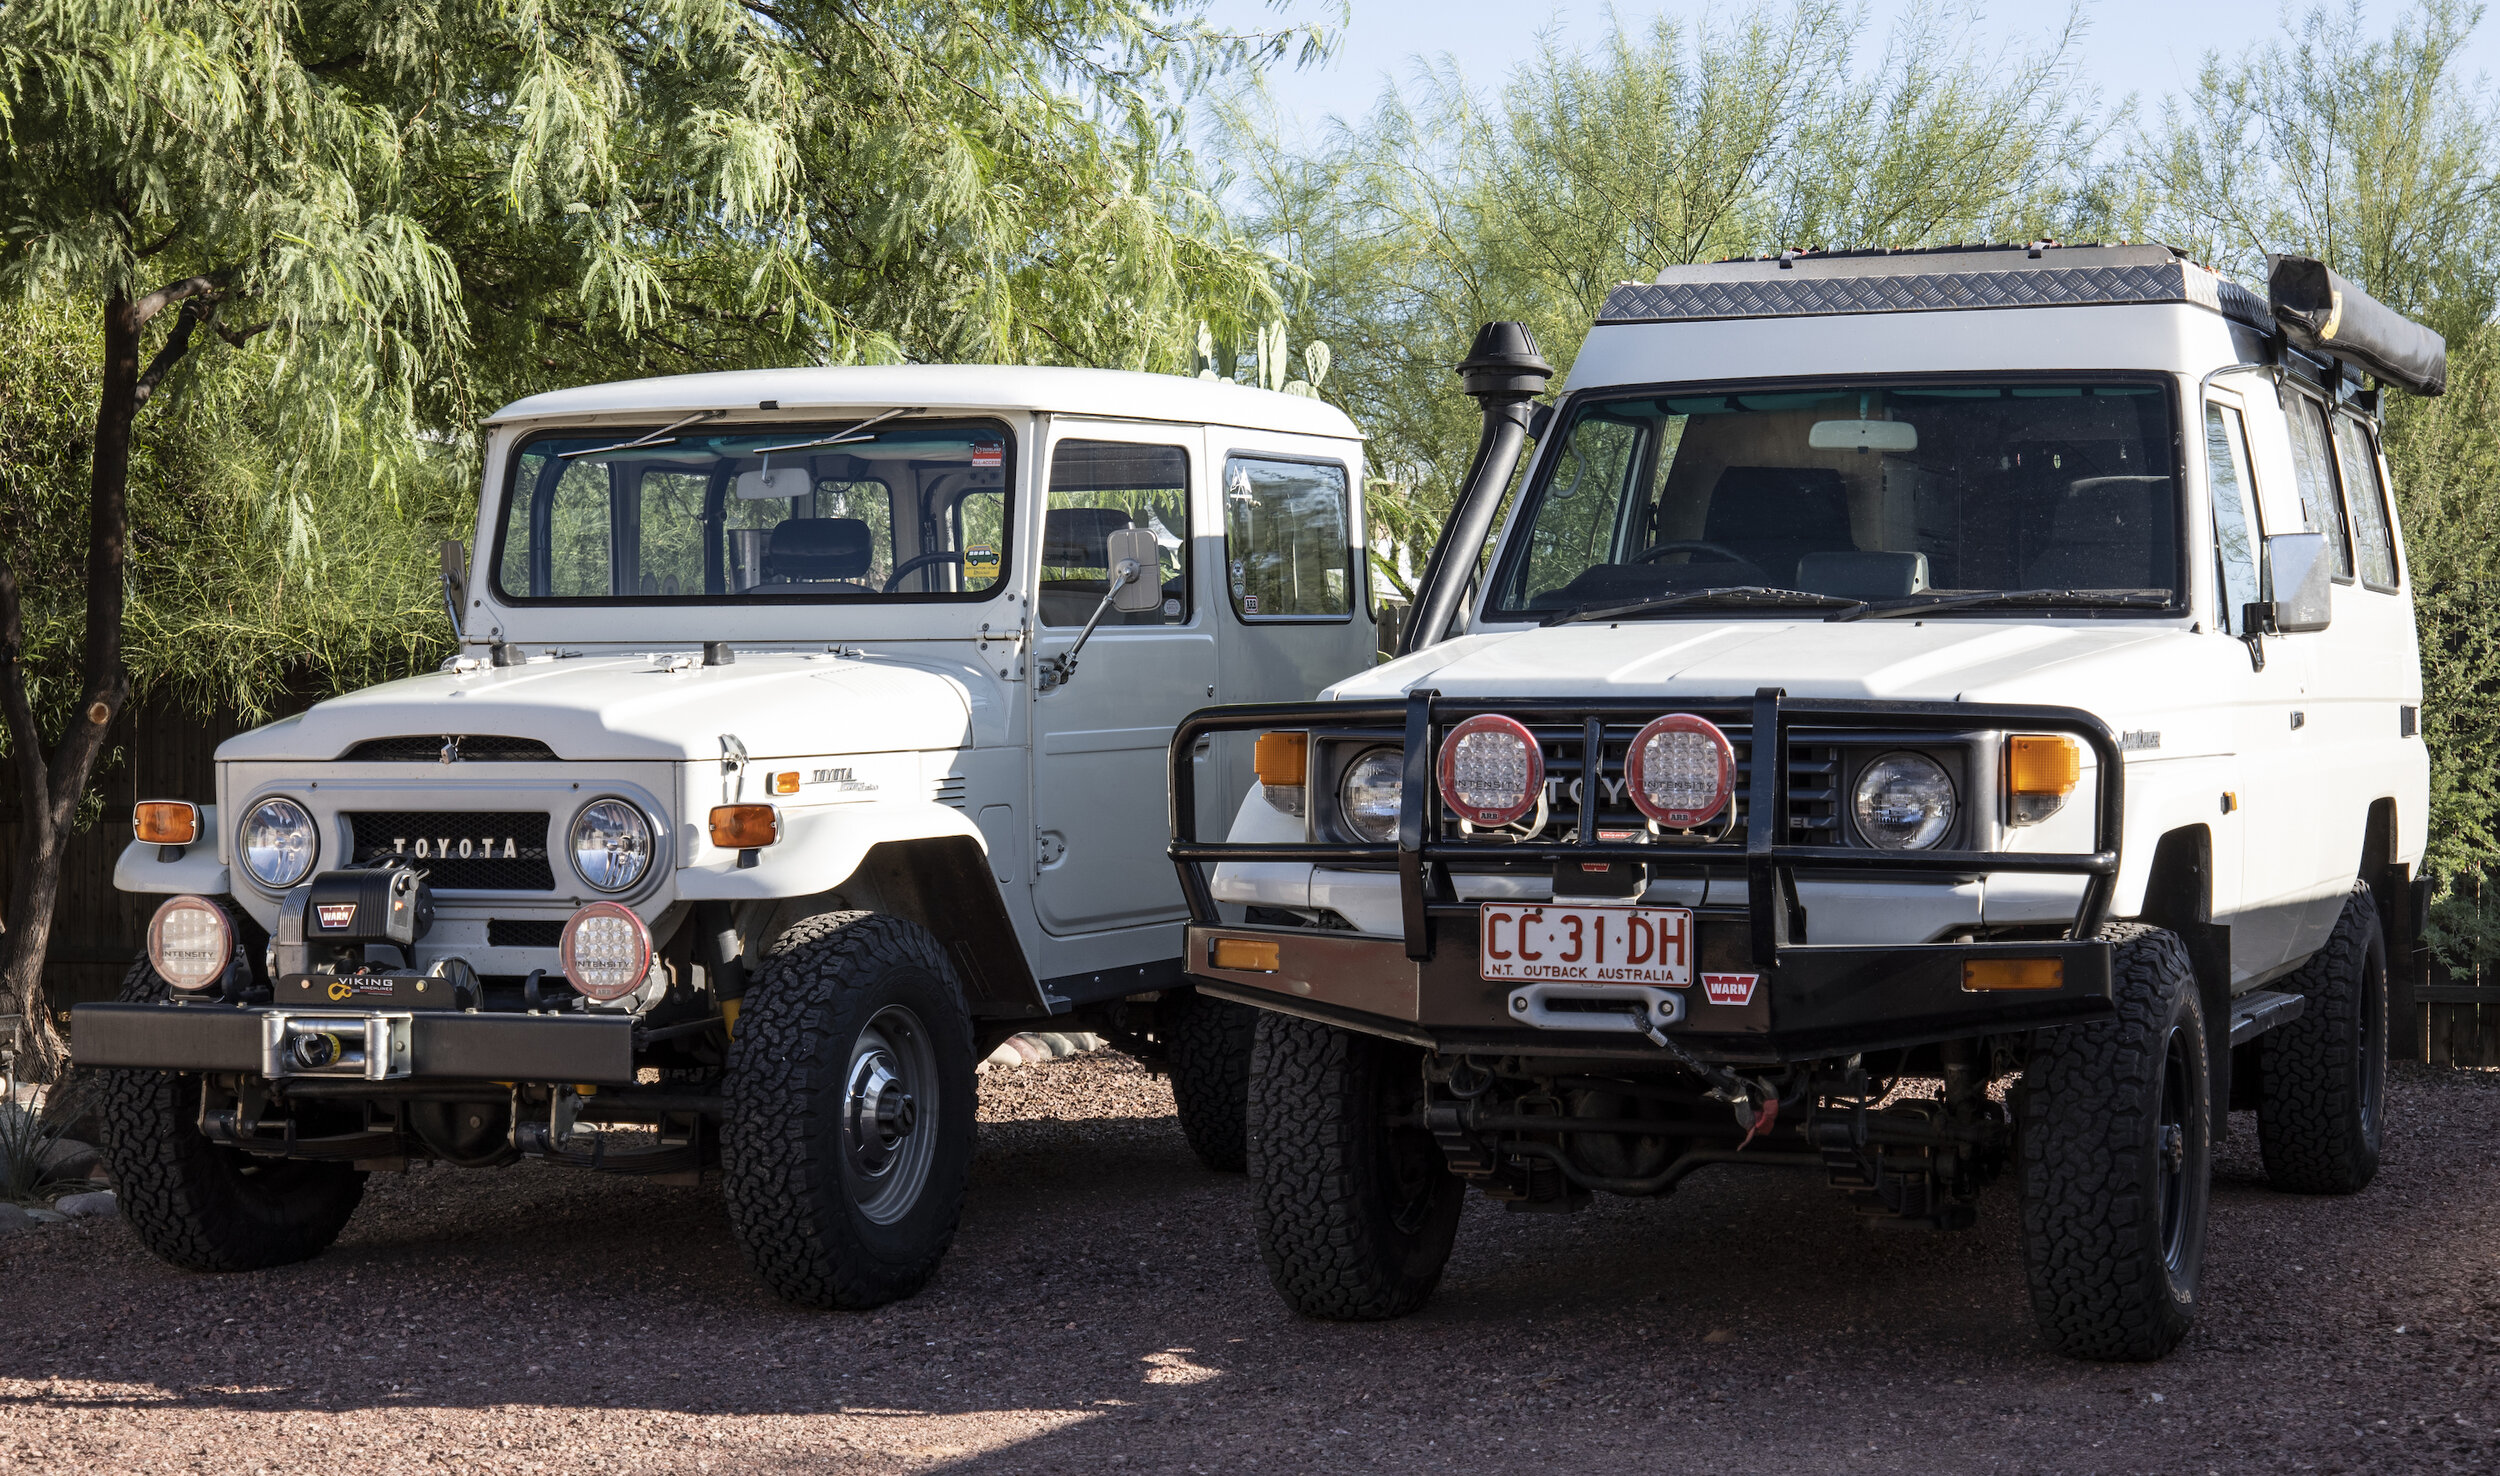
I got over my Luddite stylistic hangups in Australia. There we had bought a 1993 HZJ75 Troop Carrier and had it converted with a pop top and a bunch of other modifications—one of which was a set of ARB Intensity LED driving lamps furnished by the company. On a single, poorly planned drive after dark toward Alice Springs, those lamps—well, I can’t say they paid for themselves, but they would have—anyway, they safely bored a bright 5000ºK hole through the Australian night, illuminating the large marsupials bounding suicidally across our path. When we got home I immediately added an identical pair to the FJ40. The headlamps, however, remained stubbornly incandescent. If LED driving lamps looked like something off the Starship Enterprise, most LED headlamps looked like they belonged on a Klingon Bird of Prey.
However . . .
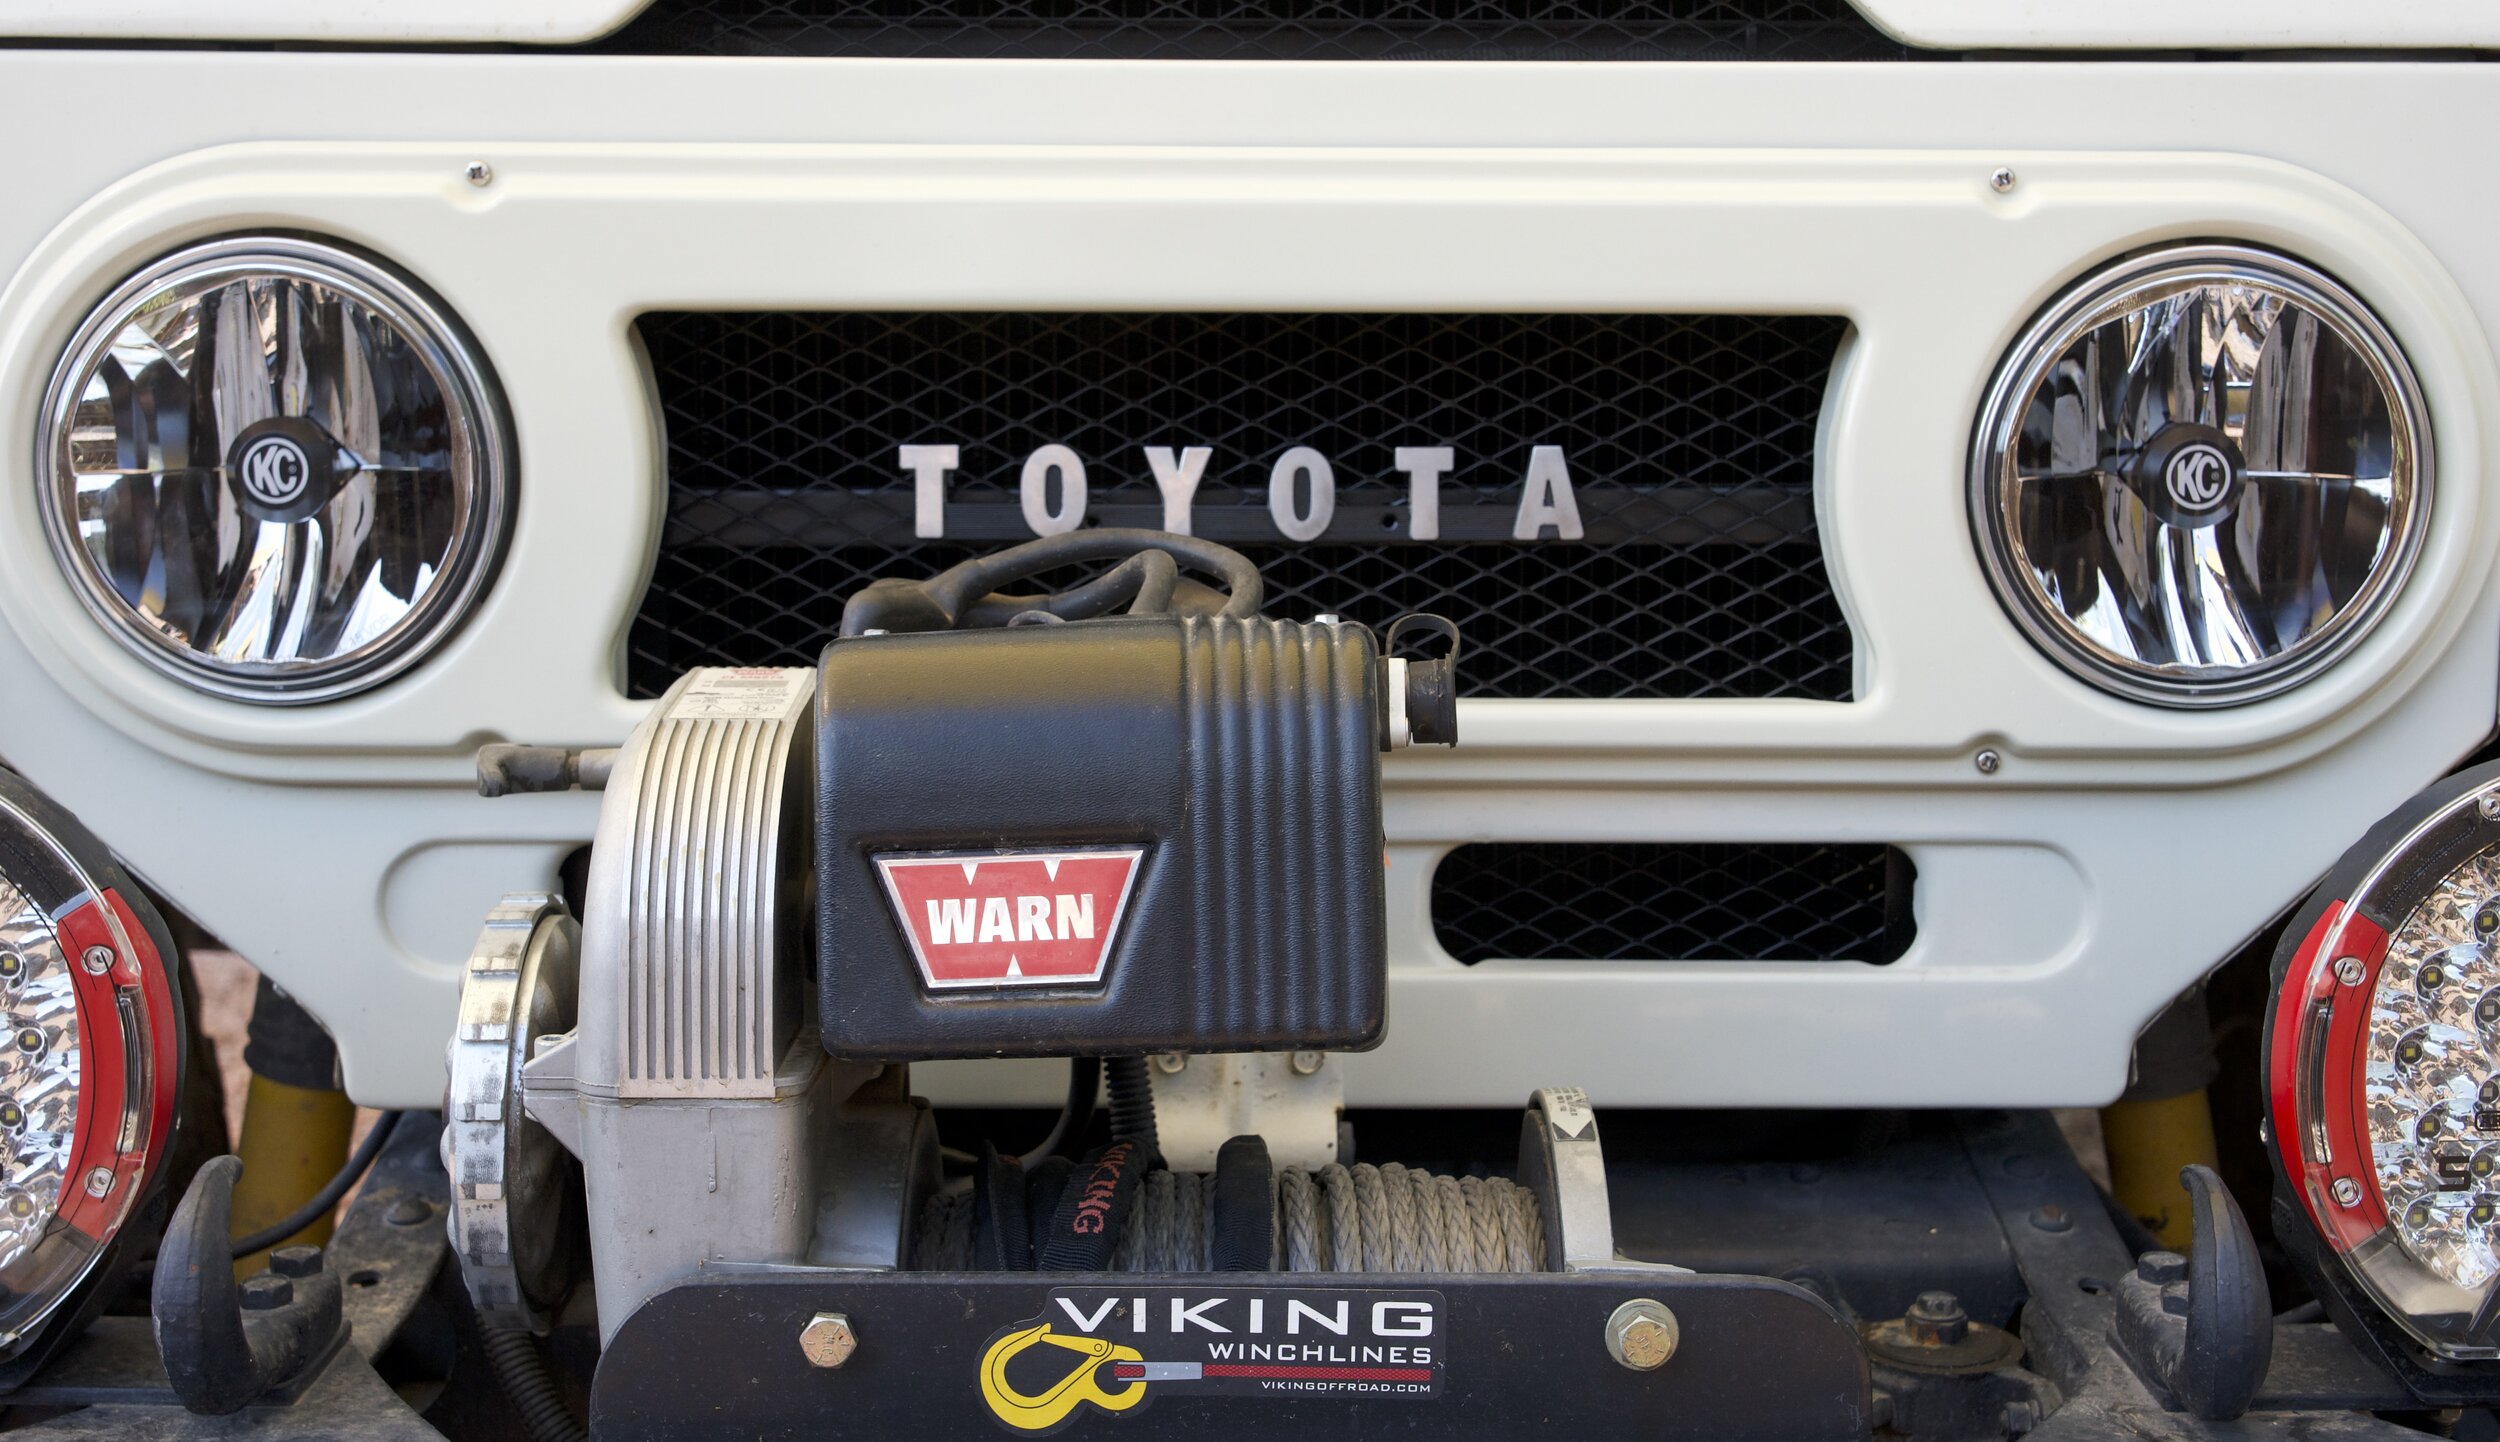
I’m working on an article for Tread magazine, about upgrading classic 4x4 vehicles such as the FJ40, or Series Land Rovers, Scouts, or CJ Jeeps, to make them more comfortable, safe, and capable for modern use. The FJ40 is getting new gearing, AC, and, just possibly, fuel injection, along with the existing upgrades I mentioned above. Given the goals, I decided it was time to grit my teeth and upgrade the headlamps, and KC Hilites—yes, KC of the classic budget Daylighters with the smiley-face covers—offered to send me a pair of their 7-inch Gravity LED headlamps. When received, I was relieved to note that they look less . . . Klingony . . . than most of their kind.
The Gravity headlamps are virtually a universal, plug-in fit for any vehicle with 7-inch round headlamps, although I found that I need to trim the headlamp buckets on the 40 by just a couple millimeters to clear the backs of the Gravity lamps. Once that was accomplished—the work of five minutes with a jigsaw—they dropped right in.
The width of a black marker tip was all the trimming necessary
I’ve yet to be able to head out to Ravenrock for a full test, but initially the pattern and color look excellent. Power draw on high beam is just 3.6 amps. For both lamps.
And the appearance? Hmm . . . I’ll get back to you . . .
Pinnacle product: the Antiluce latch
Can a tailgate latch with one moving part qualify as a pinnacle product? Absolutely. In fact, that’s exactly why it does.
I’m not sure when the “Antiluce” (get it?) latch was invented—Google suffered a rare fail in not finding me something like an Antiluce Appreciation Society with monthly meetings at the Queen’s Head in Tunbridge Wells. I know they were on Series II Land Rovers because I’ve seen them. Photos of JUE 477, the very first production Land Rover, seem to show a type of Antiluce latch, perhaps refined as production progressed. For all I know it could have been invented decades before that. A small British company named Burrafirm, later purchased by Albert Jagger Limited, seems to have held the patent for quite some time.
The Antiluce is so simple that it would take the proverbial one thousand words to describe it, so if you’re not familiar with it look at the photos and it will be clear. It’s essentially a toggle latch—flip it horizontal to close the tailgate and the hole in the hasp fits over it. Then flip it vertical, push in on the tailgate to snug it against its weather strip, and the stepped opening in the Antiluce automatically takes up the slack and ensures a rattle-free fit. With new weatherstrip the latch might only drop down to the first or second step, but as the weatherstrip beds in or wears, the latch simply drops down a step at a time to maintain consistent tension. Brilliant. Its natural tendency is to obey gravity, so if the tailgate flexes over rough roads the pin will only snug itself, not loosen or come unfastened.
The drop-down tailgate on my FJ40 closes with over-center draw latches, which are bulkier, heavier, fiddlier, and no better. If I ever do a complete restoration on the Land Cruiser I plan to convert it to Antiluce latches. They’re available from numerous sources including all the major Land Rover stores, and could easily be adapted to other uses on custom trailer compartments or cabinetry. The threaded shaft can be had in several lengths, and there are weld-on versions too. At around $30, it’s possibly the cheapest pinnacle product on earth.
The five best modifications . . . to leave off your expedition vehicle
Expedition travel is a different universe than weekend four-wheeling. When you’re just out for a few days near home—camping, challenging a few trails—breaking down is no more than an inconvenience. But if you’ve embarked on a long journey far from familiar territory, perhaps in another country or on another continent, a breakdown can endanger the trip—or even your safety if you’re traveling solo and are tens or hundreds of miles from assistance. For journeys such as this, your priorities regarding vehicle modifications and accessories need to change, from an emphasis on maximum 4WD performance (and, let’s be honest, maximum looks) to reliability and durability. A lot of the products that enhance the former can seriously impact the latter. Here are a few of the most important.
Big tires. Everyone loves the look of big, aggressive tires on a 4x4, and in certain situations they have advantages in ground clearance, traction, and the ability to successfully climb ledges. But big, heavy tires extract a heavy price. They put massive additional stress on your suspension, steering components, and bearings. They hurt fuel economy and retard acceleration—and if you install higher-ratio differential gears in an attempt to compensate for these downsides, you’ll simply weaken the pinion gear, which has to be reduced in size to gain the higher ratio. Larger-diameter and heavier tires also increase braking distances. Remember that Land Rovers conquered Africa on skinny 7.50 x 16 tires, and Land Cruisers conquered Australia on the same size. Besides, if you destroy one of your 38s in Botswana I guarantee you won’t find a replacement in Maun. They know better there. For more details on the downsides of big tires, see here.
Installing higher ratio ring and pinion gears results in a smaller, weaker pinion gear.
Big suspension lift. As with tires, there are some advantages to a raised suspension for rock crawling or mud bogging. Not on an expedition. You want to keep your center of gravity as low as possible to ensure maximum fuel economy and safe handling while carrying the equipment and rations needed for a long journey. Big suspension lifts increase angles on rod ends and driveshaft joints, leading to premature wear. You’ve probably seen photos of the Camel Trophy Land Rovers that challenged some of the toughest terrain on the planet—they all rode on stock-height suspension. If you really think you need some lift, keep it to a couple of inches. The expedition experts at ARB know this—their Old Man Emu suspension kits are all in the two-inch range.
Race shocks. Along with a suspension lift, many owners install long-travel shocks modeled after racing versions, with all-metal heim-joint ends, external-bypass tubes, and remote reservoirs. Shocks like this are designed to deal with the kind of high-speed, high-amplitude movement common in off-road races—exactly what you’re not going to be doing on a long journey in a loaded vehicle. You’re better off using a simple shock with enough oil capacity to stay cool after a full day of driving over washboard or rutted roads and trails. Standard rubber bushings last longer and are far easier to replace than heim joints, and help dampen road vibrations. Exposed chrome shafts quickly become sandblasted in the bush; they should be shielded or completely covered with a sheath or bellows.
The best expedition shock I’ve ever used is the Koni Heavy Track Raid, an utterly boring-looking thing next to the racer models, but with a huge oil capacity capable of soaking up mile after mile of abuse under a fully loaded Land Rover 110. ARB’s (Old Man Emu) BP51 is another excellent shock, employing internal bypass valves that allow adjustment of both compression and rebound without the exposed bits of external pypass tubes. Some BP51 models, it appears, come with heim joints; I’d avoid those. Sadly neither of these shocks is available for my FJ40 or I’d have them on it (although the standard OME Nitrocharger has performed well for me for decades).
The Koni Heavy Track Raid relies on robust twin-tube design and massive oil volume to handle torturous conditions.
Wheel spacers. A wheel spacer is a disk—usually aluminum—that fits between the hub and the wheel to increase track width and reduce lateral load transfer, which can fractionally help handling and stability. They give your truck a more aggressive look, too. Unfortunately, they also put significant extra stress on wheel bearings, since as you move the wheel farther away from the bearing you’re essentially lengthening a very strong lever. You’re also increasing the scrub radius, which is the distance between where the pivot point of the kingpin intersects the ground and the center of the tread, as well as increasing the kingpin offset. All of this affects the steering and suspension negatively, and will wear components you do not want to have to replace in a spot where “Amazon” only refers to a large river.
Every time I criticize wheel spacers I get emails from guys (you know who you are) who’ve had them on for X-hundred thousand miles and never had a problem. I don’t doubt this. But physics is physics, and putting extra leverage on your wheel bearings and steering components does them no good, period. (I know a guy who smoked two packs of cigarettes a day and lived to 80, too. Doesn’t prove it’s a good idea.)
“High-performance” air intakes. Intake systems that replace the stock air filter with one designed—or at least hyped—to produce more horsepower are frequently much worse at actually filtering air, and are often more vulnerable to water intrusion during a crossing. Those advertised horsepower gains are measured on a dyno—about as far from expedition reality as possible. The truth is, most factory intake systems are carefully routed to ingest cold outside air while minimizing the danger of water ingress. You can, if you choose, install a snorkel, which contrary to belief does not automatically turn your vehicle into a submarine, but does help get the intake above some ground-level dust.
Roof rack. Okay, I said five, but here’s a bonus. Do without a roof rack if you can. Ah, but what about the Camel Trophy Land Rovers I just mentioned? They looked awesome under those racks piled high with jerry cans and PelicanPelican cases, right? True, but, first, the CT vehicles usually had two team members plus two journalists inside; they were operating in extremely remote terrain, and and simply had to carry extra gear on the roof. More important, those vehicles all too frequently ended up on their sides during demanding special tasks. You don’t want to do that, because you won’t have 15 other Camel Trophy vehicles to help you get back on all four wheels.
Excess roof loads negatively affect handling and fuel economy, and everything strapped up there is vulnerable to casual theft. It’s even bad for braking: Weight up high tends to pitch the vehicle forward under braking, unloading the rear tires. If you absolutely need a roof rack, keep the load as light as possible—the weight of the rack itself plus, say, a tent is about maximum for safety’s sake. Some of the current minimalist aluminum racks from Front Runner and ARB don’t add much mass or bulk themselves, as long as they’re not loaded up with 300 pounds worth of jerry cans and Hi-Lifts and solar hot shower systems.
Remember, on a long, remote journey, reliability should be your number one through five priority. Add on all the accessories you like that won’t affect that, but the best approach to most critical driveline components is to stay as close to stock as possible.
Proof in the pudding: We successfully negotiated the Abu Moharek sand sea in three Land cruisers with 1) near-stock-size tires, 2) stock suspension, 3) factory (raised) air intakes, 4) no wheel spacers, and 5) lightly loaded roof racks.
(A version of this article first appeared in Tread magazine.)
LiFePO4 voltage stability
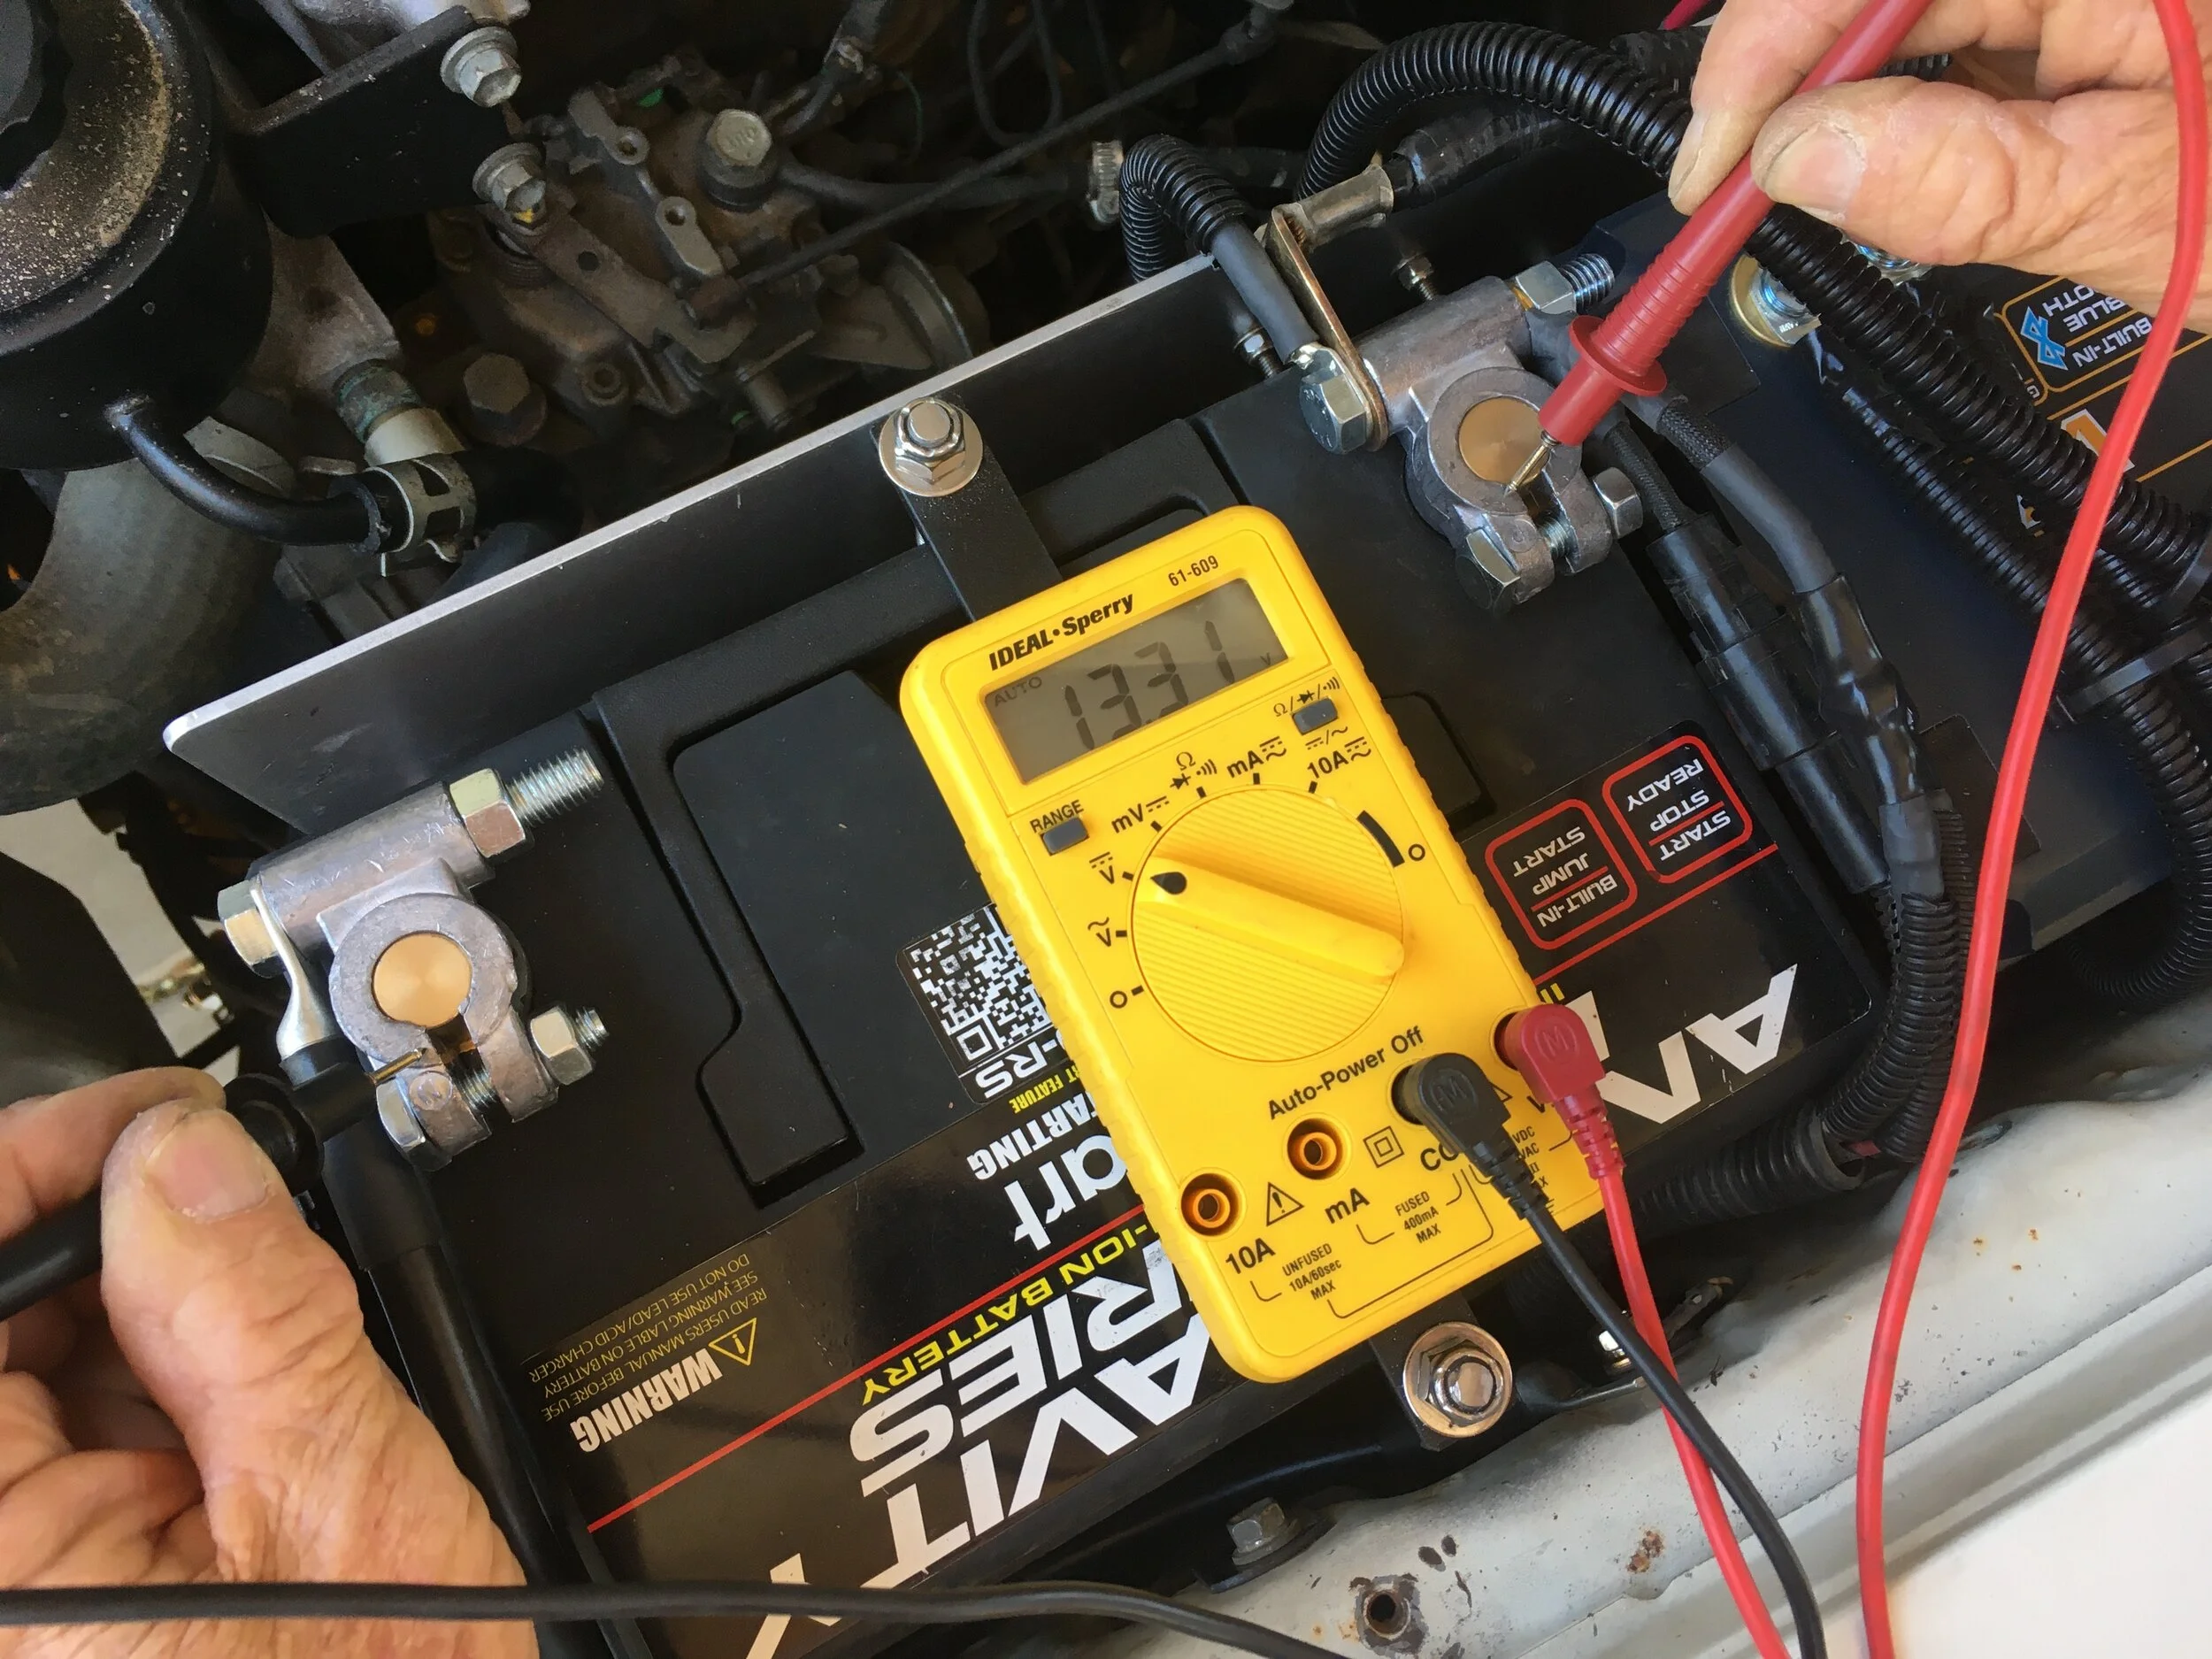
After an extended interval collecting the bits for the LiFePO4 dual-battery system I’m installing in our Troopy, I’m finally buttoning up the project, which will appear first in OutdoorX4. The delay gave me a chance to experience in a small way one of the benefits of LiFePO4 batteries, which is their superior voltage stability when left idle. I received this battery from AntiGravity in early February, and it has sat since then. Upon installing it I checked the voltage before starting the engine, with the result here. That’s impressive.
Hella horns
The only car I’ve ever owned that had decent factory horns was a Porsche 911SC, which was equipped with proper Autobahn blasters to move inattentive slower cars into the right lane right now. All others—and especially all the Japanese makes—needed serious upgrades to perform at a level I consider acceptable. I don’t use my horn very often, but when I do I want it to capture its target’s undivided attention. This has become significantly more important in the age of texting—which studies have show to be more dangerous than drunk driving. Why? Drunk drivers, at least, are generally paying attention because they know they’re drunk and they don’t want to alert the police. Texting by definition requires one to remove all one’s attention from the road.
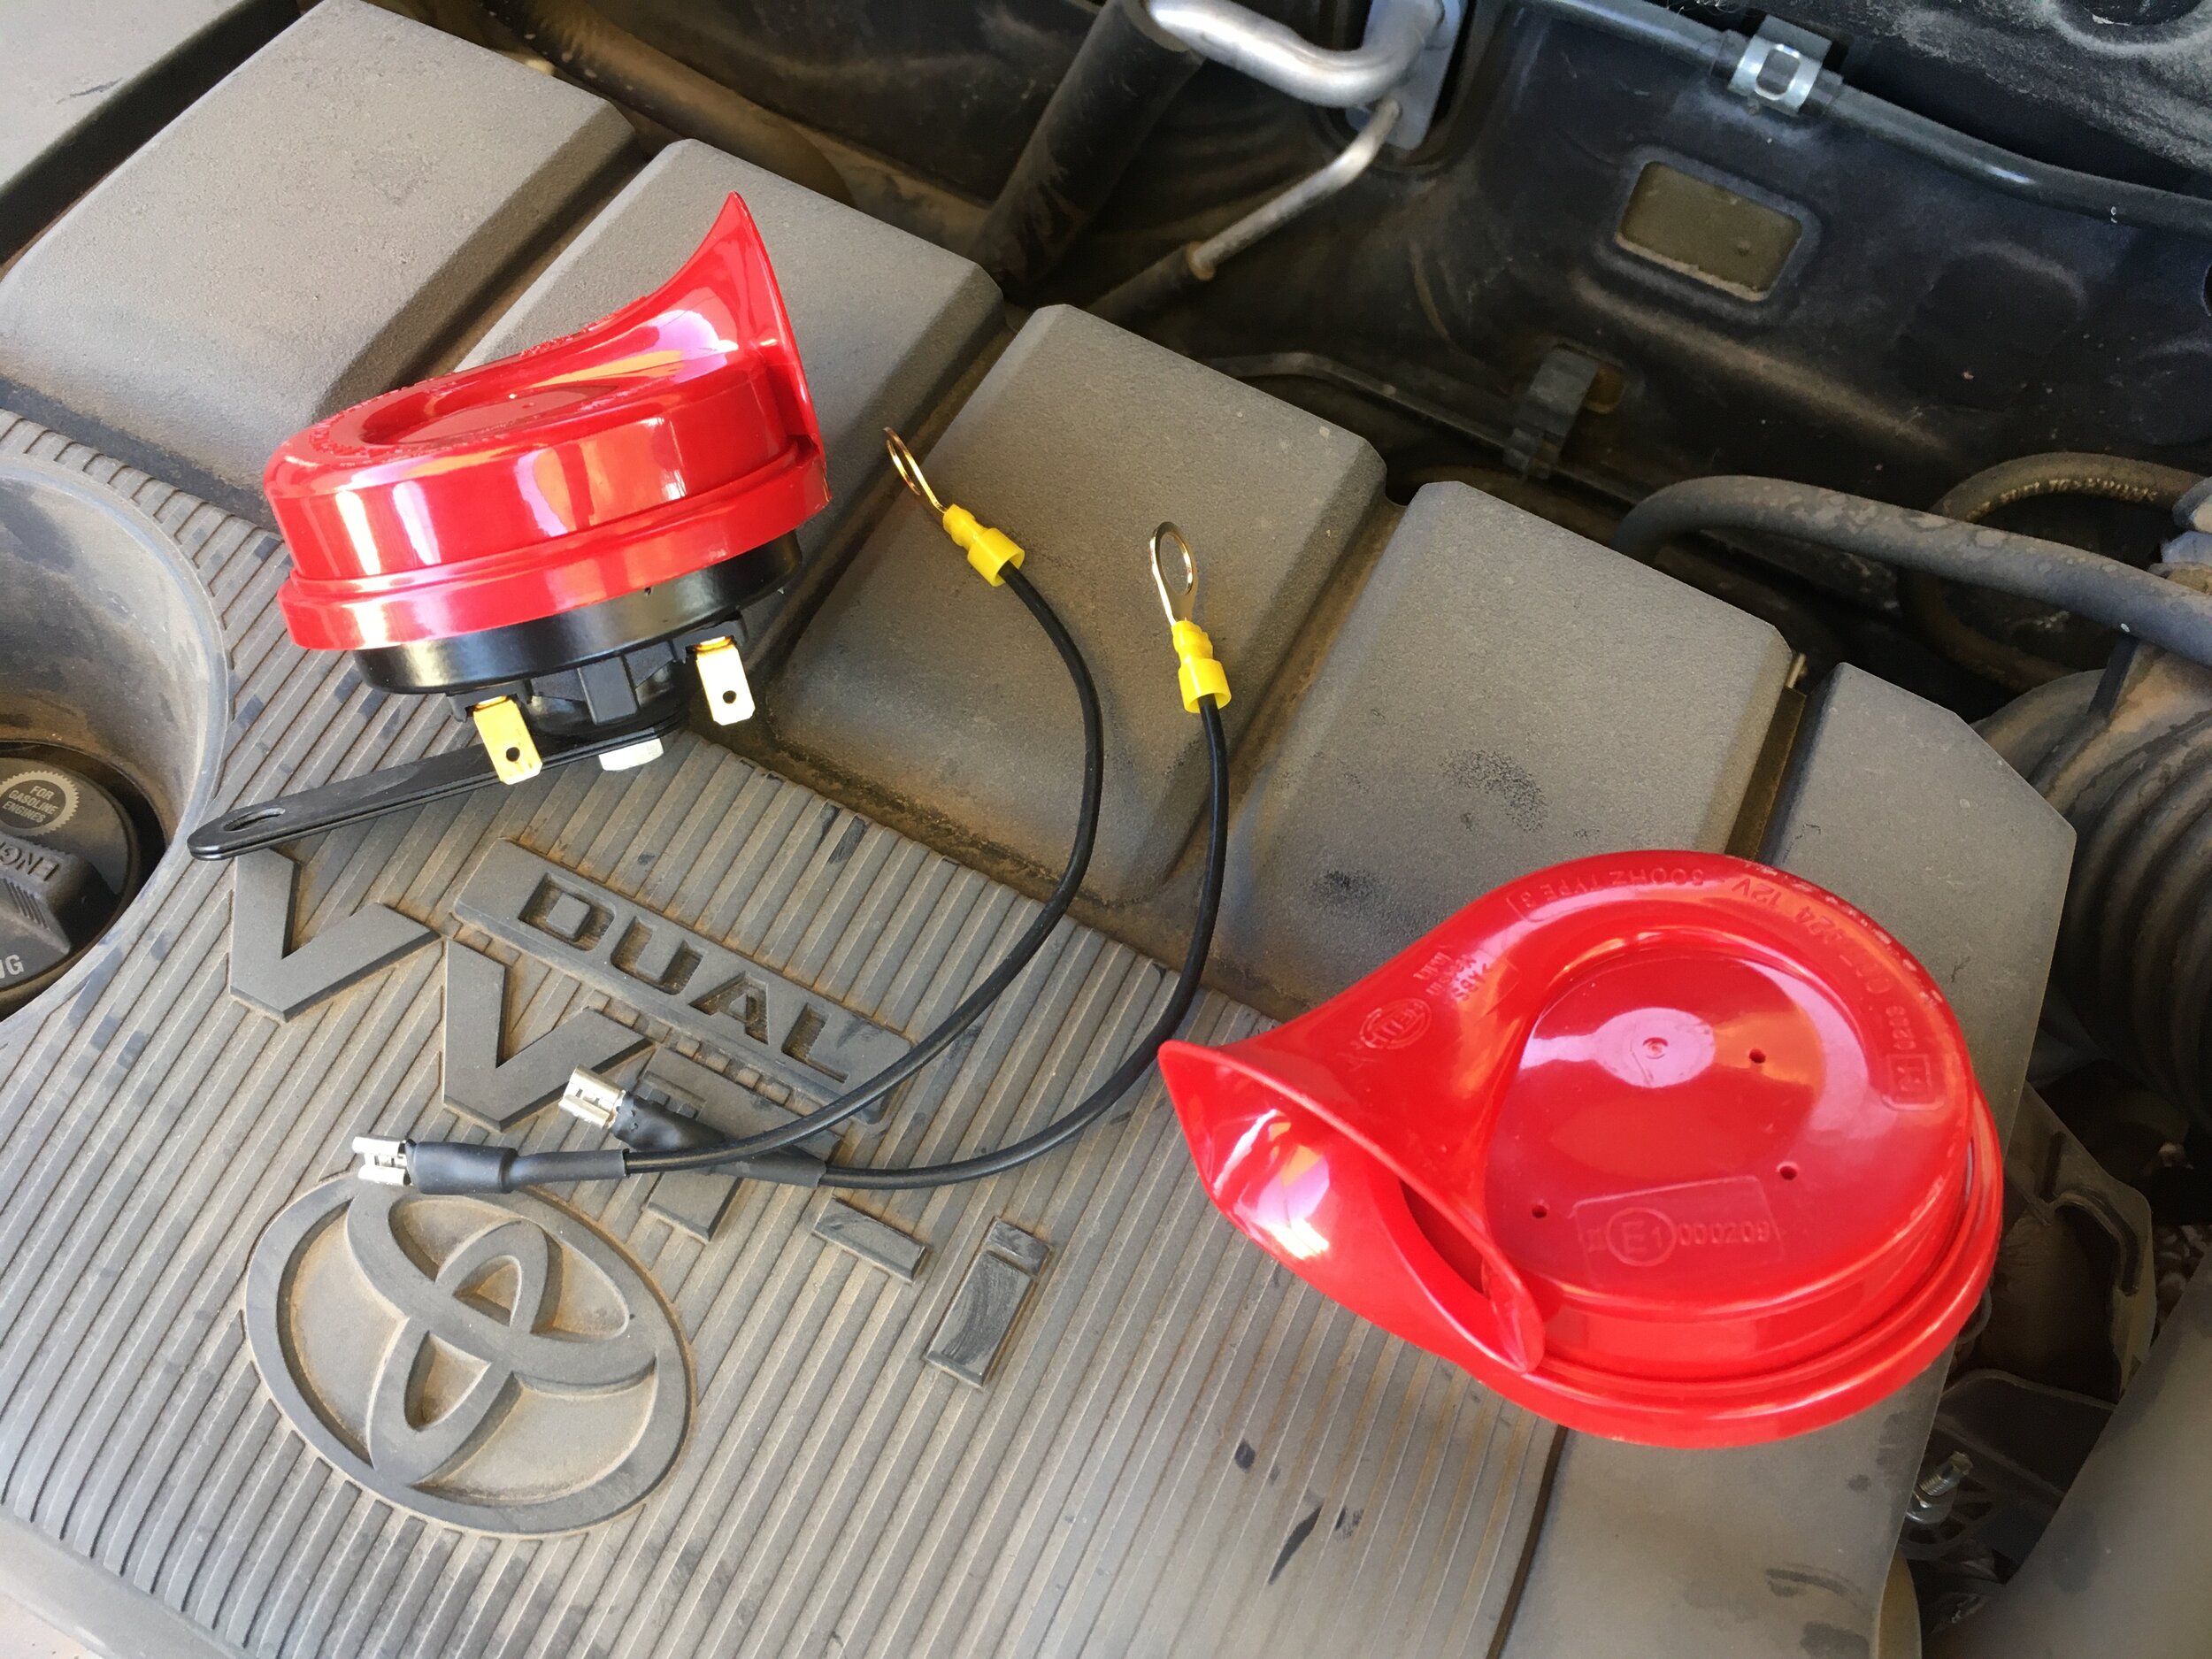
Thus all of our vehicles carry Hella horns of one model or another. They’re affordable, starting around $20 or so, and all have an authoritarian tone. My favorites are the twin or triple-trumpet air-powered models, which have a lovely teeth-on-edge screech, but the lesser models such as the ones here are still excellent.
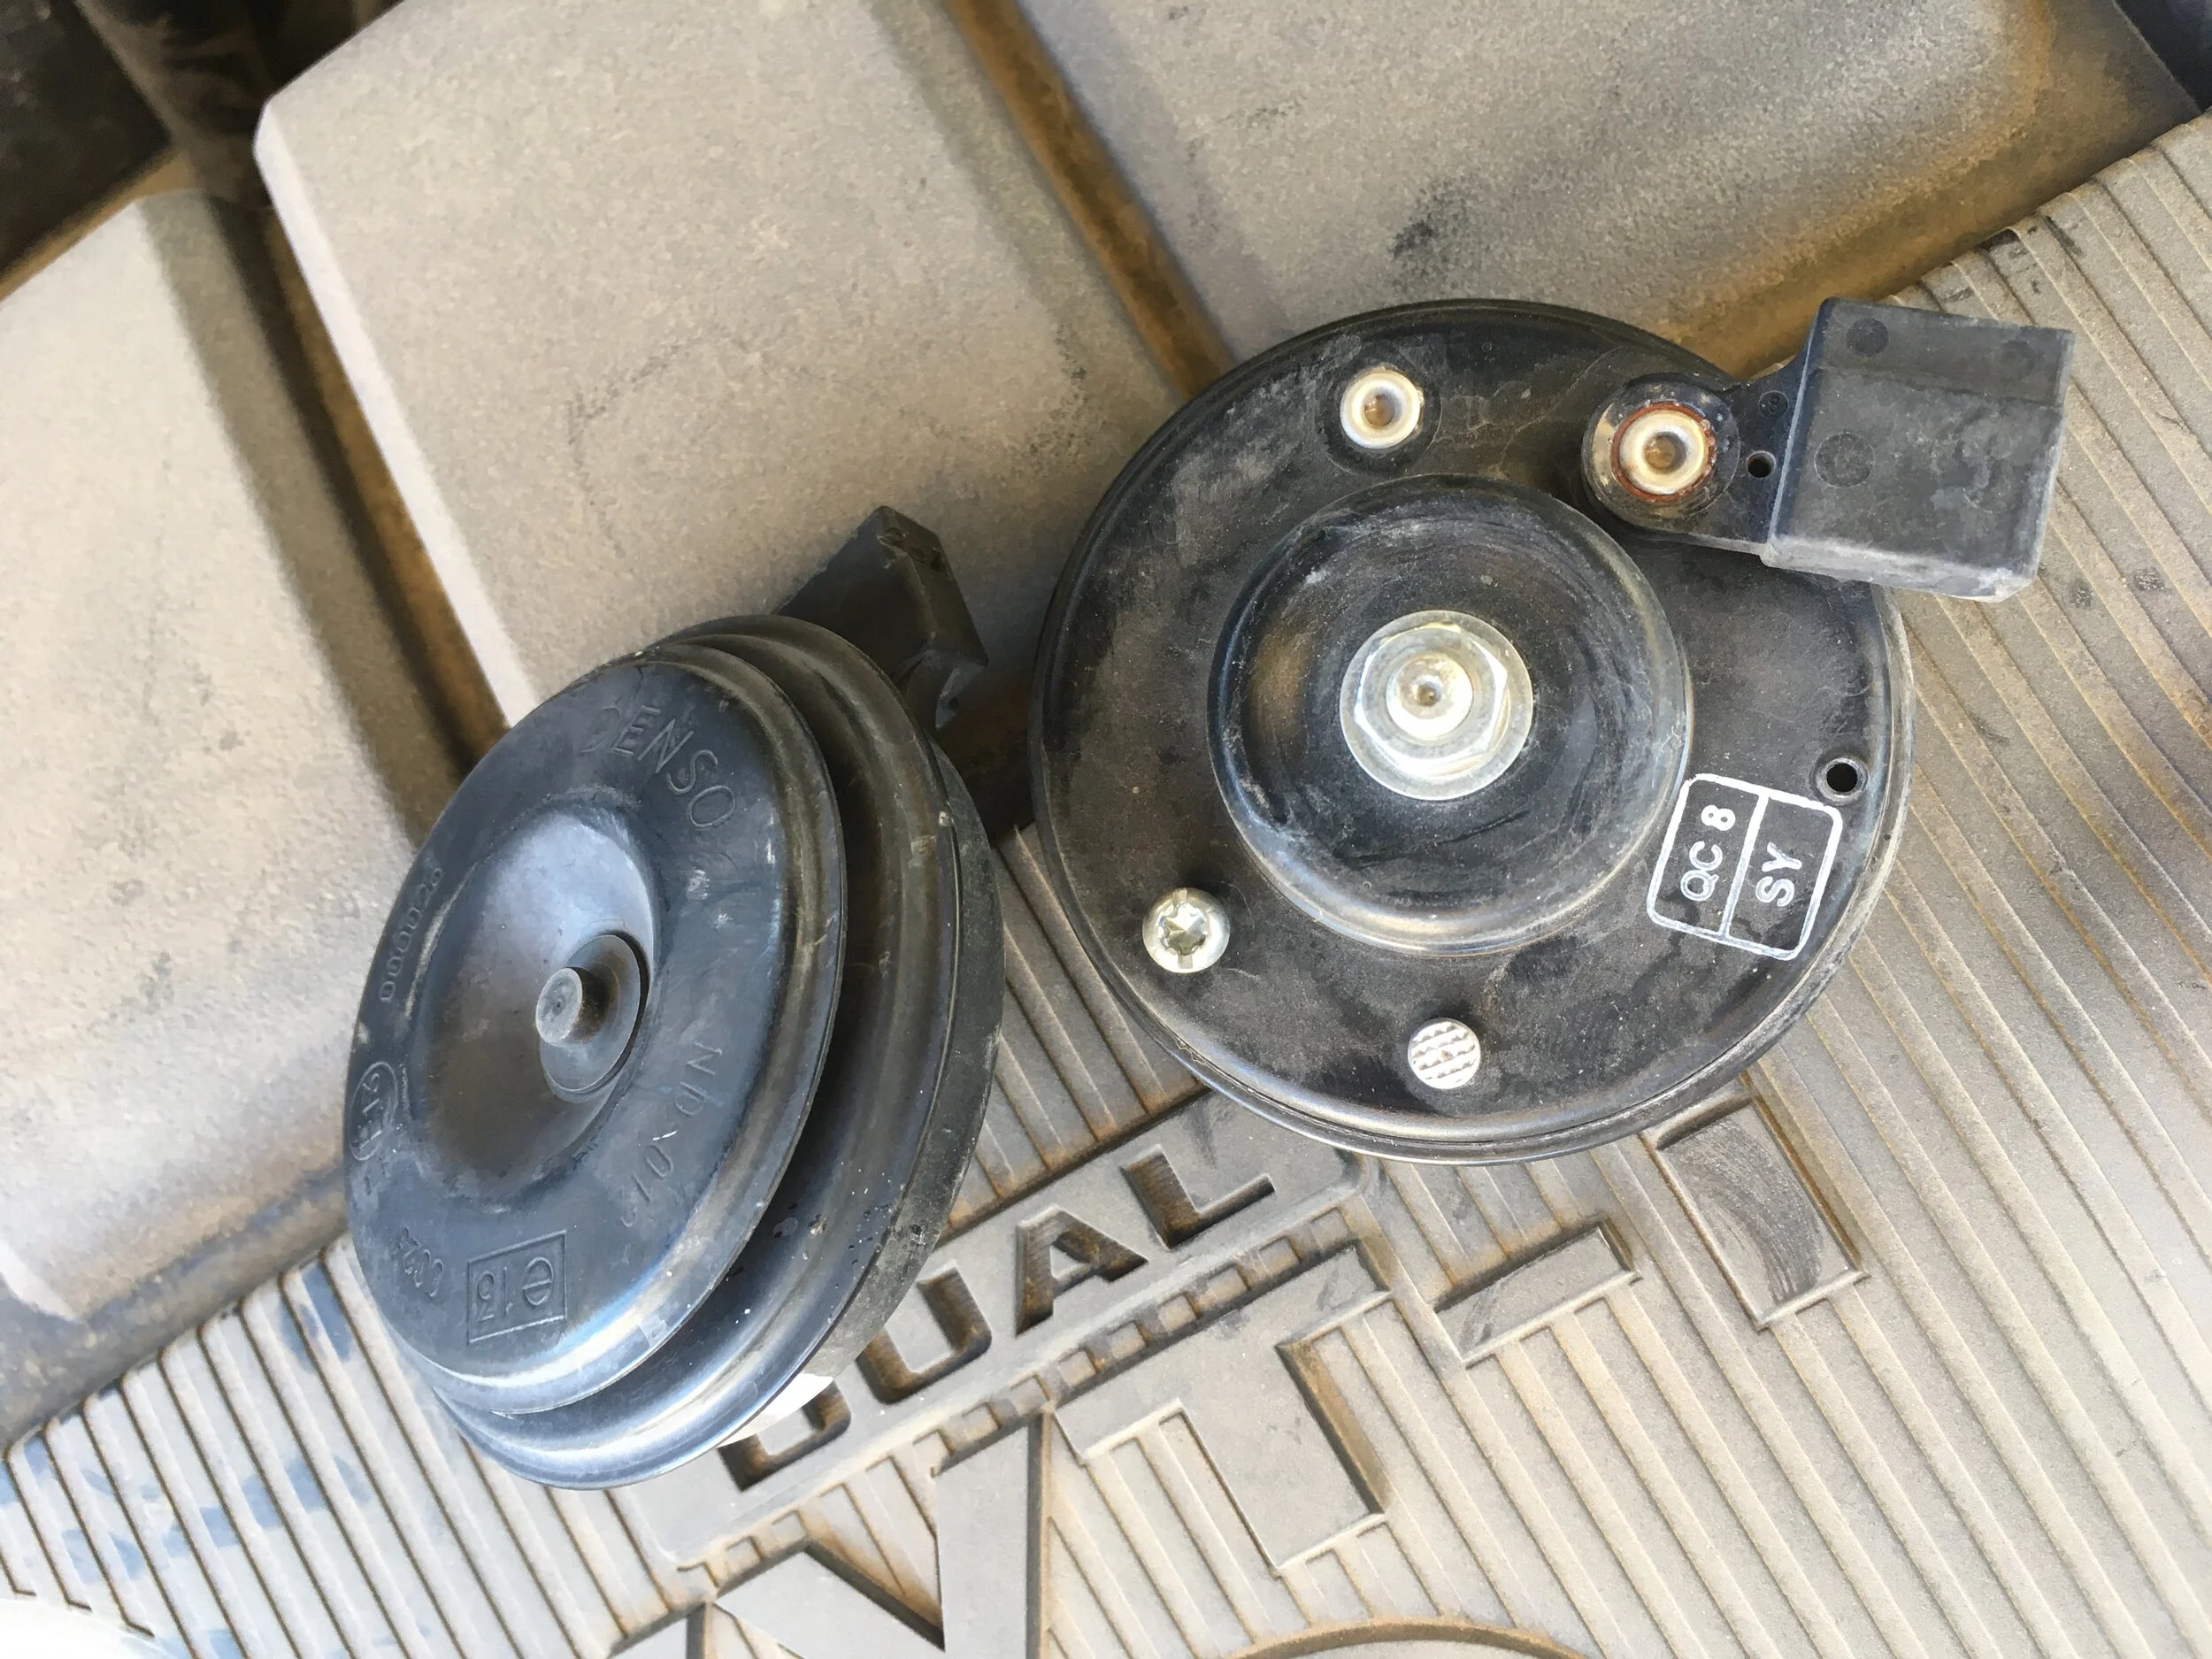
These went on Roseann’s mother’s RAV4, which we have taken over since she gave up driving at 90 and is now allowing us to chauffeur her around town. The stock horn on this vehicle was even worse than most Japanese horns, which tend to sound like sheep bleating. This one sounded like an asthmatic sheep bleating.
Of course, being a modern vehicle, removing the “grille” on the RAV to access the horns actually involved peeling off the entire plastic front end of the thing . . .
. . . which, thanks to a helpful YouTube video describing the location of the hidden fasteners, only took about ten minutes.
After that it was easy. The Hellas require a separate ground wire, which I simply connected to each horn’s mounting bolt. The result is a huge improvement. I’m going to go hunt for texters.
The world's best recovery shovel . . .
If you want to start one of those 47-page debates on an overland forum, just type, “What’s the best recovery shovel?” in the topic line.
On one end you’ll be assured that a $20 folding entrenching tool is all you need. On the other you’ll learn that you absolutely must carry a full-length garden shovel so you can reach under to the middle of the vehicle with it. And you’ll hear everything in between.
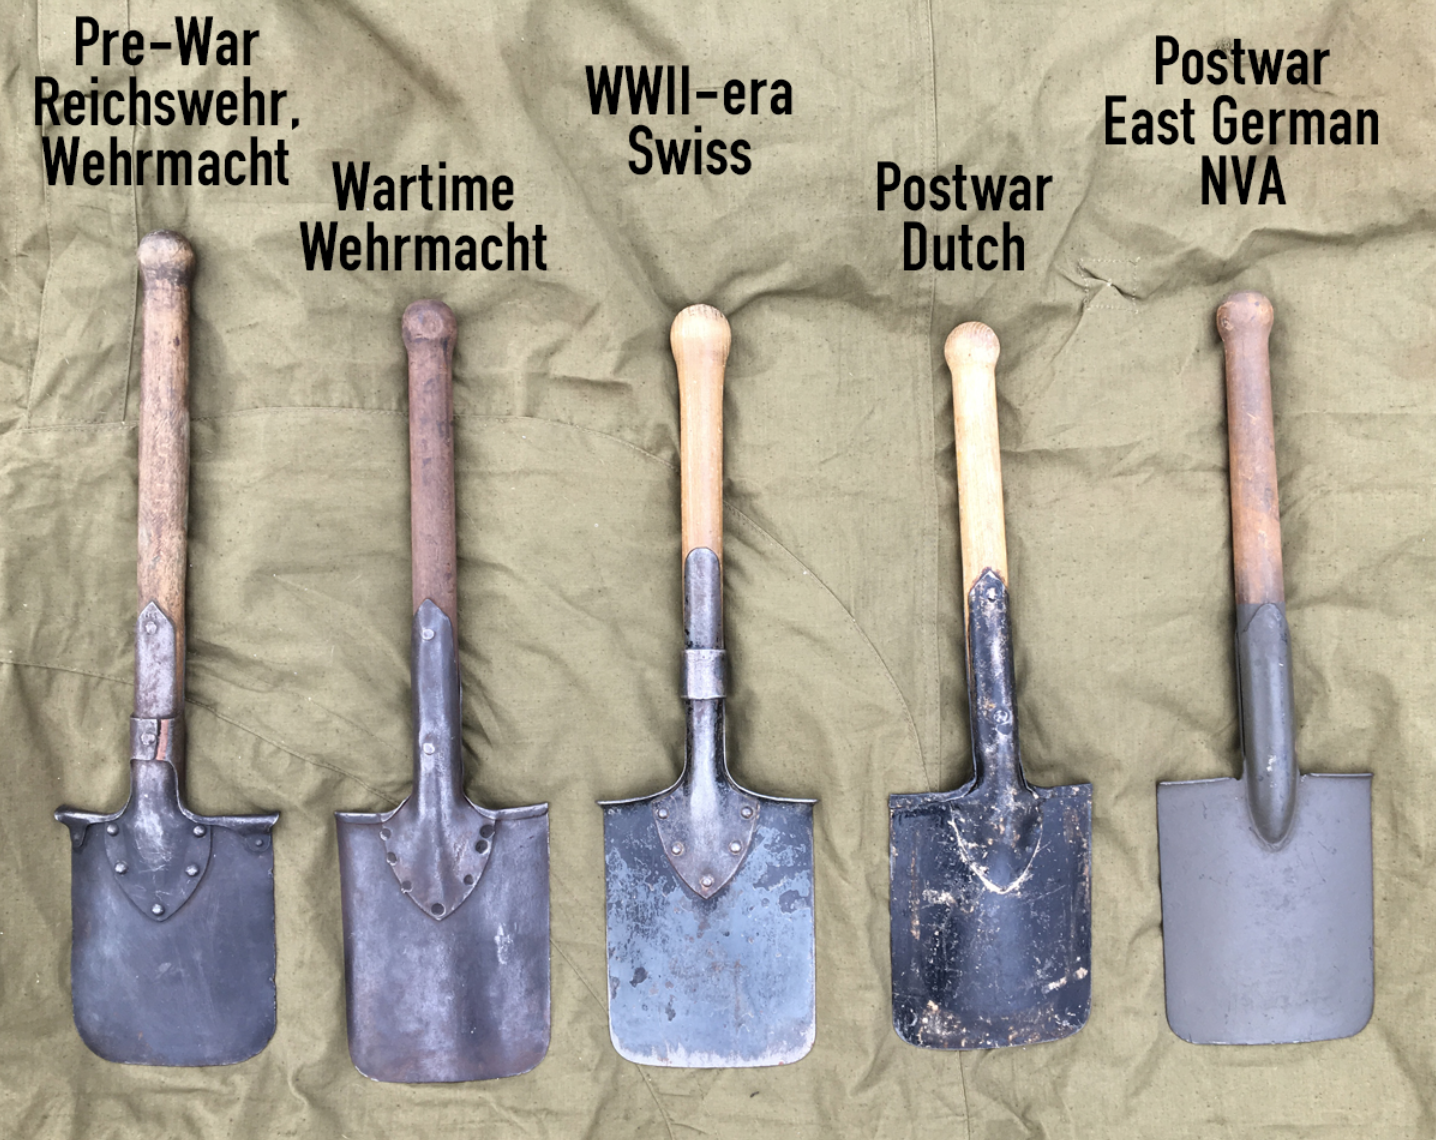
I’ve tried and owned a lot of them, including oddities such as the WWII Wehrmacht entrenching tool, which is awesome for its size, indestructible, and has one sharpened side edge to use as a semi-effective hatchet. Much superior to the folding U.S. entrenching tool in my opinion. There’s an interesting history of them here.
I also have a factory Land Rover T-handled shovel (half of their “Pioneer Kit,” the other being a pick), which is excellent:
Also an all-steel Wolverine (review here), which is also excellent, if heavy and decidedly crude in construction (I know, it’s not a fly rod, but still . . .). Being all-metal, the Wolverine also gets blisteringly hot if left in the sun.
I sampled one of the Krazy Beaver shovels . . .
. . . and managed to bend one of the teeth my first time out, in addition to which I didn’t like the pinned plastic handle. Not many people realize that you should occasionally sharpen your shovel, and doing so on the Krazy Beaver would be a real pain.
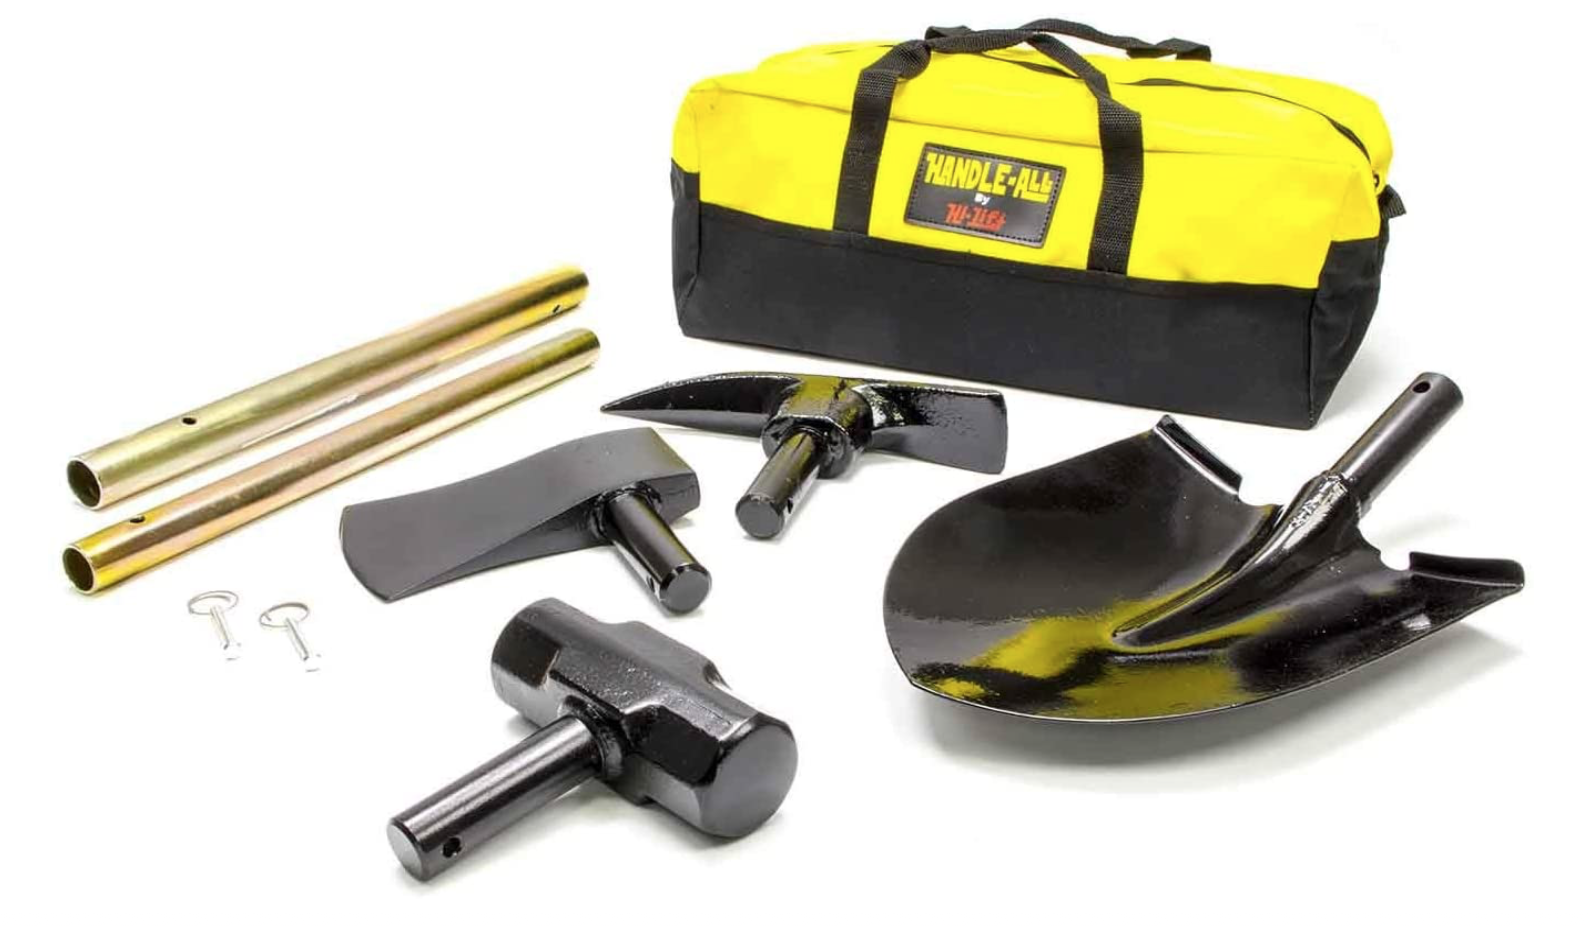
I also tried a Hi-Lift Handle All, which comprises a shovel, sledge hammer, axe, and mattock all in one, and, as typical with such things, performs poorly as any of them. It was indubitably versatile, but utterly awkward and uncomfortable to use.
And before you ask: No, I’ve not tried one of these because I do not live in fear of a Zombie Apocalypse:
I briefly tried an early example of the DMOS Collective folding/collapsing shovel, which felt a bit rickety to me, and full of moving bits begging to be jammed with mud. However, I’ve not tried one of the later models, which I understand are sturdier. They are available with a very nice mounting bracket, and will store easily inside the vehicle, a boon unless you’re into ostentatious exterior displays of all the recovery gear you rarely use. However, I still I can’t imagine that a folding shovel with a collapsible handle held by numerous spring pins could possibly be as strong or last as long as a single-piece model. Also: $239 for the Pro model? Even my broad latitude for equipment elitism blanched at that. The bracket, incidentally, adds another $239 . . .
Through all this experimentationI learned that I strongly prefer a mid-length wood shaft with either a T or D-shaped handle, as on the Land Rover Pioneer unit. Why wood? I live in southern Arizona and most of my foreign travels have been in warm countries. And even when wearing gloves, the steel shaft and handle of the Wolverine were uncomfortably hot if I set down the shovel for a few minutes when the air temperature was above 90ºF and the ground temperature 40º higher. And it was just as uncomfortable in freezing weather. Fiberglass is better, but then the question of aesthetics arises, and what can beat a wood shaft? Its only disadvantage is weathering if left exposed to the elements, but I’m willing to keep the shovel stored in the garage except when I’m on a trip. Judicious re-varnishing would reduce the issue as well. Technically a steel or fiberglass shaft might be stronger, but I can count the broken wood shafts of mid-length shovels I’ve seen on a closed fist.
I like a T or D handle because it’s often necessary to punch the shovel into the substrate (not just when doing a recovery but for many camp tasks), and a T or D handle is way more comfortable for this, and produces more power as well.
Finally, the mid-length shovel is just the best compromise for length. It allows you to reach far under the vehicle yet retain sufficient power, and is of course a lot easier to store than a full-length garden shovel. (Also, I have seen long wood shovel shafts break if abused.)
All this, the world’s longest lede (the correct spelling for the introduction to an article), is leading (leding?) up to my nomination for the world’s best recovery shovel—and I’ll bet it’s one you’ve never encountered in those 47-page threads. Plus it has the coolest name ever for a tool.
It’s called a poacher’s spade. Told you.
Originally—according to tradition—cut down from an old full-size spade, the poacher’s spade was used by poor rural tennants in Britain to dig out rabbits to supplement their meager diets (also to dig out the ferrets and terriers sent after the rabbits). This hunting was illegal since all game was the property of the estate owner—thus, poacher’s spade (or rabbiting spade). It was ideal for the task because the blade was no wider than necessary to unearth a rabbit burrow, and lighter than a full-size shovel if you wound up needing to flee from a shotgun-wielding gamekeeper. The relatively small blade area enhanced rigidity and cut more easily into tough substrate (does England even have tough substrate?).
So, you’re asking, how does this translate to efficacy as a recovery shovel? Why would you want a small blade when you might have a half a cubic yard of sand to get out from under a bogged vehicle in order to be able to insert MaxTrax or other recovery aids?
The answer dawned on me over the course of many, many scenarios digging out vehicles deeply bogged in sand or mud, whether genuinely stuck or put there for training purposes: I realized that a good portion of my digging time and effort was wasted just making room for the shovel itself. When the vehicle was buried to within a few inches of the bodywork, I spent my first couple of minutes at each wheel just scooping out a ramp so I could get the shovel in to where it actually needed to be to dig out the tire without risking gouging the bodywork with the edge of the blade. I theorized that a smaller blade—perhaps no larger than that on an entrenching tool but with a longer, solid handle—might actually be faster than a larger shovel that frequently got in its own way.
I tested the theory with an old trenching (as opposed to entrenching) spade I had, with a D-handled wood shaft and a narrow but square-cornered blade made for cutting nice neat trenches. The blade shape wasn’t ideal but the narrow width immediately showed its superiority in extracting deeply sunk vehicles. There was noticeably less prep work to begin actually uncovering the tires. To my surprise, I found that it wasn’t even at a disadvantage in removing sand, since I typically hold the shovel sideways like a canoe paddle and sweep out sand from the tires. The long, narrow blade scooped out just as much sand as a fat blade.
Experiment complete and successful, I had no doubt what kind of shovel I wanted to get.
I knew about poacher’s spades thanks to a long fascination with the 18th, 19th, and 20th century practitioners of the time-honored pursuit, who elevated the skill of winkling out food from under the noses of estate owners and gamekeepers to a high art. In addition to spades, poachers employed guns, traps, snares, nets, ferrets, terriers—they even developed a particular breed of dog called a lurcher, a cross between a coursing dog and a herding breed such as a border collie. The result was both intelligent and fast—the perfect companion for a poacher (the name comes from the Romany word lur, meaning thief or bandit). I have several books written by legendary poachers such as Brian Plummer, Ian Niall, and Jim Connell, and the tales they tell of close calls are wild indeed.
I also knew where to go to get a proper poacher’s spade: Bulldog Tools in Wigan, Greater Manchester, founded in 1780 and still forging tools at the same location. Bulldog made entrenching tools for the British military in WWI and does so today. Bulldog tools are available from several outlets in the U.S., and are sometimes sold under the name Clarington Forge here. I ordered their Premier 28” Rabbiting Spade, which is equipped with an ash shaft ending in a beautiful split and steam-bent D (or Y) handle. The blade and handle socket are forged in one piece, and the socket extends nearly halfway up the shaft. (Strangely the steel part doesn’t seem to get as hot as the Wolverine’s hollow steel; I suspect the wood core might bleed off some heat but I don’t know.)
And . . . it’s perfect. The blade is thick and rigid but not heavy thanks to its size. The length is just right. And despite being forged in England in a 240-year-old factory, it was only $66.
Let me be clear: A $20 folding Chinese entrenching tool will dig you out if the alternative is staying put. For that matter, your bare hands will dig you out if the alternative is staying put. But for me, having the most suitable tools for a particular job enhances my enjoyment while traveling. And if something has gone wrong—even something as inconsequential as a bogging—those suitable tools take all the stress and a lot of the work out of the situation.
There’s another reason to carry a recovery shovel made in Britain: It will lend you a proper British attitude toward getting bogged, which usually involves saying, cheerfully, “Bugger,” then relaxing and having a brew-up before tackling the problem. And while you’re doing that you usually figure out the easiest and safest way to solve the issue, in contrast to the normal American Oh-shit-we’re-stuck-we-need-to-get-out-now! panic attack.
Cheers.
Long-wheelbase Jimny announced
What a shame we can’t get these in the U.S.! More on the Indian Autos Blog, here.
Buyer beware: Fake NATO fuel cans
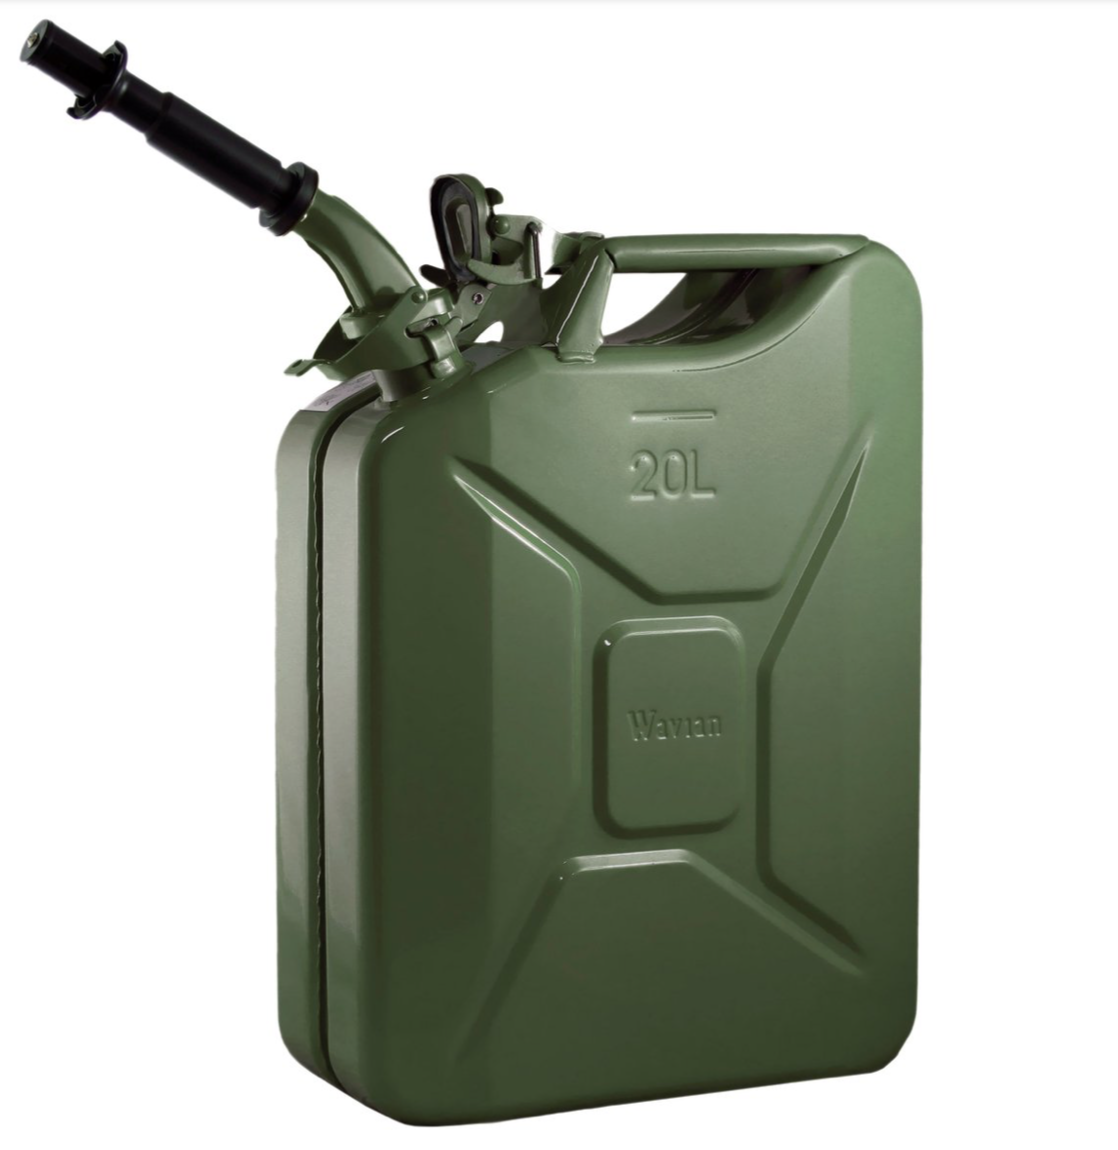
A properly constructed NATO fuel can. Note the full welds on the handle, the fully recessed perimeter weld, and the reinforced spout.
I can smugly claim to have been a very early adopter of the NATO jerry can—at least in terms of U.S. overland travelers—after becoming disgusted with the poor design of the U.S. Blitz cans with which I originally equipped my FJ40’s rear rack. The Blitz cans leaked at the screw-in lid, they seeped at the crimped seams, and they took forever to decant into the main tank via the poorly ventilated flexible spout. I loathed the things but it was all we had. Or so I thought.
Some time in the mid-1980s, after noticing NATO-style cans in photos in various articles (including, IIRC, one by Tom Sheppard), I did some research, and began to realize how superior the original Wehrmacht design was. The Brits and, later, NATO were smart enough to copy exactly the design of the German cans they liberated during the North Africa campaign. The perimeter seam was welded, not crimped; the lid was a small-diameter hinged assembly that cammed tightly closed; a generous breather and properly designed spout made decanting a fast and leak-free procedure. The interior was lined with a rust-proof coating.
For misguided reasons of economy the American military, with their own Wehrmacht can to copy, decided to cut corners, and the result was the hugely inferior Blitz can. In fact the only effective feature we adopted was the three-handle design, made so one soldier could easily carry four empty cans, or two full ones, and so a line of men could easily pass full cans along without fumbling.
I ordered two surplus NATO cans from overseas at absurd cost—and never looked back. They didn’t leak, even when stored on their backs or sides, even in 110º Arizona sun. Decanting was easy and fast. The improvement over Blitz cans was night and day.
Wide breather orifice aids fast decanting.
Surplus NATO cans, and current production models from NATO suppliers, became easily available after the turn of the millenium. Wavian now imports new NATO cans directly from the Latvian factory where they have been made since WWII. (Valpro cans are identical.) Other high-quality NATO cans are available from Gelg (Polish manufacture), although they are made of slightly thinner steel—.8mm versus the .9mm of Wavian/Valpro.
My later testing against the newer U.S. military (plastic) Scepter cans only reinforced the NATO can’s supremacy. Every other Scepter can I tried seeped at the wide lid. You could buy any of a number of special spanners designed to crank the lid as tight as possible, and get it open again—a bandaid “solution” to a poor design. The plastic sides bulged in heat and jammed in their holders. Besides which, being plastic, all Scepter cans are doomed to become plastic trash at some point. Thus, the NATO jerry can remains my fuel can of choice.
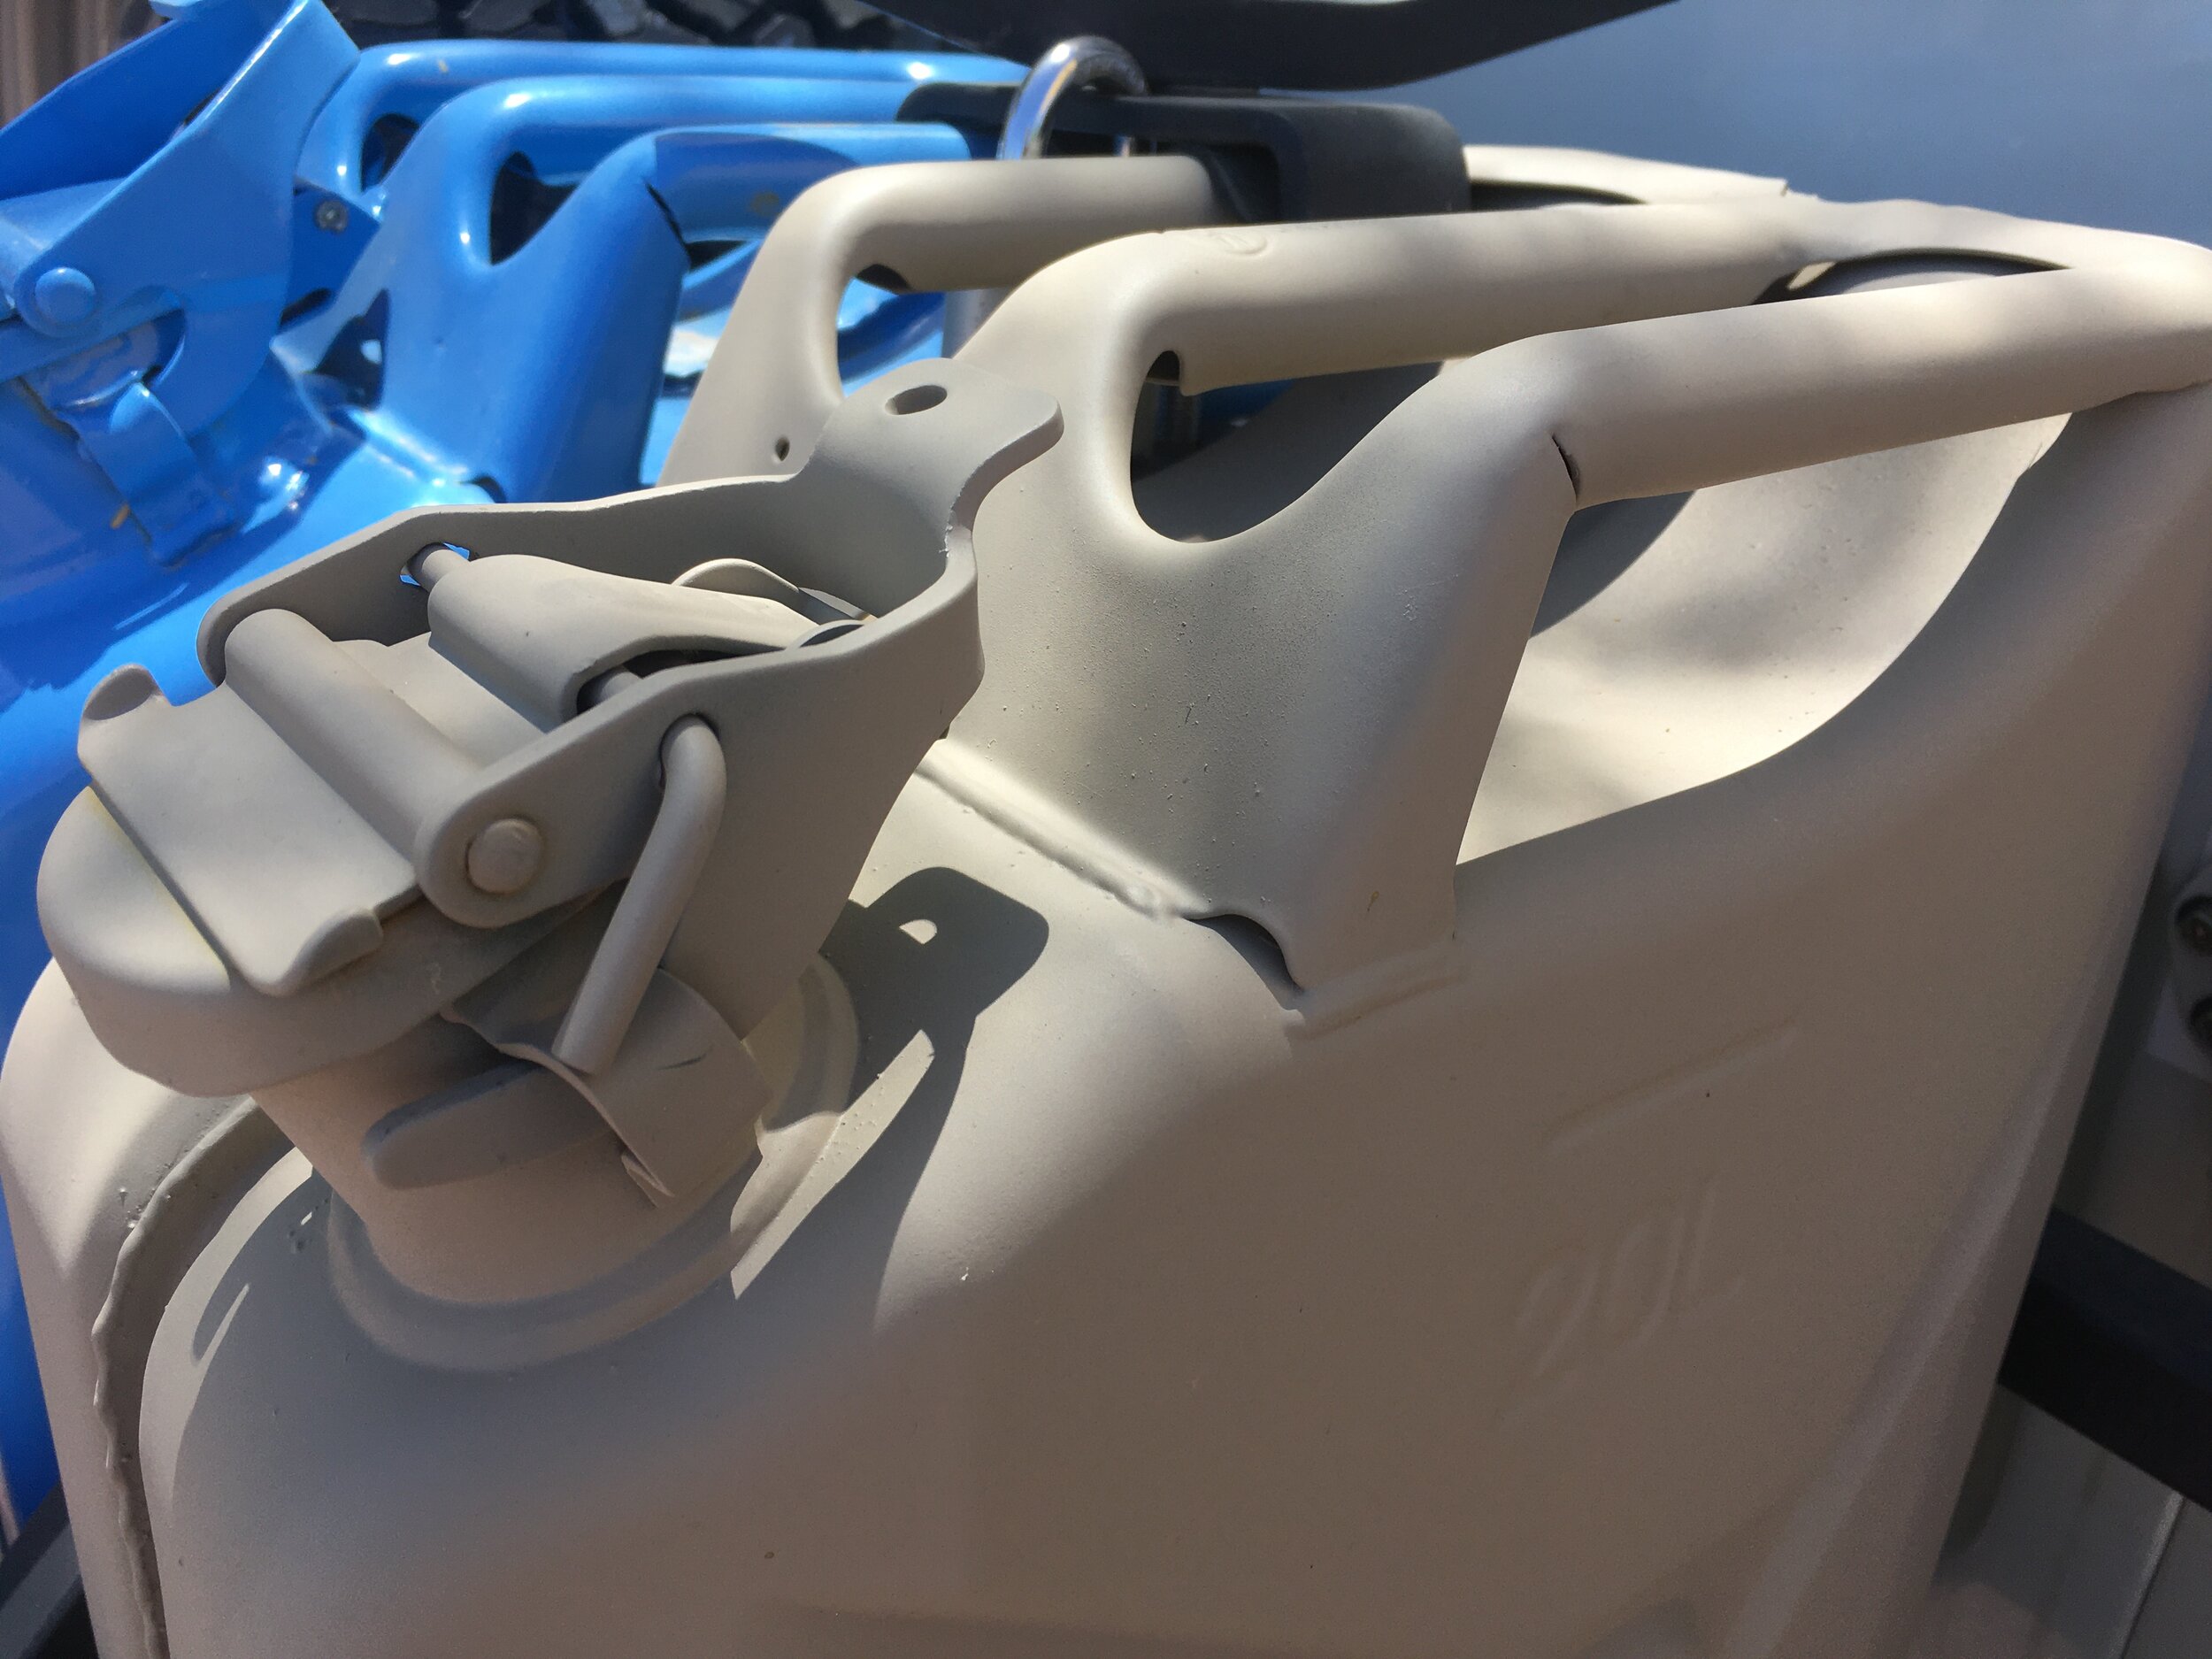
However, recently I’ve been noticing Chinese copies of the NATO can that are shockingly inferior to the European-made versions. You can find them on Amazon under the brand name Teekland, for one, and at Walmart (and, I presume, other discount stores). At a glance they look to be identical to their more expensive counterparts, but even a cursory inspection shows this to be a sham. The steel is thinner than the Gelg cans—.7mm. The interior is uncoated and rusts instantly. The handle is attached with spot welds rather than strip welds. The breather is a tiny tube rather than the generous orifice of the Wavian/Valpro and Gelg cans. Also, critically, the welded perimeter seam is not recessed as it is on authentic NATO cans; thus you cannot effectively store these cans on their backs. Absolutely nothing about these ripoffs except the styling is the same as the European-made containers.
Chinese copy. Note the tack welds on the handle, the raised perimeter weld, the flimsy and poorly welded spout, and the undersized breather tube inside.
But there’s worse. The online Walmart ad claims a list prince of $169.99, selling for “only” $64.99. Yet even the premium Wavian can lists for $80; the Gelg for $50. Thus Walmart will sell you an inferior fuel can for more money. (The Amazon can is $50; identical in price to the distinctly superior Gelg.)
So, caveat emptor—look for either genuine NATO surplus jerry cans, or newly manufactured ones from either Wavian or Gelg.
Hint: When using “Search,” if nothing comes up, reload the page, this usually works. Also, our “Comment” button is on strike thanks to Squarespace, which is proving to be difficult to use! Please email me with comments!
Overland Tech & Travel brings you in-depth overland equipment tests, reviews, news, travel tips, & stories from the best overlanding experts on the planet. Follow or subscribe (below) to keep up to date.
Have a question for Jonathan? Send him an email [click here].
SUBSCRIBE
CLICK HERE to subscribe to Jonathan’s email list; we send once or twice a month, usually Sunday morning for your weekend reading pleasure.
Overland Tech and Travel is curated by Jonathan Hanson, co-founder and former co-owner of the Overland Expo. Jonathan segued from a misspent youth almost directly into a misspent adulthood, cleverly sidestepping any chance of a normal career track or a secure retirement by becoming a freelance writer, working for Outside, National Geographic Adventure, and nearly two dozen other publications. He co-founded Overland Journal in 2007 and was its executive editor until 2011, when he left and sold his shares in the company. His travels encompass explorations on land and sea on six continents, by foot, bicycle, sea kayak, motorcycle, and four-wheel-drive vehicle. He has published a dozen books, several with his wife, Roseann Hanson, gaining several obscure non-cash awards along the way, and is the co-author of the fourth edition of Tom Sheppard's overlanding bible, the Vehicle-dependent Expedition Guide.

