Overland Tech and Travel
Advice from the world's
most experienced overlanders
tests, reviews, opinion, and more
Accu-Gage customer service
For many years my go-to tire gauge has been the Accu-Gage from G.H. Meiser & Co. (even though, yes, the “Gage” bit makes the editor in me wince). They come in different ranges and configurations, and I’ve always found them to be absolutely consistent and reliable. I must have at least five or six; I’m not even sure.
A few months back I managed to crack the plastic face of the one on the left here. It sat in my desk for weeks before I finally emailed the company to ask if I could either purchase a new face, or send it in for repair. I wasn’t expecting much given such things these days, but I got back an immediate reply saying simply, “What’s your address?”
A week lated a new face showed up. No charge. Nice.
G.H. Meiser is here. Needless to say, highly recommended.
Hack your tire plug kit for more versatility
There are two tire plug kits I recommend above all others I’ve tried: The Extreme Outback Ultimate Puncture Repair Kit, and ARB’s Speedy Seal kit.
Each has its advantages. The ARB kit comes in a snap-in, well-organized blow-molded case, so everything you need is easy to access and nothing you don’t need is in the way. The reamer and plug insertion tool are stoutly made with solid aluminum handles—critical for working on tough all-terrain tires. (Never, ever buy plastic-handled plug tools.) Included are pliers for pulling out whatever has holed your tire, a razor for trimming the inserted plug, lube to ease insertion (no wise cracks please!), a tire gauge, and a kit containing spare valves and valve cores, valve caps, and a valve tool. Finally, 40 plugs are included, which should suffice for a very long time—except see below.
The Extreme Outback Ultimate Puncture Repair Kit is the one you want if you are heading out to drive around the world, or you are a professional leading self-drive tours, or if you just want to guarantee that you can repair any tire issue short of a carcass-shredding blowout. In addition to everything in the ARB kit (except the pliers), the EO kit includes an exhaustive selection of patches and rubber cement to repair seriously large punctures or even sidewall tears from the inside out, once you have broken the bead and removed one side of the tire from the rim. There are even thread and needles to sew up sidewall tears before patching them, and such thoughtful additions as a piece of chalk to mark where your tire and rim meet, so when you remount the tire your balance will not be lost, and packets of hand wipes. The one downside not shared by the ARB kit is that all this stuff is crammed into a heavy-duty zippered nylon case. It’s amazingly compact, but you need to pull just about everything out to accomplish even the simplest plug job.
Also included are plenty of plugs—but, as with the ARB, there is a problem.
I’ve always maintained that the plugs in the ARB kit, which are about 8mm in diameter, are far too large for the average nail or screw hole. They are extremely difficult to insert in such a hole in any tire with a tough carcass, especially a stout E-rated AT, even after a vigorous reaming.
Up until recently, the Extreme Outback kit included two sizes of plugs, about 6mm and 4mm. The 4mm plugs were perfect for most small holes—in fact, when teaching tire repair and actually drilling 3/16th-inch holes in tires for students to practice on, the thin plugs were all I used. Only when demonstrating more challenging situations did I need the larger sizes.
Now, however, the EO kit only comes with 6mm plugs, which, while easier to insert than the ARB’s, are still problematic for many repairs. Case in point: At the last Expo I was having students plug tires after I drilled holes in them. The first volunteer was a woman, and she simply could not get a plug from the EO kit inserted, even with plenty of lube and while putting virtually all her body weight on it. Finally Mark Kellgren, who was teaching with me, took over—and had nearly as hard a time getting the thing in there. Finally I realized I had unwittingly run out of the 4mm plugs and had substituted one of the thicker ones, which was clearly too large for such a hole.
Left to right: ARB, Extreme Outback thick and thin, and Safety Seal Slim tire plugs. (The Safety Seal plugs are slightly flattened and look thicker than they are.)
I called George Carousos, who owns Extreme Outback, and he told me the kits were no longer available with the thinner plugs. So I decided it was time to hack all our ARB and EO kits. I looked up Safety Seal, a company that has been making tire repair products for half a century, and ordered a box of their slim plugs. At a listed 3.2mm these should be smaller than the old thin EO plugs, but if anything they look a tiny bit thicker. Nevertheless they should suffice for those smaller holes. So I’ve replaced half the thicker plugs in all our kits with thinner versions, which should make each kit far more versatile.
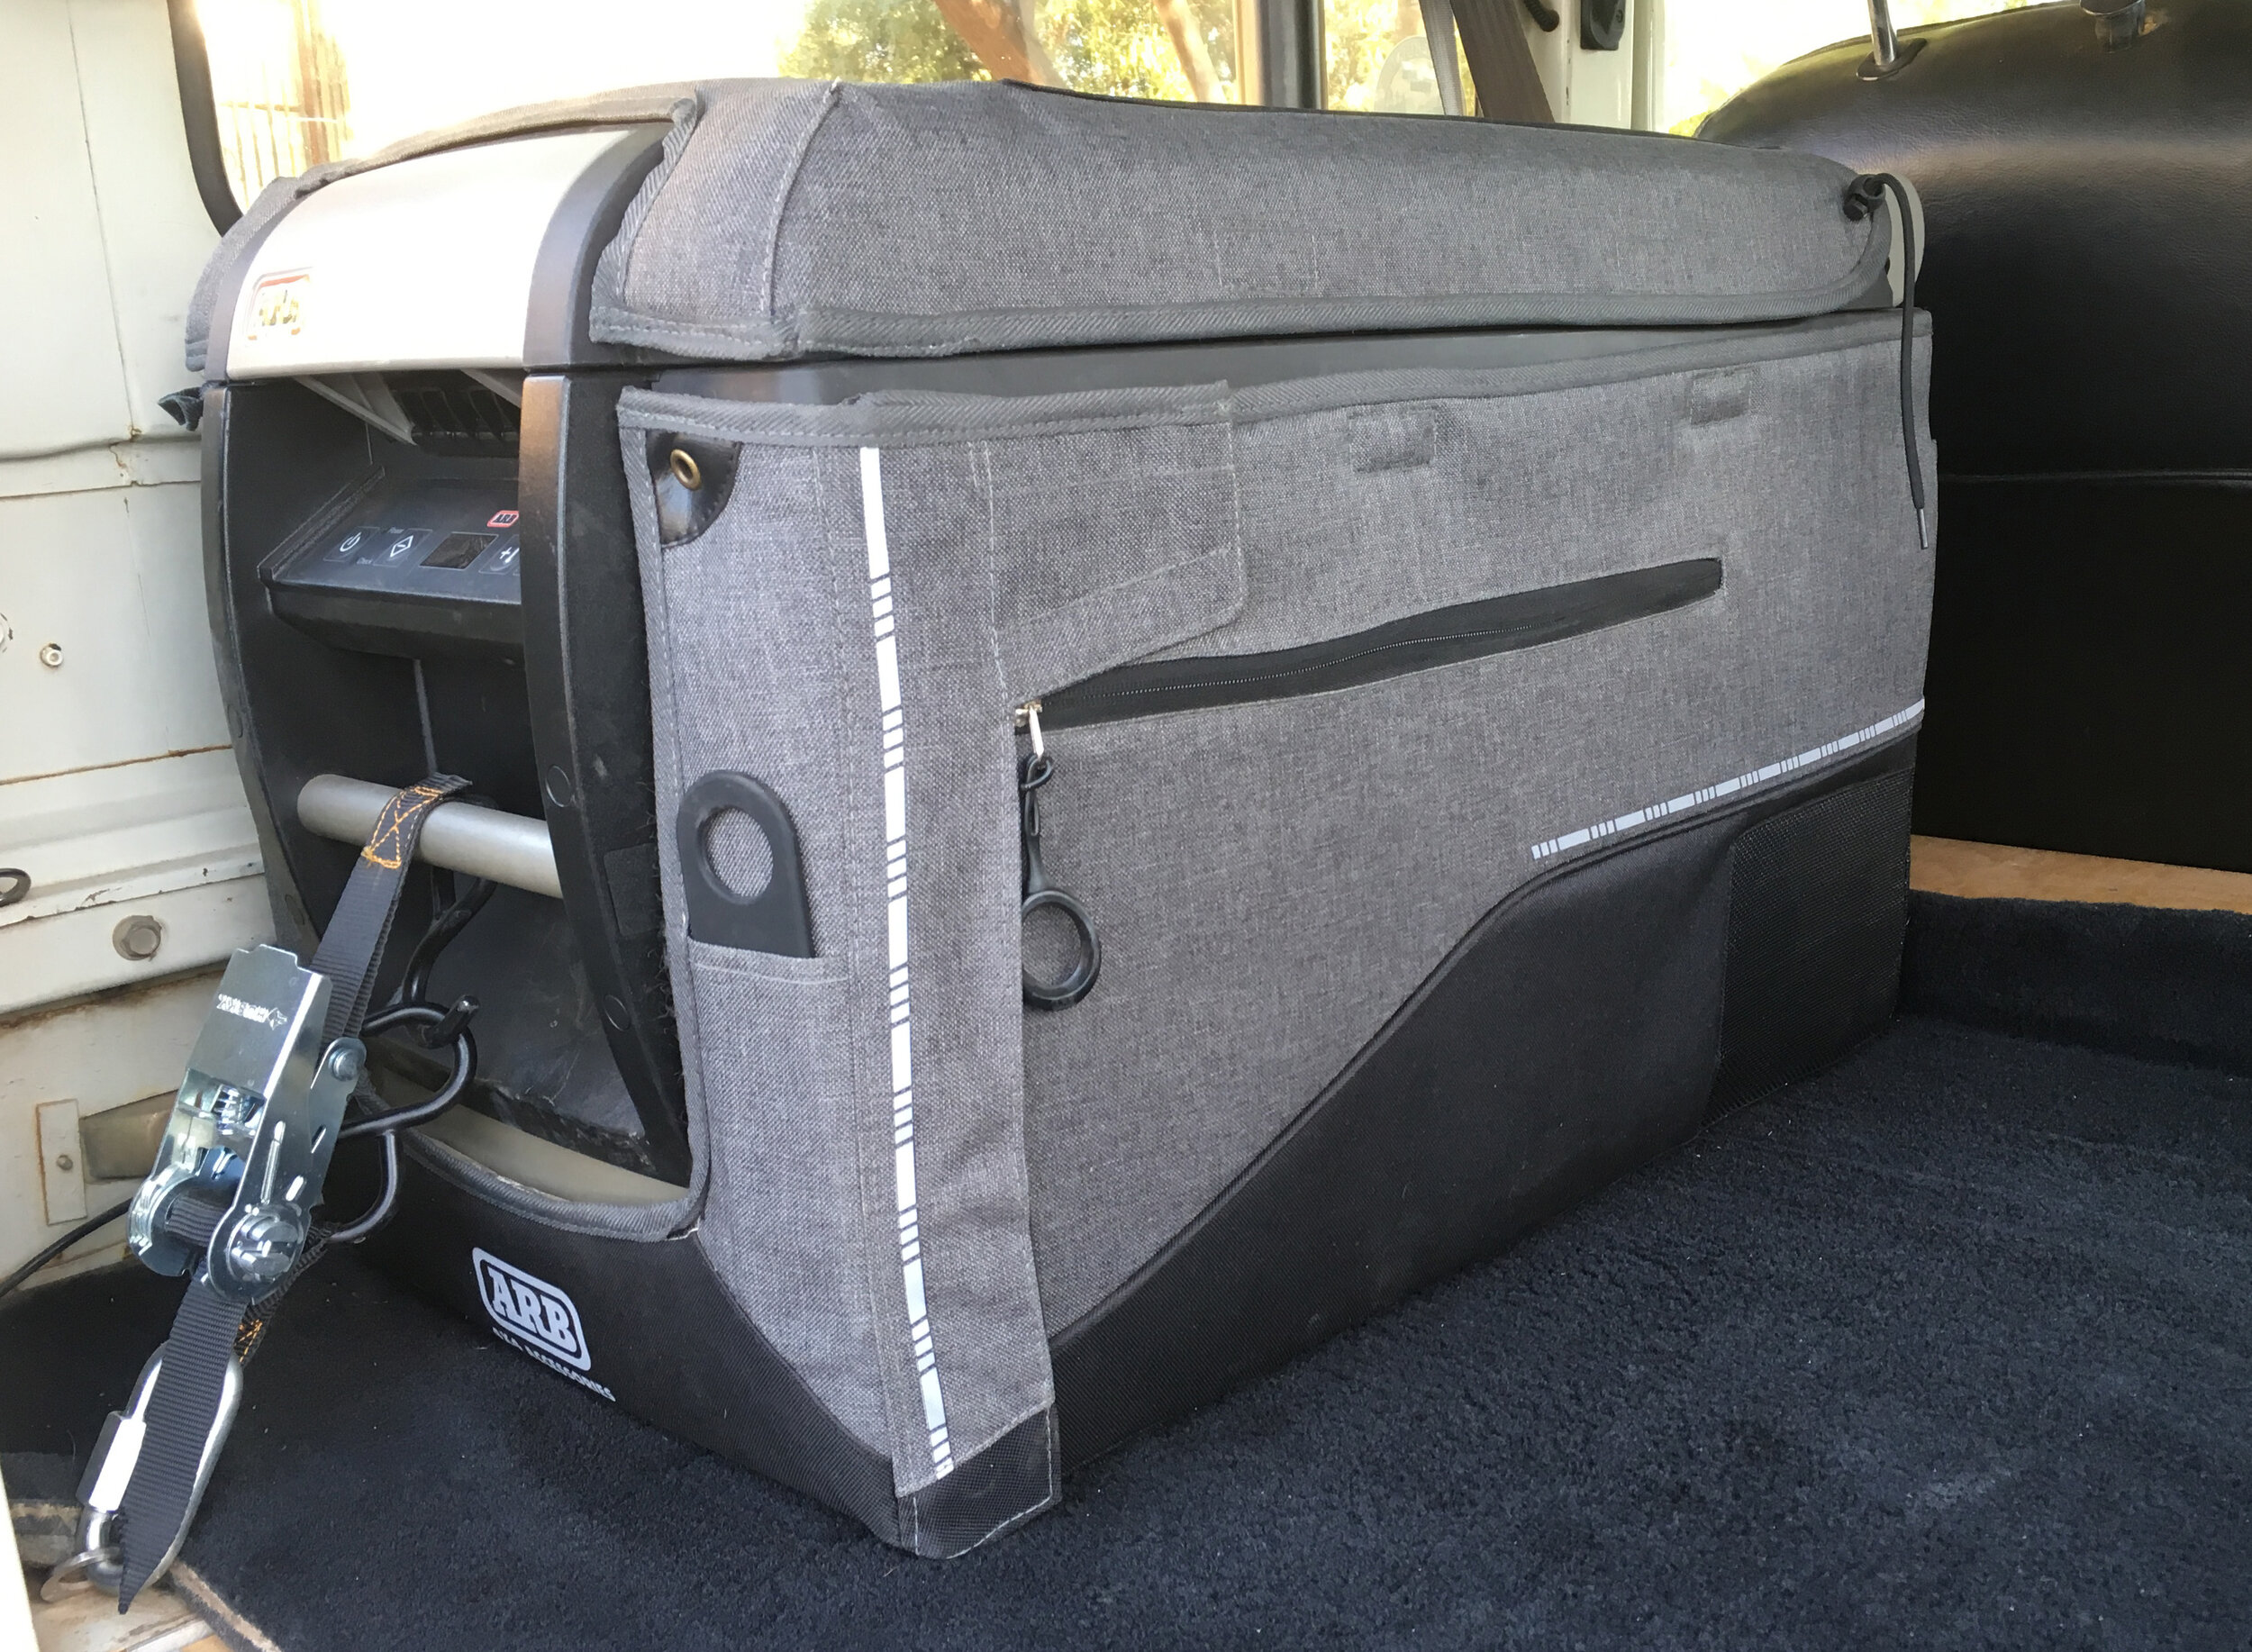
ARB's revised Series II fridge
The 37-quart size is big enough for a couple and a week’s worth of food, and fits in smaller vehicles.
As so often happens with any consumer product, 12V fridges—the item many overland travelers put on their shopping list before any other accessory—have blossomed in sophistication, features, size, and of course price. It’s now easy to spend close to $2,000 on a dual-compartment, dual-lid, dual-control, 110-liter fridge/freezer.
But what if you just want a reliable, moderately sized fridge from a trusted brand, with easy-to-use controls, a digital temperature readout, and perhaps remote monitoring capability, but none of the polished stainless-steel bling?
ARB, after introducing their own top-end unit, the superb, weatherproof Elements (see here), has slightly revised their tried-and-true basic fridge, now called the Classic Series II. I have one of the first ARB fridges made (after they stopped rebranding Engel fridges), and it has worked perfectly for ten years. So I expect the new one to be just as reliable and durable.
As with my original, I specified the smallest, 37-quart size for the new one. Why? First, because it fits in my FJ40 and many other compact 4x4 vehicles. And second, because the beauty of a fridge in contrast to an ice chest is that you don’t have to load everything you want chilled at the begining of the trip. You can keep just a day’s worth of drinks in the fridge and reload every evening or even in the morning; the fridge will easily cool them by lunch. If you use UHT milk cartons, as we do, you can do the same with that. Thus there’s plenty of room for a good week’s worth of food.
In tweaking the Series I into the II, ARB wisely retained the reliable Secop (formerly Danfoss) compressor. The dimensions and shapes of all the different capacities are the same, as are the faired-in handles that double as stout and versatile tie-down bars. The cabinet is still durable, powder-coated steel. So what’s new? The control panel buttons are now backlit, making them easier to read, and a 12V input display has been added to help monitor battery condition. There is a new, gunmetal gray color scheme, and while this might not sound like a big deal, I think it makes the fridge look hundreds of dollars more expensive than the previous blue scheme. The optional and desirable insulated transit cover carries the same handsome tones. Very stylish.
The big news, however, is the Bluetooth transmitter that allows remote monitoring and control via a free app. While personally this has limited appeal (I can count the apps I have on my iPhone on one hand), if you’re a fan the app will do everything for you short of loading the fridge—including sending you a notice if your friend leaves the lid open after stealing a beer.
In use there’s not much different to report compared to my old ARB fridge—and that’s a good thing. I like the reversible basket, which can either separate the top “crisper” shelf from the rest of the cavity, or provide a really long area on top for . . . a leg of lamb, maybe?. The center divider also helps keep cartons and bottles upright. An LED lamp illuminates the contents well.
Crisper shelf at upper right is good for vegetables or other things you don’t want as cold as the rest of the contents.
To be picky, I would have wished for a hold-open strut of some sort. I’d complain that the latch feels just as brittle as the one on mine always has, but then mine has never broken, so I’ll refrain.
The ARB Classic Series II is $950, and I think its quality and reliability justifies the price. The fridge carries a generous three-year warranty. ARB USA is here.
The (more) versatile ARB jack base
Nearly everyone I know who owns a Hi-Lift jack also owns one of the ubiquitous red plastic base plates, which hugely enhance flotation in soft sand or mud. Recently ARB introduced their own base plate, which is of course designed to accept the rounded base of the ARB hydraulic jack. However, ARB cleverly molded the recess so it will also accept a Hi-Lift, and furthermore I found it fits many bottle jacks as well, which the red Hi-Lift base plate will not. So if you have a Hi-Lift but haven’t yet bought a base for it, consider the more versatile ARB version. Bonus: If you ever decide to spring for that pricey but superb ARB Jack, you’ll be ahead of the game.
Securing lug nuts—the pro way
Confession: I came late to the discipline of properly torqueing the lug nuts on my vehicles—and checking them regularly.
Very late.
For years I never gave them a thought except when I had a puncture or I was reinstalling a wheel after maintenance or a repair. And when I put them back on I simply cranked really hard on my T-handled lug wrench and called it good.
I had a wake-up call a few years ago, when Roseann and I were hauling a pair of Expo cargo trailers to Flagstaff. I was driving my FJ40 and pulling a 14-foot box trailer that probably weighed 3,000 pounds or so. Only a couple of days before I’d had new tires installed at a local tire store. We’d decided to go the back route to Flagstaff: from Tucson to Globe via Highway 77, then to Payson via 188, then through Pine and Strawberry on 260 and up 87 to Mormon Lake Road. We stopped in Payson for fuel, and as I pulled in at low speed I heard a distinct clicking sound coming from the left rear of the Land Cruiser. A short search led to the source: lug nuts on that wheel that were barely finger tight and the wheel was shifting fractionally back and forth.
I shudder to think what could have happened if I’d experienced a catastrophic failure on the steep, winding mountain road uphill from Strawberry. I tightened the lug nuts on that wheel, checked all the others (which were fine)—and changed my attitude. Now I include checks of the lug nuts in my normal maintenance routine, especially when traveling in the backcountry on rough roads.
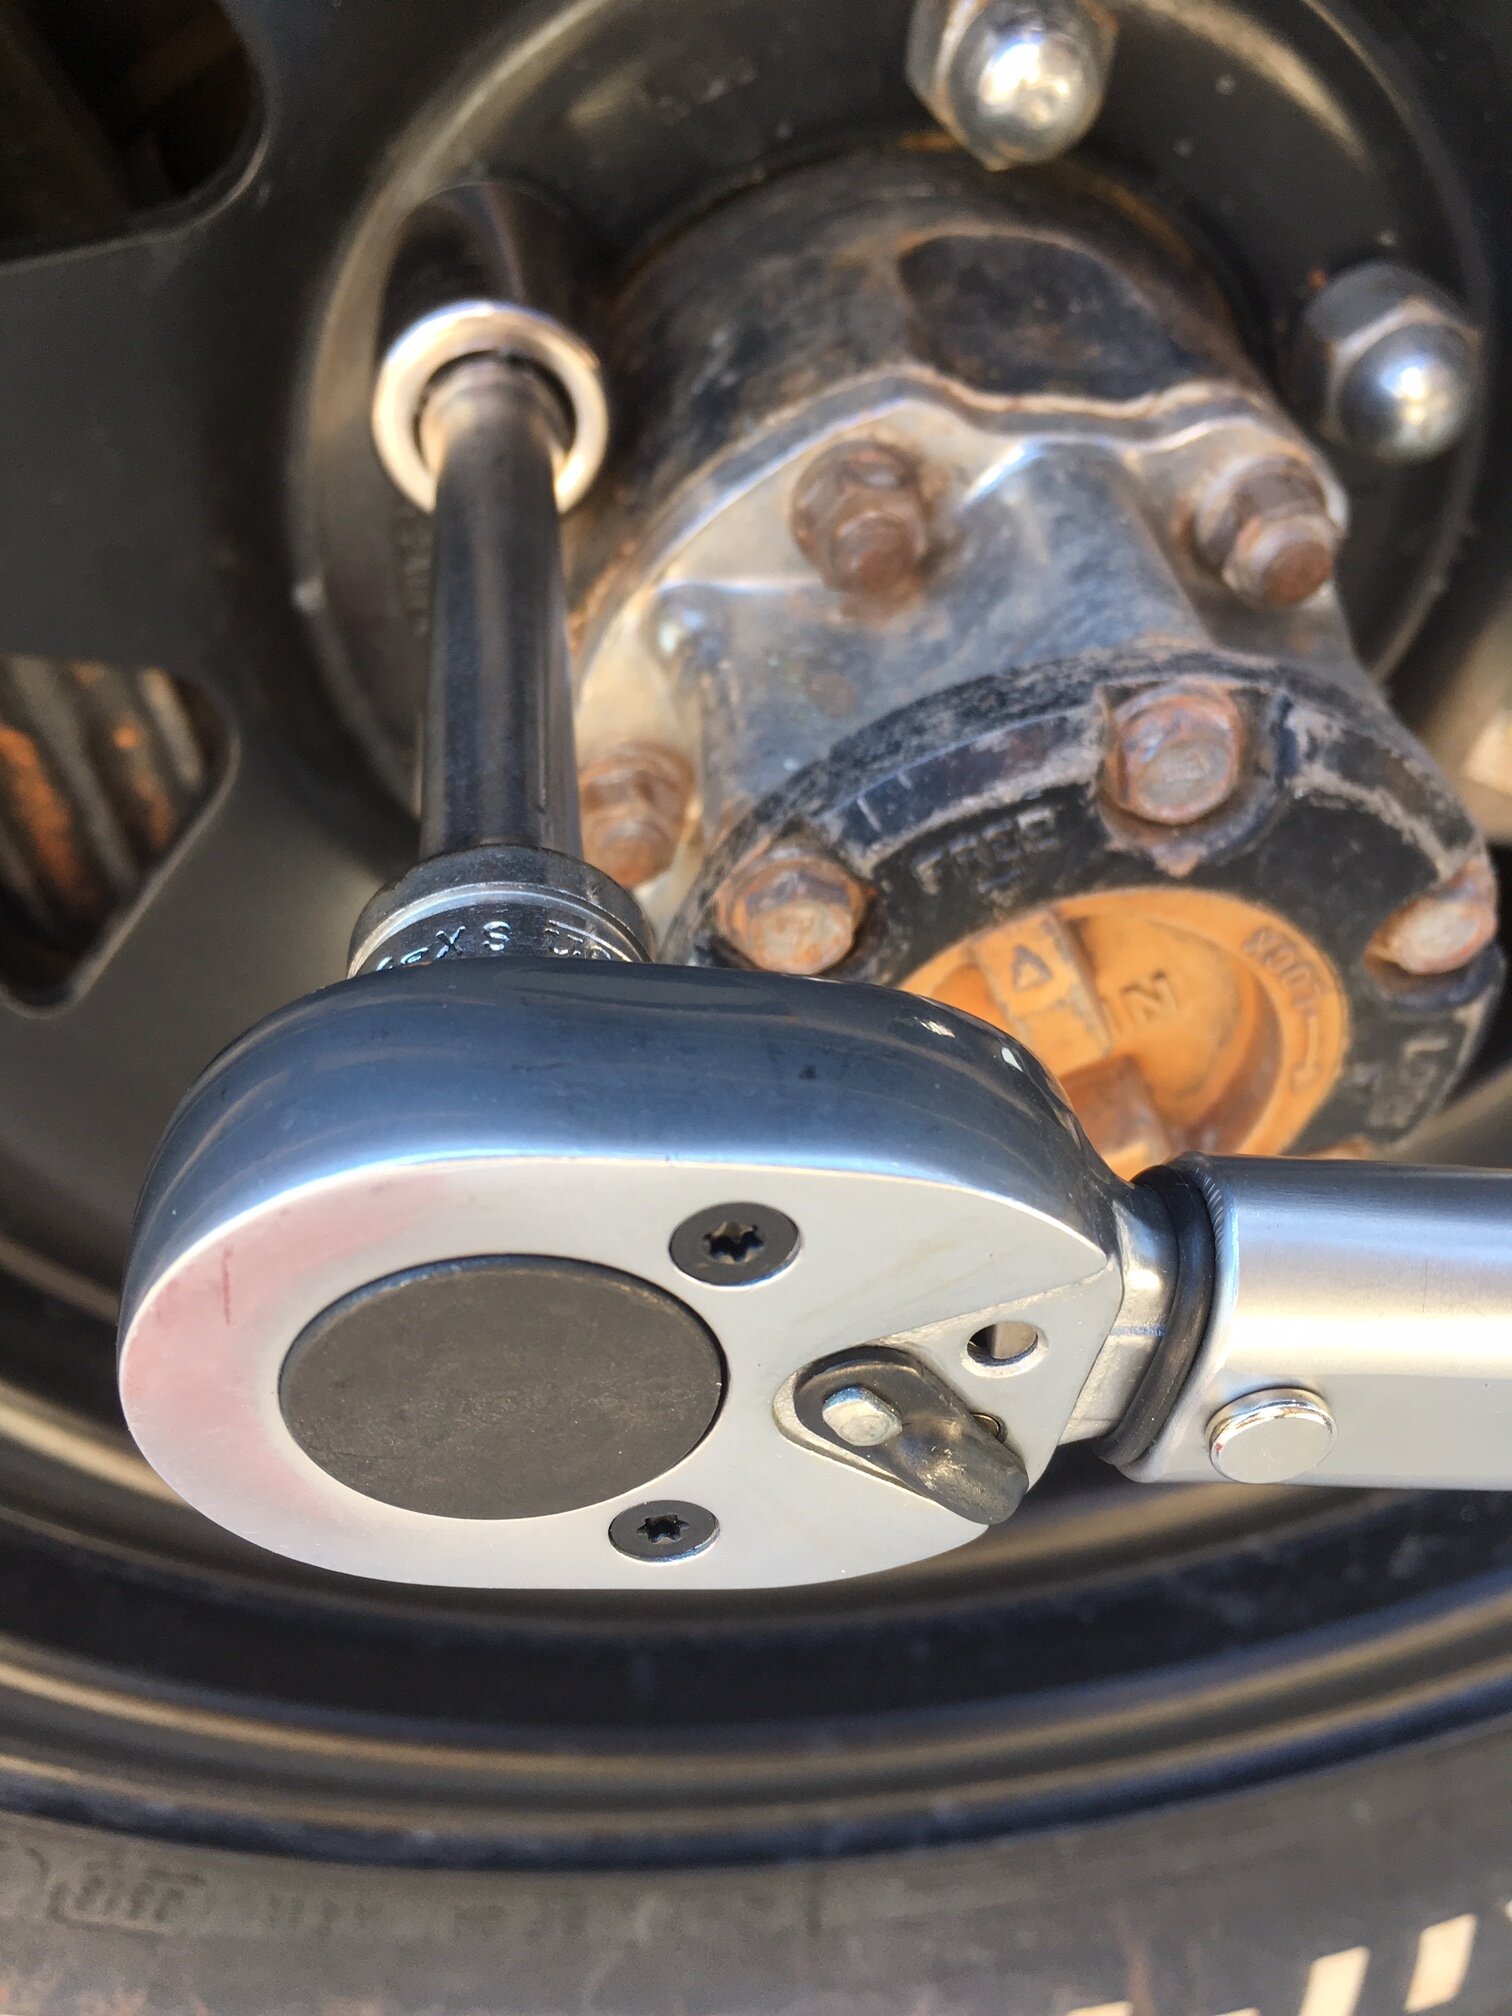
While I was changing my attitude I decided to change my approach as well, and use a proper torque wrench to ensure correct and even tension on the nuts. I know, I know: I already admitted I was behind the curve on this.
Checking torque at home is easy: I have a superb Snap-on digital torque wrench worth about a zillion dollars, which a company PR rep simply gave me when I was doing another article that involved torque settings. (That rep, sadly, is no longer with the company, probably in large part due to all the tools he sent me whenever I emailed him that I had a new article coming out. It was a great ride while it lasted.)
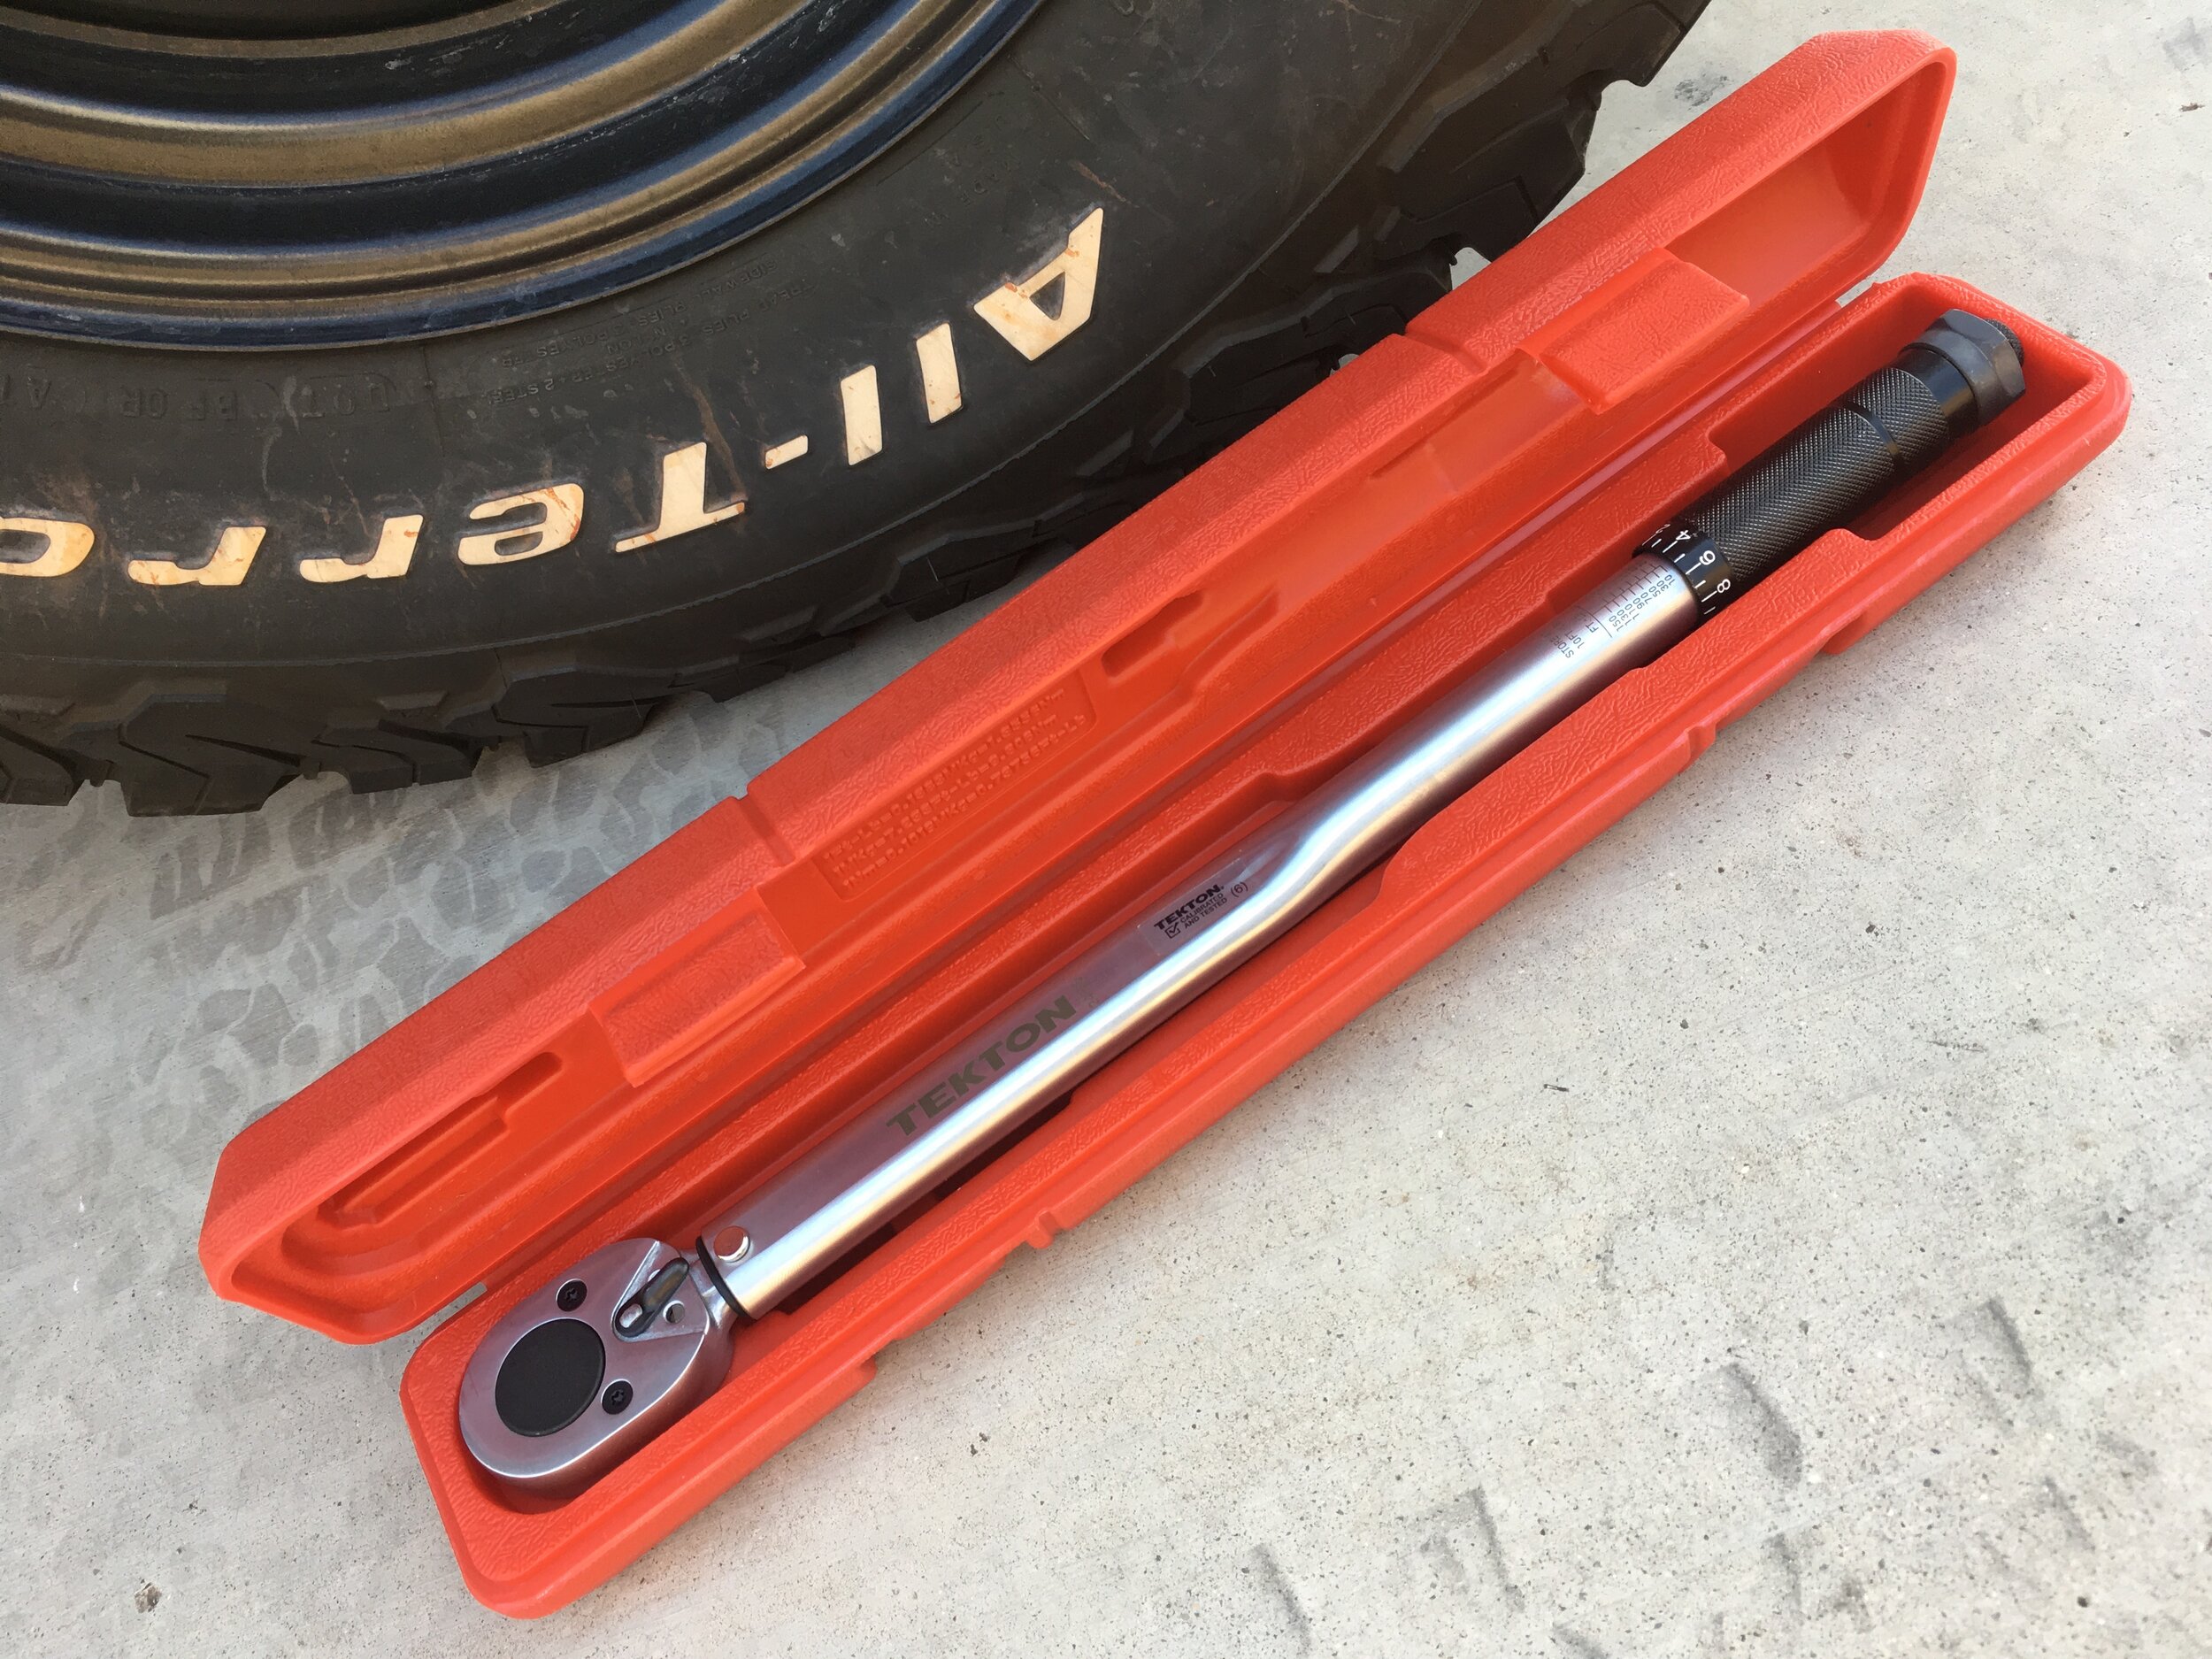
However, the Snap-on wrench is a full 24 inches long, and simply overkill for a traveling tool kit, even though a torque wrench has many uses in the field besides tightening lug nuts. A simple mechanical torque wrench would more than suffice, but I wanted decent quality without spending, well, a zillion dollars. And I found what I needed at Tekton Tools.
I became aware of Tekton by accident when I stumbled on their booth at the west Expo last year. As a self-appointed tool connoisseur/snob (take your pick), I approached the brand like a sommelier sniffing an unfamiliar cabernet. And came away impressed.
The Tekton website offers more detailed information on the company’s tools than any other site I’ve seen—including Snap-on’s. The page for their 3/8ths inch socket and ratchet set, for example (here), informs you of not just features, but each socket’s minimum failure point compared to ANSI specifications. The country of origin—in this case, Taiwan—is also clearly stated. (The quality of Taiwanese-made tools is excellent in my experience.) They note that the set does not skip any sizes—one of my pet peeves about many sets I’ve tried. The ratchet is a fine, 90-tooth unit, and the ANSI measurements are published for that as well. Nice.
So, on to Tekton’s 1/2-inch torque wrench, which employs a simple but precise rotating handle adjustment and click/bump alert when the selected value is reached. The company claims plus or minus four percent accuracy, which is more than adequate for any task including engine assembly. In the hand it compared favorably to my memory of a similarly configured Sears Craftsman American-made torque wrench I had decades ago, which if I recall cost more even back then. The first thing I did was to compare it to the Snap-on wrench at identical settings on the same nut; the two were within the probability of error of my ability to respond to either the click of the Tekton or the beep and buzz of the Snap-on. Like all mechanical torque wrenches, it is important to reset the wrench to its minimum value in between uses to avoid stressing the mechanism and throwing off the accuracy (this is not necessary with digital wrenches). It’s also important to remember that a torque wrench—whether Tekton or Snap-on—is not a breaker bar; it should be used only for tightening nuts or bolts to a specified setting. The Tekton wrench is all-steel, so I expect it to be durable. And at $40 for the 18-inch 10 to 150 ft-lb version it is an outstanding bargain.
Back to my lug nuts. What exactly is the correct setting? Good luck obtaining the figure from your vehicle manufacturer. Obviously proper setting vary with the vehicle and the wheel size, but as a very general rule, for vehicles in the general mid-size overlanding category—Land Cruisers, Land Rovers, pickups, etc.—about 80-90 ft-lb is proper for a steel wheel. If you prefer to go by stud size, here is a chart.
Alloy wheels are more problematic. Some charts I’ve seen list higher torque than for steel wheels torque—around 100 ft-lb. Others list lower figures—70-75 ft-lb. Why the higher figure? I have yet to find a definitive answer, but possibly it is because steel wheel lug nut holes are typically raised a tiny bit and thus retain fractional elasticity to grip the nut more effectively, while alloy wheels must be clamped flat against the hub. For both steel and alloy wheels the primary effect you are achieving with tightening is to fractionally stretch the threaded lug itself, creating a powerful clamping mechanism.
Lug nuts should always be tightened (or loosened) in an alternating sequence across the wheel, thusly:
Like so many other habits I’ve adopted, being lug-nut conscientious makes me feel like I’m approaching travel in a serious, professional manner, and adds just one more layer of peace of mind to any journey.
Edit: A question came up regarding using anti-seize lubricant on lug-nut threads, as many people do who live in areas where snow and salted roads are common. While manufacturers—and thus I—recommend installing lug nuts on clean, dry threads, this chart from Fastenal shows that effective torque increases if one lubes the threads (or if those threads are zinc-plated). Note that if used, anti-seize compound should only be applied sparingly to the threads, not to any mating surfaces of the wheel or nut.
PakMule hitch-mounted cargo basket
A few years ago I was chatting with a group of people about various aspects of long-distance travel—in particular the proper loading, positioning, and lashing of cargo—and I happened to mention a Chevy Tahoe I’d spotted recently that had a hitch-mounted cargo basket with several cases and duffels strapped to it. To be perfectly honest, I was a bit scornful that owners of a vehicle that size would need extra cargo capacity.
One of the guys in the group asked, “Do you travel with children?”
Um, no.
He just looked at me, raised one eyebrow, and smiled.
Point taken. I’ve never gratuitously criticized an auxiliary cargo carrier again. And when I was asked to review PakMule’s aluminum hitch basket, I was prepared to do so objectively.
Clearly, if it is possible to fit all your gear inside the vehicle, you should do so for all the obvious reasons. But if there is stuff that absolutely, positively needs to go outside, where is best? The most common choice is on a roof rack, which has the advantage of middling resistance to theft and the fact that it doesn’t change the vehicle’s dimensions in terms of parking or maneuvering. But overhead clearance is an easy-to-forget factor, and whatever weight you put up there—added to the weight of the roof rack itself—compromises the center of gravity and plays havoc with aerodynamics. Plus the gear is just as much of a pain for you to unload as it is for a would-be thief.
Enter the hitch-mounted cargo basket. No effect on CG. Significantly reduced effect on aerodynamics. A breeze to load and unload. Hmm . . .
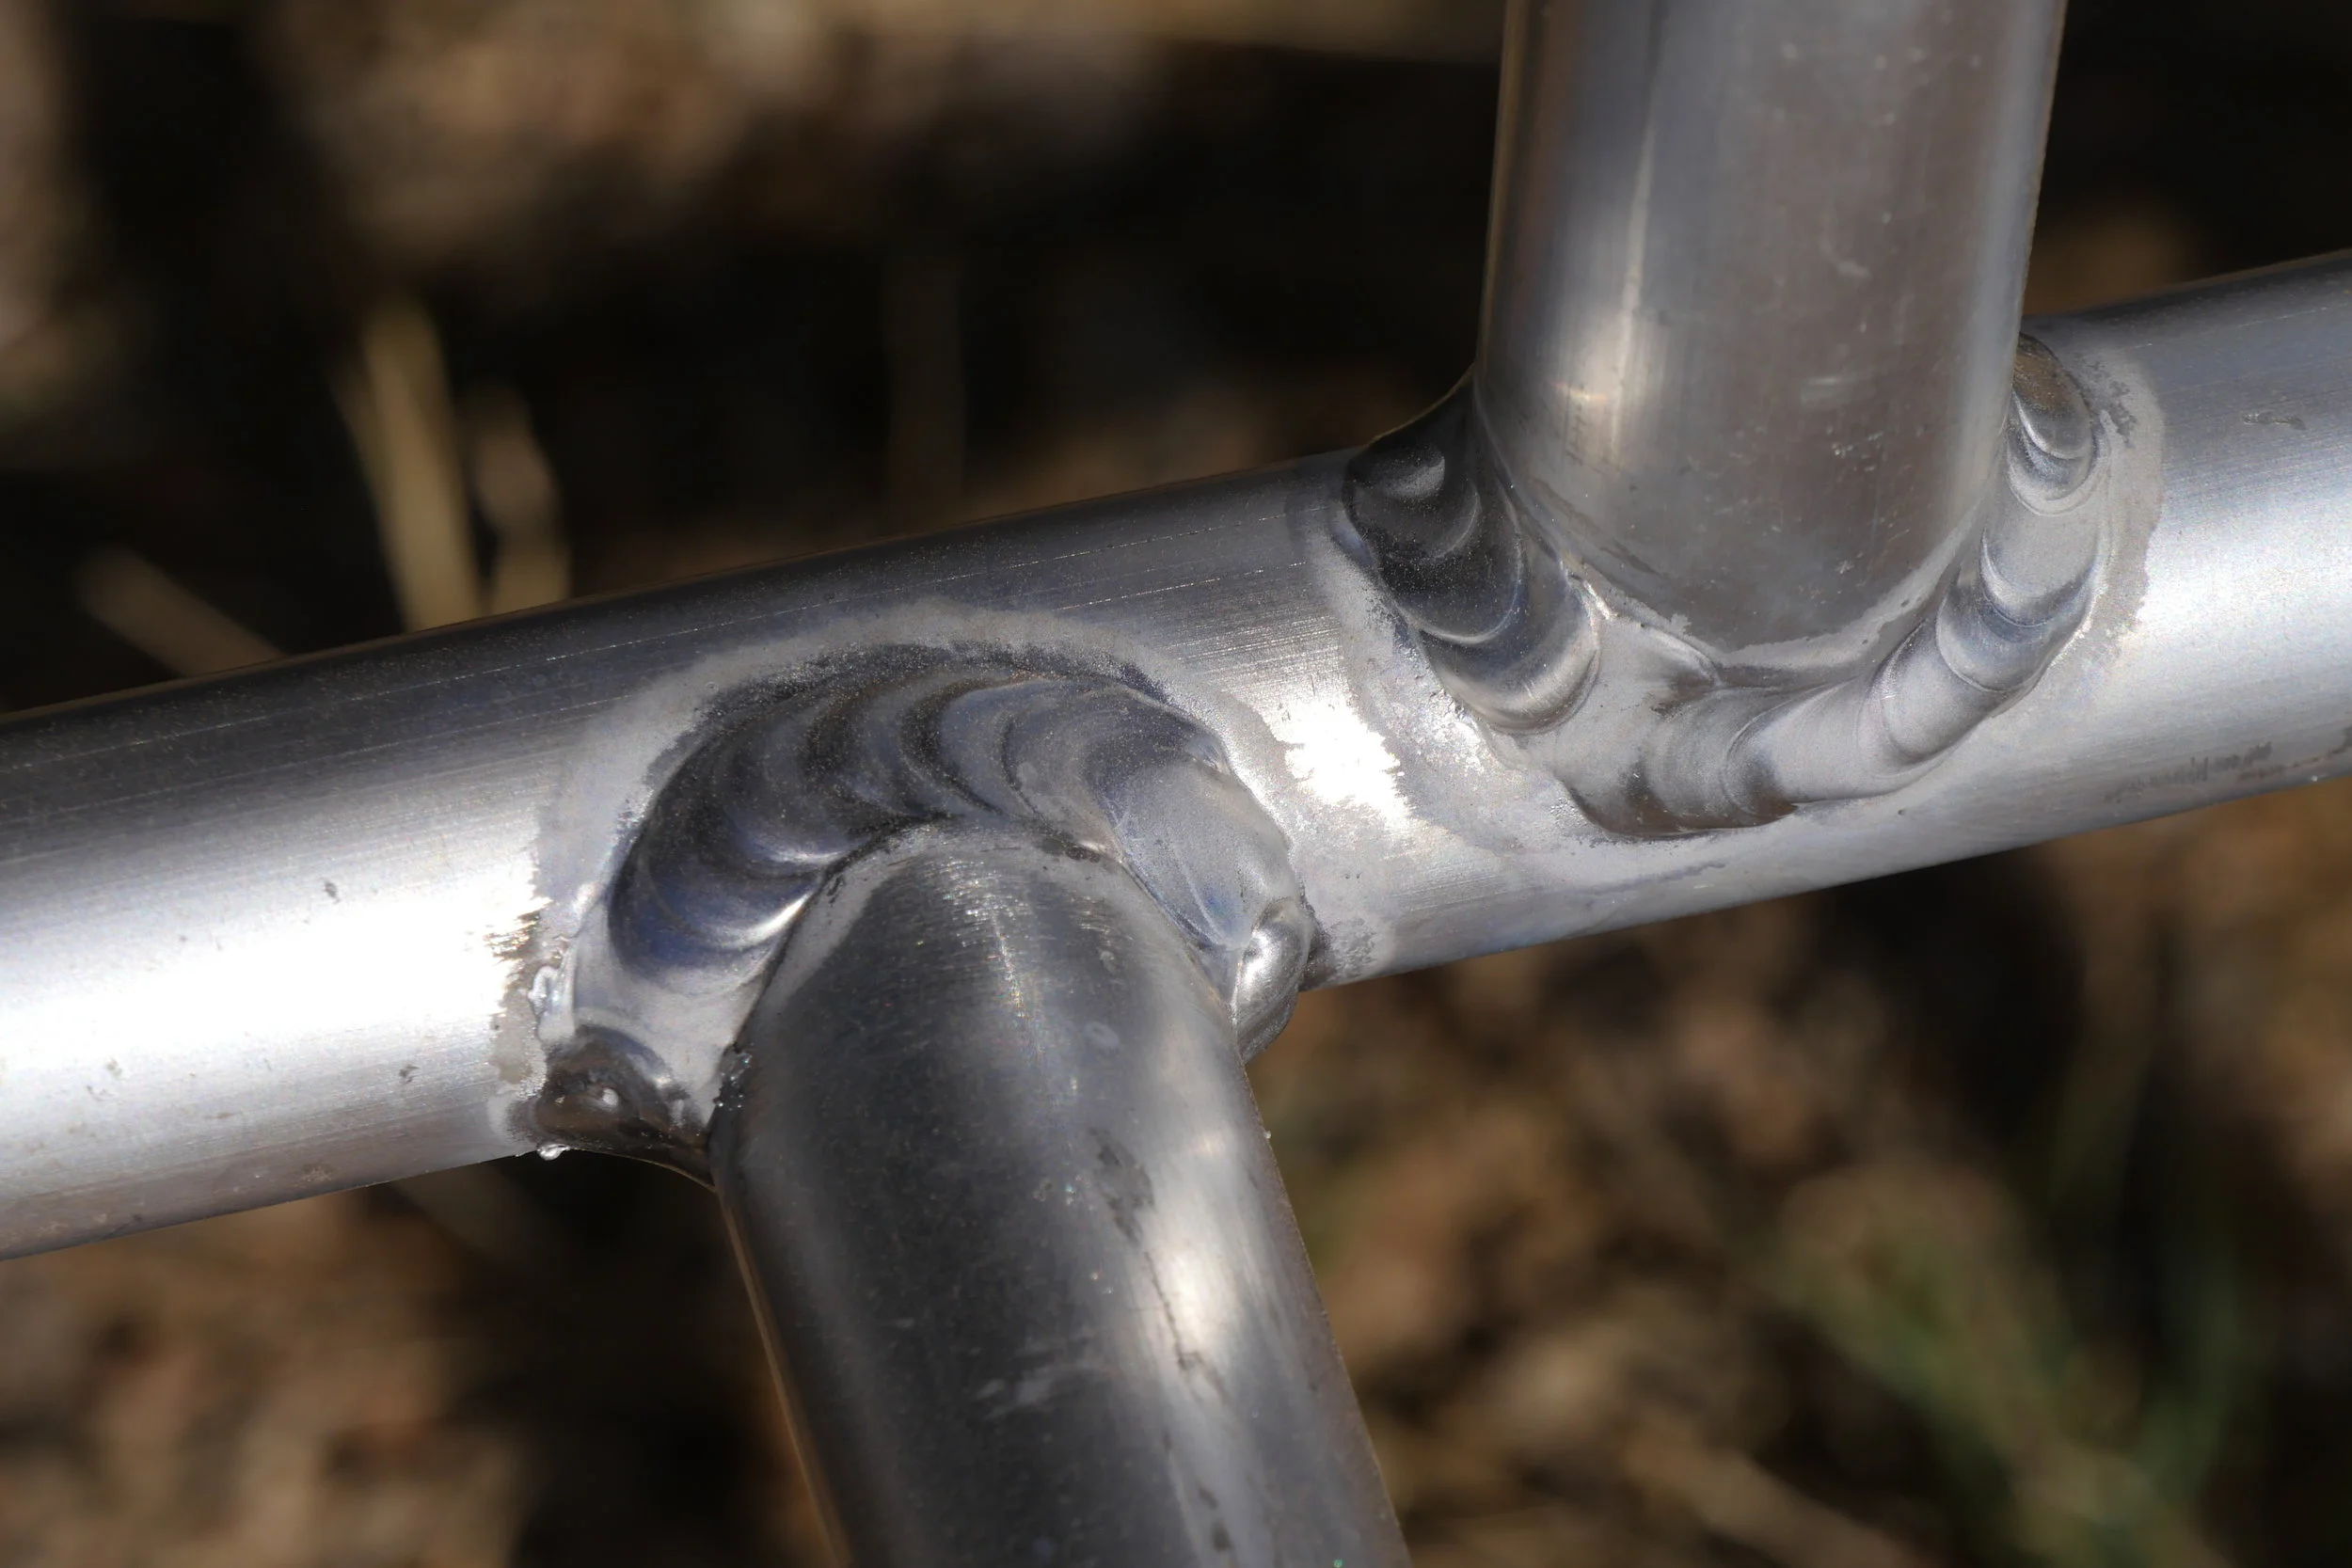
The PakMule cargo basket arrived in a huge box that, awkwardness aside, was surprisingly easy to lift. That’s because the basket itself, despite having interior dimensions of 67 by 26 inches—a full 12 square feet—is 100-percent tig-welded aluminum and weighs just 42 pounds. The workmanship of those welds, while not up to the concentric perfection of that found on high-end bicycles, is even and solid. And there is no paint or powder coating to inevitably chip and scratch.
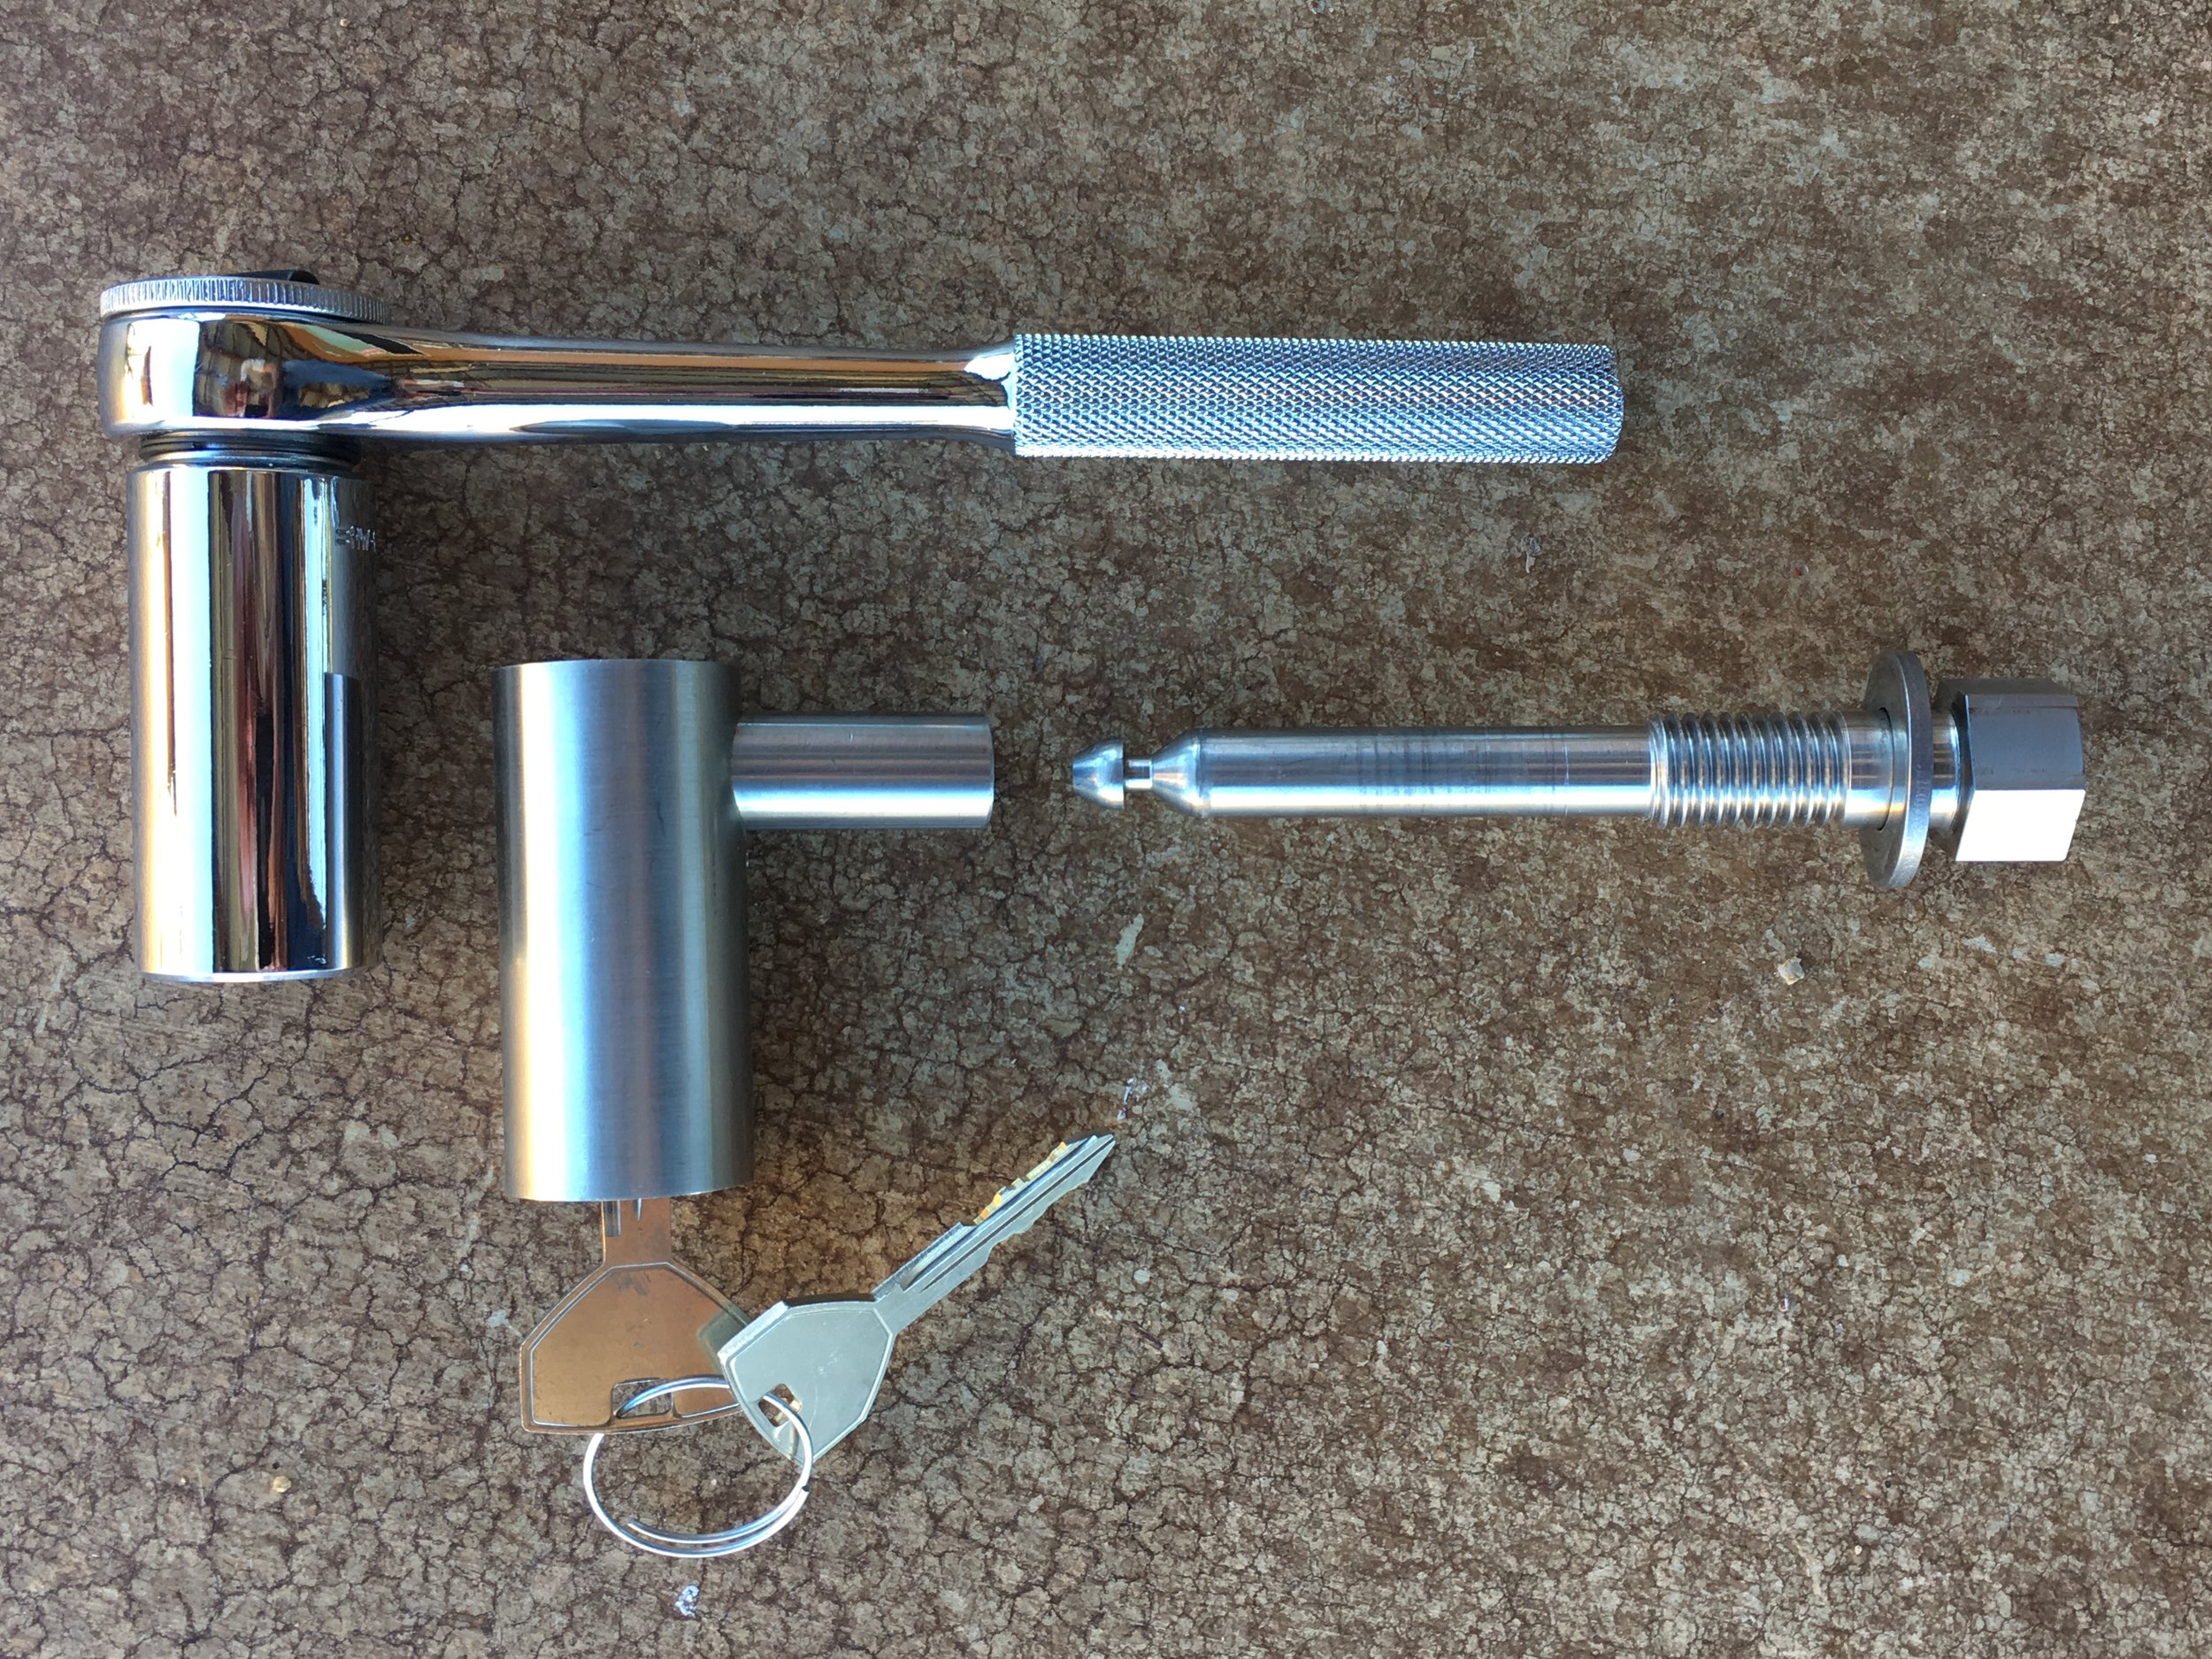
Installing the PakMule is simplicity itself: Slide the basket’s shaft into your receiver, insert the threaded pin and snug it with a 7/8th-inch socket or wrench—or, if you’re a heathen, an adjustable wrench or (wincing here) slip-joint pliers—then attach the keyed locking assembly, which snaps on without the use of the key. (The company offers as an accessory an American-made ratchet and 7/8ths socket—for me that’s practically enough to stop right there and give the whole product a five-star review.) The entire process takes about 60 seconds and presto, you’ve got a generous trunk’s worth of extra cargo space.
It must be said that moving an external load from the roof to behind the bumper comes with its own caveats. Reversing in tight quarters becomes, first, a function of remembering the damn thing is back there, and then being extra, extra cautious with distance and swing clearances. (I suspect gear strapped to it will block the rear-view cameras of many vehicles.) Also, while the PakMule is rated for an impressive 500 pounds, you’d be smart to keep the total load well below that, as the stress on your rear suspension is magnified considerably with the additional leverage of weight hung out that far behind the springs and shocks. There’s certainly no issue regarding strength of the structure: I stood on a back corner of the basket and bounced up and down with scant effect.
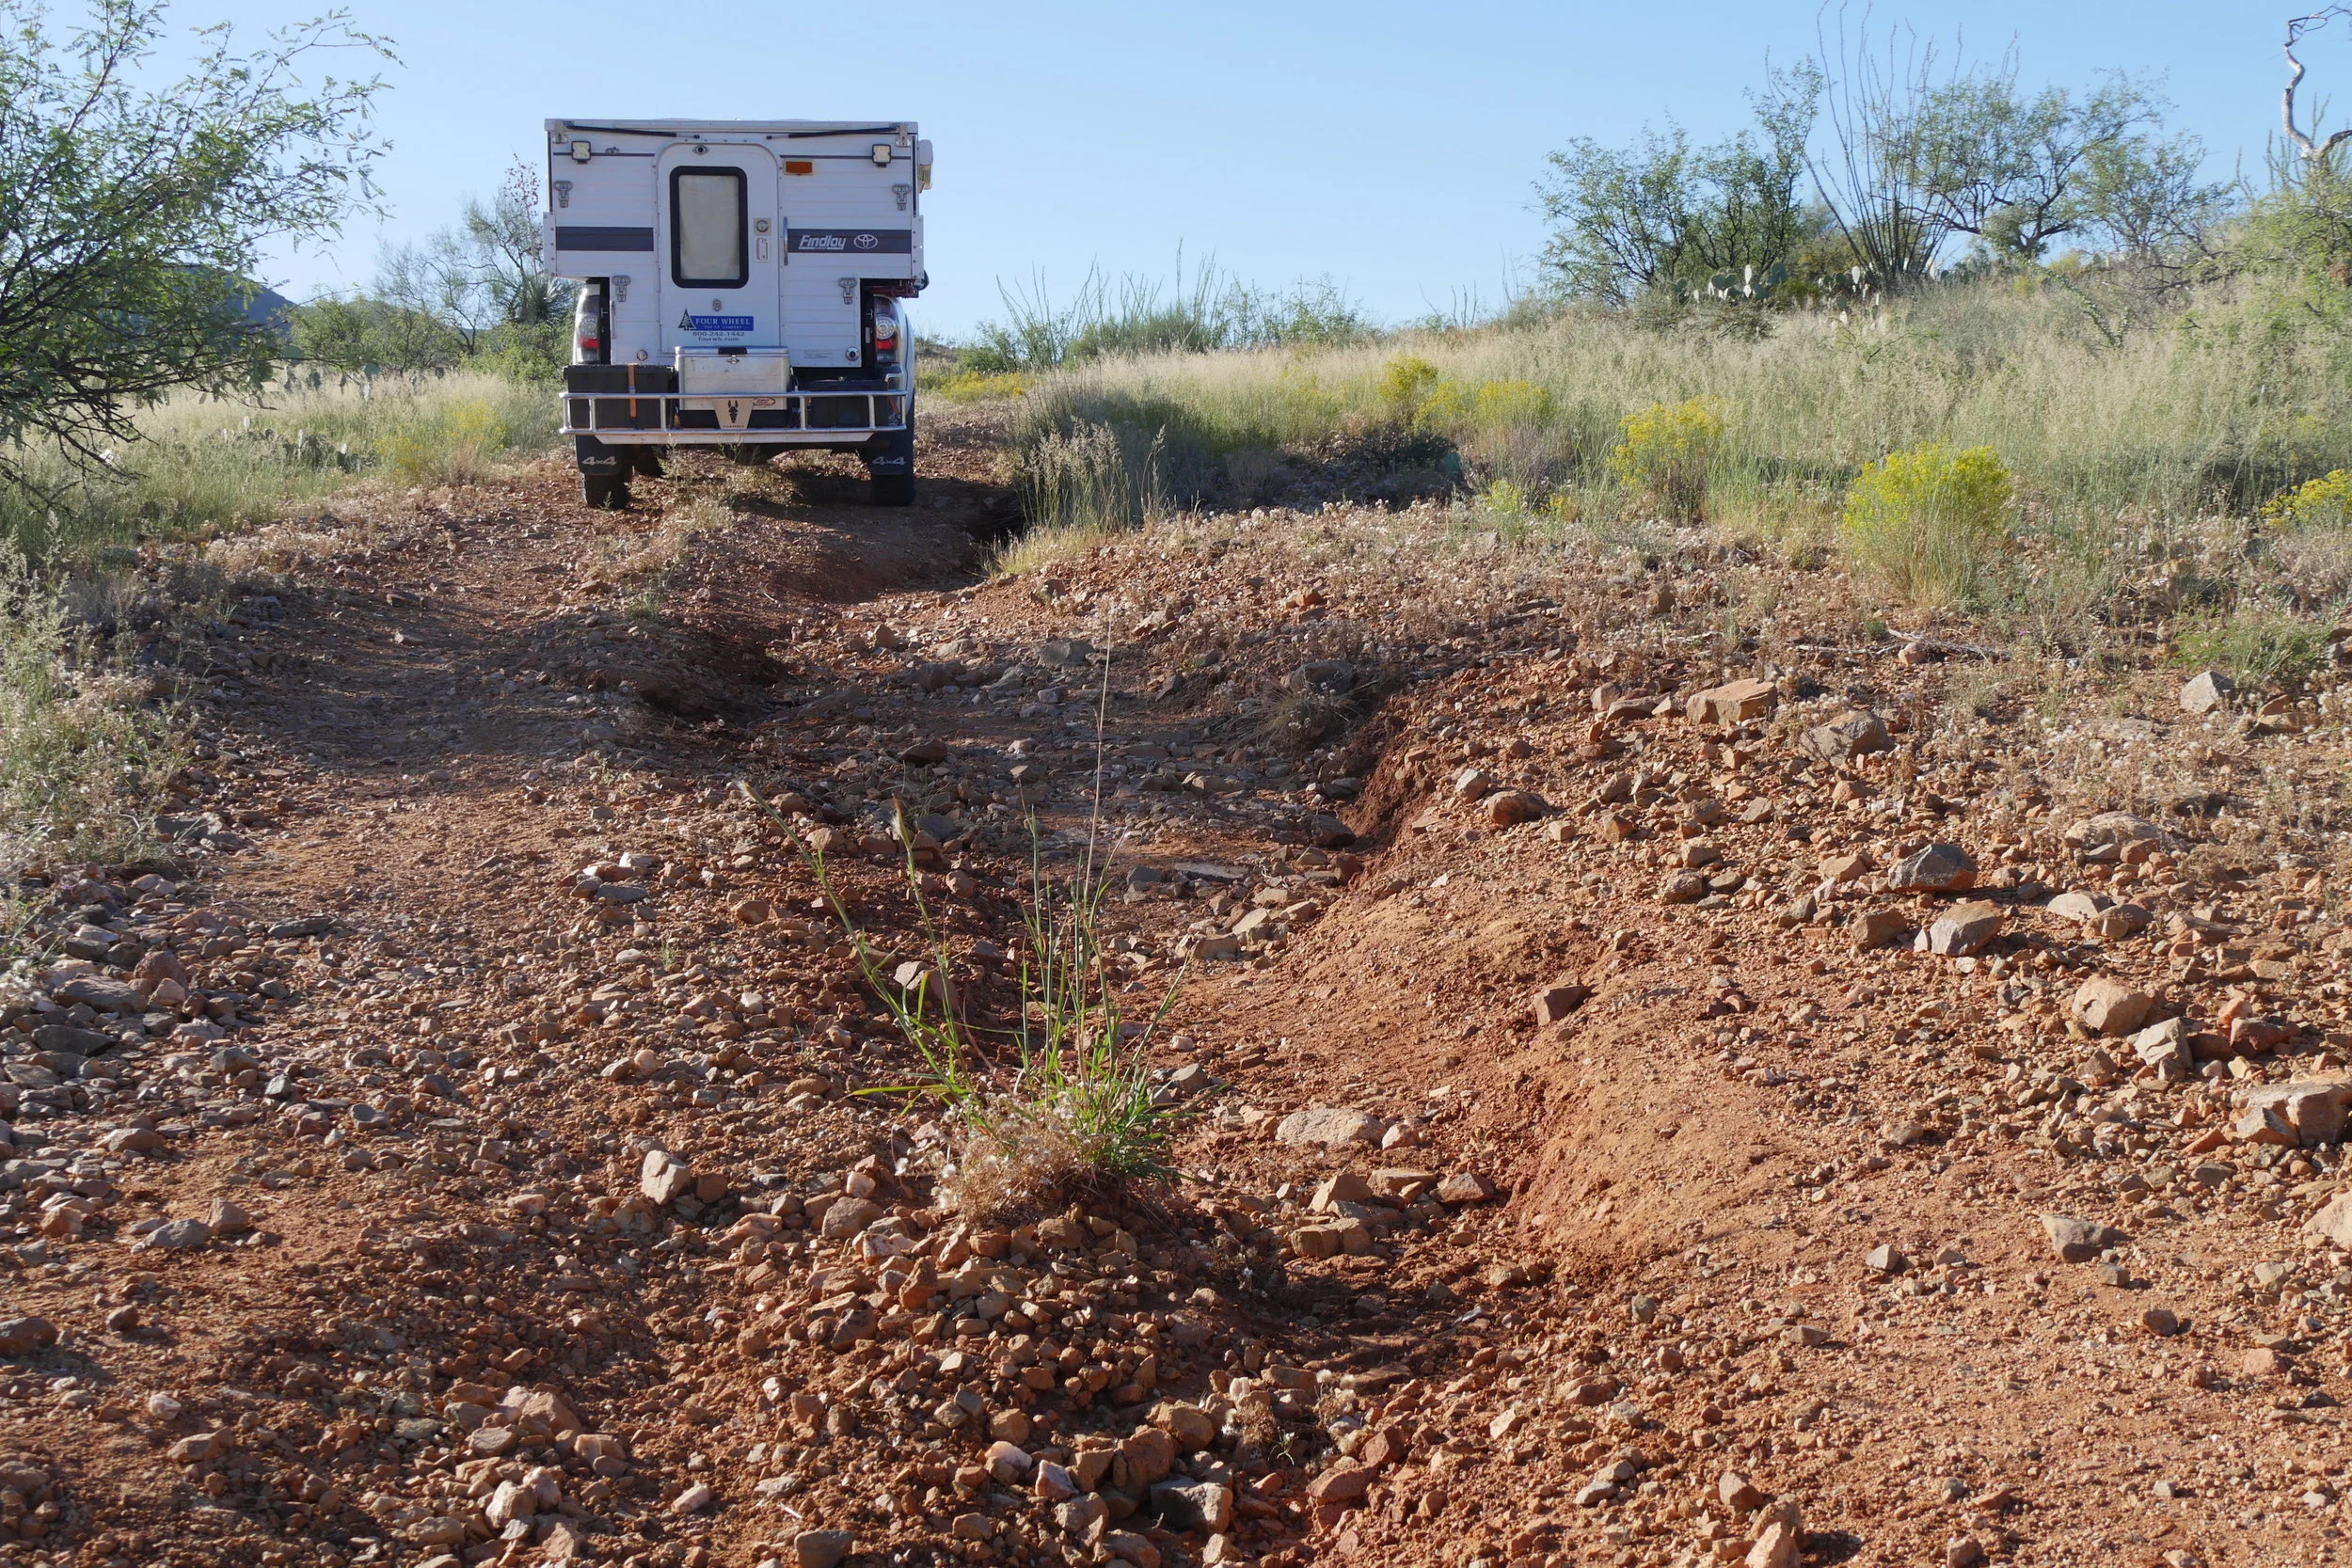
What about off-pavement driving? Not that you couldn’t have figured this out on your own, but the PakMule will pretty much obliterate your departure angle in sharp dips and transitions to steep climbs. It’s simply the nature of the beast, and something you’ll have to consider when choosing routes and picking individual lines. A spotter will be a great help. And it’s easier to unload and remove the basket than it is to unload and reload a roof rack when you need clearance under a low limb. I was pleased to note the basket cleared a few dips I predicted it wouldn’t, but as soon as the trail entered real 4x4 territory that clearance ran out pretty quickly.
No clearance issues on trails like this . . .
I certainly didn’t worry about stability. I’ve lost count of the times I’ve followed vehicles fitted with receiver-mount bicycle or cargo racks that rocked back and forth quite alarmingly. The threaded tightening pin on the PakMule eliminates that almost completely, although it’s a good idea to load your heaviest item in the center of the basket to reduce the rocking moment as much as possible. Securing cargo is easy since the frame and floor of the basket are constructed of round tubing and one can attach a ratchet strap almost anywhere. I did notice that, after seven miles on a rough dirt road, the threaded locking pin had loosened somewhat. It’s a good idea to check it every once in a while. I cranked on the ratchet more purposefully the second time around, and it remained tight on the way back.
. . . but on sharper dips it goes away quickly.
Accessing the stuff in the basket is a cinch, but what about getting to the rest of the gear in the back of the vehicle? That depends on the vehicle, and how high you have stuff stacked in the rack. If you have an SUV with a two-piece tailgate and an upper section that lifts, it’s possible to reach some items by standing on the basket and leaning in over the lower gate. When the unit was mounted on our Toyota Tacoma with its Four Wheel Camper and side-hinged door, there was 15 inches of clearance between the basket floor and the door—plenty to clear Wolf Packs but not quite enough to clear the Coleman ice chest I borrowed for the test. (I was amused to realize I don’t even own an ice chest any more. DC fridge/freezers are somewhat addictive.) Even with cargo removed, the 8.25-inch height of the standard basket might not clear some side-swing tailgates; for those vehicles the company offers a basket with the same floor space but a lower, four-inch height.
These three things didn’t even come close to filling the basket.
The best strategy for employing the PakMule is to use it for the stuff you naturally load last and need—or can conveniently set aside—first.
As a safety issue, I was surprised to see not even red reflector strips on the back of the PakMule to alert inattentive drivers that the rear end of your vehicle is actually two and a half feet behind the brake lights. A clip-on LED running/brake-lamp kit that would plug into a standard trailer socket would be an inexpensive but worthwhile option. Between us, my wife and I have been rear-ended four times (once very severely for her), so I’m sensitive to the issue, but such an accessory might prevent even a minor crunch. I was certainly hyper-aware of vehicles coming up behind me at red lights in traffic.
On another suggestion-box note, I wonder if the company has any plans to introduce a bicycle-carrier attachment for the basket. It seems like it would be an easy thing to engineer.
I’m not going to abandon my philosophy that all one’s gear should go inside the vehicle if possible. But for those times when it simply won’t, the PakMule is worth considering as a temporary solution. Its lightweight construction makes installation easy, and it would store on a garage wall or carport ceiling when not in use. Yet stability is excellent, and securing gear properly is effortless. So if you were the folks in the Tahoe with kids and the shaky cargo basket, take a look at the PakMule site, right here.
Nitecore charger
One of the few downsides of modern digital cameras is the need for frequent battery charging. My first pro-level camera, a (film, of course) Canon F1 built with the ruggedness of a 747’s Black Box, had a battery to operate the light meter, but would function quite happily without it; you just had to remember the classic “Sunny 16” rule for exposure.
Not so these days: No battery, no camera. Even the ascetic’s choice, manual-focus rangefinder Leica M10 is digitized and thus dead without power.
One upside is, modern lithium/ion batteries boast tremendous charge density for their weight. Another—important for travelers—is that virtually all chargers for those batteries are muti-voltage and will operate happily on either 120 or 240 VAC current. Unfortunately, while the countries of the world managed to confine their mains single-phase voltage supply to those two choices, the variety of plugs necessary to access that voltage is bewildering. And if, like me, you are absent-minded enough to leave not one, but two adapters firmly inserted in sockets on a single trip across Africa, you could find yourself critically short on charging capabilities. Trust me that finding a U.S. to Botswana or Namibia adapter in Botswana or Namibia is a near-futile quest.
Fortunately there is a backup power source right there in the notebook computer you take to download and store those photos: the USB port. Which brings me to the Nitecore charger.
The Nitecore, which is available in numerous configurations to accept most camera batteries, plugs into the USB port of your notebook computer, which means it is way less likely to be left behind. That would be enough for me to click “buy now” right there, but the Nitecore also incorporates a digital readout that tells you the overall health of the battery, its current state of charge, rate of charge, and voltage. Brilliant.
I used the Nitecore on a recent trip to Mexico in our Tacoma and Four Wheel Camper, which highlighted another advantage: Since we currently have only a single-outlet 12VDC to 120VAC inverter in the truck, I was able to charge both computer and camera batteries at once. And I found the state-of-charge feature useful: At one point I was unsure of the capacity left in one of my BP-DC12 1200mAh batteries before a long hike. So I plugged it into the Nitecore, which informed me it was at 980 mAh—plenty to go on with just a single spare.
The Nitecore has a very short cord, which enables it to fold away in the back of the unit. And as you can see from the lead photo, the unit itself is significantly smaller than either my factory Lumix or Leica chargers. Given the extra functions included, that’s remarkable. Bravo Nitecore.
Highly recommended, even if you’re not absent-minded.
Interesting NATO water can
Previously I related the story of the NATO fuel container that failed due to a pressure point in the carrier on our Troopy. We waited until we were in Durban to buy a replacement, and happily found both a yellow diesel can and this interesting water container, a variant of the standard blue NATO water container which I’d never come across before. It has a distinctly larger opening and cap, which makes it both easier to fill from a bucket and extremely quick to empty.
Interestingly and rather maddeningly, these EU-manufactured cans each cost around $34 U.S. in South Africa. I don’t understand why they are so expensive in the U.S.
While I like the large opening on the water can, I prefer the smaller opening of the fuel can, which allows the cap to put more pressure on the gasket, ensuring the leak-proof seal that makes genuine NATO cans superior to any other fuel container I’ve used, including the plastic U.S. military Scepter can.
I was tempted to see if I could get a wholesale account for these cans and fill a 40-foot container with them.
Hint: When using “Search,” if nothing comes up, reload the page, this usually works. Also, our “Comment” button is on strike thanks to Squarespace, which is proving to be difficult to use! Please email me with comments!
Overland Tech & Travel brings you in-depth overland equipment tests, reviews, news, travel tips, & stories from the best overlanding experts on the planet. Follow or subscribe (below) to keep up to date.
Have a question for Jonathan? Send him an email [click here].
SUBSCRIBE
CLICK HERE to subscribe to Jonathan’s email list; we send once or twice a month, usually Sunday morning for your weekend reading pleasure.
Overland Tech and Travel is curated by Jonathan Hanson, co-founder and former co-owner of the Overland Expo. Jonathan segued from a misspent youth almost directly into a misspent adulthood, cleverly sidestepping any chance of a normal career track or a secure retirement by becoming a freelance writer, working for Outside, National Geographic Adventure, and nearly two dozen other publications. He co-founded Overland Journal in 2007 and was its executive editor until 2011, when he left and sold his shares in the company. His travels encompass explorations on land and sea on six continents, by foot, bicycle, sea kayak, motorcycle, and four-wheel-drive vehicle. He has published a dozen books, several with his wife, Roseann Hanson, gaining several obscure non-cash awards along the way, and is the co-author of the fourth edition of Tom Sheppard's overlanding bible, the Vehicle-dependent Expedition Guide.


