Overland Tech and Travel
Advice from the world's
most experienced overlanders
tests, reviews, opinion, and more
Pelican Air 1535: The best carry-on for adventurers?
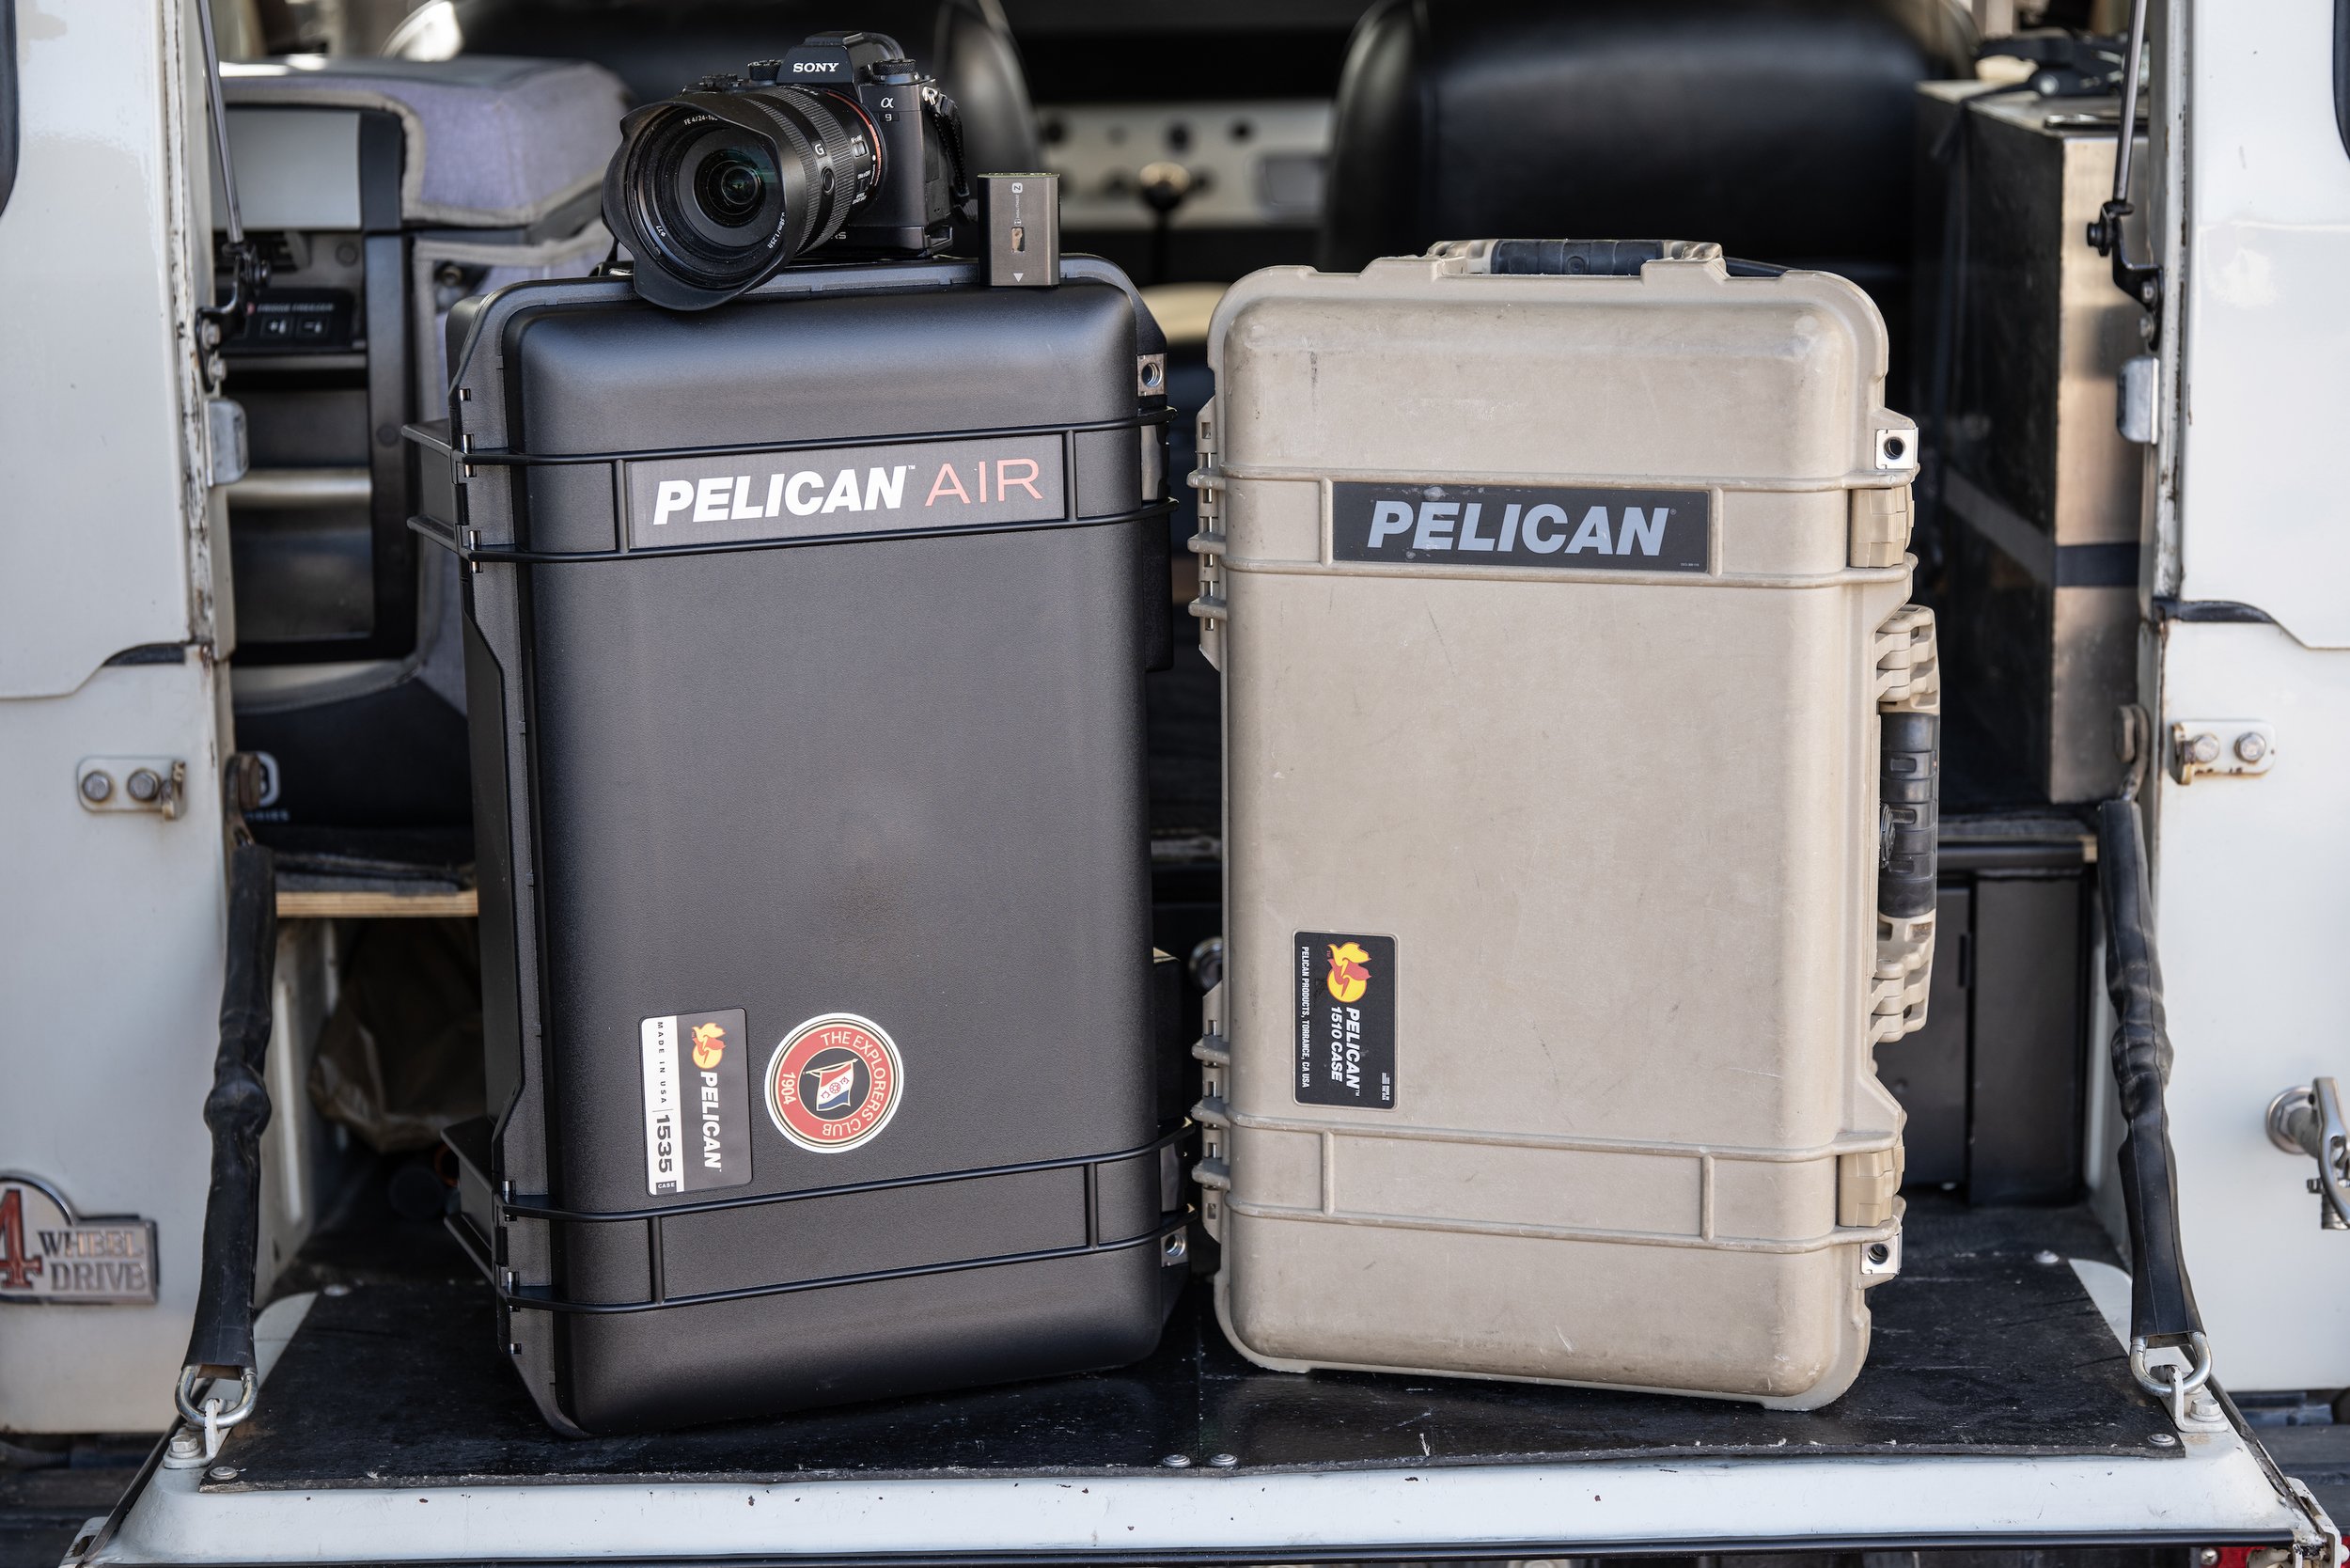
Left and right: same weight.
Does anyone else reading this think there should be a law that commercial airliners be built with overhead storage space actually equivalent to the number of seats?
Until there is such a rule—and, to be fair, until airlines start cracking down on passengers who heave on board bulging suitcases laughably larger than the little trial box next to the gate desk—the struggle to snag overhead space during boarding will continue to resemble trench warfare. And if, like me, your carry-on holds such critical equipment as cameras (plus associated lithium batteries), lenses, and binoculars, you do not want to be forced at the last minute to have it stuffed (“Free of charge!” as they always say, gee thanks) in the cargo hold. That’s why you have a carry-on.
If you are lucky or quick or vicious enough to successfully place your bag in the overhead bin, you know you cannot expect that any care will be given to it by subsequent aspirants to the space. It needs to be as crush-resistant as a bathyscaphe (ooh . . . too soon?).
Twenty five years ago I bought my first Pelican case, a 1500 with a padded camera-organizer interior made by Lowe Alpine systems, and used it on my first assignment to Africa. On one game drive in Zambia it was on the back seat of an open Land Rover, and while I was in the front seat and the vehicle was moving at a good pace down a track, another passenger tried to move it and wound up tipping it over the back just as I turned and watched in helpless horror. The (fortunately closed and latched) case cartwheeled end over end for about 20 feet before coming to rest in a pile of elephant dung. It, and the cameras inside, emerged unscathed, and I’ve been a Pelican disciple ever since.
Thus, several years ago I settled on a 1510 Protector as my carry-on—actual, legal, carry-on size. It was, like all Pelican cases in the line, completely water- and dust-proof, and laughed off the efforts of fellow passengers to abuse it. It rolled on two wheels with an extendable handle (I hate the “walk-the-dog”-style four-wheeled cases, which render their owners nearly two humans wide on a crowded concourse), it was lockable, and, set upright, served nicely as a perch at airport gates equipped with fewer seats than the aircraft parked outside (don’t get me started on that one). It served me flawlessly on many flights to several continents.
The only problem with the 1510, at least for flying, was weight. It scaled at exactly 12 pounds empty, thus contributing significantly to its total load. Given the recent habit of some carriers—looking at you, New Zealand Air—to limit (and check) carry-on weights, this was an additional drawback.
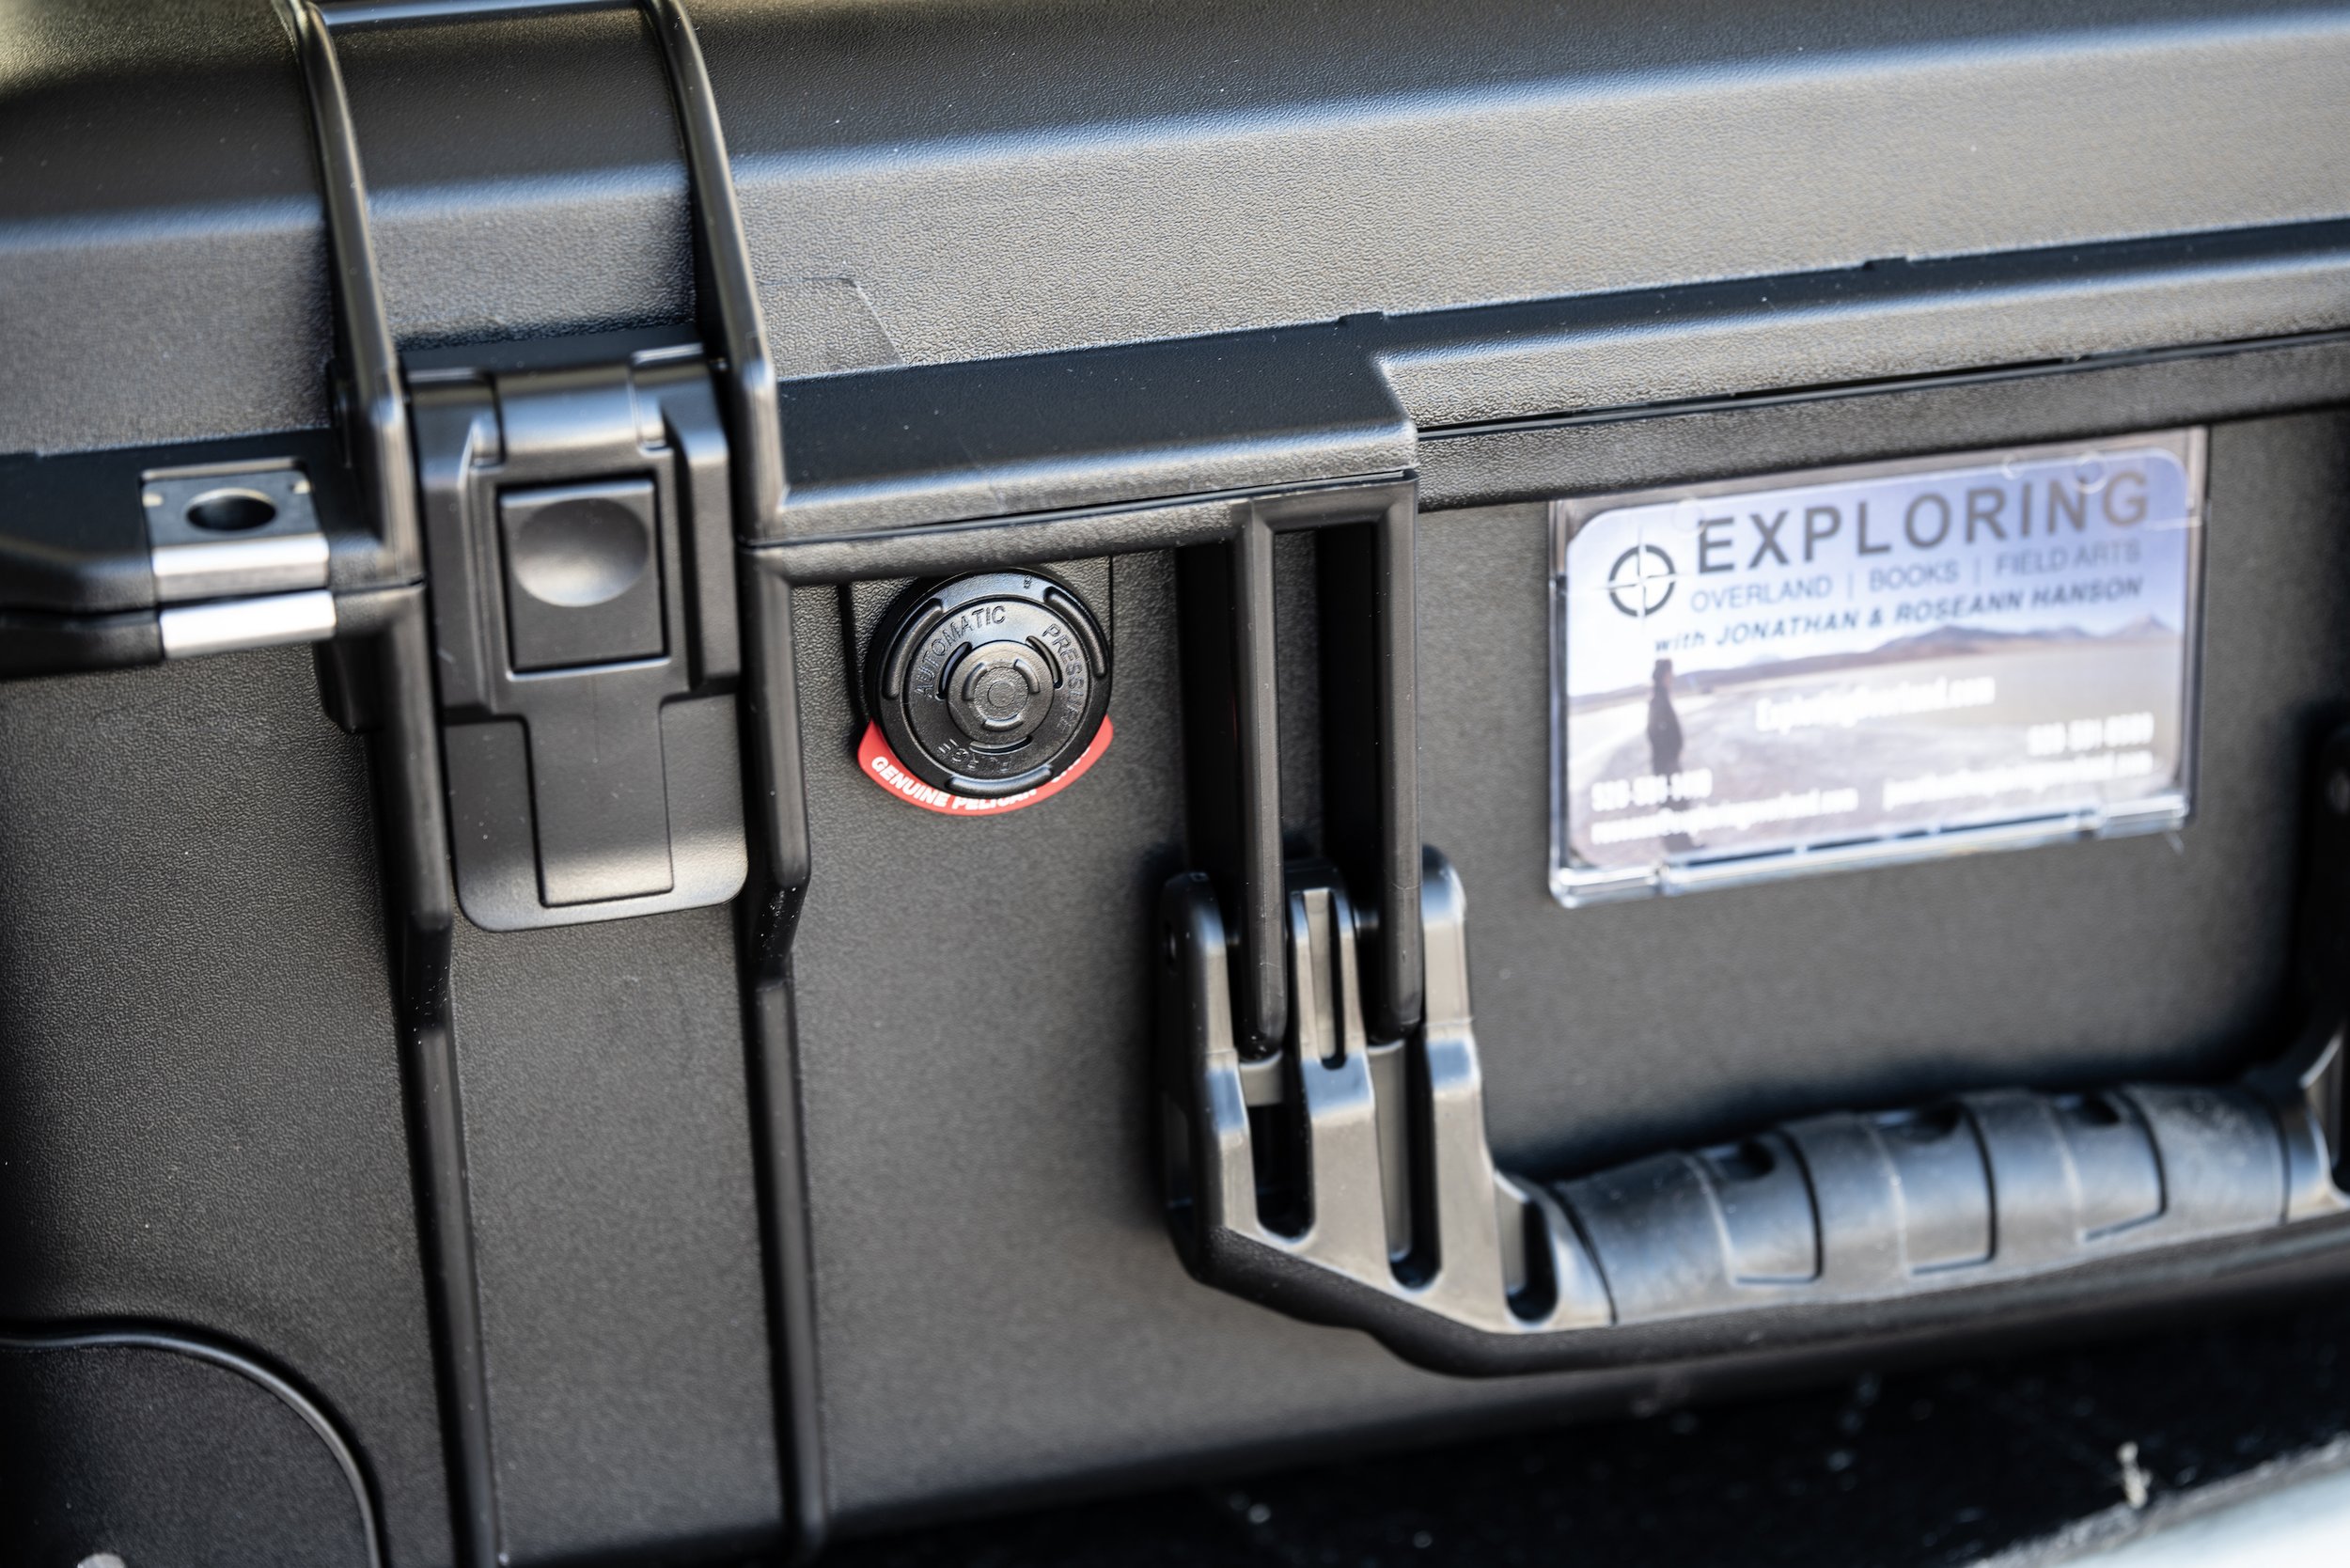
A few years ago Roseann bought one of the then-new Pelican Air cases, a 1535, virtually identical in dimensions to the 1510 but a full three and a quarter pounds lighter. Pelican says it’s made from “HPX” polymer, which is up to 40 percent lighter than their regular material. I admit to being skeptical that the Air could hold up, but Roseann’s proved—at least for the purposes of air travel—every bit the equal of the 1510. Crush-proof, sit-on-able (although I wouldn’t stand on the lid as I do with the 1510). It still incorporates stainless-steel padlock protectors and a pressure-equalization valve, and is IP-67 and MIL-SPEC certified. The wheels roll on stainless-steel bearings, as in the heavier case.
I wondered what that three-pound, four-ounce weight reduction represented in terms of contents, and discovered that my Sony A9, mounted with a 24-105 zoom, weighs three pounds two ounces. So call it the camera, lens, and an extra battery. That’s an impressive savings. We’re now a two-1535 family.
One of the things I like most about Pelican is that they constantly look for ways to improve. The newer 1535, for example, has the effortless push-pull latch system, which Roseann’s does not, and also a center handle on the vertical top of the case, for more versatile handling. Finally, there’s a nifty business-card holder/ID case only accessible with the lid open.
Perhaps my sole, niggling reservation is the plastic issue. However—remember my original 1500? It’s still perfectly functional and used regularly, and is likely to last at least another quarter century. At least that sets it apart from single-use plastic bags and water bottles. Here’s hoping Pelican eventually develops a completely recyclable polymer.
That aside, the Pelican Air 1535 comes highly recommended.
Reinforced padlock eyes, effortless push-pull latches, pressure-compensation valve, and sturdy business/ID card holder.
Pelican is here.
A cheap, bombproof lens-shipping case.
For the first 30 years of my career as a writer/photographer, all my camera gear went with me on airlines as carry-on luggage, packed securely in a Pelican case. For 30 years, there were no enforced weight limits for carry-on items, so no one ever noticed that the loaded case eventually weighed upwards of 33 pounds. That changed on one flight to Australia, when the check-in clerk asked to weigh it, and actually laughed out loud when she hefted it. Pointing to the sign I hadn’t noticed that said, MAXIMUM CARRY ON WEIGHT 7KG (15 pounds), she demanded I offload half its contents into our checked baggage. There followed five minutes of panic as we rolled a couple thousand dollars worth of DSLR equipment into our clothing, stuffed it into the middle of our checked duffels, and prayed for the best. (Walking past the business-class check-in we noticed that the limit there was 14kg or 30 pounds, sort of giving the lie to our clerk’s assurance that the limits were to “balance the load.)
We were lucky and everything made it to Sydney intact, but it was obvious a new approach was going to be necessary given increasingly widespread carry-on weight limits. Henceforth I carried a single camera body and a couple lenses on board, and packed the rest inside hard cases in our luggage, knowing it would inevitably be subjected to casual treatment by baggage handlers who, even if they were conscientious, were invariably pressed for time.
Early this year I picked up one of Sony’s brilliant 200-600mm zoom lenses for my Alpha 9 camera, and decided it needed extra protection—and thanks to my long-past life as a fixer-of-most-things, I knew how I wanted to go about it.
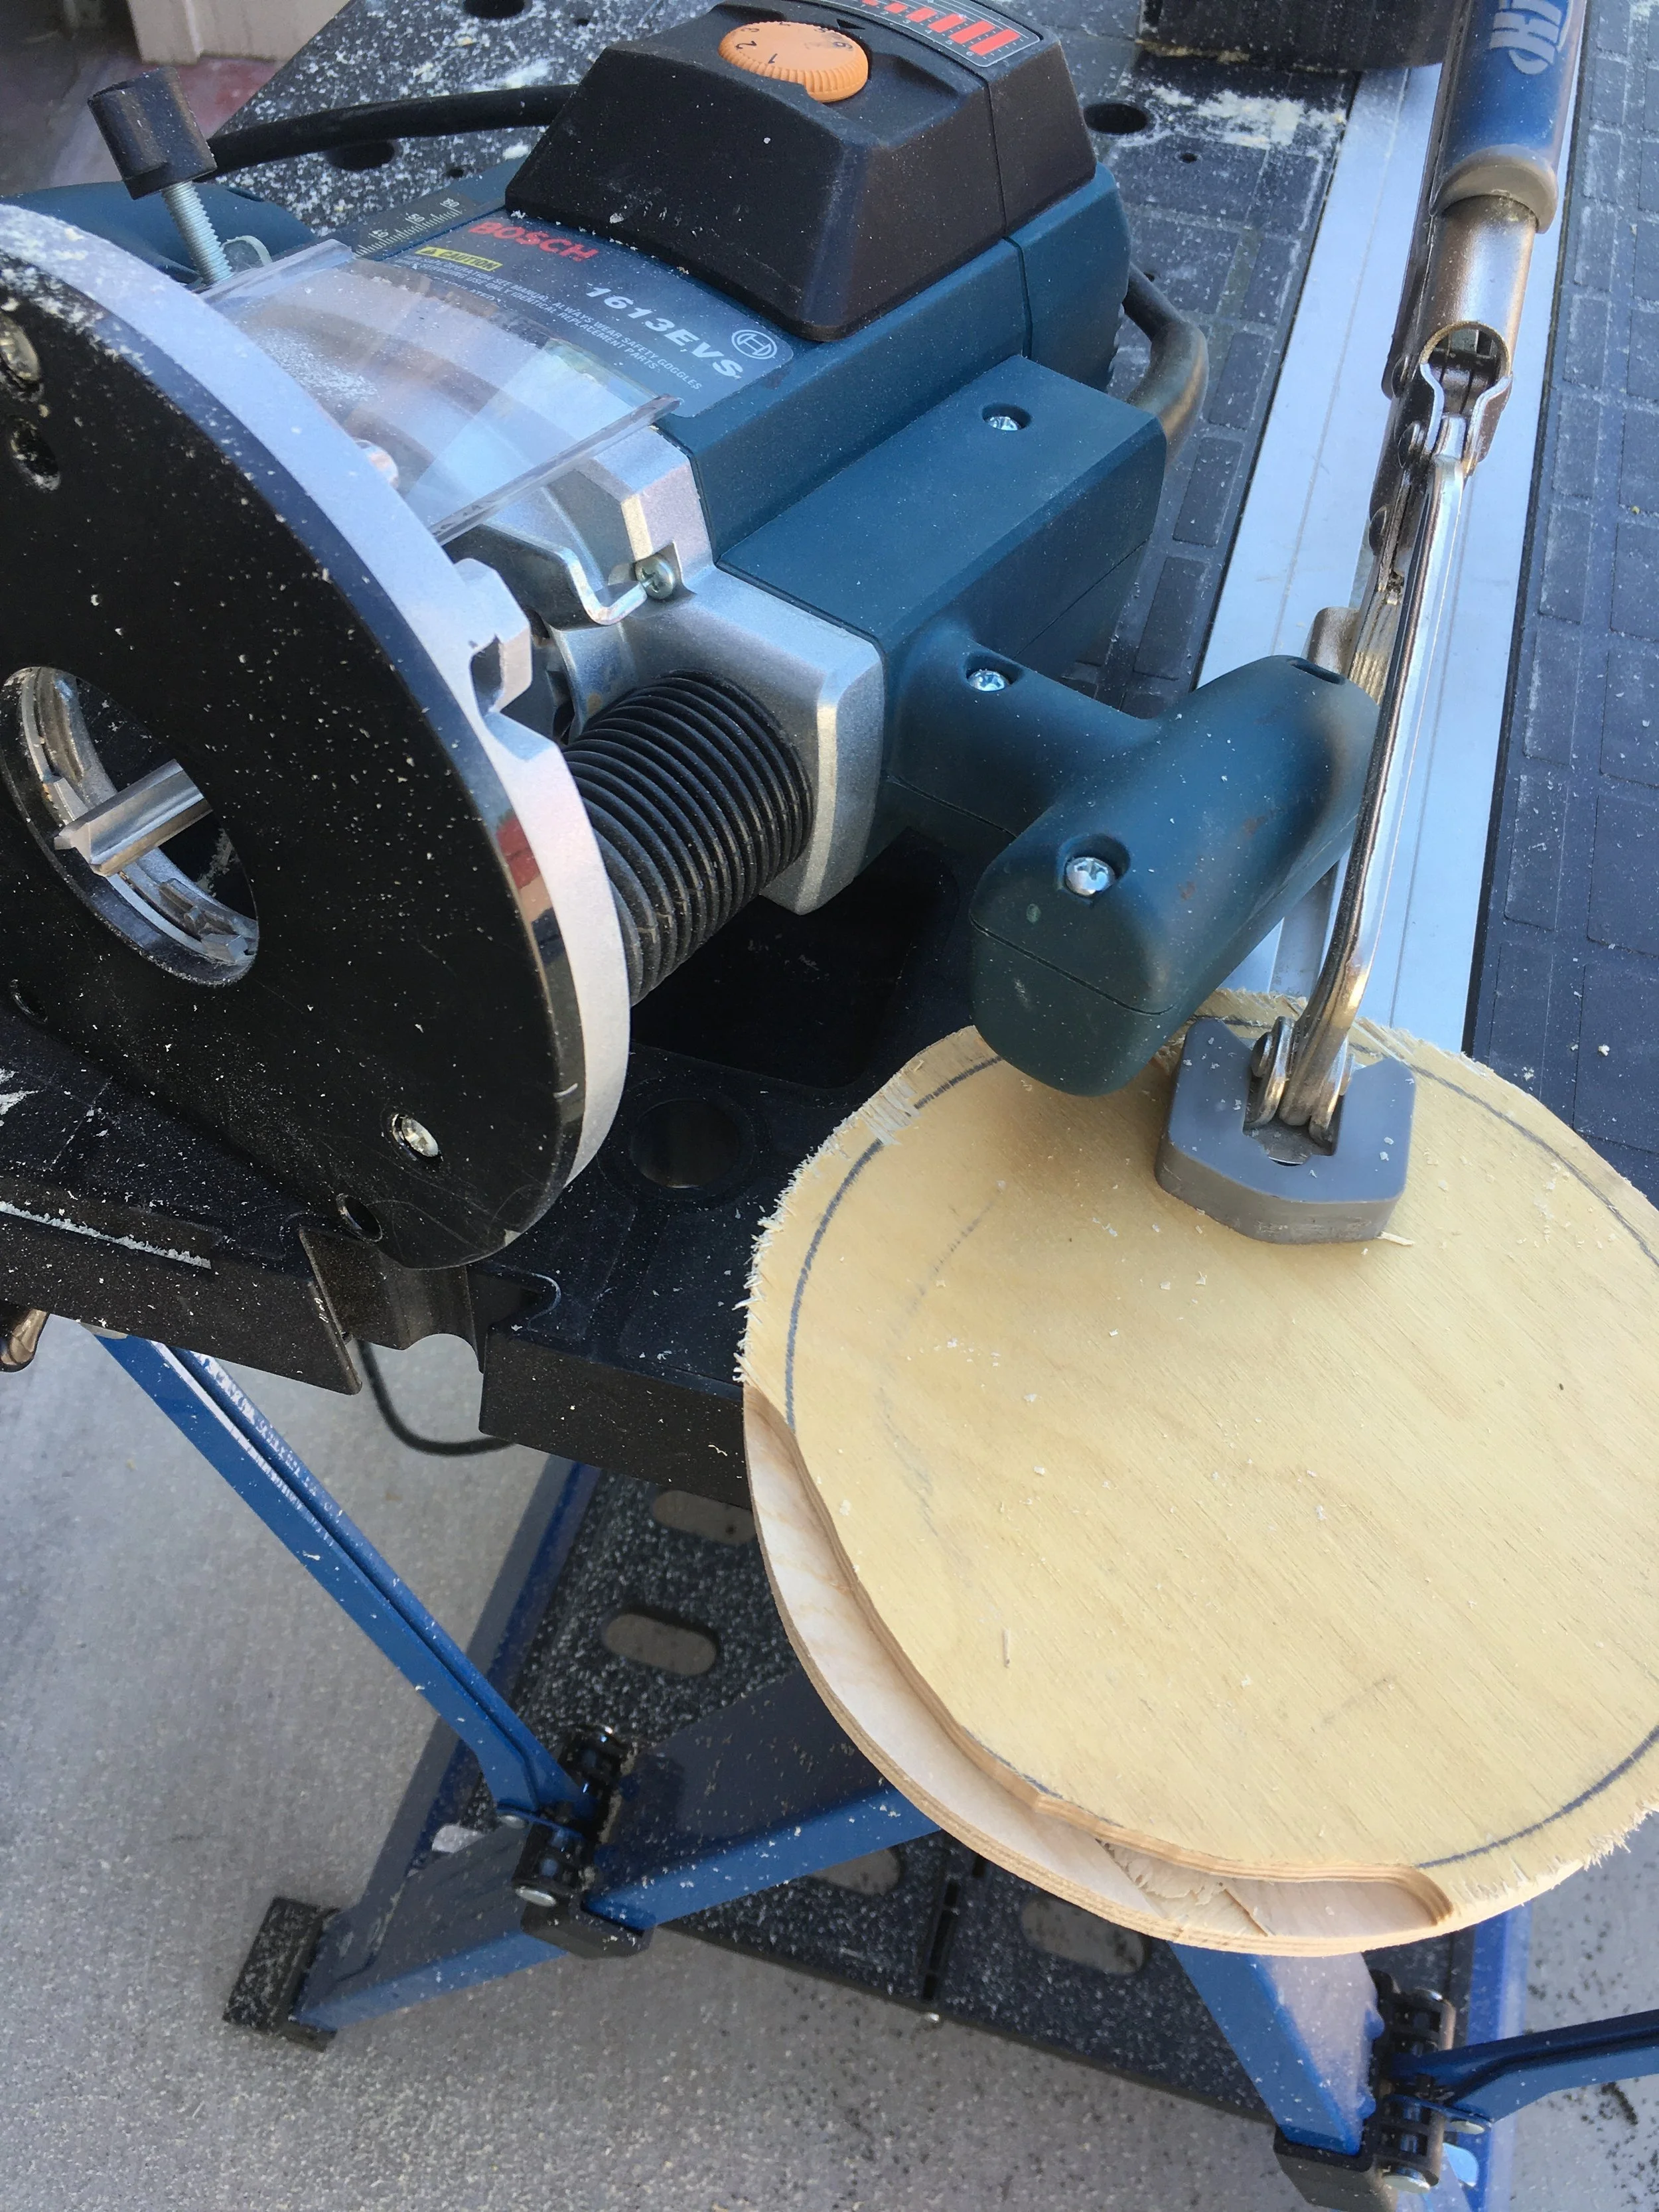
At Lowe’s Home Improvement I picked up an ABS stand pipe, six inches in diameter and 24 inches long, for the princely sum of $8.95 plus tax. Back home I picked out a scrap piece of 3/4-inch plywood (it happened to be Baltic birch but ordinary plywood would suffice). I traced the outer circumference of the pipe twice, then traced another circle inside each, a bit more than the thickness of the pipe wall. With a jigsaw I cut out each circle, then used a router to relieve the outer edge so each cap would fit securely into each end of the pipe.
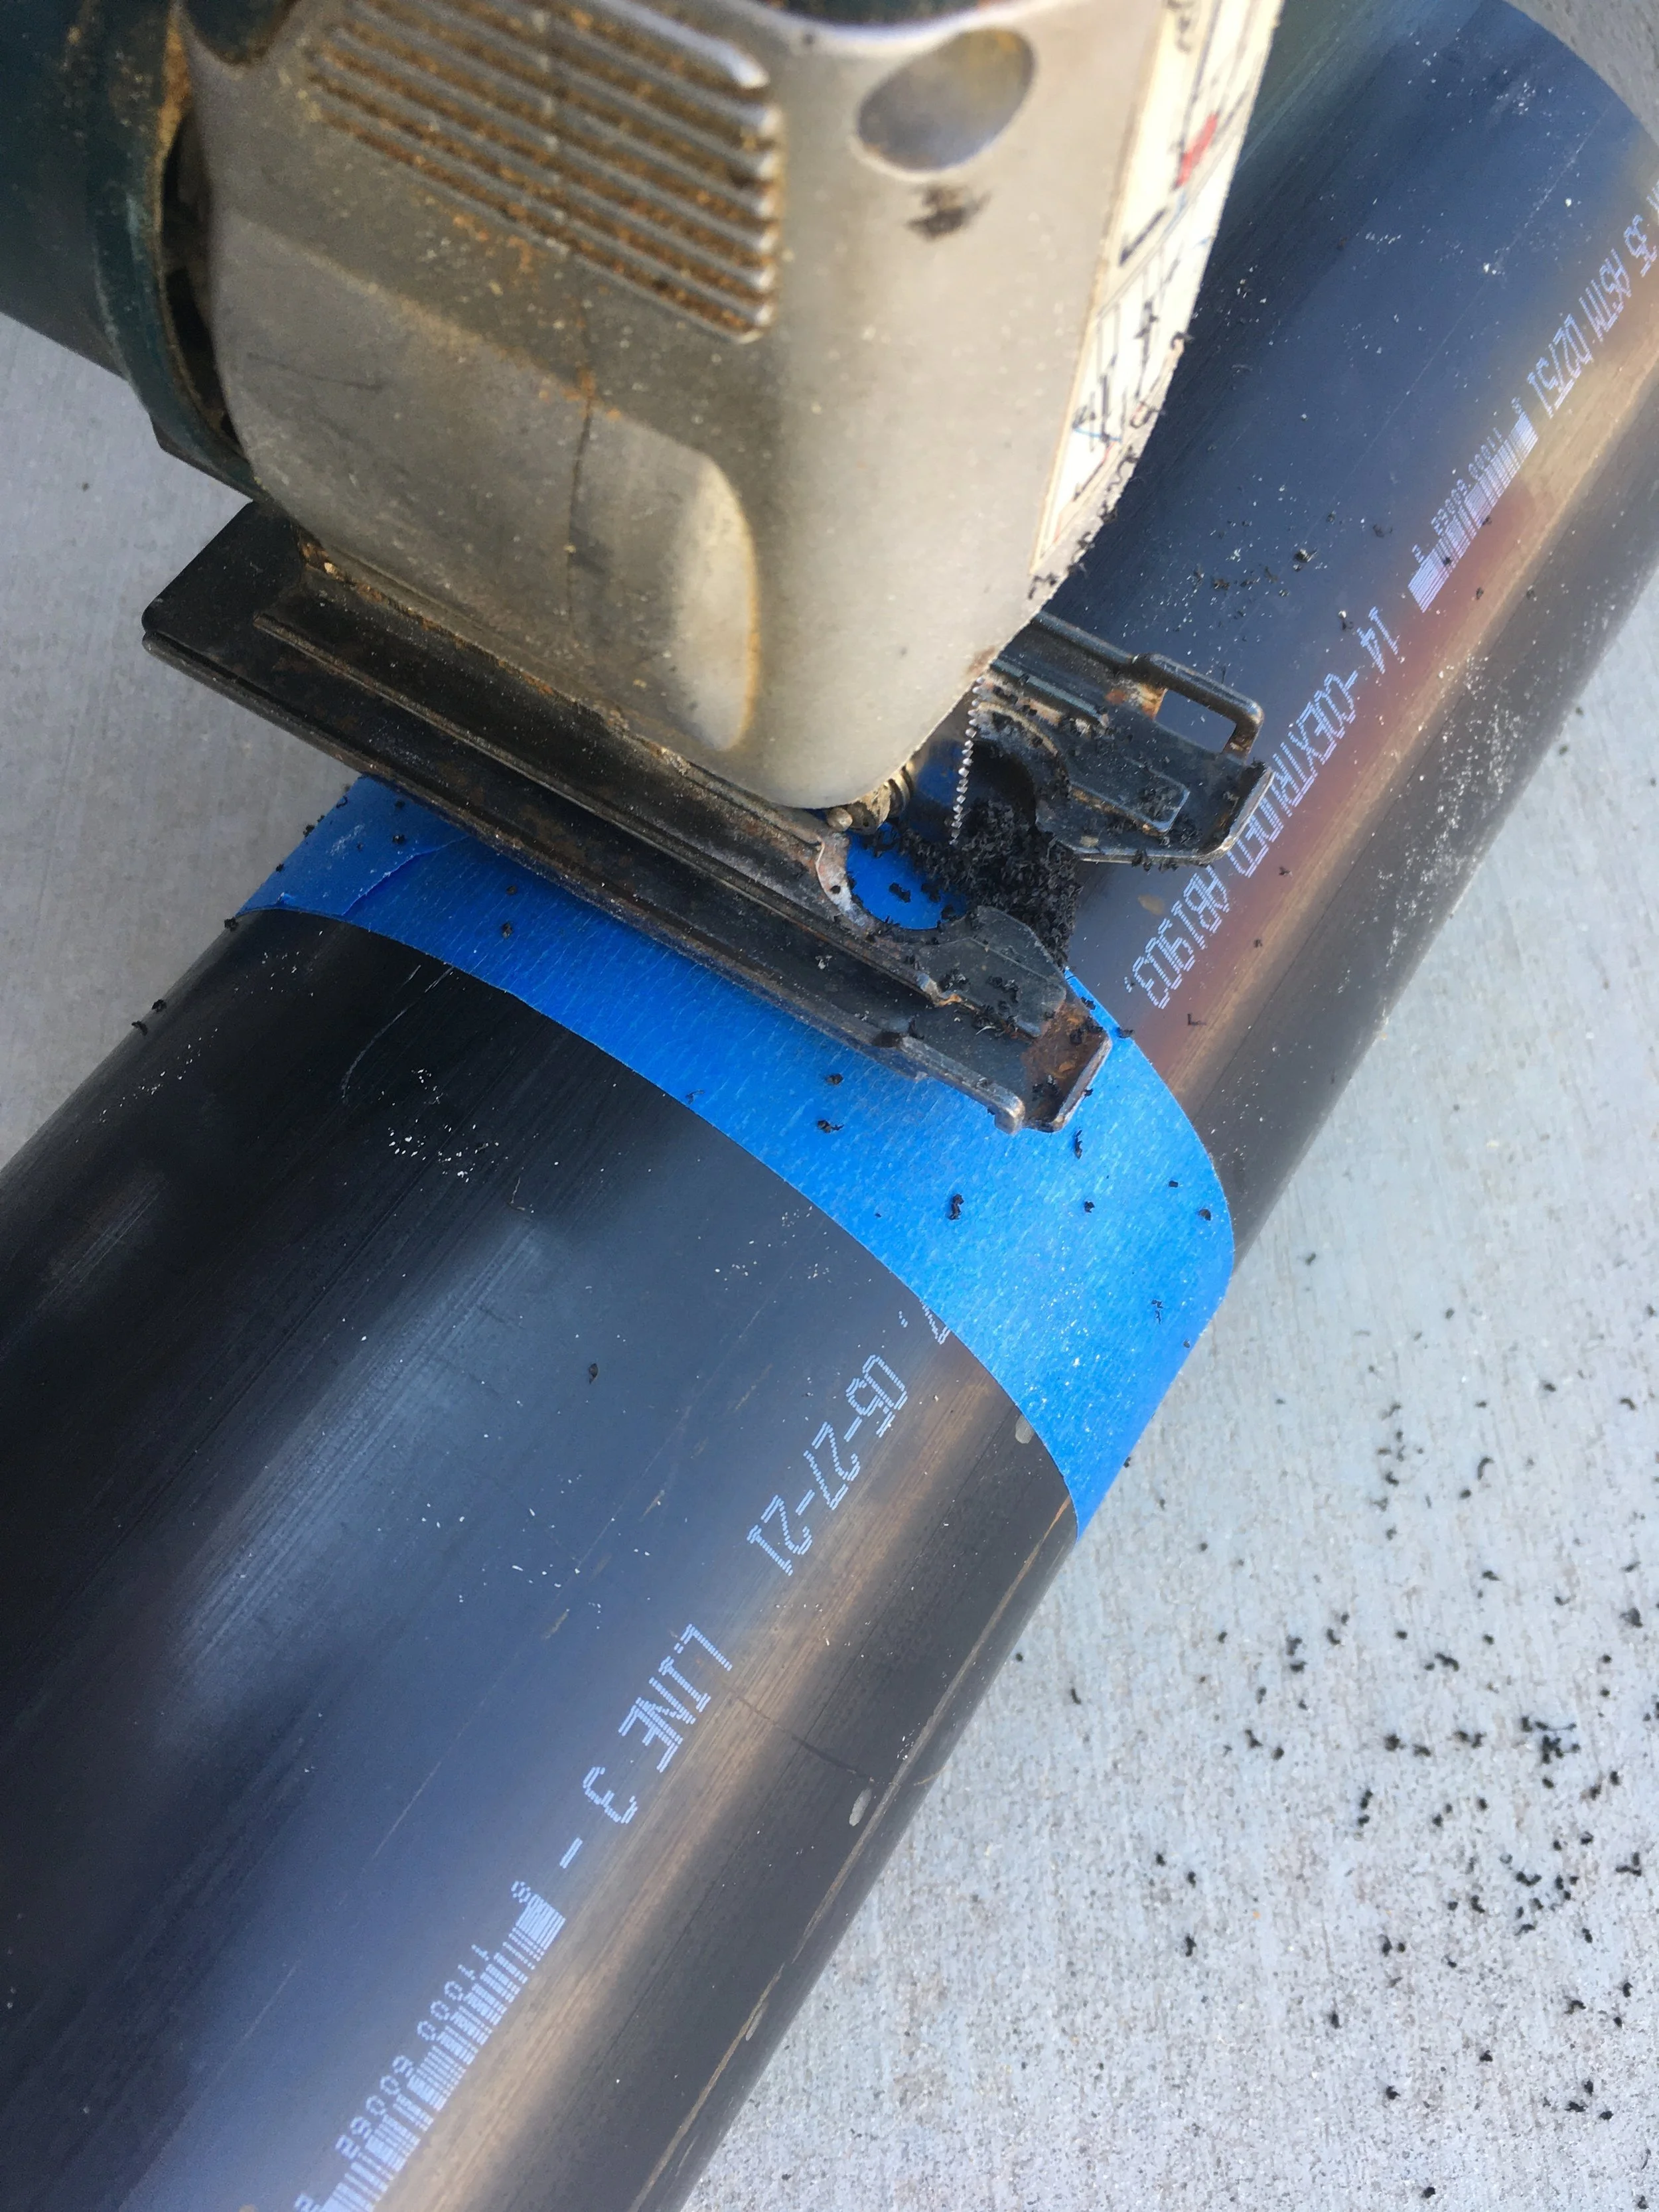
Next I set up the Sony lens next to the pipe, gauging its length with space left over for padding on each end. I marked the spot with a circumference of painter’s tape and trimmed the pipe with the jigsaw.
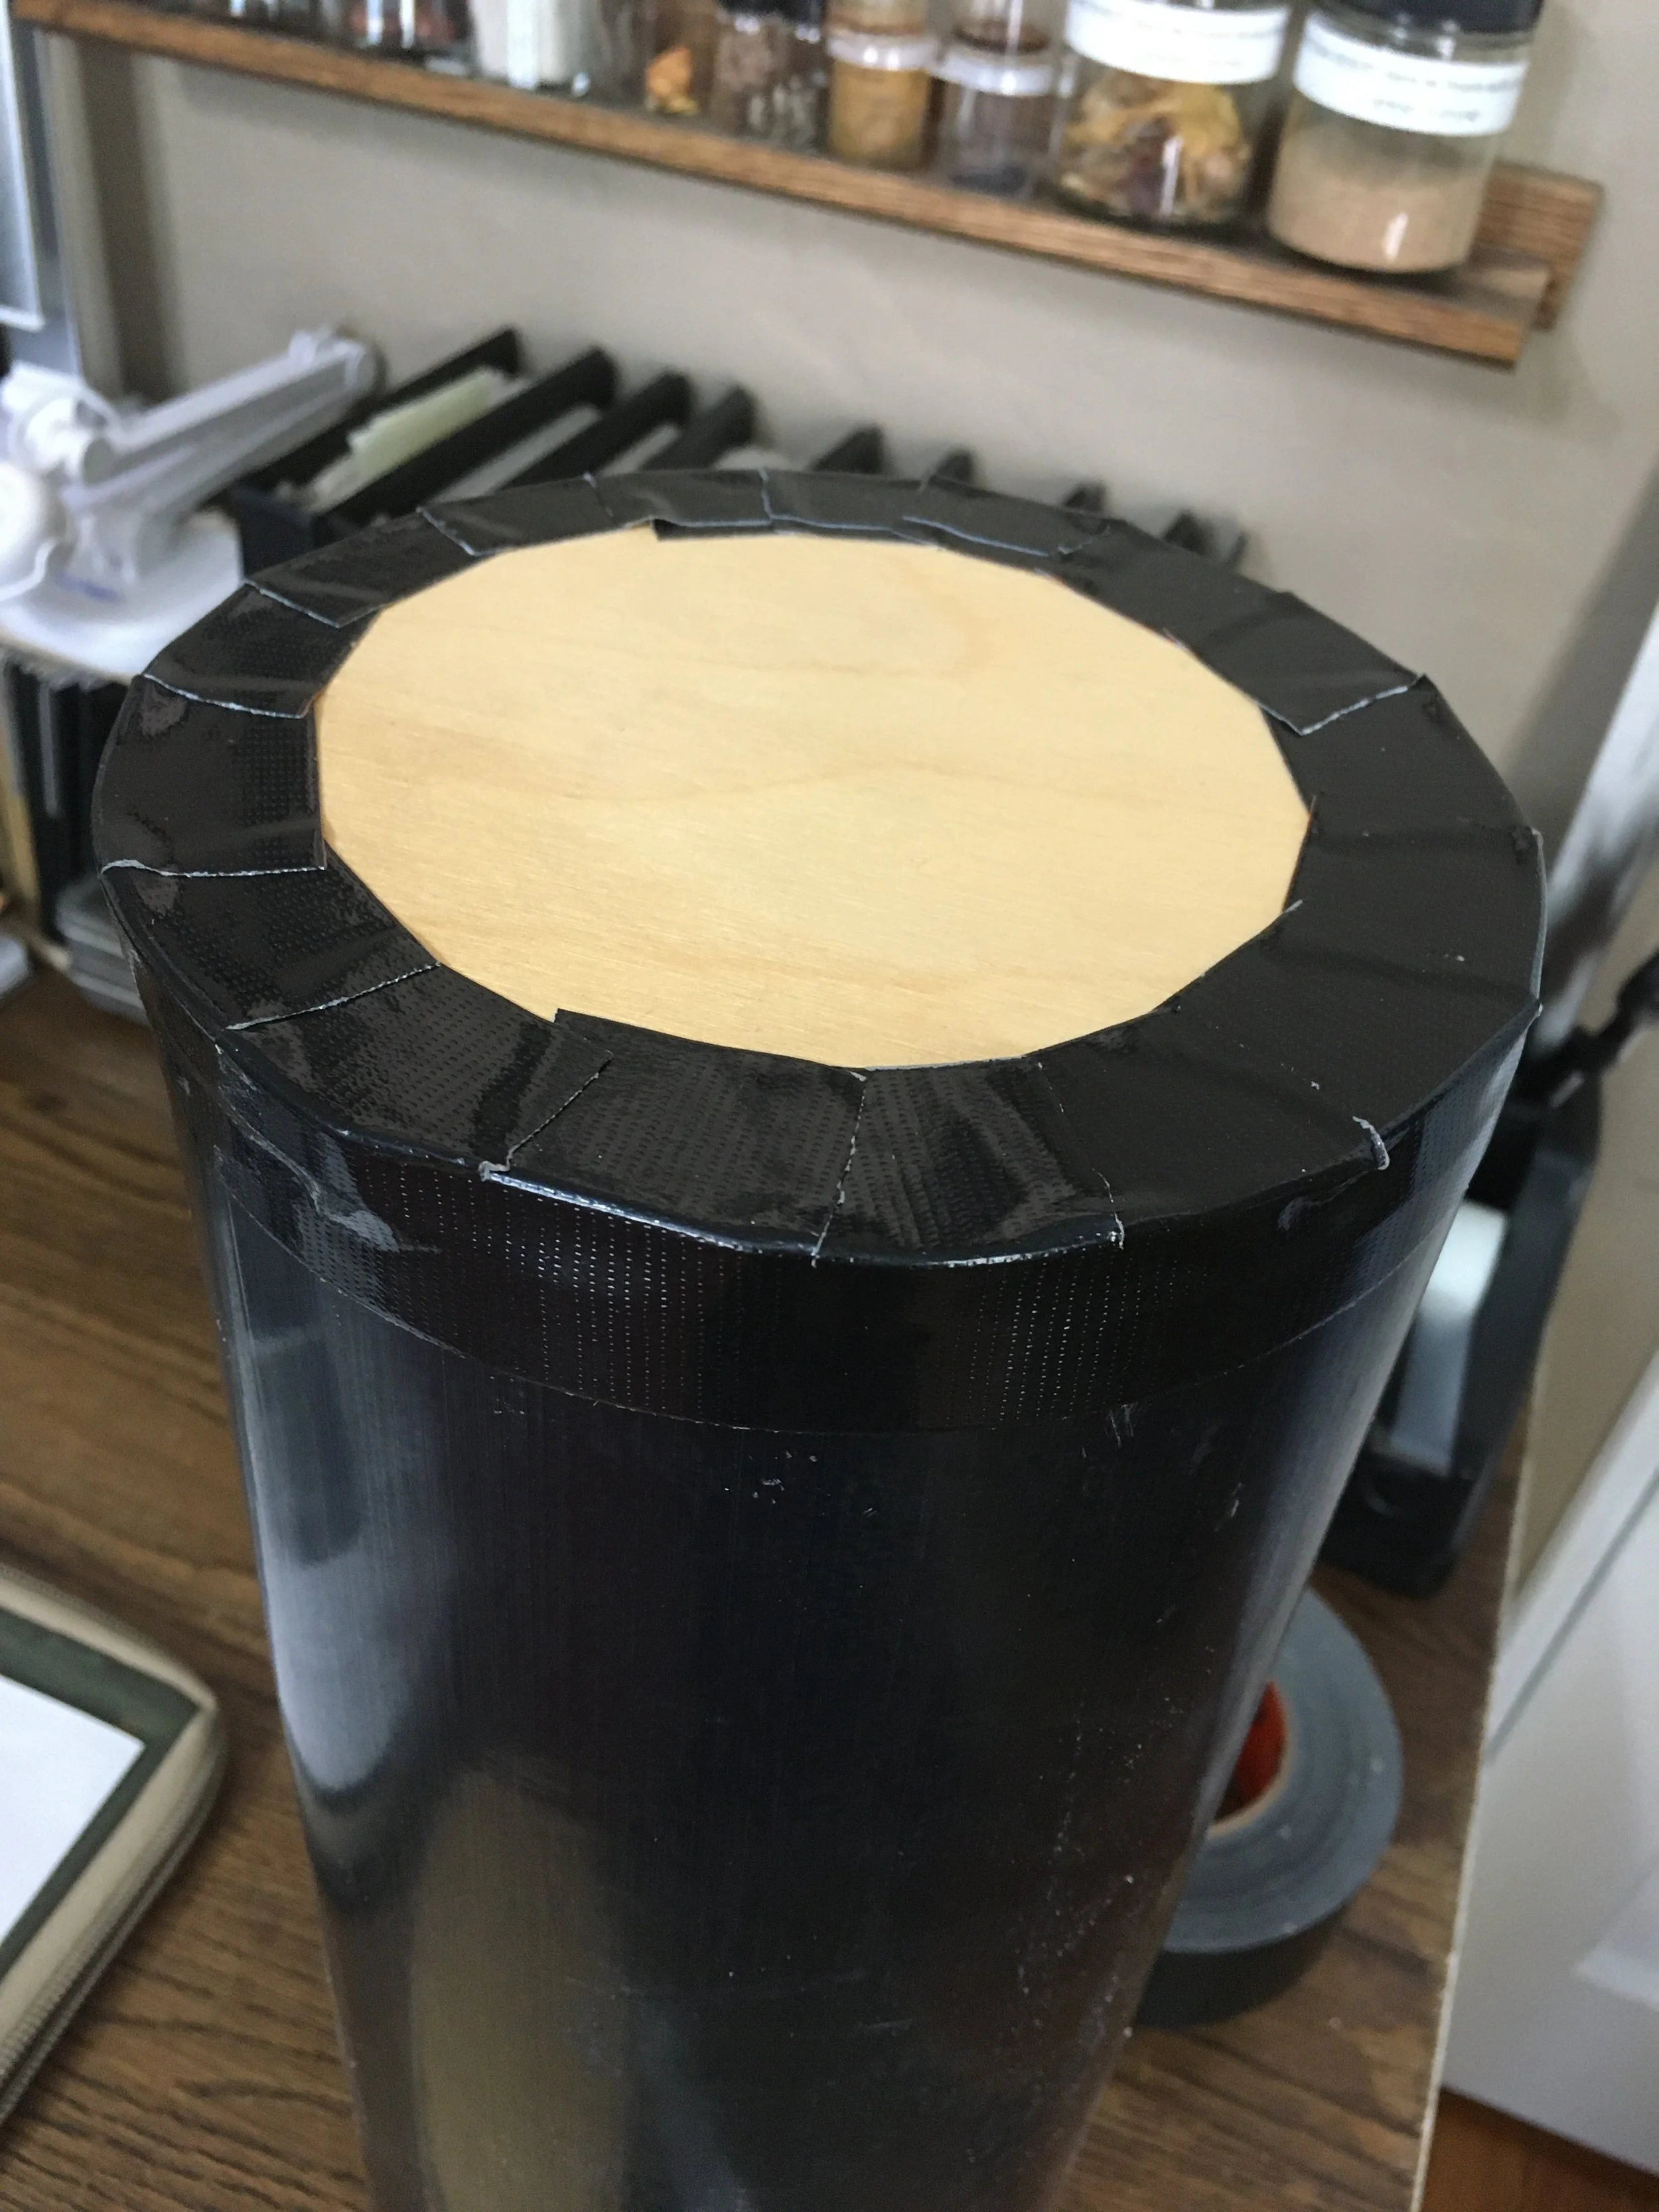
Nearly finished. I made sure the length was good, then used Gorilla tape to secure the “bottom” cap to the pipe, first with a piece around the edge, cut and overlapped thus:
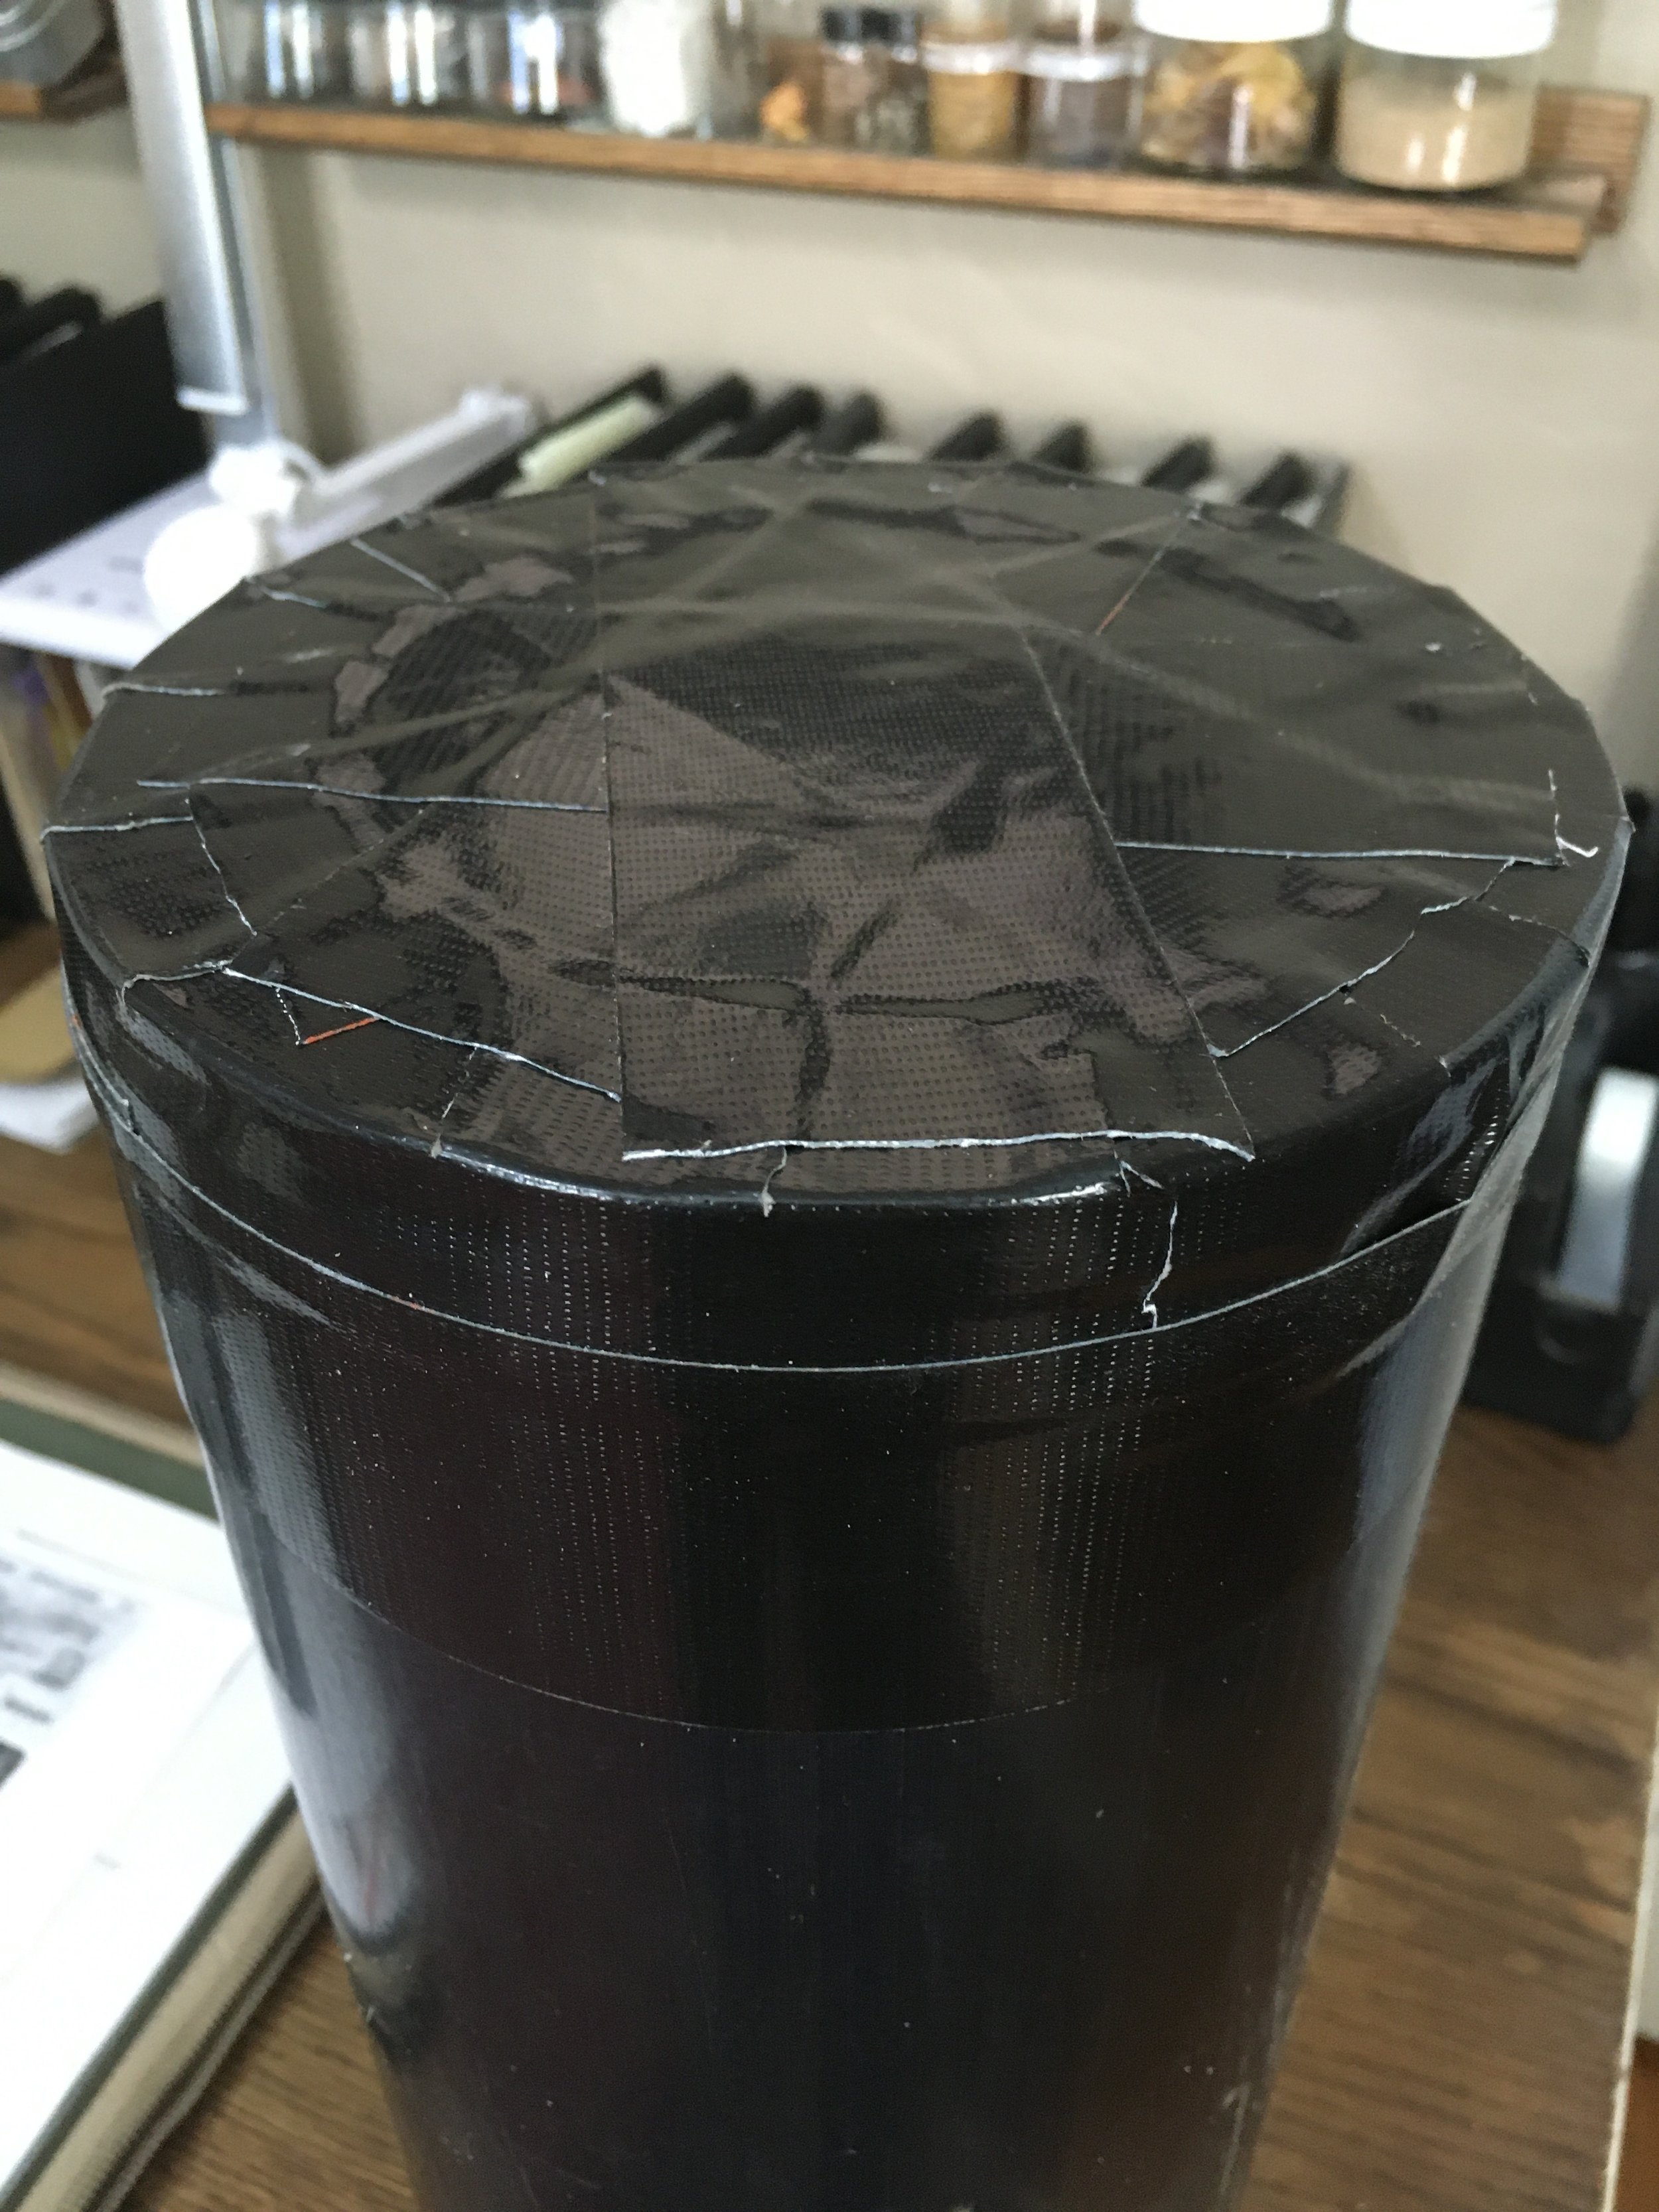
. . . then with strips all the way across.
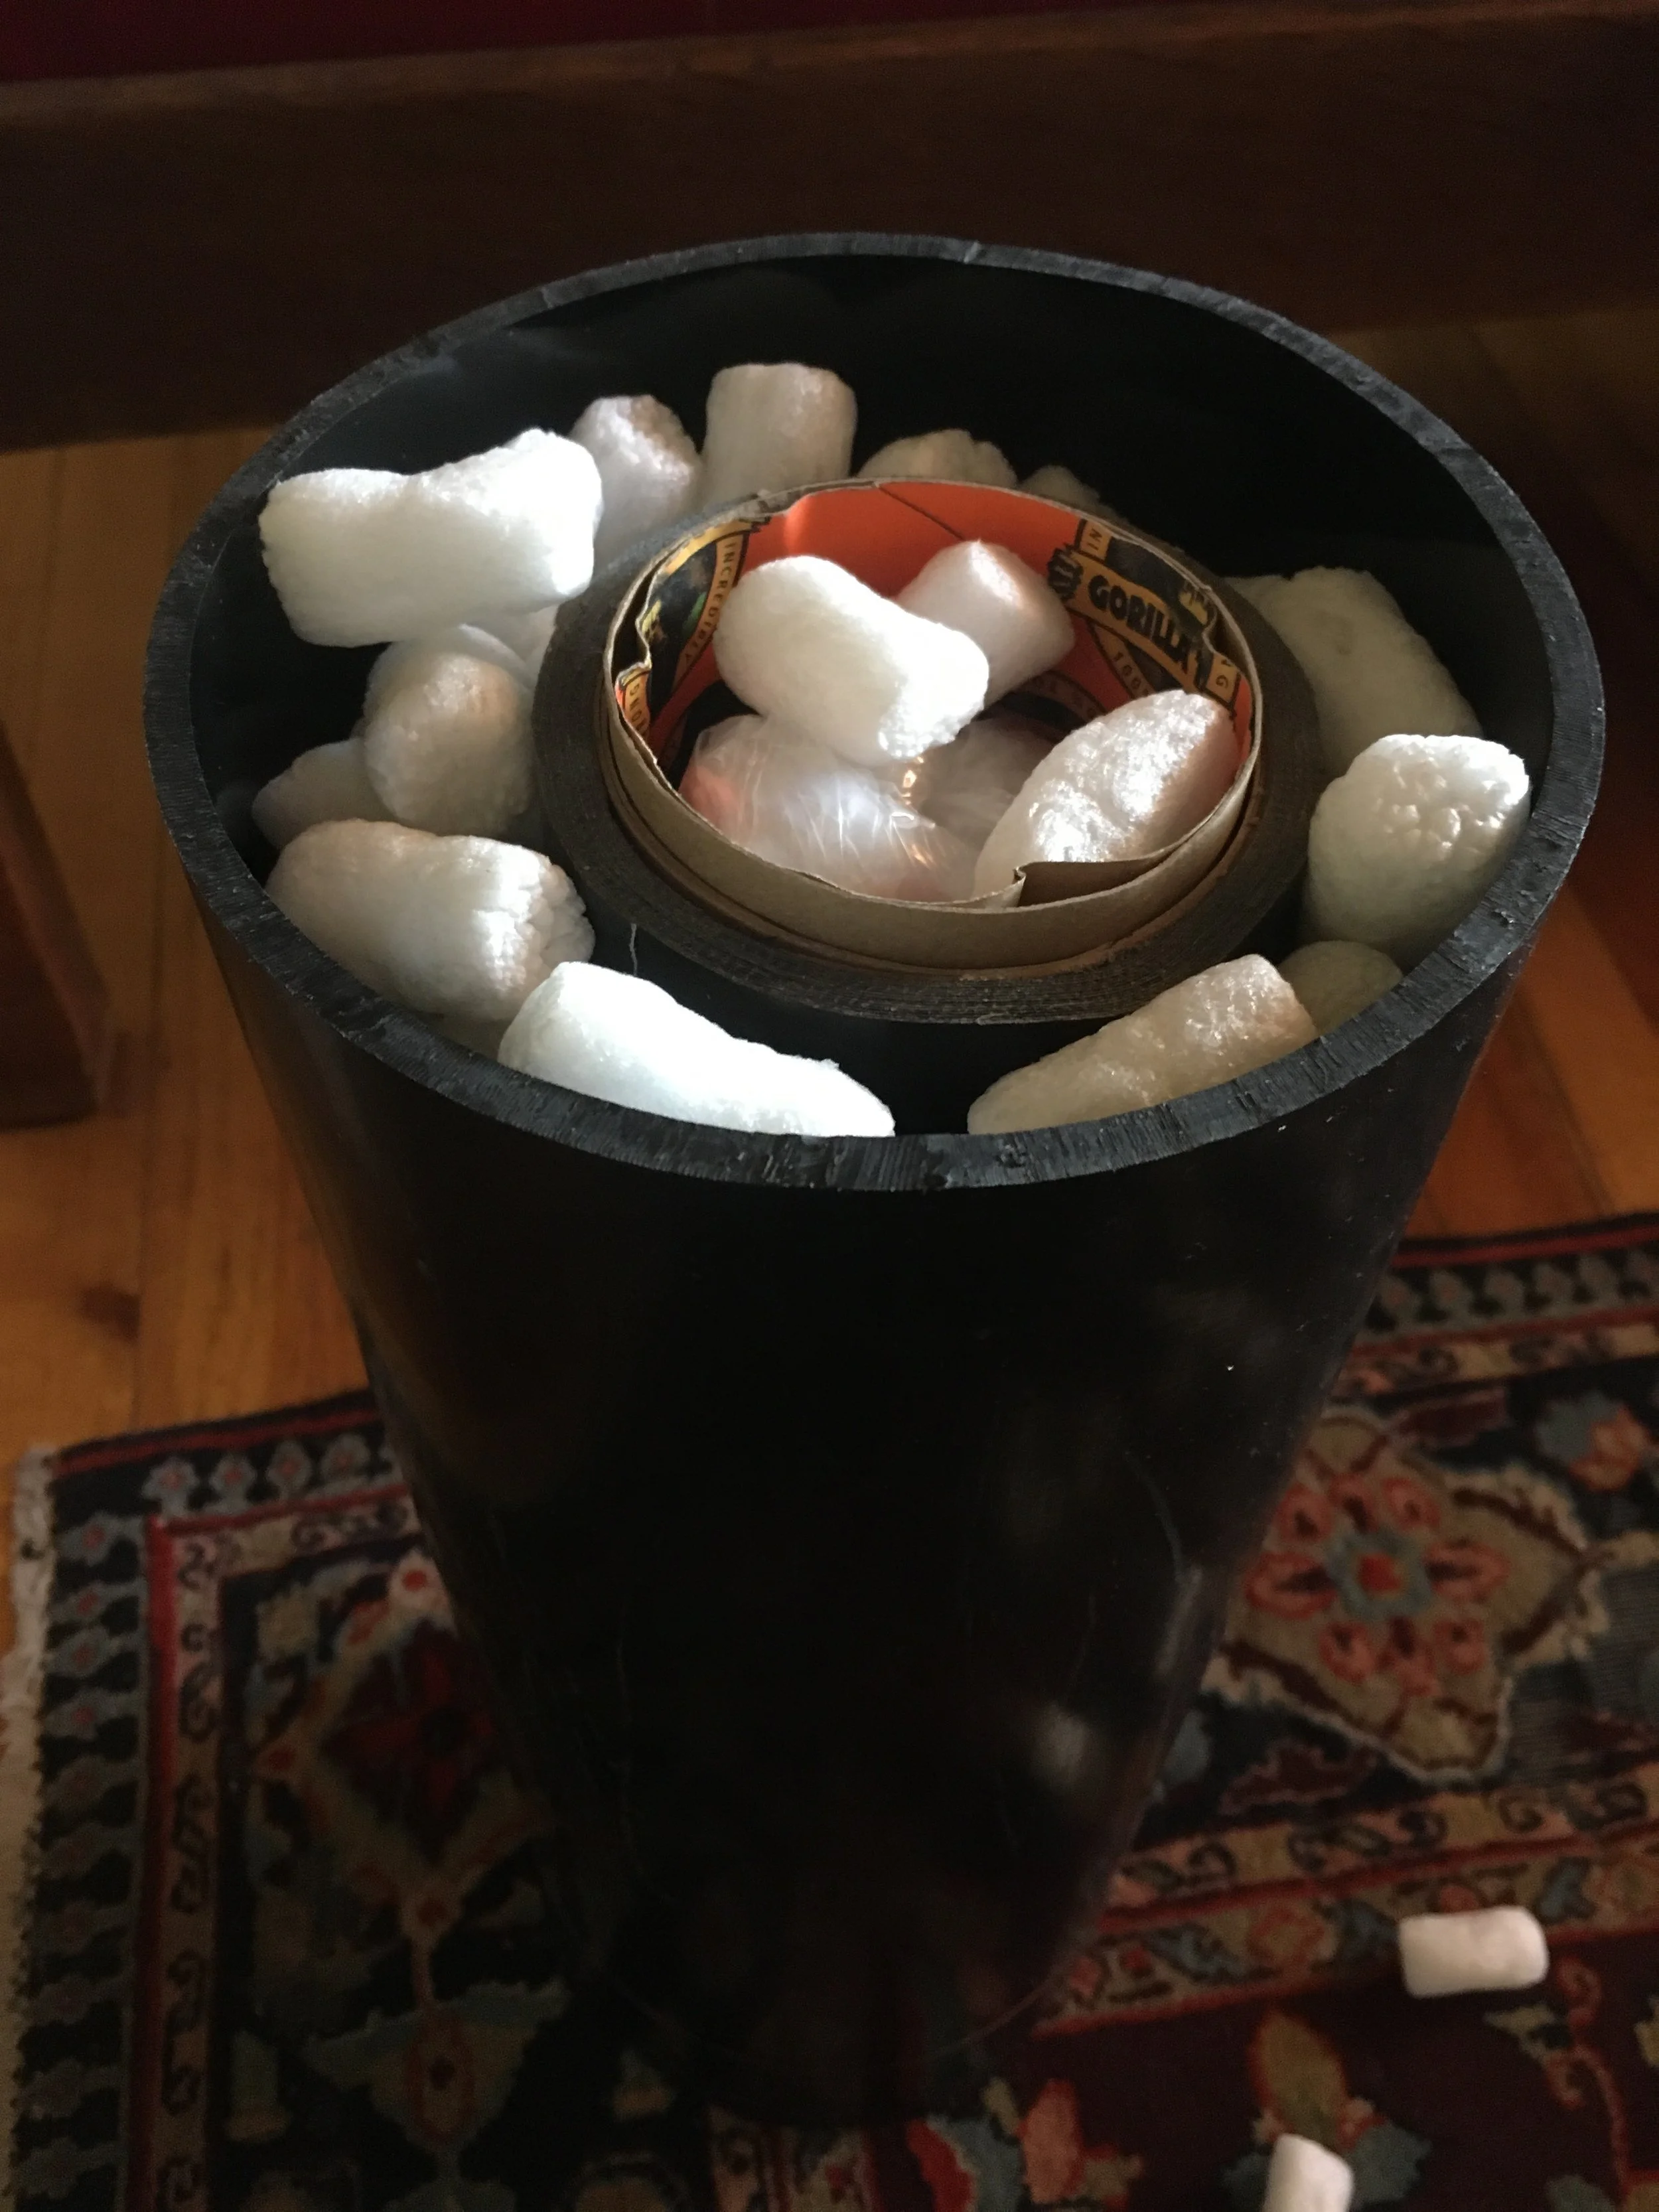
All that remained was to load the lens—wrapped in a plastic bag to keep it dust-free—well-surrounded by packing peanuts. On top I inserted the remainder of the roll of tape to re-secure it on the way home—and also, I hoped, to allow anyone who might open it for inspection to re-secure it.
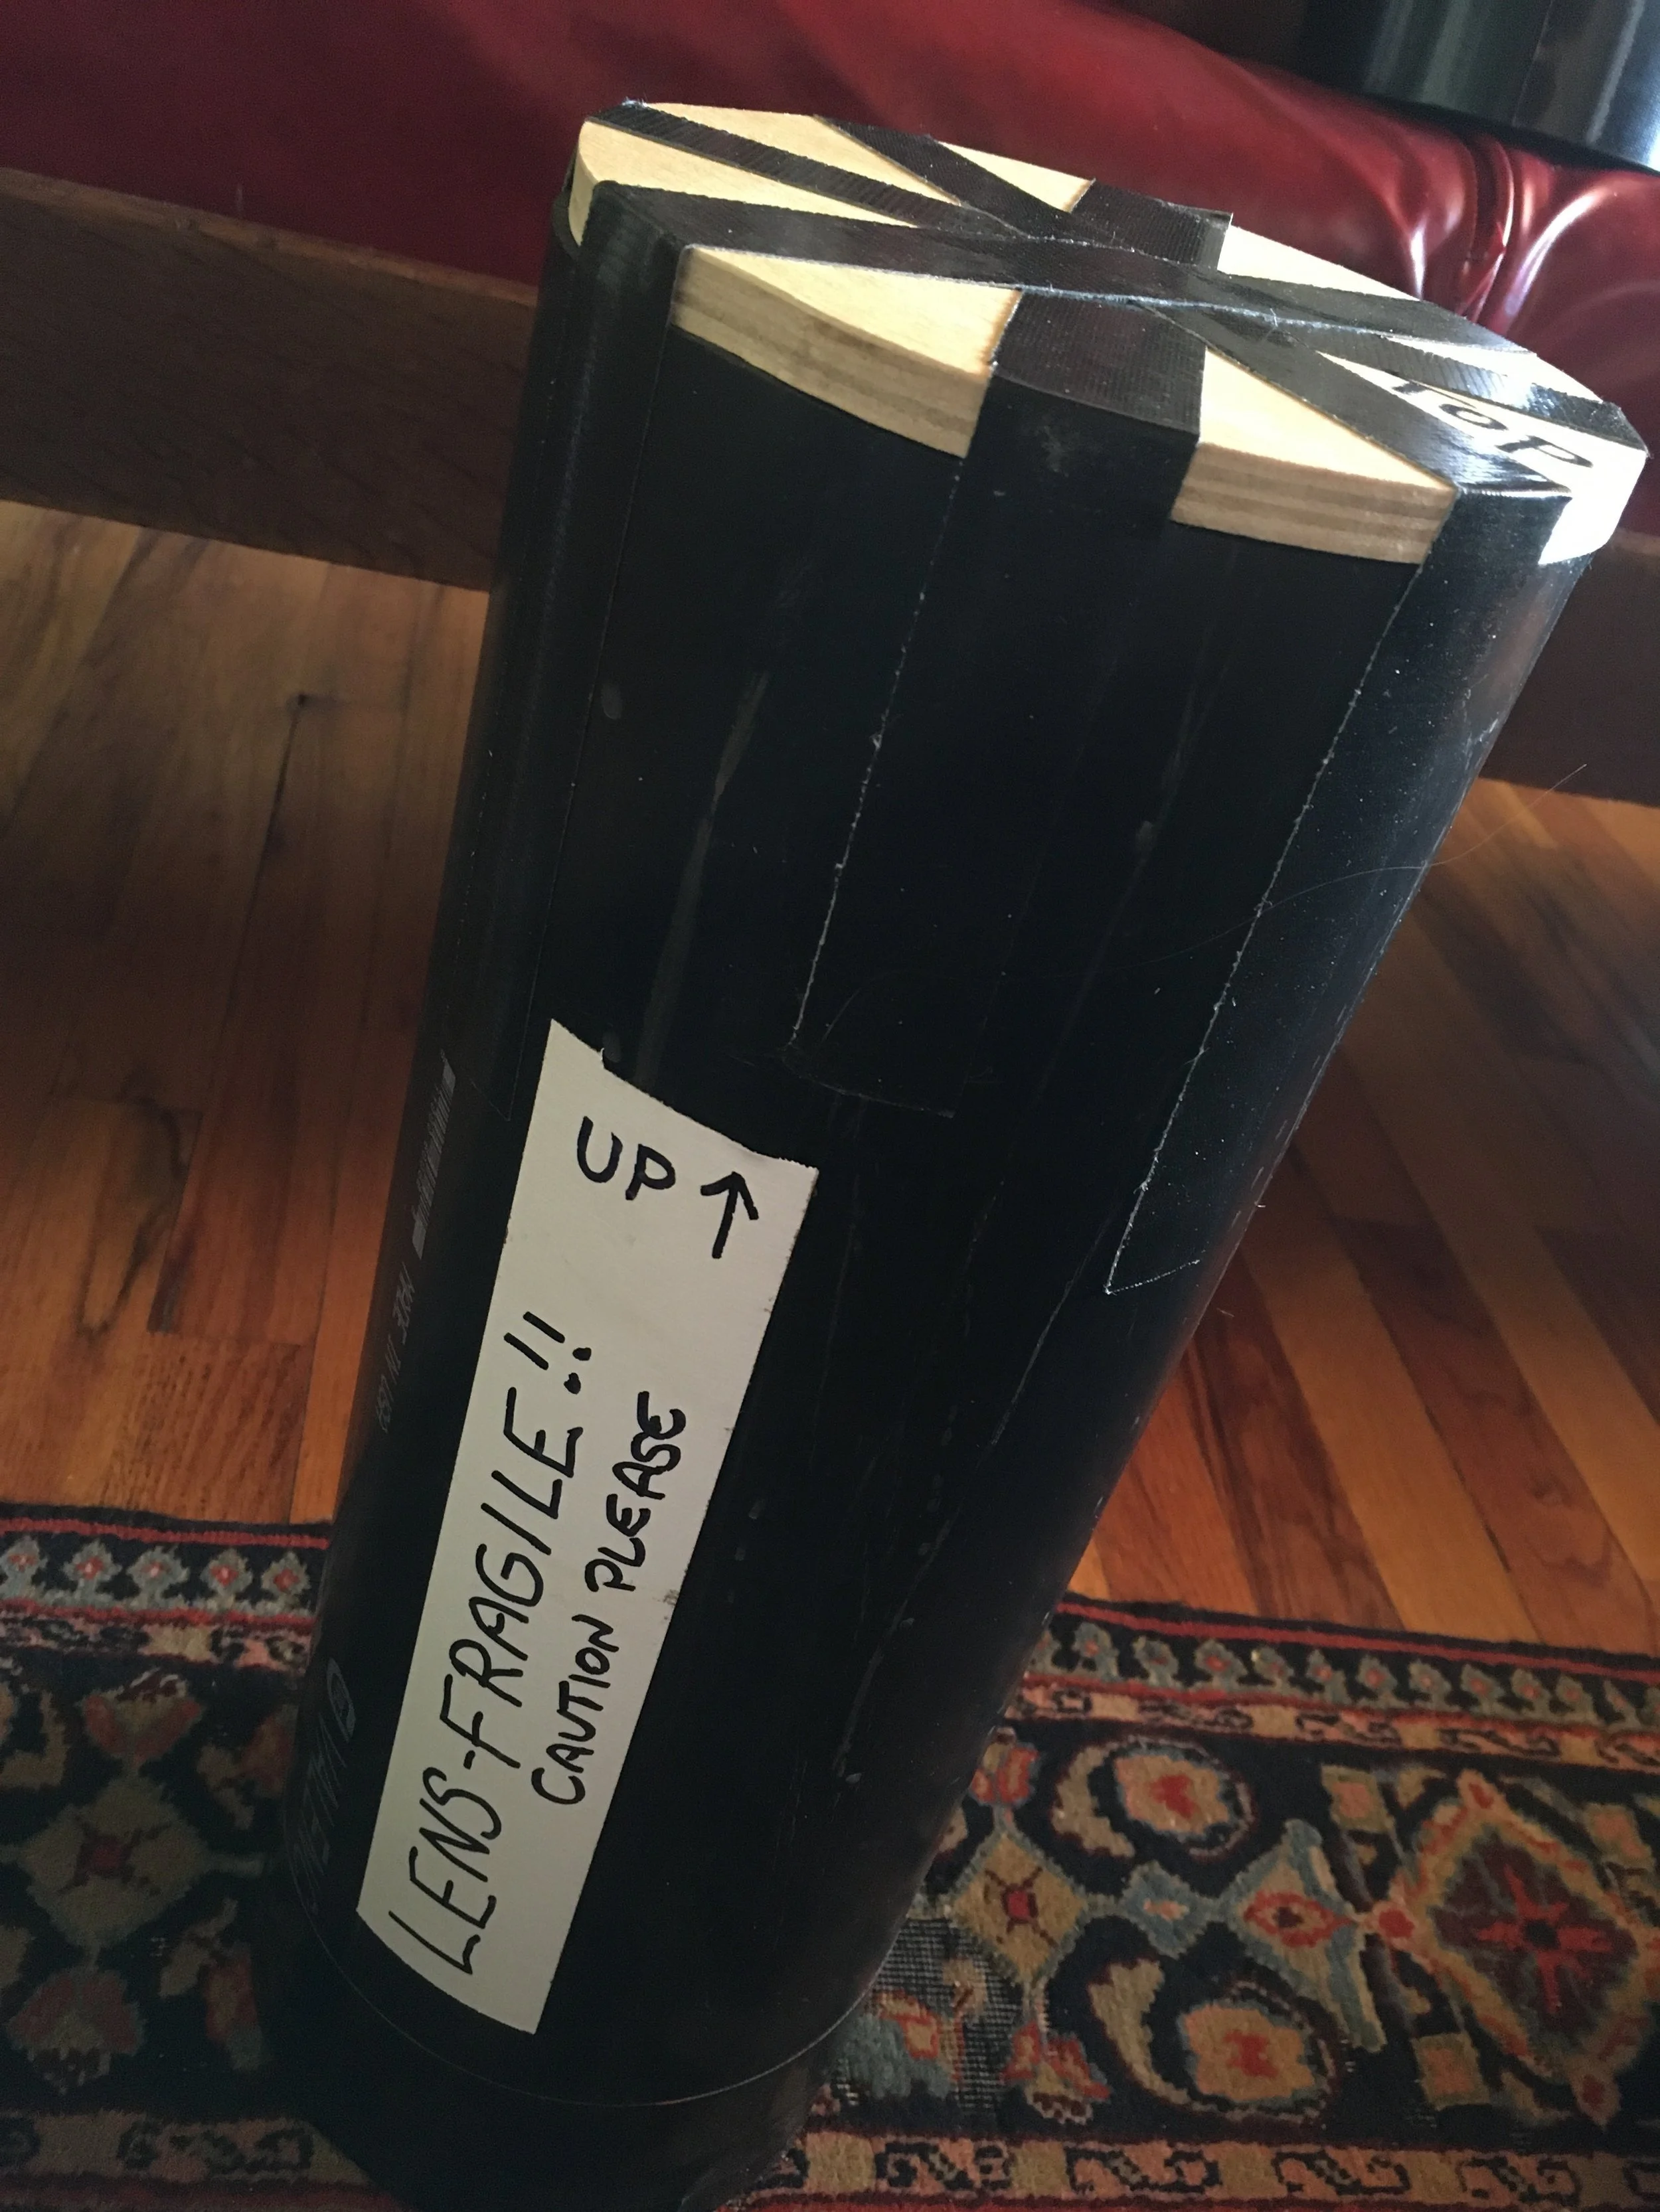
With the top taped shut, the case felt utterly bombproof. You’d have to run over the thing with a tractor to damage it (perhaps not beyond the realm of possibility at a couple airports I know, but . . .). I still marked the outside with warnings.
Of course the case survived multiple flights to, from, and within Alaska with zero issues, and for once we felt zero stress consigning such a piece of equipment to the vagaries of checked luggage.
Total out-of-pocket cost: $8.95. Plus tax.
Nitecore charger
One of the few downsides of modern digital cameras is the need for frequent battery charging. My first pro-level camera, a (film, of course) Canon F1 built with the ruggedness of a 747’s Black Box, had a battery to operate the light meter, but would function quite happily without it; you just had to remember the classic “Sunny 16” rule for exposure.
Not so these days: No battery, no camera. Even the ascetic’s choice, manual-focus rangefinder Leica M10 is digitized and thus dead without power.
One upside is, modern lithium/ion batteries boast tremendous charge density for their weight. Another—important for travelers—is that virtually all chargers for those batteries are muti-voltage and will operate happily on either 120 or 240 VAC current. Unfortunately, while the countries of the world managed to confine their mains single-phase voltage supply to those two choices, the variety of plugs necessary to access that voltage is bewildering. And if, like me, you are absent-minded enough to leave not one, but two adapters firmly inserted in sockets on a single trip across Africa, you could find yourself critically short on charging capabilities. Trust me that finding a U.S. to Botswana or Namibia adapter in Botswana or Namibia is a near-futile quest.
Fortunately there is a backup power source right there in the notebook computer you take to download and store those photos: the USB port. Which brings me to the Nitecore charger.
The Nitecore, which is available in numerous configurations to accept most camera batteries, plugs into the USB port of your notebook computer, which means it is way less likely to be left behind. That would be enough for me to click “buy now” right there, but the Nitecore also incorporates a digital readout that tells you the overall health of the battery, its current state of charge, rate of charge, and voltage. Brilliant.
I used the Nitecore on a recent trip to Mexico in our Tacoma and Four Wheel Camper, which highlighted another advantage: Since we currently have only a single-outlet 12VDC to 120VAC inverter in the truck, I was able to charge both computer and camera batteries at once. And I found the state-of-charge feature useful: At one point I was unsure of the capacity left in one of my BP-DC12 1200mAh batteries before a long hike. So I plugged it into the Nitecore, which informed me it was at 980 mAh—plenty to go on with just a single spare.
The Nitecore has a very short cord, which enables it to fold away in the back of the unit. And as you can see from the lead photo, the unit itself is significantly smaller than either my factory Lumix or Leica chargers. Given the extra functions included, that’s remarkable. Bravo Nitecore.
Highly recommended, even if you’re not absent-minded.
The TrekPak divider system
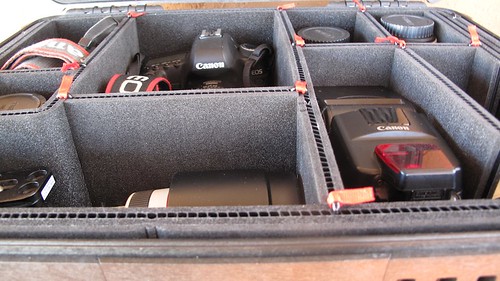
Few experienced travelers, photographers, or scientists would dispute that the ubiquitous Pelican case is the ultimate traveling container when the contents absolutely, positively have to stay protected from impacts, crushing, and dust and moisture incursion. I certainly wouldn’t argue (see here). I know someone who had to move several large Pelican cases full of equipment across an arctic inlet—by sea kayak. He simply rafted the cases behind the boat and towed them across. No problem. If you can deal with the relatively high weight of the empty Pelican, and the just-so-so volumetric efficiency, nothing will give you as much peace of mind when the equipment inside is worth quite literally 40 or 50 times what the case cost. It’s the cheapest kind of insurance.
But you can’t just toss your photography or video equipment inside a big plastic box, however sturdy. You need interior padding and organization. And that presents a bit of a dilemma.
The Pelican can be equipped with either of two options from the factory. The “Pick N Pluck” interior comprises an open-cell foam filler that is partially pre-cut into small square sections. You tear free the sections you want to create pockets to fit camera bodies, lenses, or other items. The result is snug and secure; however, once done you can’t re-organize to accommodate new or replacement equipment, and you must leave at least two cube-widths of the soft foam between items or the structural integrity collapses. That reduces available room significantly. Also, with constant use the open-cell foam degrades rather quickly. I’ve found the Pick N Pluck interior best when a case is devoted to one very expensive or fragile item, such as a monster 600mm F4 telephoto, where the tight fit and thick cushioning provide excellent impact resistance.
The other Pelican option is a set of padded, nylon-covered dividers, which rearrange and connect via hook-and-loop strips. This interior can adapt to new contents, but it’s quite limited in configuration and thus tends to waste space, and the hook-and-loop material is fiendishly efficient at collecting and holding on tightly to all sorts of debris, which eventually reduces its grip on itself.
Aftermarket options have been around for a long time, but every one I’ve used—such as the otherwise superb Lowepro Omni Pro in the link above—wastes a lot of volume due to redundant lids and straps, and dividers that are actually over-padded. How often I’ve wished for a thinly but densely padded divider system that wouldn’t rely on Velcro, had more structural integrity than open-cell foam, and could be re-organized easily to “suit the mission.”
Thanks to, of all things, Kickstarter, I may have gotten my wish. A new company called TrekPak has (rather spectacularly) defied recent odds on the crowd-sourced funding site and made it into full production with a modular divider system designed to match several sizes of Pelican cases, as well as a couple of high-quality daypacks from Deuter.
Georgia Hoyer, the president of TrekPak, sent me a kit for a Pelican 1550, one of the most versatile mid-sized cases in Pelican’s lineup.
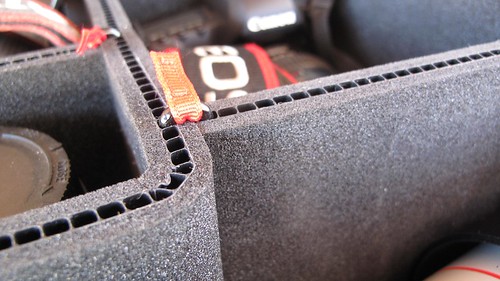
At first glance the pile of foam slabs in the box doesn’t seem very impressive. It’s not until you start assembling the unit using its clever U-shaped steel clips (with bright red pull tabs) that it gains form and, it turns out, superb function. The secret to the TrekPak system is the corrugated plastic core sandwiched between the layers of closed-cell foam. That core adds structural rigidity as well as the means to configure the kit to suit your equipment. The TrekPak kit contains enough sections of varying length to accommodate most needs, but, unlike the hook-and-loop-style dividers, if you need a shorter bit to create a suitable compartment, you can easily trim one with a straight edge and razor.
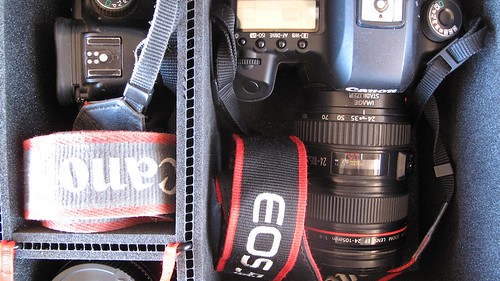
I laid out the camera gear I wanted to fit in the Pelican 1550, and began experimenting with the provided TrekPak sections. Eventually, after some trial and error, I fit the following into individually padded compartments: A Canon 5D MkII body with attached 24-105 F4L lens, a 5D body, further lenses comprising a 70-210 F4, a 15mm fisheye, a 100mm macro, a 300mm F4, and a 17-35mm F4, a 1.4 converter, and two EX550 flash units. Not bad at all, and there was room left over for batteries and CF card wallets. The dividers are easy to align and connect with the clips. It’s up to the user to attach or leave off the little red flags on each clip—they add a festive note and make it much easier to remove the clips, but aren’t necessary.
I could have used one extra full-length divider—the kit comes with two—and I had a few short sections left over. I’m hoping the company will eventually offer individual sections for sale to allow complete individual customization. Some customers might whinge at à la carte pricing for extra pieces, but many won’t need them, and the versatility would be worth the cost for those who do. My 70-210 lens, on its side, left enough room above it for another skinny lens; it would be nice if TrekPak offered thin foam without the plastic core for the user to fabricate bi-level compartments (not that I can’t easily find such material on my own; it’s just nice to have it all available from one source). With a little more configuring and a bit more material, I could have constructed a T-shaped compartment for the camera and attached lens, which would have been slightly more space-efficient than the square I wound up with. However, all in all I was extremely impressed with how much gear fit in the case, thanks to the just-right thickness of the TrekPak dividers. And the ease of reconfiguring to suit changing equipment is a bonus.
So how does the Pelican case/TrekPak combination work in the field? As a transport case it’s brilliant. You don’t need any more padding than this system provides as long as your equipment fits reasonably snugly inside. And, as we already know, one’s confidence in the waterproof/dustproof security of all that expensive gear is unmatched. (There aren’t many other camera cases I’m willing to stand on to gain a little height for a photo with all my gear inside.)
As a user case—that is, to be at hand for a shoot when you need to access lenses, cards, and batteries—the Pelican/TrekPak is far, far better than my old Pelican/Lowepro Omni Pro combination, since there is no internal lid to get in the way. However, it’s obviously a vehicle-dependent setup—you wouldn’t want to go on a walking safari with this thing (look at those Deuter day packs if you carry a lot of equipment on hikes). And you’ll need an entire seat to accommodate the 1550 if that’s the model you choose. I’m planning to try a kit for the (smaller) Pelican 1510 rolling carry-on case I want to use for managing photo equipment on international flights.
While I suspect the vast majority of TrekPak kits will be used for photography or video gear, the system would be equally versatile for many types of delicate equipment used by those working in the field: spotting scopes, satellite communication devices, radio-tracking receivers—you name it. I’m planning to devote an entire Pelican case to all the impedimenta one accumulates when using the Canon 5D MkII and III as a video camera: external microphone, follow-focus unit, suction mount for exterior vehicle shots, stabilizer for hand-held tracking, LCD viewfinder—a ridiculous amount of stuff.
Let’s see—1550 camera case, 1550 video equipment case, 1510 carry-on, all with TrekPak divider systems.
I guess I’m a convert.
TrekPak kits start at $65: TrekPak
iPhone LifeProof Case, part 1
For more and more people, our phones are not just devices with which to phone home, they are also our primary GPS, pocket camera, video recorder, notepad, music player, book reader, dictionary, translation tool, and complete mobile office. In fact, I am writing this review on my iPhone 4S.
With so much at stake, especially while traveling, protection is key. Not only are these pricey electronic gadgets averse to water and fearful of heights (i.e. made from slabs of glass), they are for the most part uninsurable.
At the Outdoor Retailer show in August I selected a few of the newest crop of rugged iPhone cases to test during our trip to the UK and Kenya. Plenty of rain in one place and dust in the other; I figured on some perfect testing conditions.
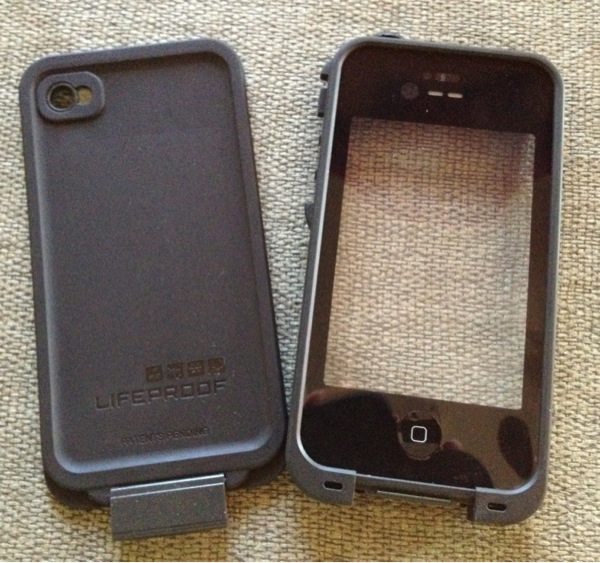
First up is the LifeProof Case ($80, Lifeproof.com). I found it highly attractive because it is not only fully waterproof to 2 meters, totally dustproof, and shockproof to 2 meters (full MIL-STD-810F-516.5 = 2 meters/6.6ft drop on all surfaces and edges), it is so streamlined it hardly changes the profile of the phone. It adds 1.5mm to each side and weighs less than an ounce (28g).
But wait there's more: the covers for the camera lenses are double AR-coated optical glass and the speaker covers are gas-permeable waterproof membranes (I believe Gore-Tex but I haven't been able to verify that while on the road).
So here are the first impressions.
- Passed the "at-home" wateproof test as specified in the instructions (to seal, sans iPhone, and submerge in water, weighted, for at least an hour)
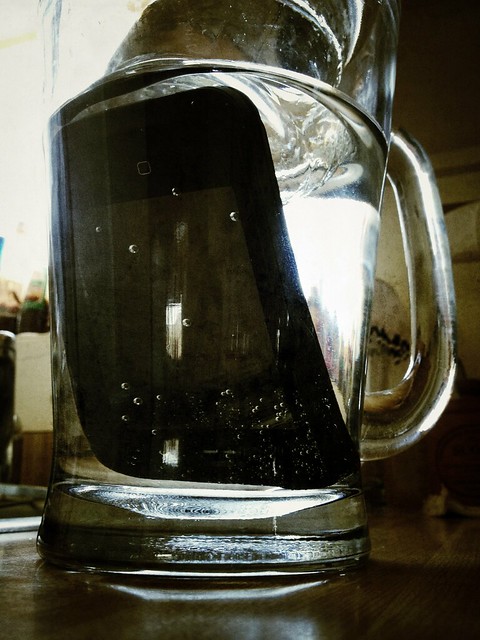
During (above) and after (below) the dunk test. No water in the case or at the gaskets.
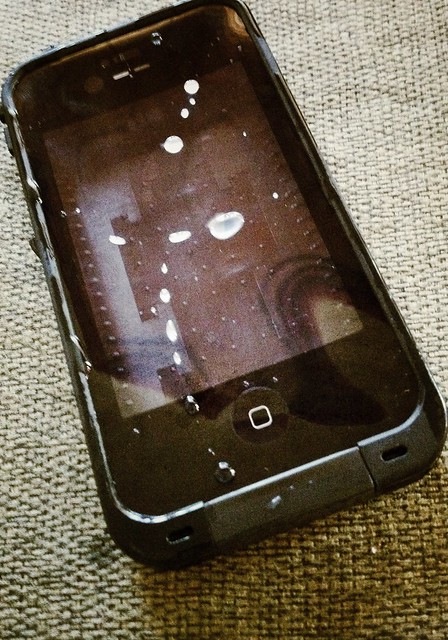
- The fittings snap together very tightly. Unlike the Otterbox case, they actually are very tough to put together and the company includes a long list of "must-do" actions to ensure the case is sealed properly. While fussy at first, you soon realize it's serious protection for an expensive gadget. However, after sealing in my iPhone 4S, the first thing I noticed was that the screen protector was warped and stood proud of the screen by about 1mm or more. This made it nearly impossible to use as anything but just a "hello" phone. Texting or manipulating photos (which I do a lot) was just silly—the fingers don't meet the screen and there is no contact, so nothing happens.
I searched forums and found this to be an intermitent problem, so after a call to the rep the company agreed to send a new one. This one fit very, very snugly and the screen protector very close (if not 100%) to the screen, so I found it easy to use, if not perfect. The Otterbox fits flat to the screen with no warping, but it's not 100% waterproof to 2m.
 Extensive instructions and warnings accompany the LifeProof case.
- The only charger you can use is the factory Apple charger / cord. My spiffy retractable cord won't work with it, nor will it work with my Griffin iTrip.
- To use headphones you must use the adaptor (so it seals) or use Bluetooth.
After 10 days on the road taking photos, posting on Flickr (see Flickr.com/photos/conserventures), Instagram, Facebook, Twitter, and here, I can say I really like this case. However, I admit to an unfair gripe. The replacement test model came in blue rather than the original (and my favorite) black. I hate blue. I just do. There's no logic. So when our friend Duncan in Scotland admired the blue case, and showed me his new black LifeProof case, I jumped at the chance to switch. Interestingly, the black case does not fit as well as that blue one, but it fits better than the first one I had. So lesson is: you might have to try multiple models to get the best fit.
So far the screen has not scratched. I have not dropped it, but I've used it in foggy spitting rain in Scotland, and it sat in a wet pocket for most of a half-day walk round a village. I noticed a little bit of fogging when we went from cold/wet to warm environments but it cleared quickly.
Next up: we're flying to Kenya, where we will fully test the LifeProof in the dusty, dry Rift Valley.
Function and elegance: Billingham camera bags
 Handsome, durable, and cavernous: the Billingham 550Carrying photo equipment on safari presents a conundrum. It’s critical that camera bodies and lenses be protected from dust, moisture, and impacts. Yet everything must be quickly accessible and organized in such a way as to allow fast identification.
Over the course of 20 years of photojournalism and hundreds of equipment reviews, I’ve used at least a dozen camera bags and carrying systems extensively, and a couple dozen more for long enough to become familiar with them. Without doubt the most bombproof was the Lowepro Omni Pro Extreme I still own—a padded, suitcase-shaped, compartmented nylon bag with a panel flap that opens the entire contents to view, and which fits inside a completely water- and dustproof Pelican 1520 case. It received its ultimate test in Zambia, on a game drive in an open Land Rover when our guide was trying to get ahead of a huge herd of cape buffalo. I was in the middle seat; the case was on the rear seat next to a fellow journalist who, in an unfathomable act of mindlessness, balanced it on the rear rail of the moving vehicle while he changed positions. The first I became aware of what he’d done was when I heard him say, “Oh,” and turned in time to see the Pelican case hit the ground on a corner and bounce like a 14-year-old Russian gymnast, then cartwheel three or four times into a large pile of herbivore dung.
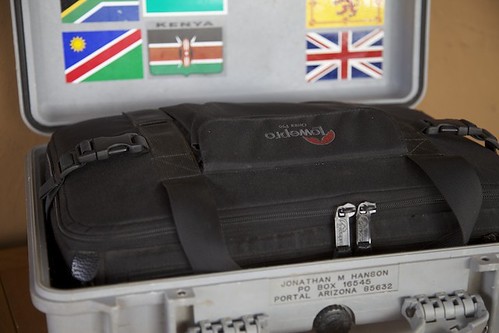 Bombproof, but heavy and low on convenience: The Lowepro Omni Pro Extreme Nothing inside was even jostled—and I doubt any other camera case I’ve ever used could have accomplished the same feat. The problem with the Omni Pro system is access: From fully closed (which mine fortunately was when it took the header) to fully open requires unsnapping the Pelican latches and opening the lid, unsnapping the soft case’s handle, undoing two Fastex buckles, then unzipping the case and grabbing a camera to photograph the elephant which has since abandoned its bluff charge, gone back to browsing, and fallen asleep. The full system is also very heavy for its volume—and that volume is restricted absolutely to the dimensions of the hard case. Two SLR bodies, a flash, and three lenses pretty much max it out. You can carry the Omni Pro without the Pelican, briefcase-like, but it bulges oddly with the weight of the contents, and the proud “Lowepro” logo has the same number of letters as “Steal me.” (What I’d give for a camera bag with a big fat embroidered label reading something like, “URINE SAMPLES— KEEP UPRIGHT”)
My least favorite camera bag is ironically one of the most iconic: the Domke F2, beloved of grizzled chainsmoking photojournalists (even, inexplicably, my wife Roseann, although she isn’t grizzled and doesn’t smoke). Constructed of undeniably stout and good-looking canvas, the Domke offers zero impact protection for the contents and next-to-zero protection from dust. The spring-steel clips that hold the lid closed must be manipulated with two hands if you need them open in a hurry, and side-pocket flaps gap wide enough to eject batteries if the bag is tipped. Perhaps the F2 works for covering the Academy Awards (“Look this way Ms. Watts!”) or climate-change conventions in Zern, but in the field it’s a dead loss, for me at least.
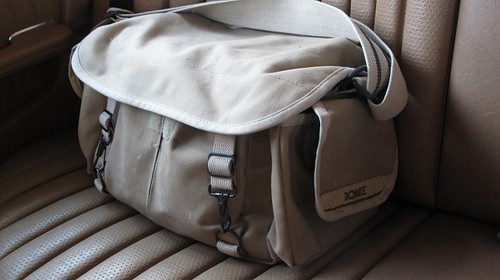 Domke: Fine if your preferred photo subject is Naomi Watts. For several years now I’ve used a Mountainsmith Endeavor (first a prototype, then a production version), and I’ve been highly impressed with its utility, physics-defying interior space (in bright yellow for visual contrast), decent padding, and excellent dust protection. A sleeve on the back slides over the extended handle of a rolling carry-on bag, and the shoulder strap is sufficiently padded for long carries. The Endeavor even endeavors to be socially responsible: Its sturdy Cordura-like fabric is made from recycled PET bottles. At $140 it’s a bargain. I still recommend it, and the company makes several variations on the theme.
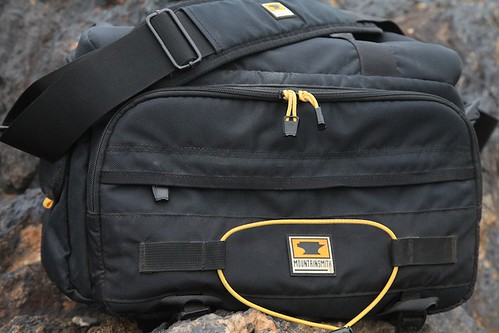 Tough and versatile: The Mountainsmith Endeavor Only a couple of things made me want more. First, I wasn’t enamored of the black, rather high-tech appearance of the bag, especially compared to the organic look of the Domke. That was a purely personal issue; another was purely geographic: We spend a lot of time in East Africa, some of it in tsetse fly country—and tsetses are attracted to black (and blue). Time after time, I’d be driving through miombo woodlands, dressed properly in non-tseste-attracting khaki, and would look down to see the Mountainsmith bag being used as an aircraft carrier by a half-dozen or more of the little bastards. (A recent study suggests that blue and black initiate a strong landing response in tsetses because those are the colors of the shadowed areas of foliage where they hide.) Finally, even the Endeavor couldn’t hold all my equipment, and it was the antithesis of the accessibility already mentioned to have gear divided between two bags.
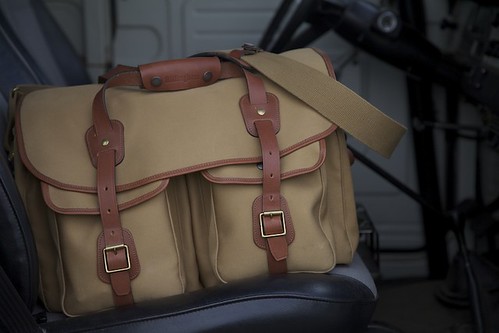
In the meantime, years and years ago (like, in the days of film . . . ) I had met a photographer who used only a pair of superb Leica M6 rangefinder cameras for his work. Three lenses—a 28mm, a 50mm, and a 135mm, if memory serves—comprised his entire professional suite. He carried the lot in an exquisite bag of khaki twill woven so densely it had a silk-like sheen, and set off with leather trim and brass hardware. “It’s a Billingham, from England,” he said when I asked. I immediately downloaded . . . no, wait—I called and had a catalog mailed to me. Martin Billingham, it turned out, began making bags for fishermen in 1973, then a few years later discovered that photographers in New York had adopted them to carry Rolleis instead of reels. A keen photographer himself, he embarked on a tentative change in direction, which proved so successful that production soon shifted entirely to the photographic market. The business is still family-owned, and all manufacturing remains in England in a factory in Brierley Hill, just outside of Birmingham.
Billingham’s flagship bag, the 550, caught my imagination—as did its price, far beyond my means at the time. Reluctantly, I filed the catalog away (in the same drawer as the Leica M6 brochure . . . ). But a couple of years ago, while planning a trip to Kenya, the Billingham wormed it way into my thoughts again, and I realized that I had three or four other nearly new camera bags I no longer used. A quick flurry of eBay activity and I was close enough to spring for the balance. I took a deep breath and clicked “Buy now” on the B&H site.
There’s always a danger in fulfilling a long-held dream, whether it be buying a high-end product, meeting someone you’ve admired from afar, or journeying to a place you’ve read about since childhood. In our minds such experiences are always perfect; fantasies never include downsides. Fortunately Martin Billingham did not disappoint.
 Perfect in every detail. The material on the 550 was just as I remembered, so tightly woven it’s classified as fully waterproof, and astonishingly resistant to grime and stains—in fact I’ve been having a hard time giving this bag the patina it deserves. (By comparison the canvas on the Domke looks like sack cloth.) The top flap covers a lengthwise zipper, so contents in the main compartment are well-protected yet accessible in seconds. In a vehicle I leave the flap unbuckled so all I have to do is flip it out of the way and slide the zipper to pull out a clean camera. Inside that main compartment I have at present one 5D and one 5D MkII body, a 24-105L zoom, a 17-40L zoom, a 70-200L F4 zoom, a 300L F4, a 1.4 converter, a 15mm Canon fisheye, a Tamron 90mm macro, and two EX flash units. Outside pockets—two large and flapped, two small and zippered, and a big flat zippered one on the back—hold all those things so necessary to modern digital imagery: spare lithium-ion batteries and chargers, a sensor-cleaning kit, a data-transfer device, and spare CF cards in their own case. Synch cords, the 240-page manual to remind me how to access half the functions on the 5D MkII . . . on and on. Should I need even more space, the 550 comes with two flapped end pockets that attach or come off as necessary.
Is the Billingham 550 perfect? No. For example, the flaps of the exterior pockets, while superior to those on the Domke bag, still fit too loosely for my comfort, and the snaps are impossible to close with one hand unless there’s something bulky inside to press against. I wish there were a zippered closure under each flap; that way you could keep the zip closed for security during transport, or leave just the flap snapped for quick access while shooting. Also, while the shoulder strap is comfortable and strongly attached, picking up the full bag (mine weighs 25 pounds all up) by the carrying handle makes me very nervous, as it’s secured only by two thin leather straps and buckles. And a final nitpick: A pretty leather luggage tag is optional. C’mon, Martin—for $500 I think you could throw that in. In a futile gesture of protest I transferred an old black Lowepro luggage tag to my 550. Sadly, it looks rather naff, so I’ll probably succumb and order the correct one. After all, from the looks of things this bag will be with me for a long time.
The Billingham range starts with the 550 and goes all the way down to a single pouch with a belt loop, perfect for a point-and-shoot. And yes, they still make a bag specifically designed for the Leica (digital) rangefinder system.
Some day . . .
Equipment review: Arctic Butterfly sensor-cleaning brush
A few weeks ago I received an unexpected Royal Mail package from Tom Sheppard. Inside was an orange case the right size to contain a pen or a watch.
Hmm . . . Had Tom decided to pass on to me his GMT Master?
Probably not.

A few weeks ago I received an unexpected Royal Mail package from Tom Sheppard. Inside was an orange case the right size to contain a pen or a watch.
Hmm . . . Had Tom decided to pass on to me his GMT Master?
Probably not.
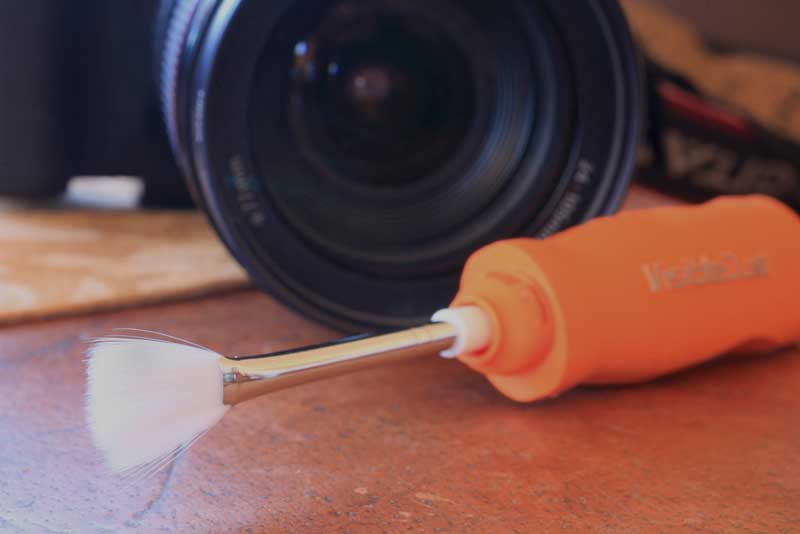
What Tom had sent me was not a Rolex, but something nearly as useful if one were on a trip of a lifetime and interested in bringing home digital images free of those nasty little dark blots caused by dust on the camera’s sensor. The amusingly named Arctic Butterfly sensor brush, from a company called Visible Dust, uses the principles of static charging to enhance the ability of its bristles to lift off minute debris from a digital camera’s sensor (or, more correctly, the filter that covers the actual sensor).
Many cameras these days are equipped with so-called self-cleaning sensors, which use vibration to literally shake dust particles off the surface. But those particles are obviously still in the camera—one can almost imagine a tiny dust dune growing slowly under the sensor on a long off-pavement journey. Unlikely perhaps; nevertheless, while self-cleaning sensors help, they don’t remove dust from the sensor chamber, and they don’t shake off the more stubborn particles.
For those clingy bits, and for all our cameras that don’t have the self-cleaning feature, the standard approach of a filtered bulb blower followed by a sensor swab moistened with cleaning solution works superbly. However, if the blower misses a hard bit which subsequently gets trapped under the edge of the swab, the result can be a scratched sensor. I’ve also used the Delkin Sensor Vac—literally a miniature Hoover—with very good results, but even it usually required followup with a swab for complete cleaning.
Operation of the Arctic Butterfly brush is simple. Set your camera on ‘sensor clean’ to lock up the mirror. Hold the brush away from the camera and hit the power button three times for a few seconds each time. This spins the brush rapidly, ejecting any debris in the bristles and enhancing their static attractiveness. Switch off, then gently swipe the brush just once across the sensor, trying hard not to brush the sensor chamber or other parts of the camera, which could have lubricant residue on them. Do not spin the brush while it’s in contact with the sensor (I wonder how many males who don’t read instructions have assumed the wrong thing here?).
That’s it. You can check the sensor for dust by pointing your camera at a white wall, stopping down the lens all the way, making sure the wall is out of focus, then taking a shot. Camera shake won’t affect the results, since what you’re looking for is moving with the camera. Examine the image in Photoshop or another program. Or use a commercially available optic such as Visible Dust’s ‘Quasar’ sensor loupe, or Delkin’s SensorScope, to examine the sensor directly.
I found the Arctic Butterfly to be very effective, as evidenced by pre- and post-brush inspection, and it’s probably more so in a dry environment such as our southwestern deserts or Tom’s Sahara. In fact, combined with a good, filter-equipped bulb blower, I think this is all one would need to guarantee virtually spot-free images for the duration of most trips. Eliminating the swabs means you don’t have to worry about sourcing sensor-cleaning fluid at your destination (since it’s generally prohibited on airlines). In its padded case the brush weighs just 4.8 ounces; on its own it’s only 2.1 ounces. Cheap, lightweight trip insurance for your images. Thanks to Tom Sheppard for alerting me to a good product I’d somehow missed.
Now, Tom—about that beat-up old watch of yours . . .
How do you carry video equipment on a motorcycle?
I'm an amateur videographer about to head to Baja for a month of riding on my KLR650. Does anyone have any advice on safely carrying camera equipment on a bike?
- Alberto Q., Austin, TX (via email)
Hint: When using “Search,” if nothing comes up, reload the page, this usually works. Also, our “Comment” button is on strike thanks to Squarespace, which is proving to be difficult to use! Please email me with comments!
Overland Tech & Travel brings you in-depth overland equipment tests, reviews, news, travel tips, & stories from the best overlanding experts on the planet. Follow or subscribe (below) to keep up to date.
Have a question for Jonathan? Send him an email [click here].
SUBSCRIBE
CLICK HERE to subscribe to Jonathan’s email list; we send once or twice a month, usually Sunday morning for your weekend reading pleasure.
Overland Tech and Travel is curated by Jonathan Hanson, co-founder and former co-owner of the Overland Expo. Jonathan segued from a misspent youth almost directly into a misspent adulthood, cleverly sidestepping any chance of a normal career track or a secure retirement by becoming a freelance writer, working for Outside, National Geographic Adventure, and nearly two dozen other publications. He co-founded Overland Journal in 2007 and was its executive editor until 2011, when he left and sold his shares in the company. His travels encompass explorations on land and sea on six continents, by foot, bicycle, sea kayak, motorcycle, and four-wheel-drive vehicle. He has published a dozen books, several with his wife, Roseann Hanson, gaining several obscure non-cash awards along the way, and is the co-author of the fourth edition of Tom Sheppard's overlanding bible, the Vehicle-dependent Expedition Guide.

