Overland Tech and Travel
Advice from the world's
most experienced overlanders
tests, reviews, opinion, and more
An Exquisite Land Rover camper
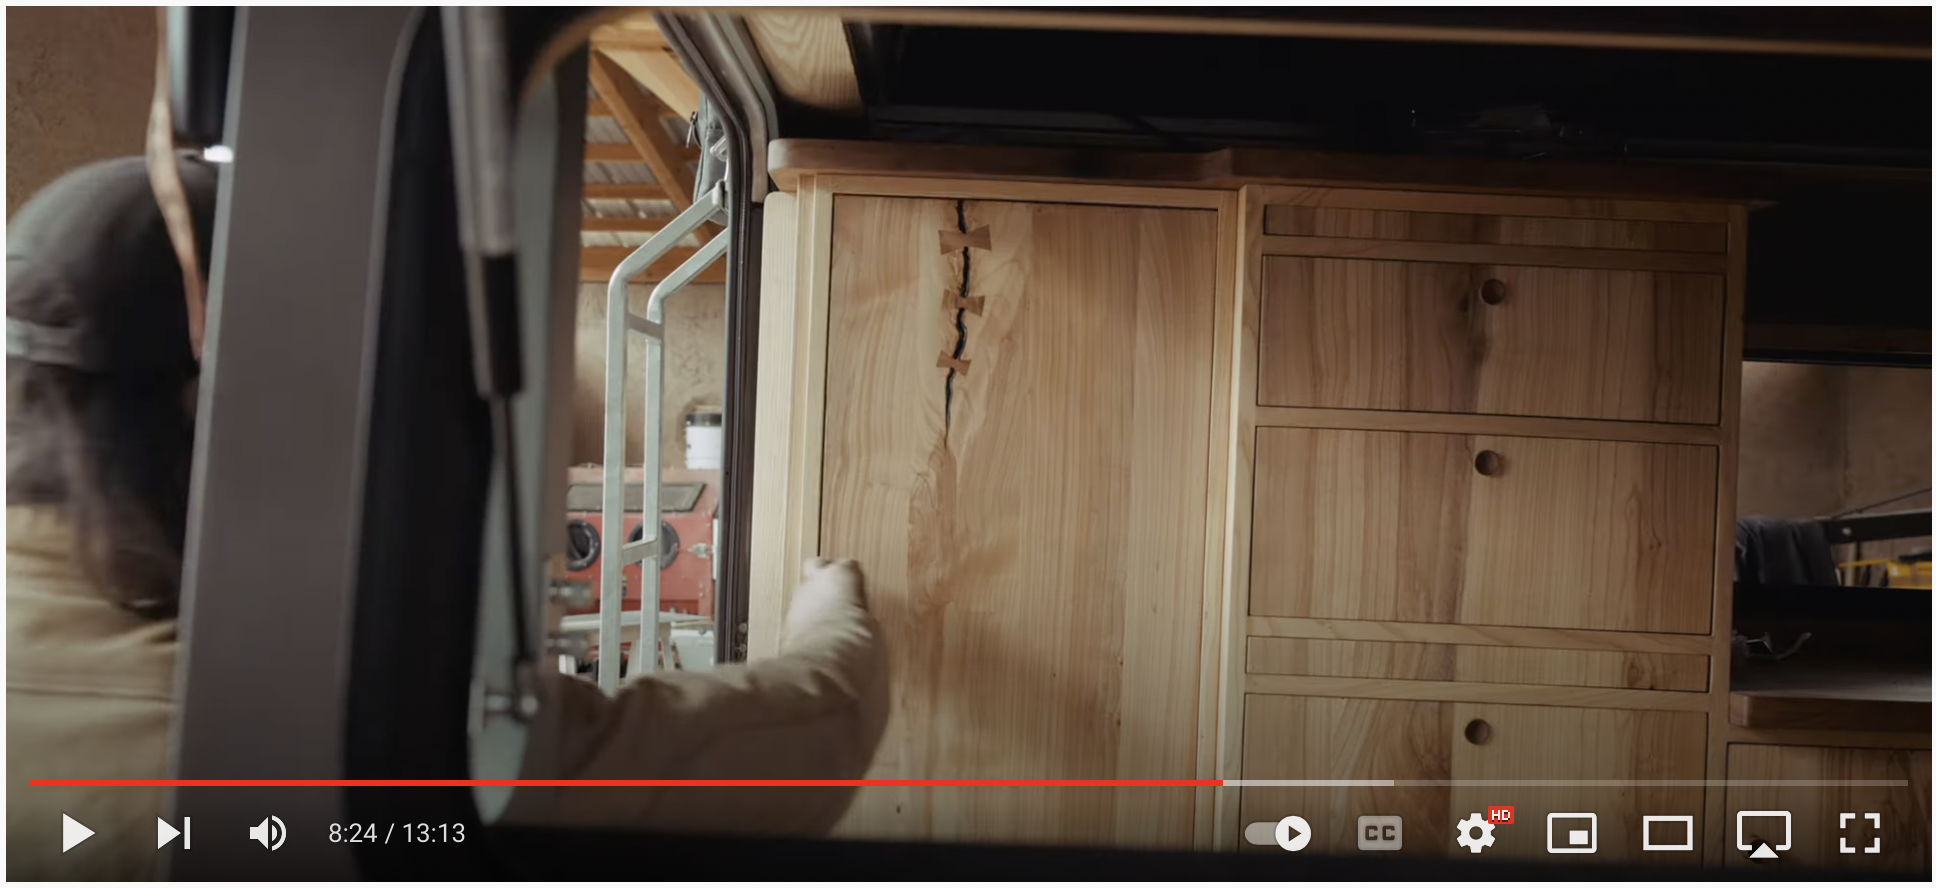
Do yourself a favor: Take thirteen minutes of your day and watch this: a true craftsman at work, building a strikingly beautiful—and functional—camping interior and exterior on a Land Rover 110 for Sonoran Rovers, using local wood from southern Arizona. Anyone who can watch the process without feeling awestruck is dead to real style.
An epidemic of hidden winch mounts
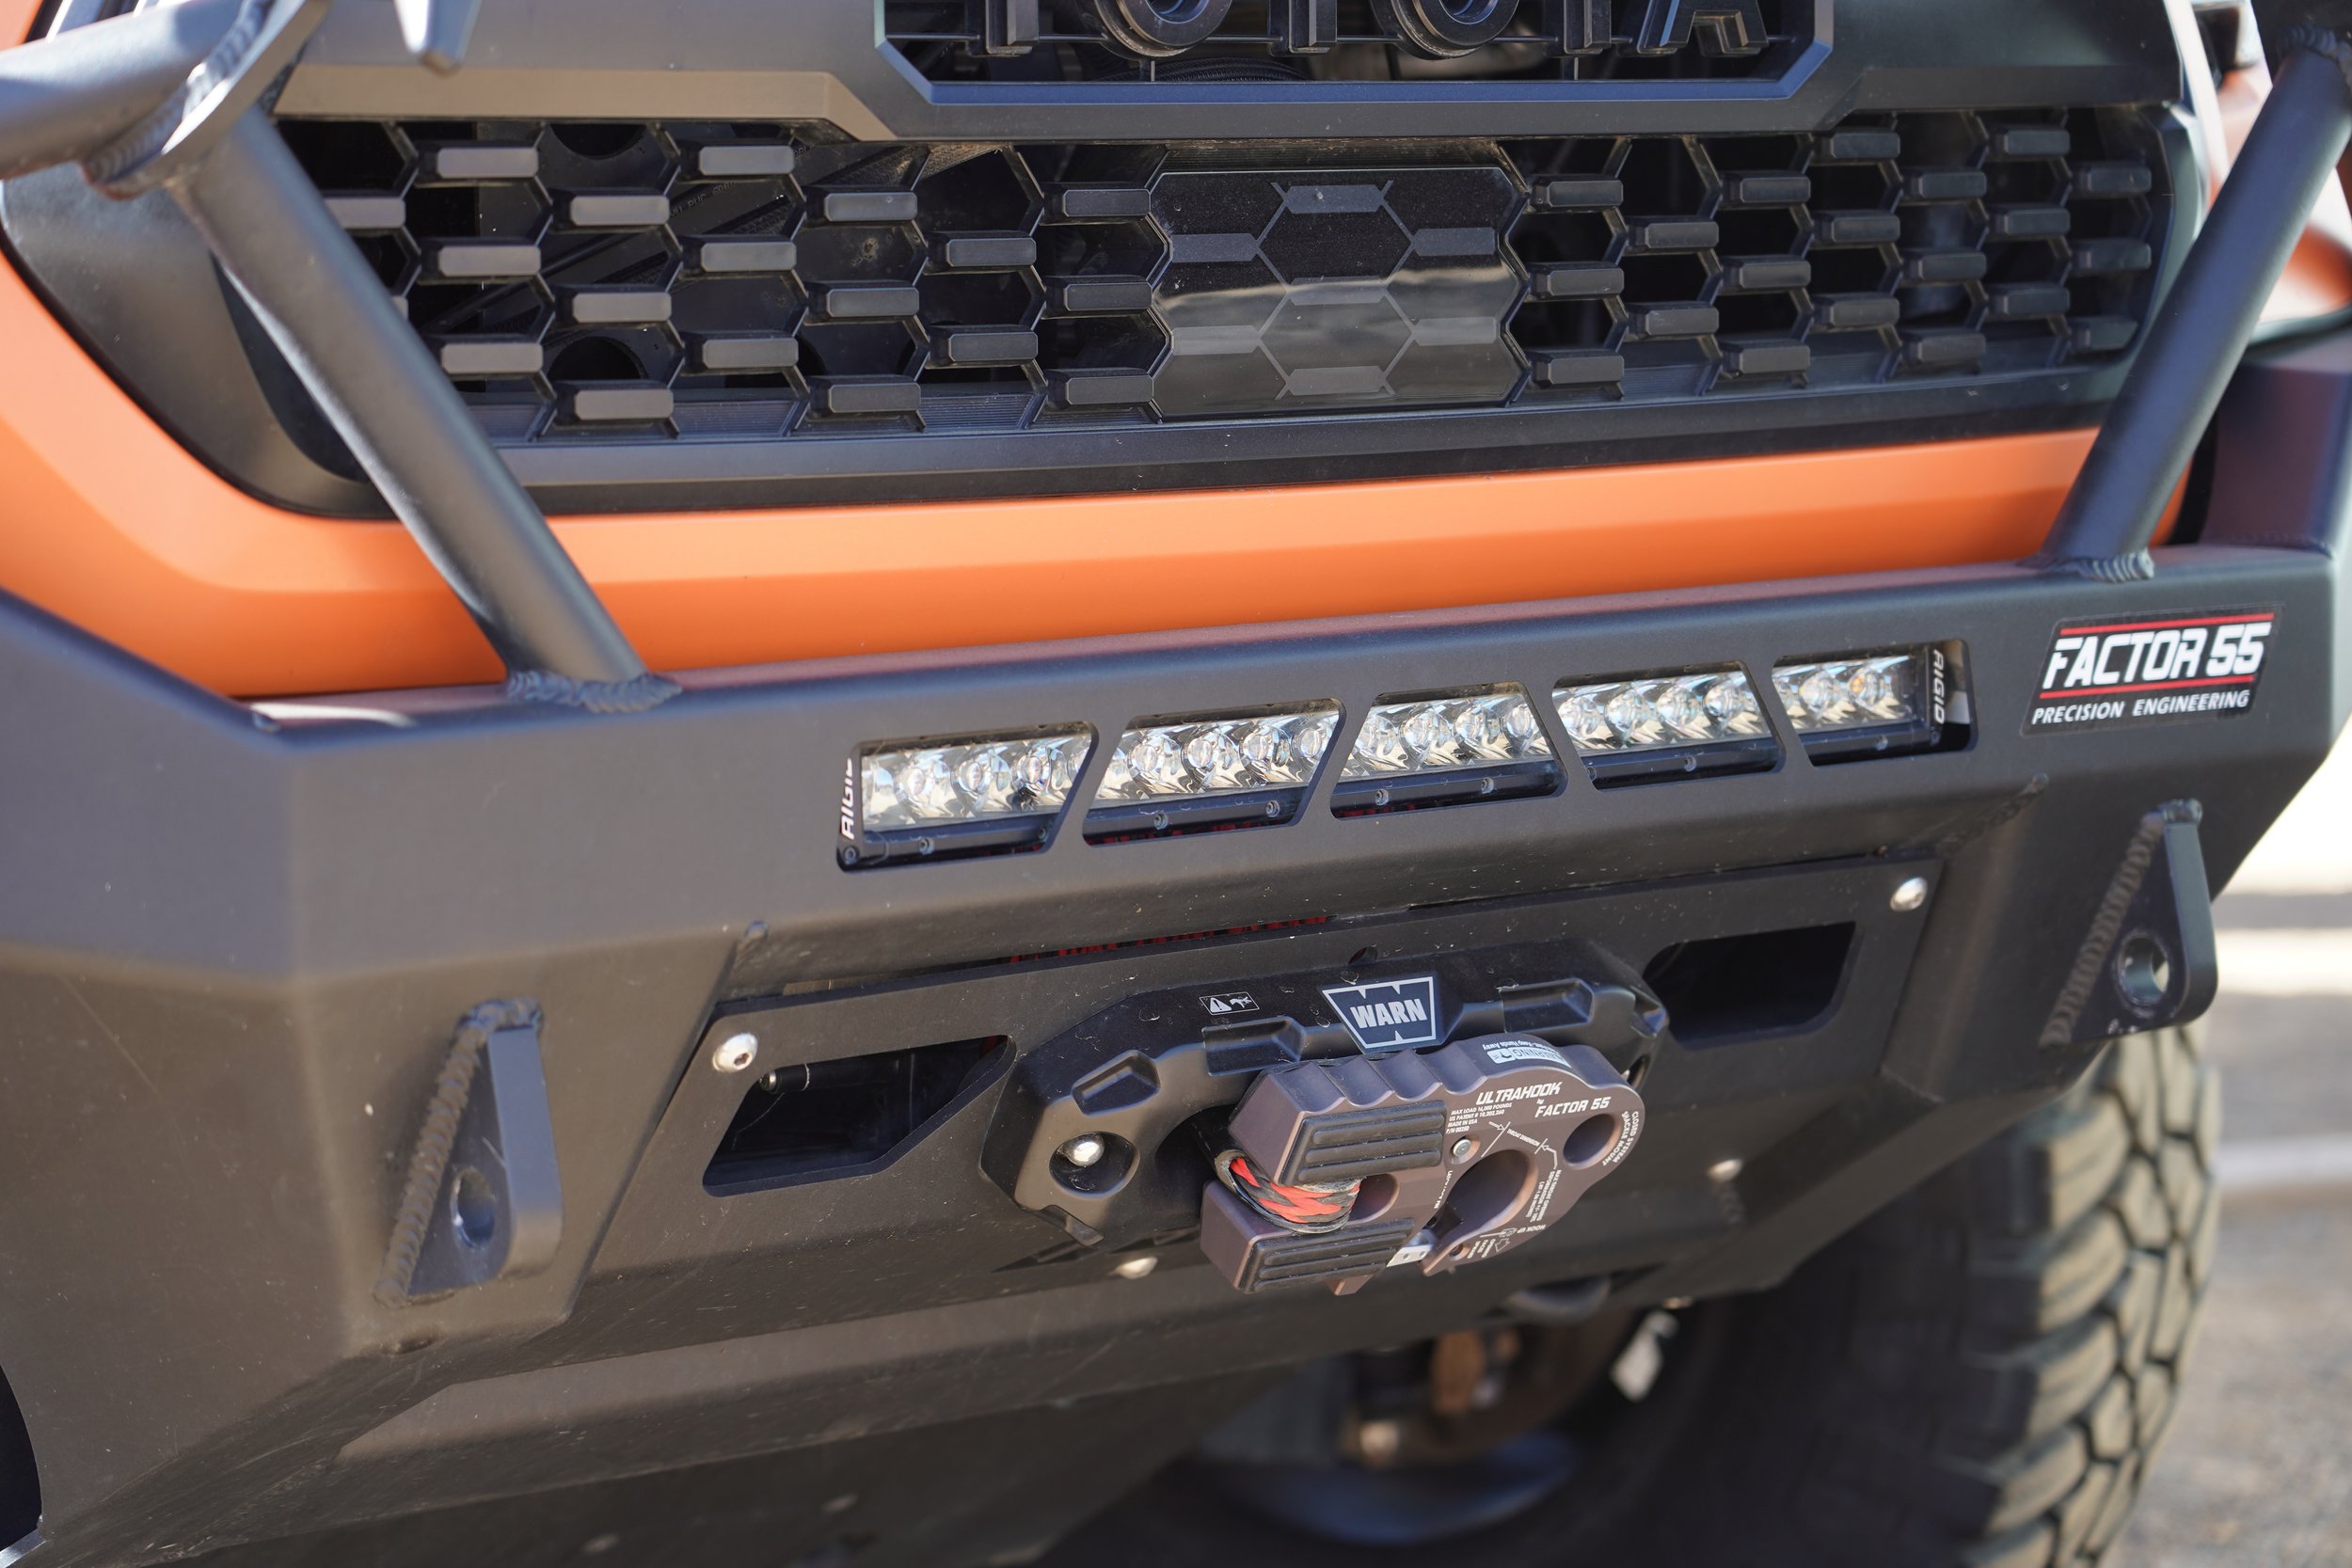
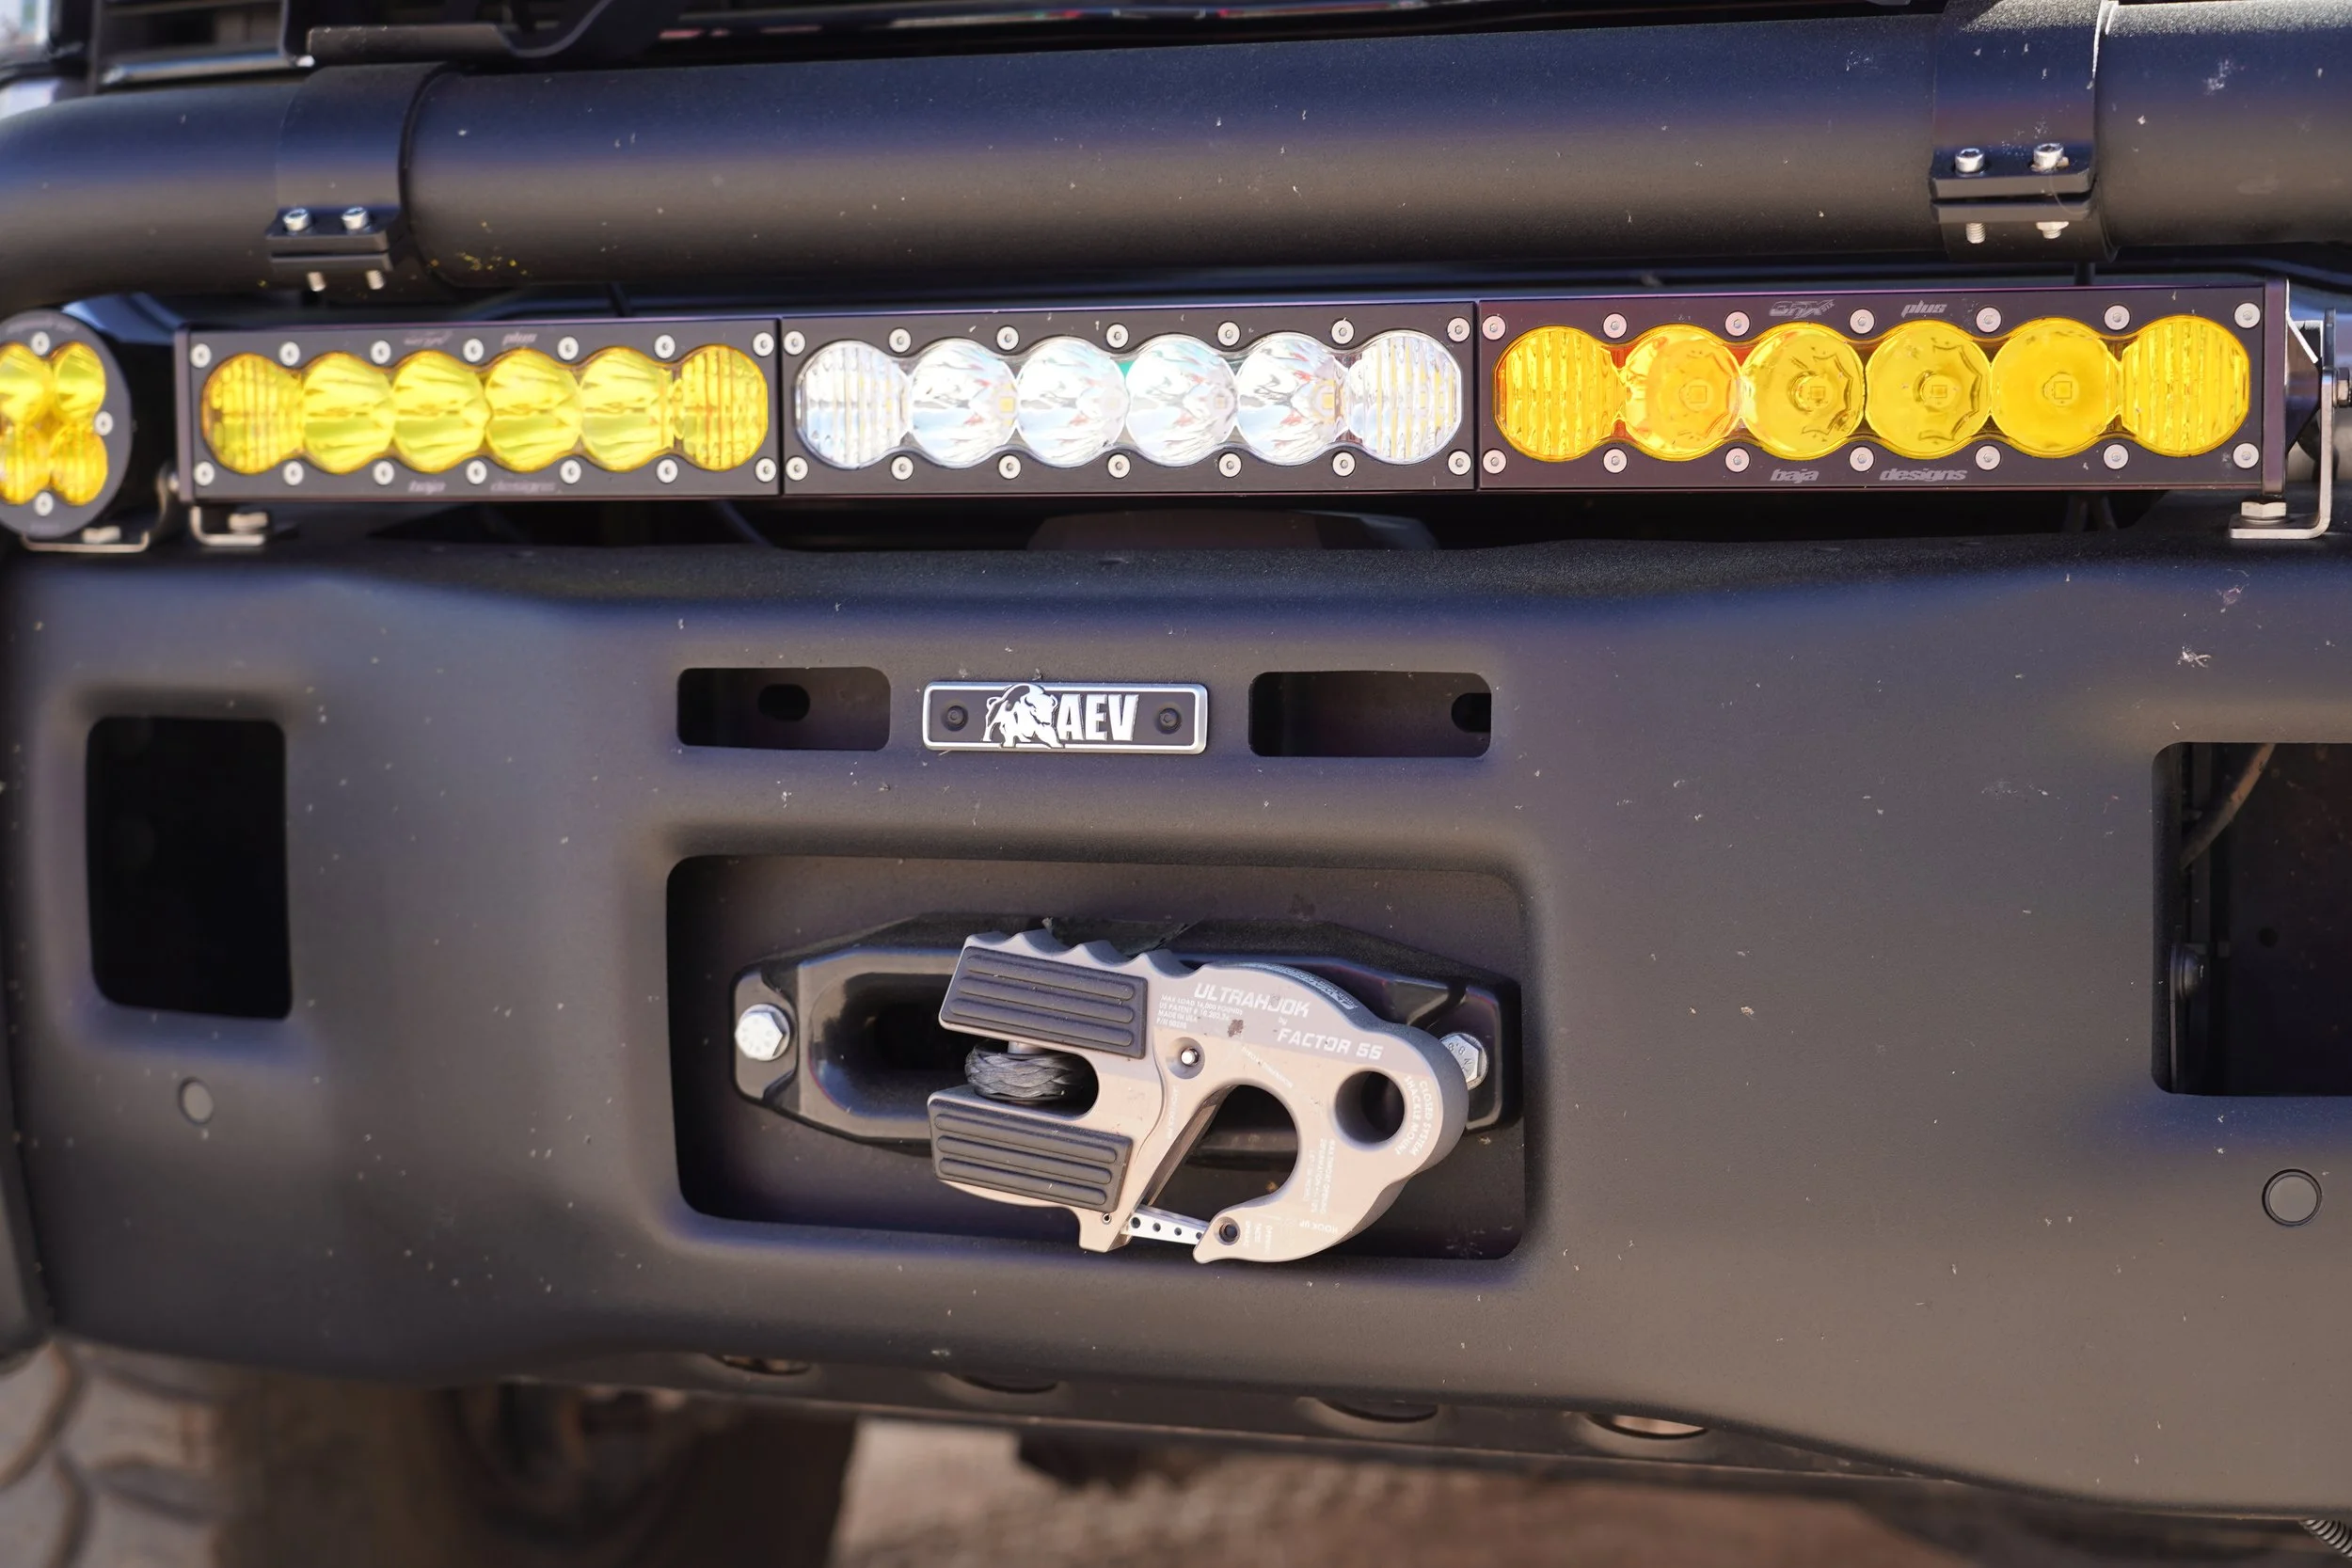
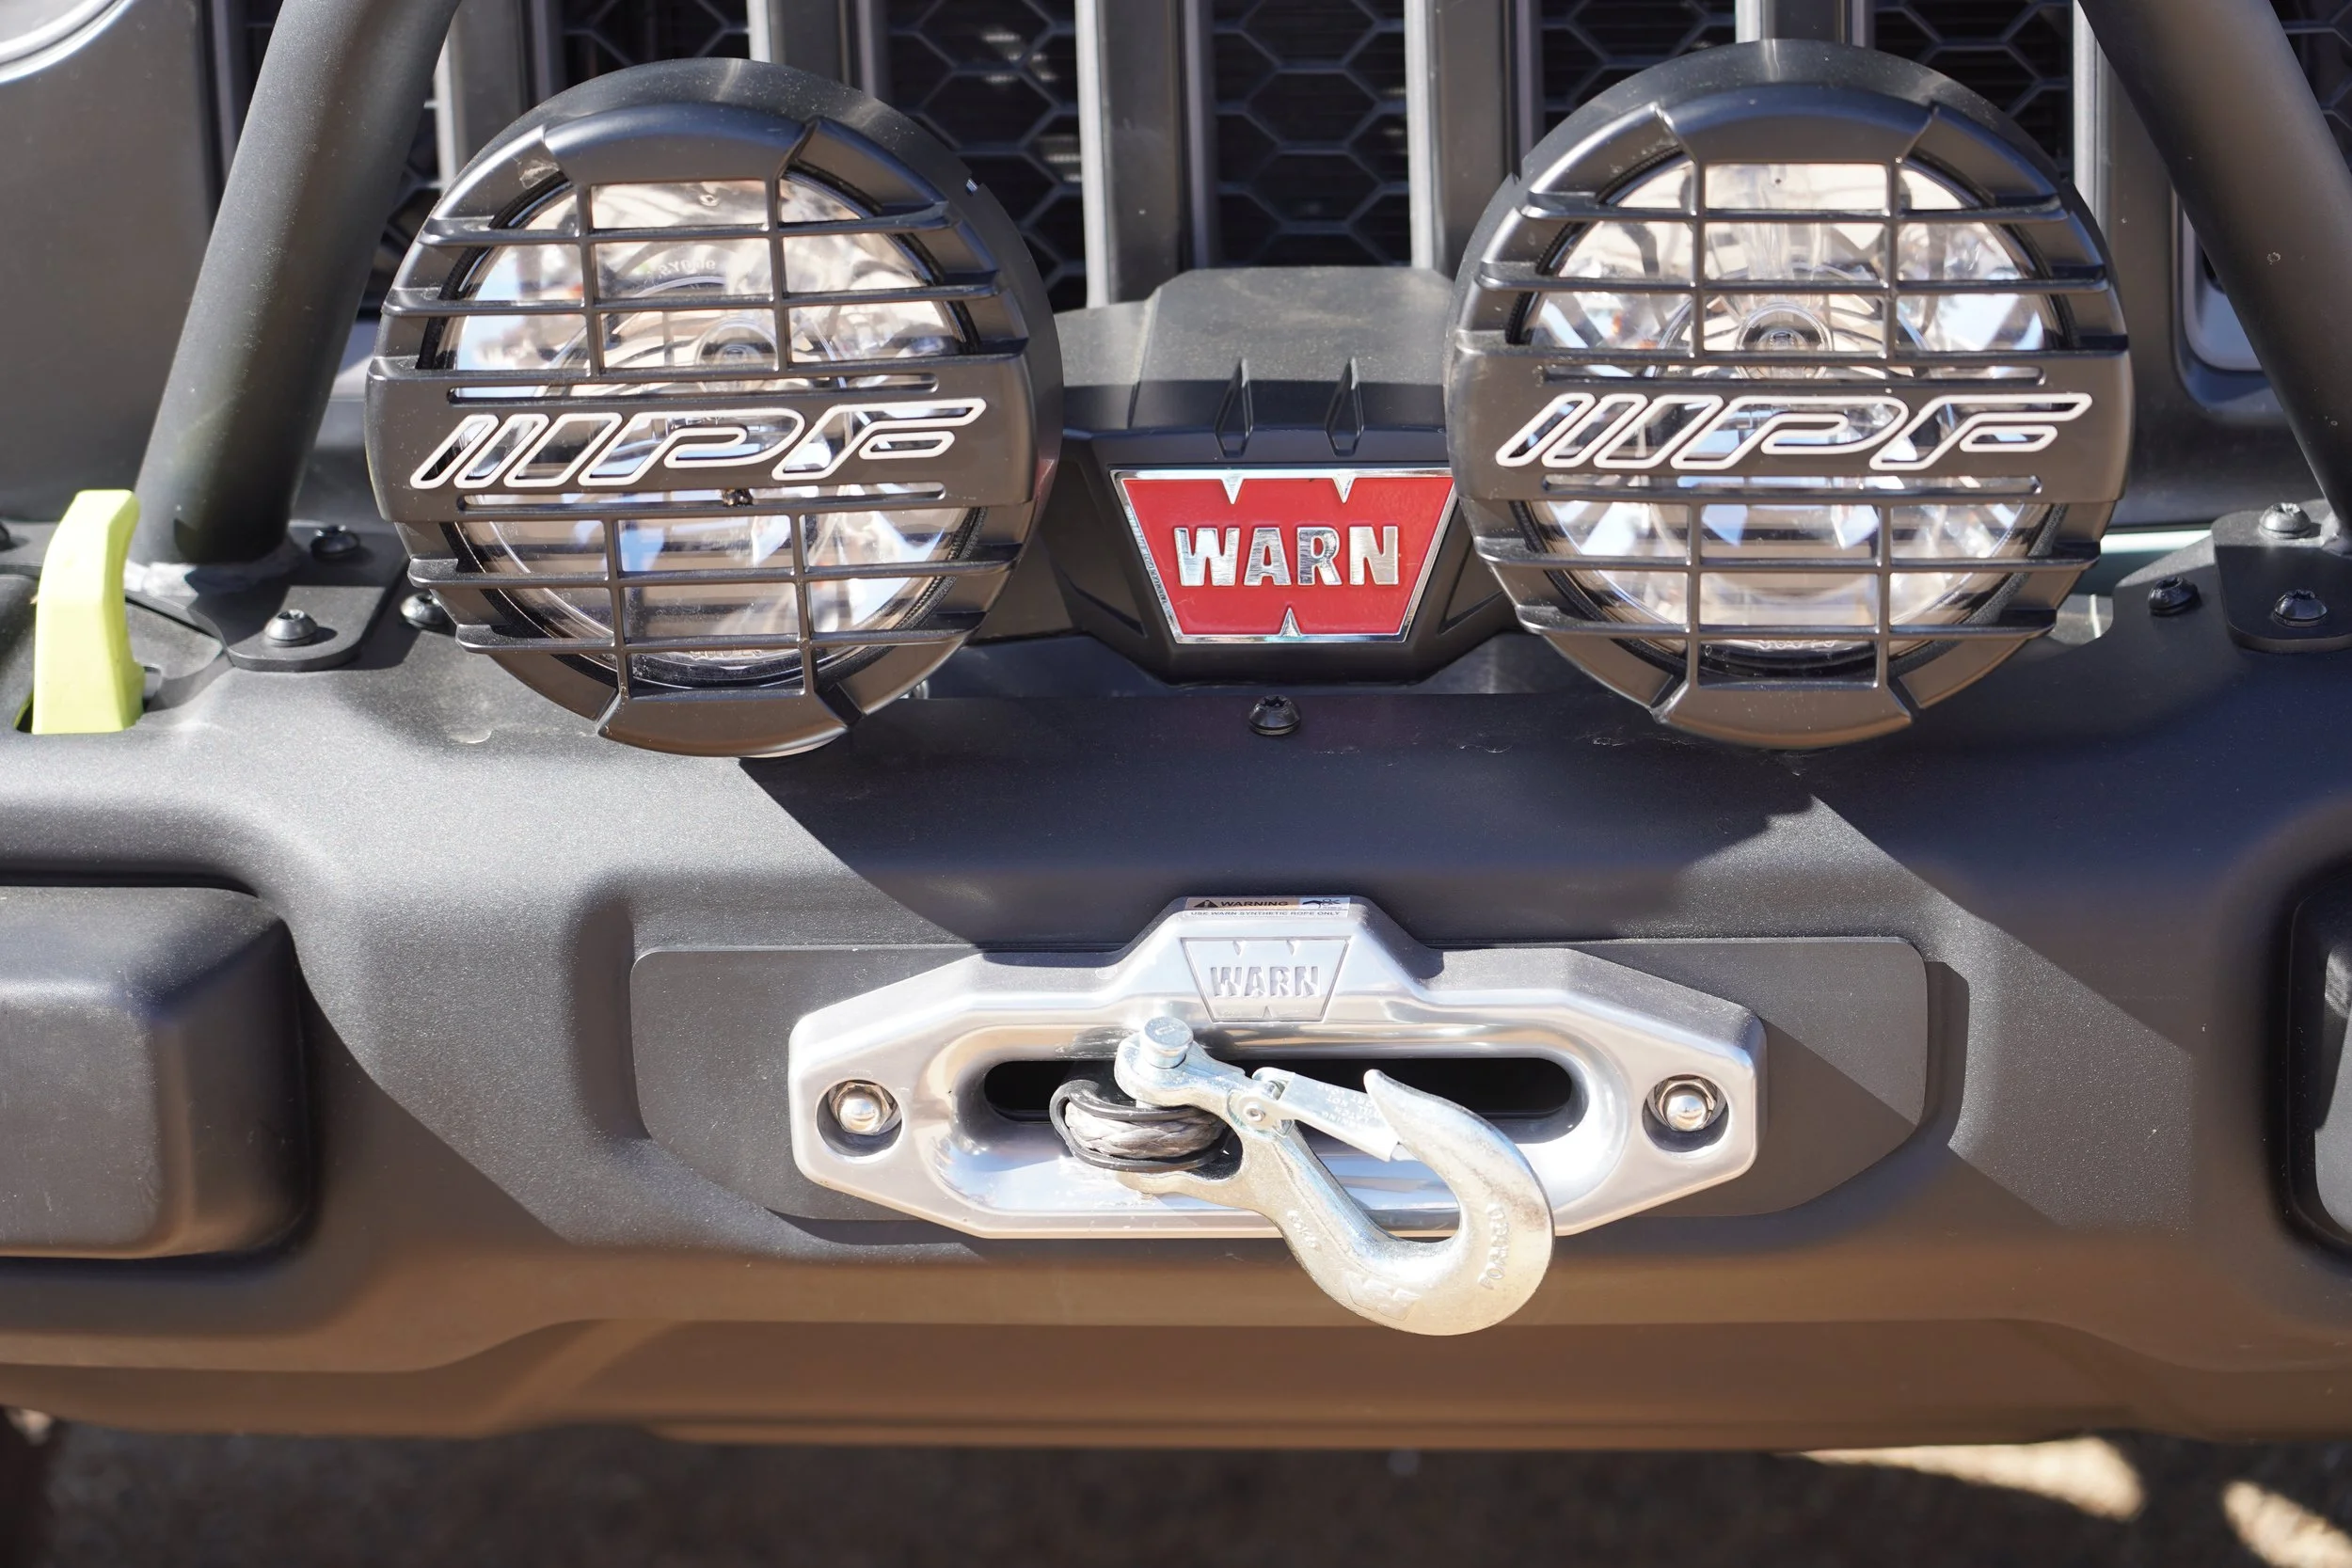
I attended Overland Expo West for the first time as a pure journalist, with no instructor duties whatsoever. Never before have I had the entire weekend to simply walk around and look at stuff. And one thing I couldn’t help noticing is the metastasizing, inexplicable proliferation of winch mounts that hide, or render completely inaccessible, the drum and its layers of line or cable.
Along with every other instructor I know, I consider it critical that the winch drum be plainly visible both during a winch recovery and during re-spooling afterward. In the first case, the winch operator or a spotter needs to be able to see that the line is spooling correctly, neither bunching up at one end—which rapidly reduces the winch’s power as layers of line build up, and can jam if not corrected—nor snarling or diving between layers of line.
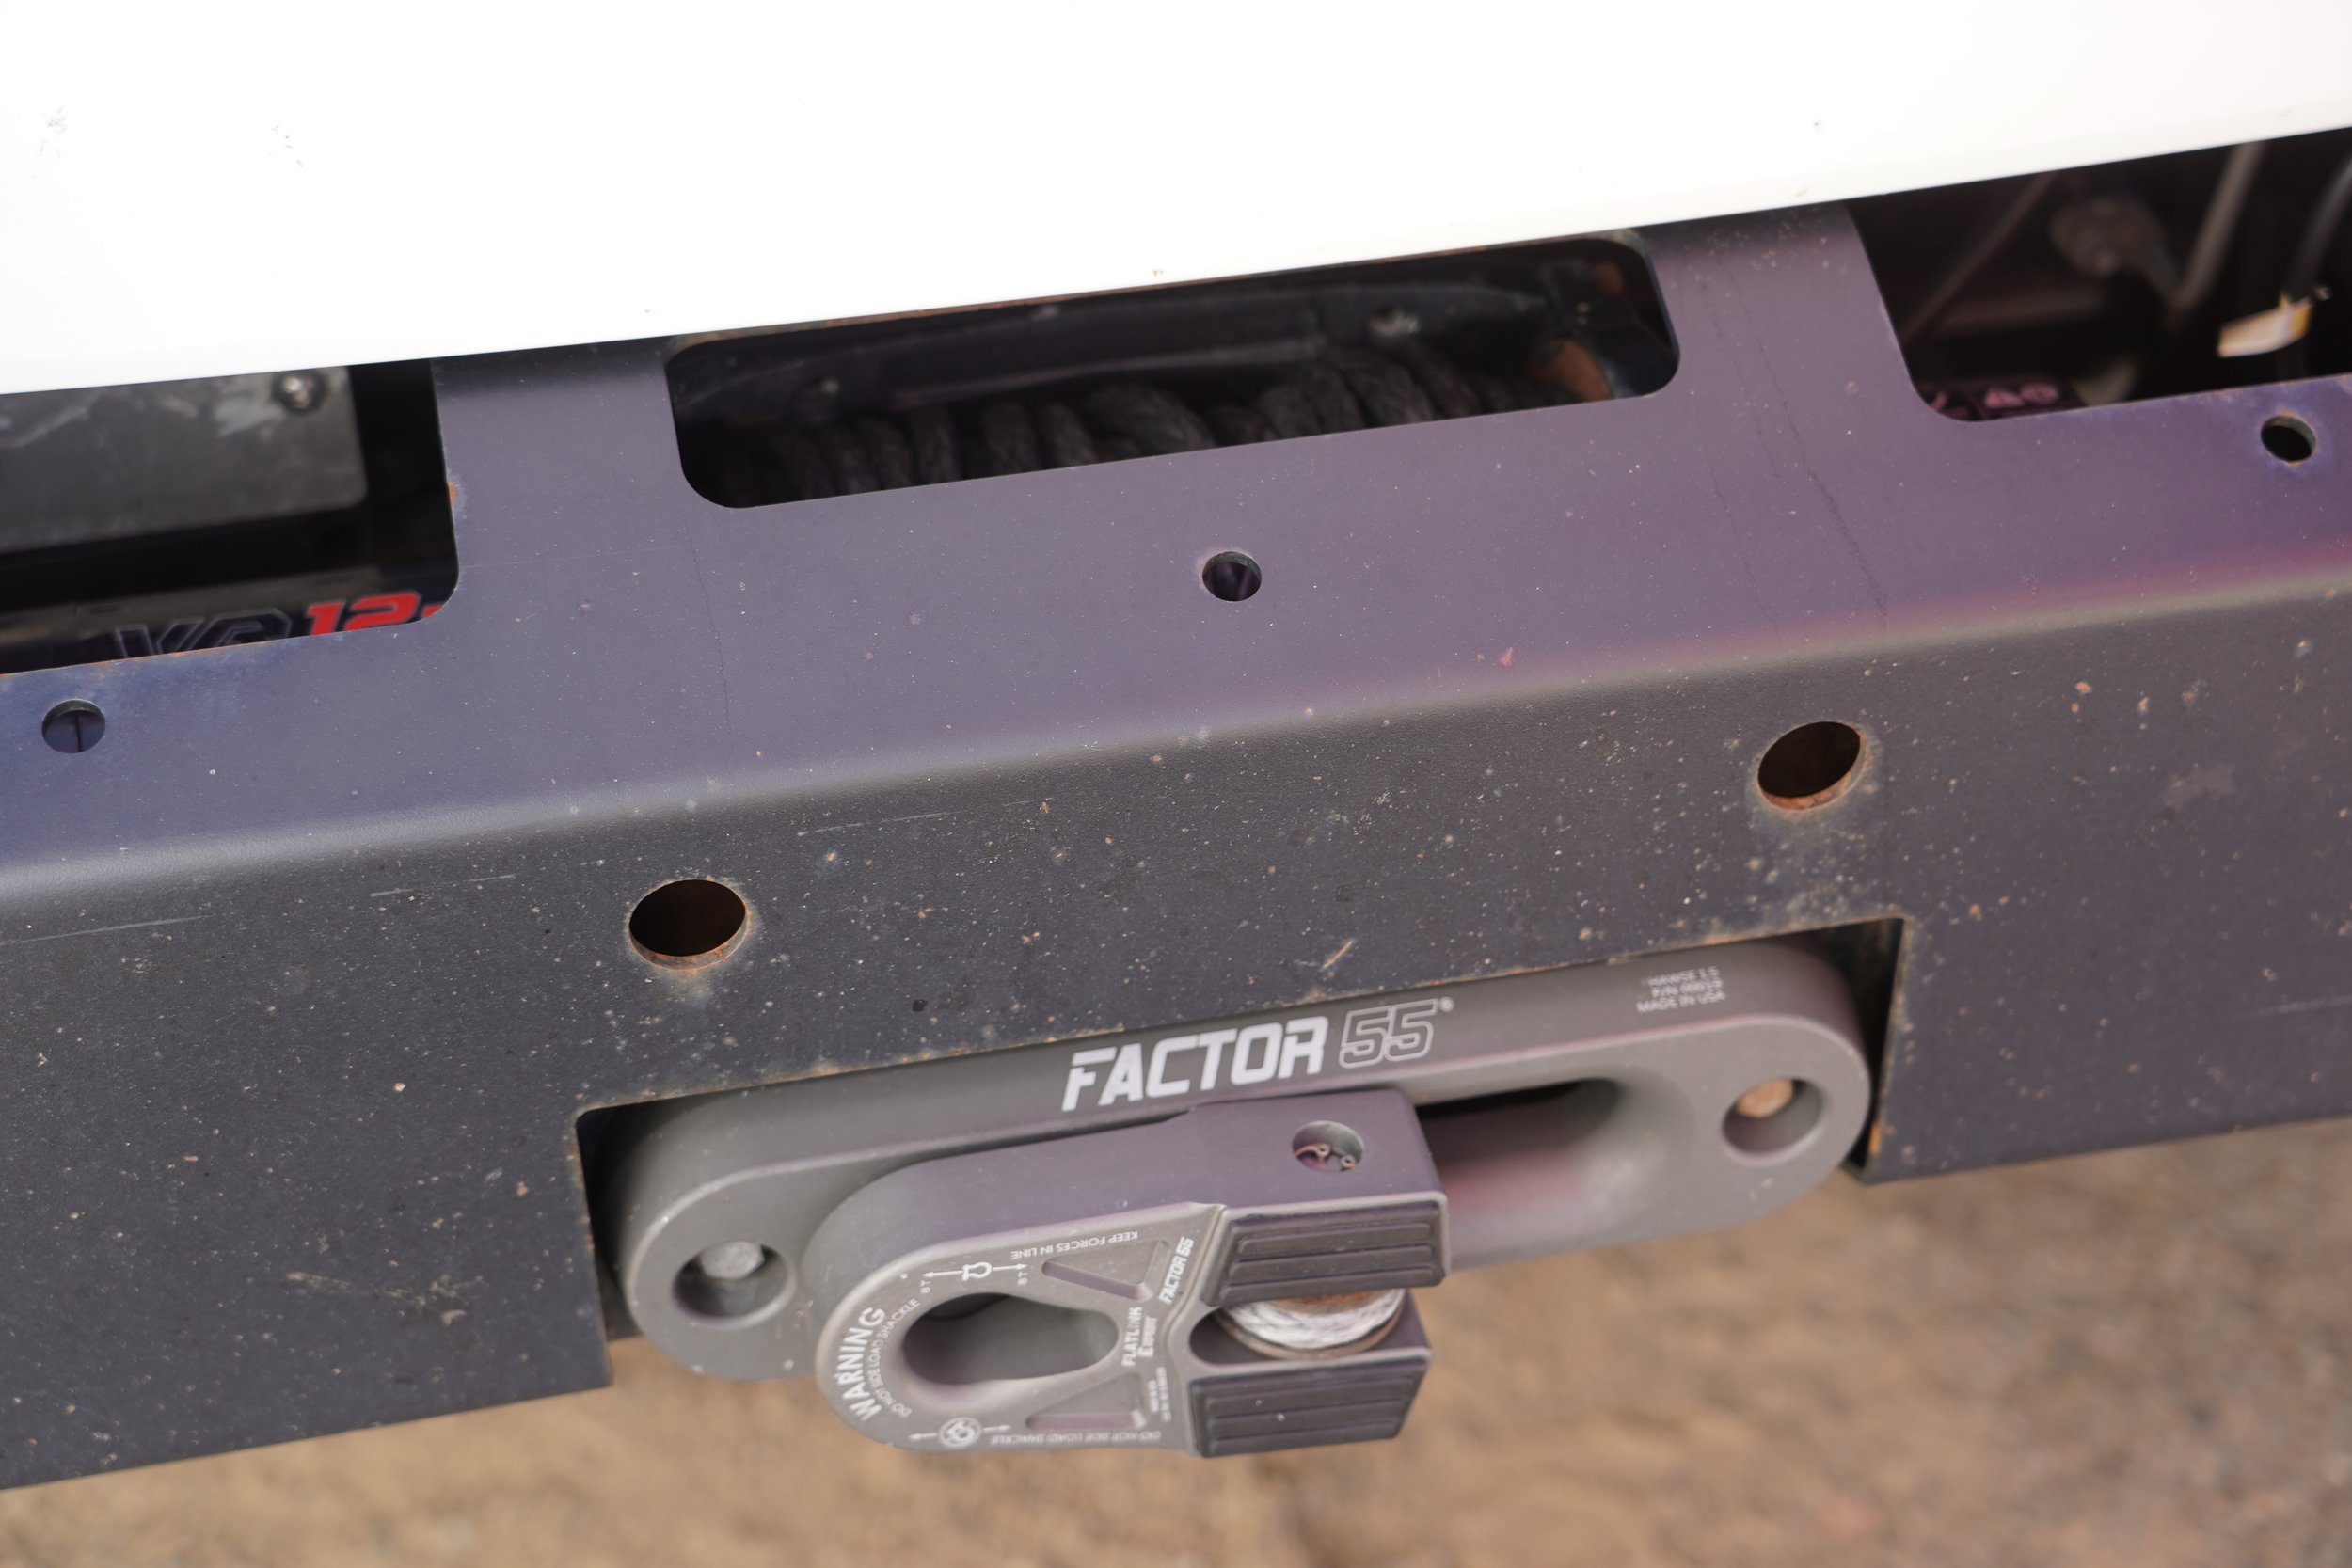
Note that, in addition, this winch is equipped with synthetic line, and the steel hook is snugged against the aluminum hawse fairlead, where it can score the surface, creating an abrasion potential for the line.
Likewise, during re-spooling after the recovery it’s critical to be able to see the line from a comfortable distance to ensure it lays on the drum in even, tight wraps. Some mounts, such as the one below, do allow inspection of the drum, but only from a spot directly over the winch, which is not where you want to stand either during a recovery or during re-spooling. And this inspection port is too small to insert one’s hands to correct any issues manually.
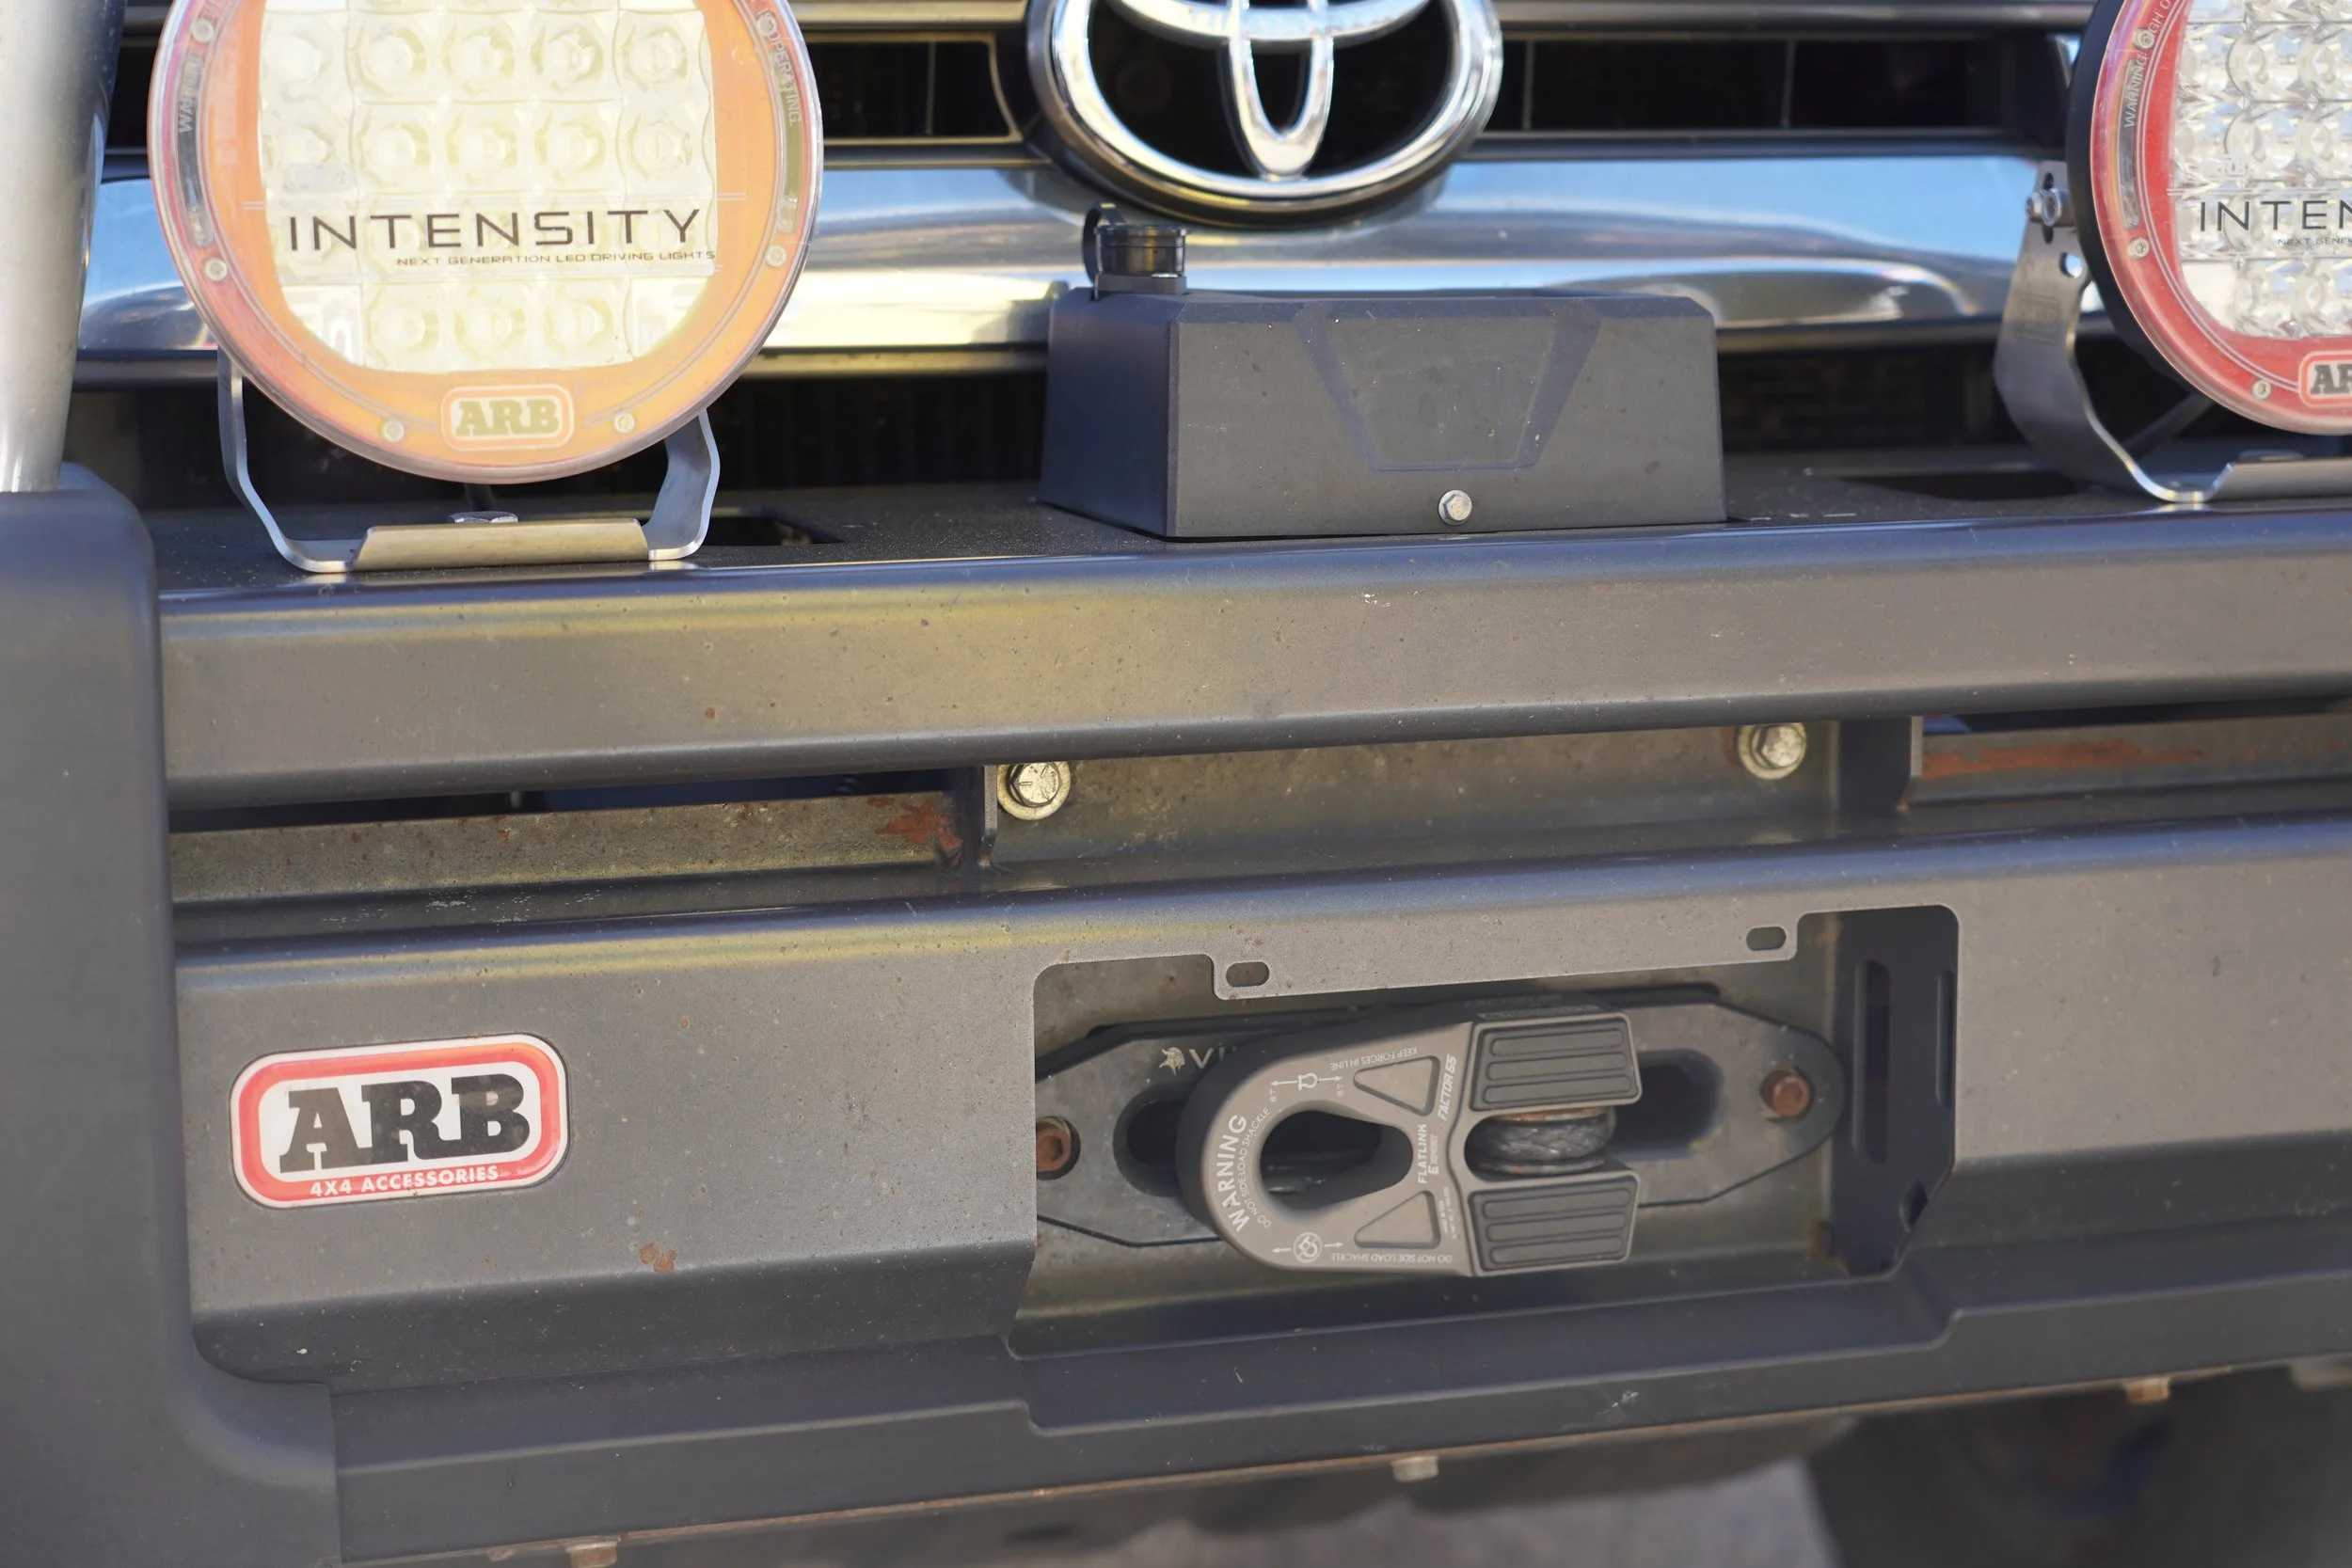
It’s not just off-brand companies doing this. Even ARB, whose products I respect hugely and is the only sponsor decal on my FJ40, has embraced the hidden mount.
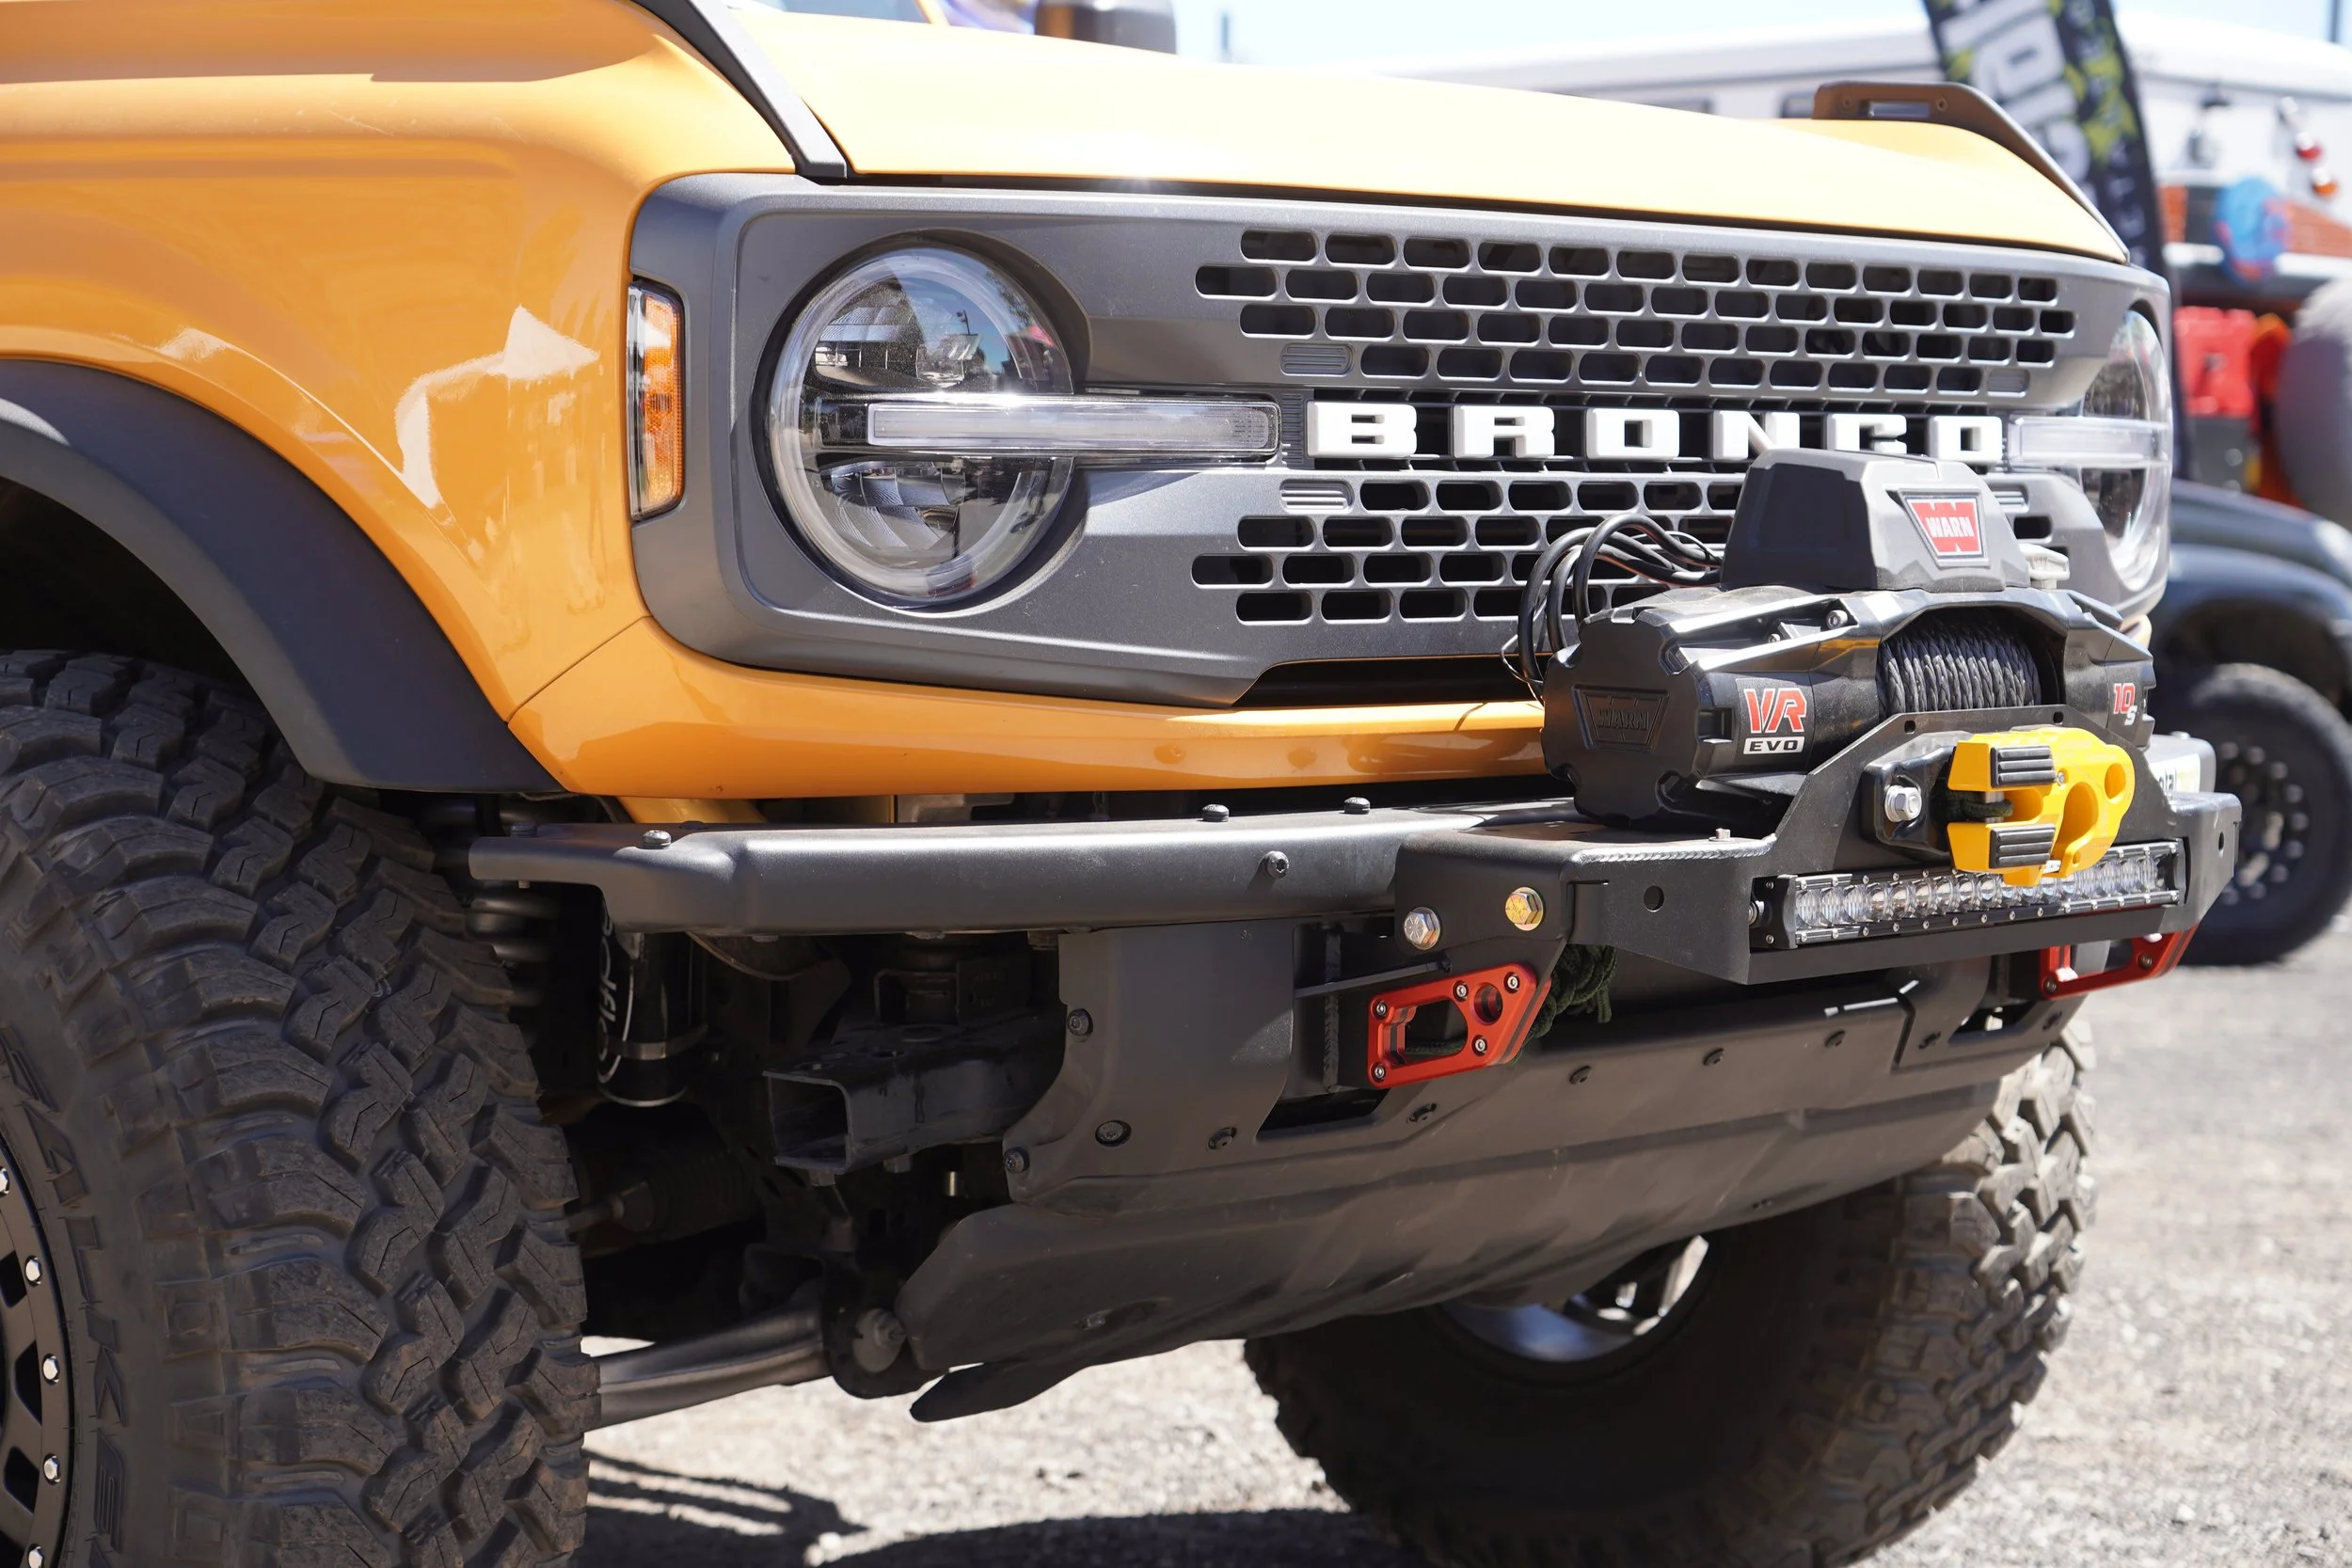
It’s not a universal affliction. Metaltech’s new winch mount for the Ford Bronco sets it right out where you can access anything (although I overheard someone there talking about a possible hidden version).
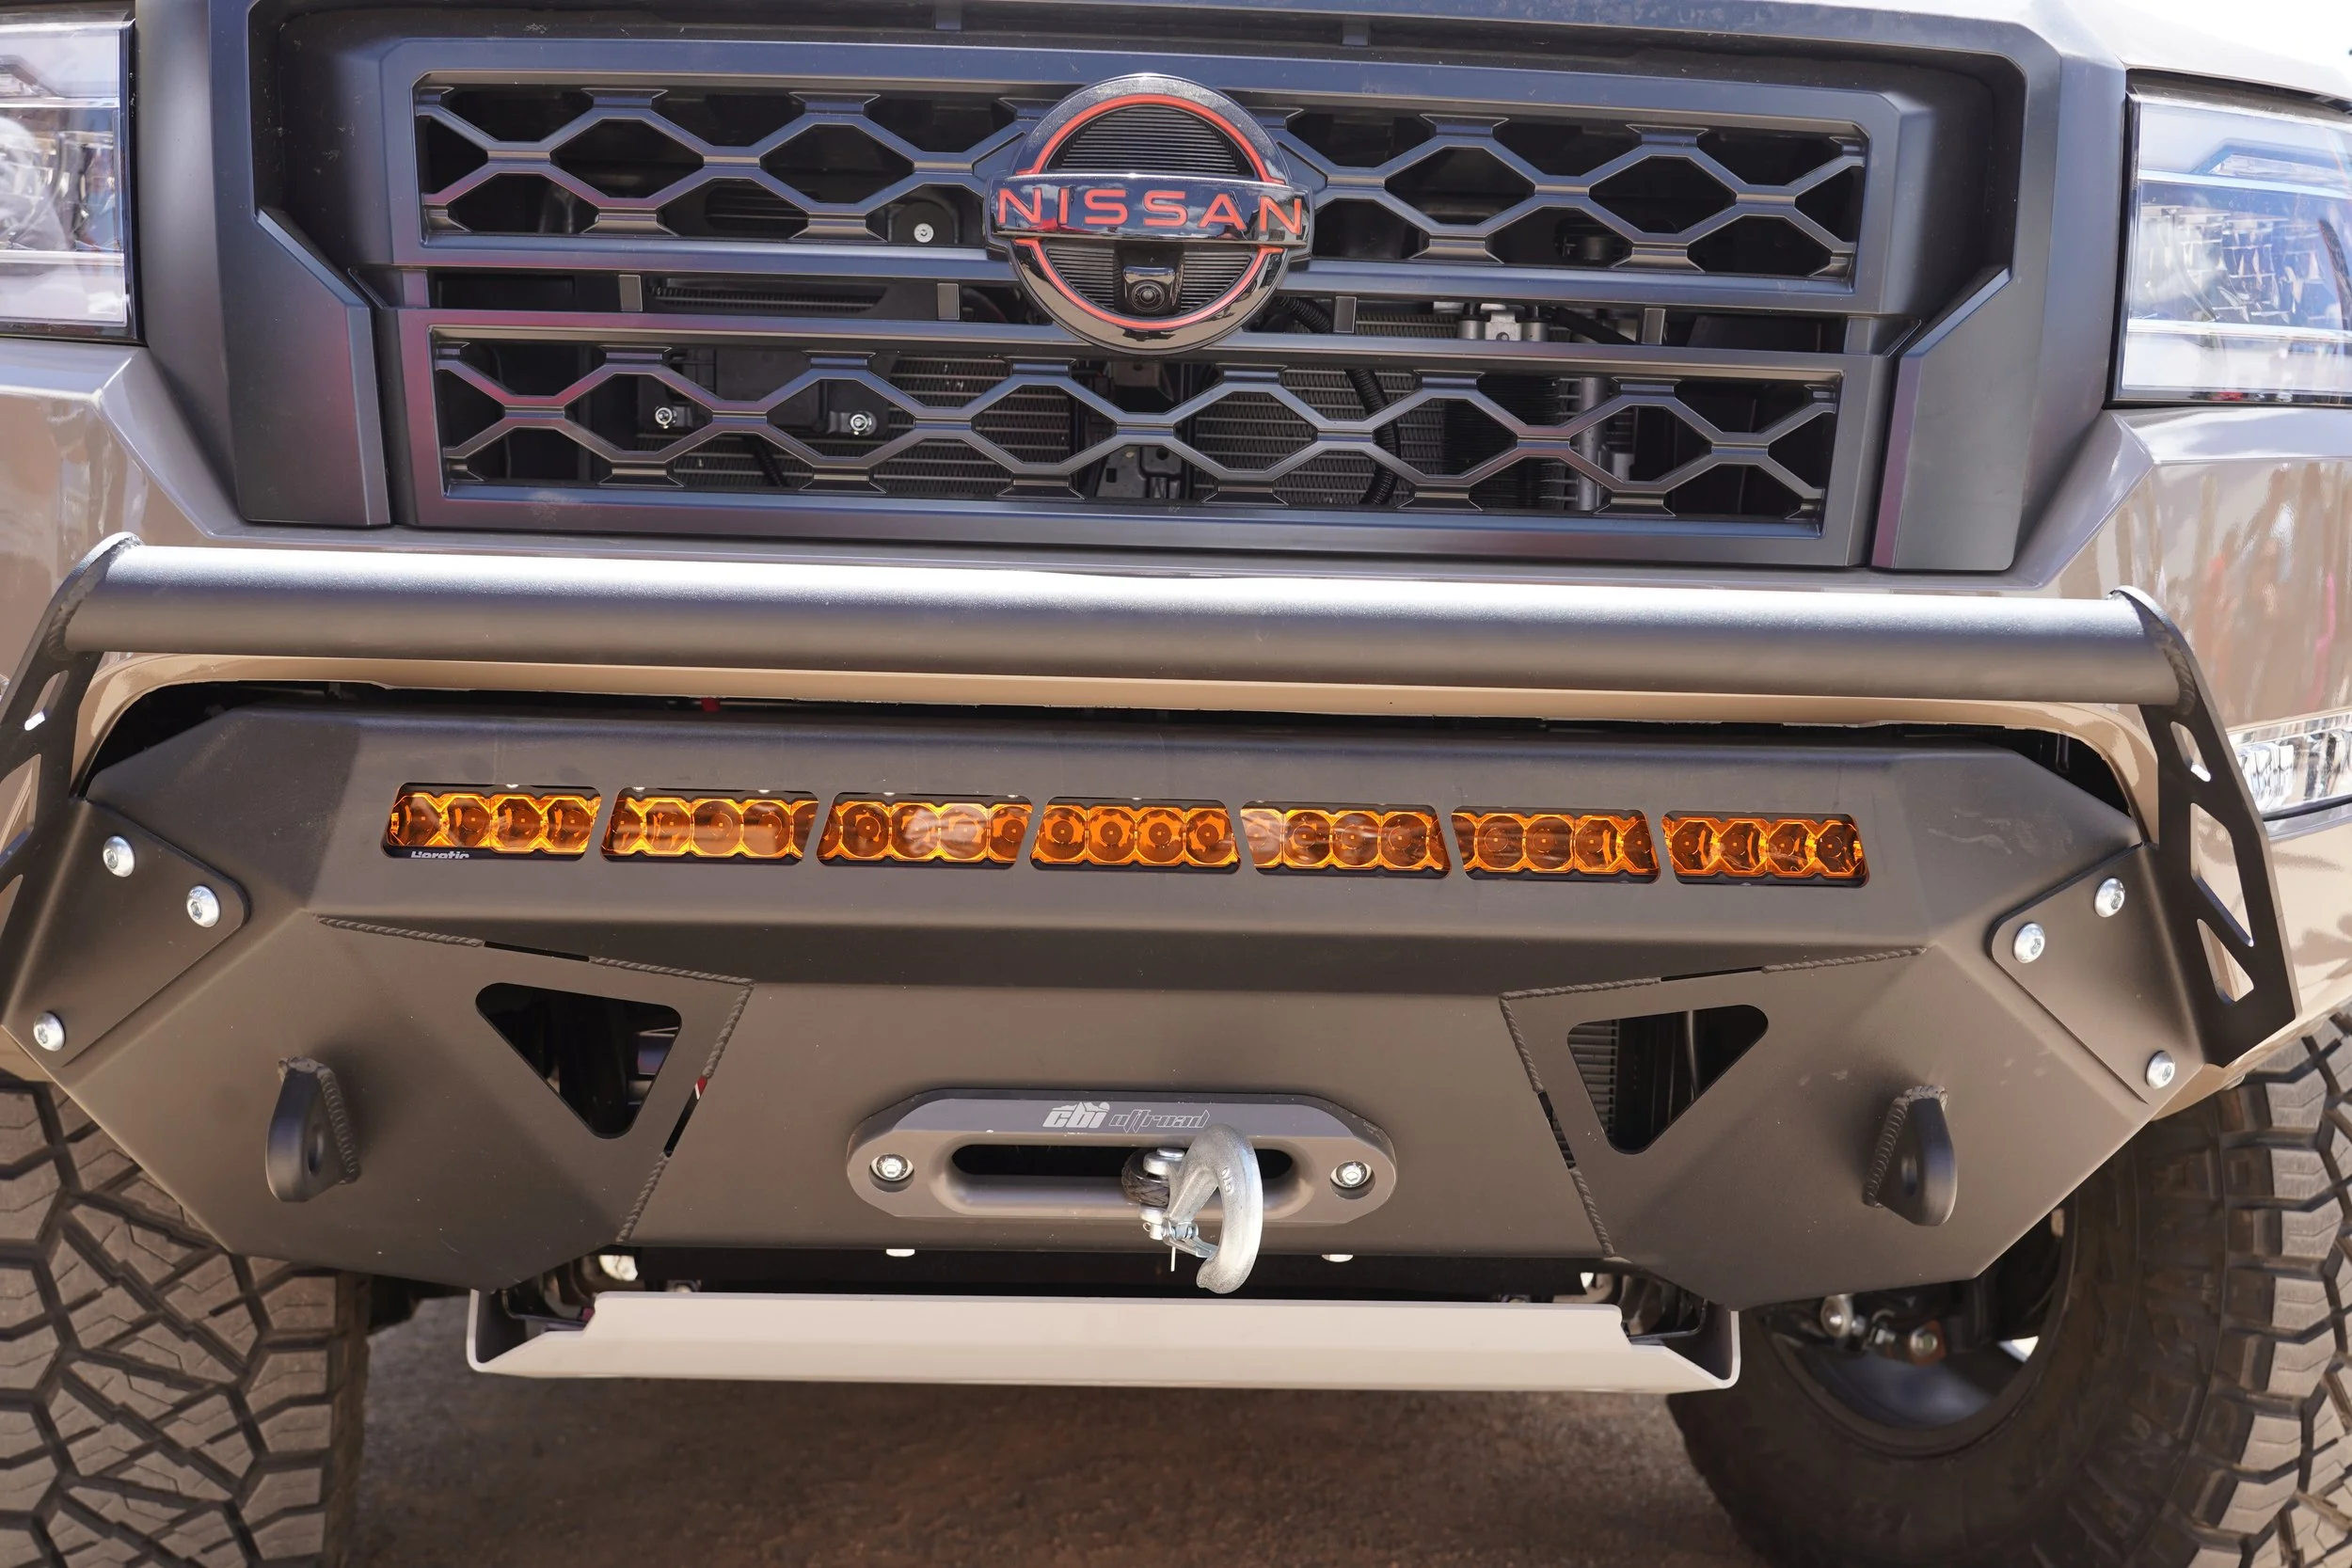
But there was a significant majority of hidden models.
Another winch equipped with synthetic line and a steel hook snugged against an aluminum hawse fairlead.
Hidden winch mounts might look stylish, and perhaps provide some protection against theft, but they are a bad idea. If at all possible, make sure your winch bumper has full access to the drum, and an easy line of sight to the line while working and re-spooling.
Can coffee in a tea bag be . . . coffee?
When Zach Frantz, the founder of Wildland Coffee, got in touch and offered to send some samples of his “coffee in a tea bag,” I was more than usually careful not to guarantee coverage of the product, and certainly no positive coverage. I consider coffee—even camp coffee—serious business, and generally grind beans for each cup and use pour-over brewing. I was skeptical, to say the least, that coffee in a tea bag wouldn’t wind up tasting like, well . . . tea. You know, that watery stuff that was responsible for the downfall of the British Empire.
Zach was fine with my caveat, and sent along an assortment.
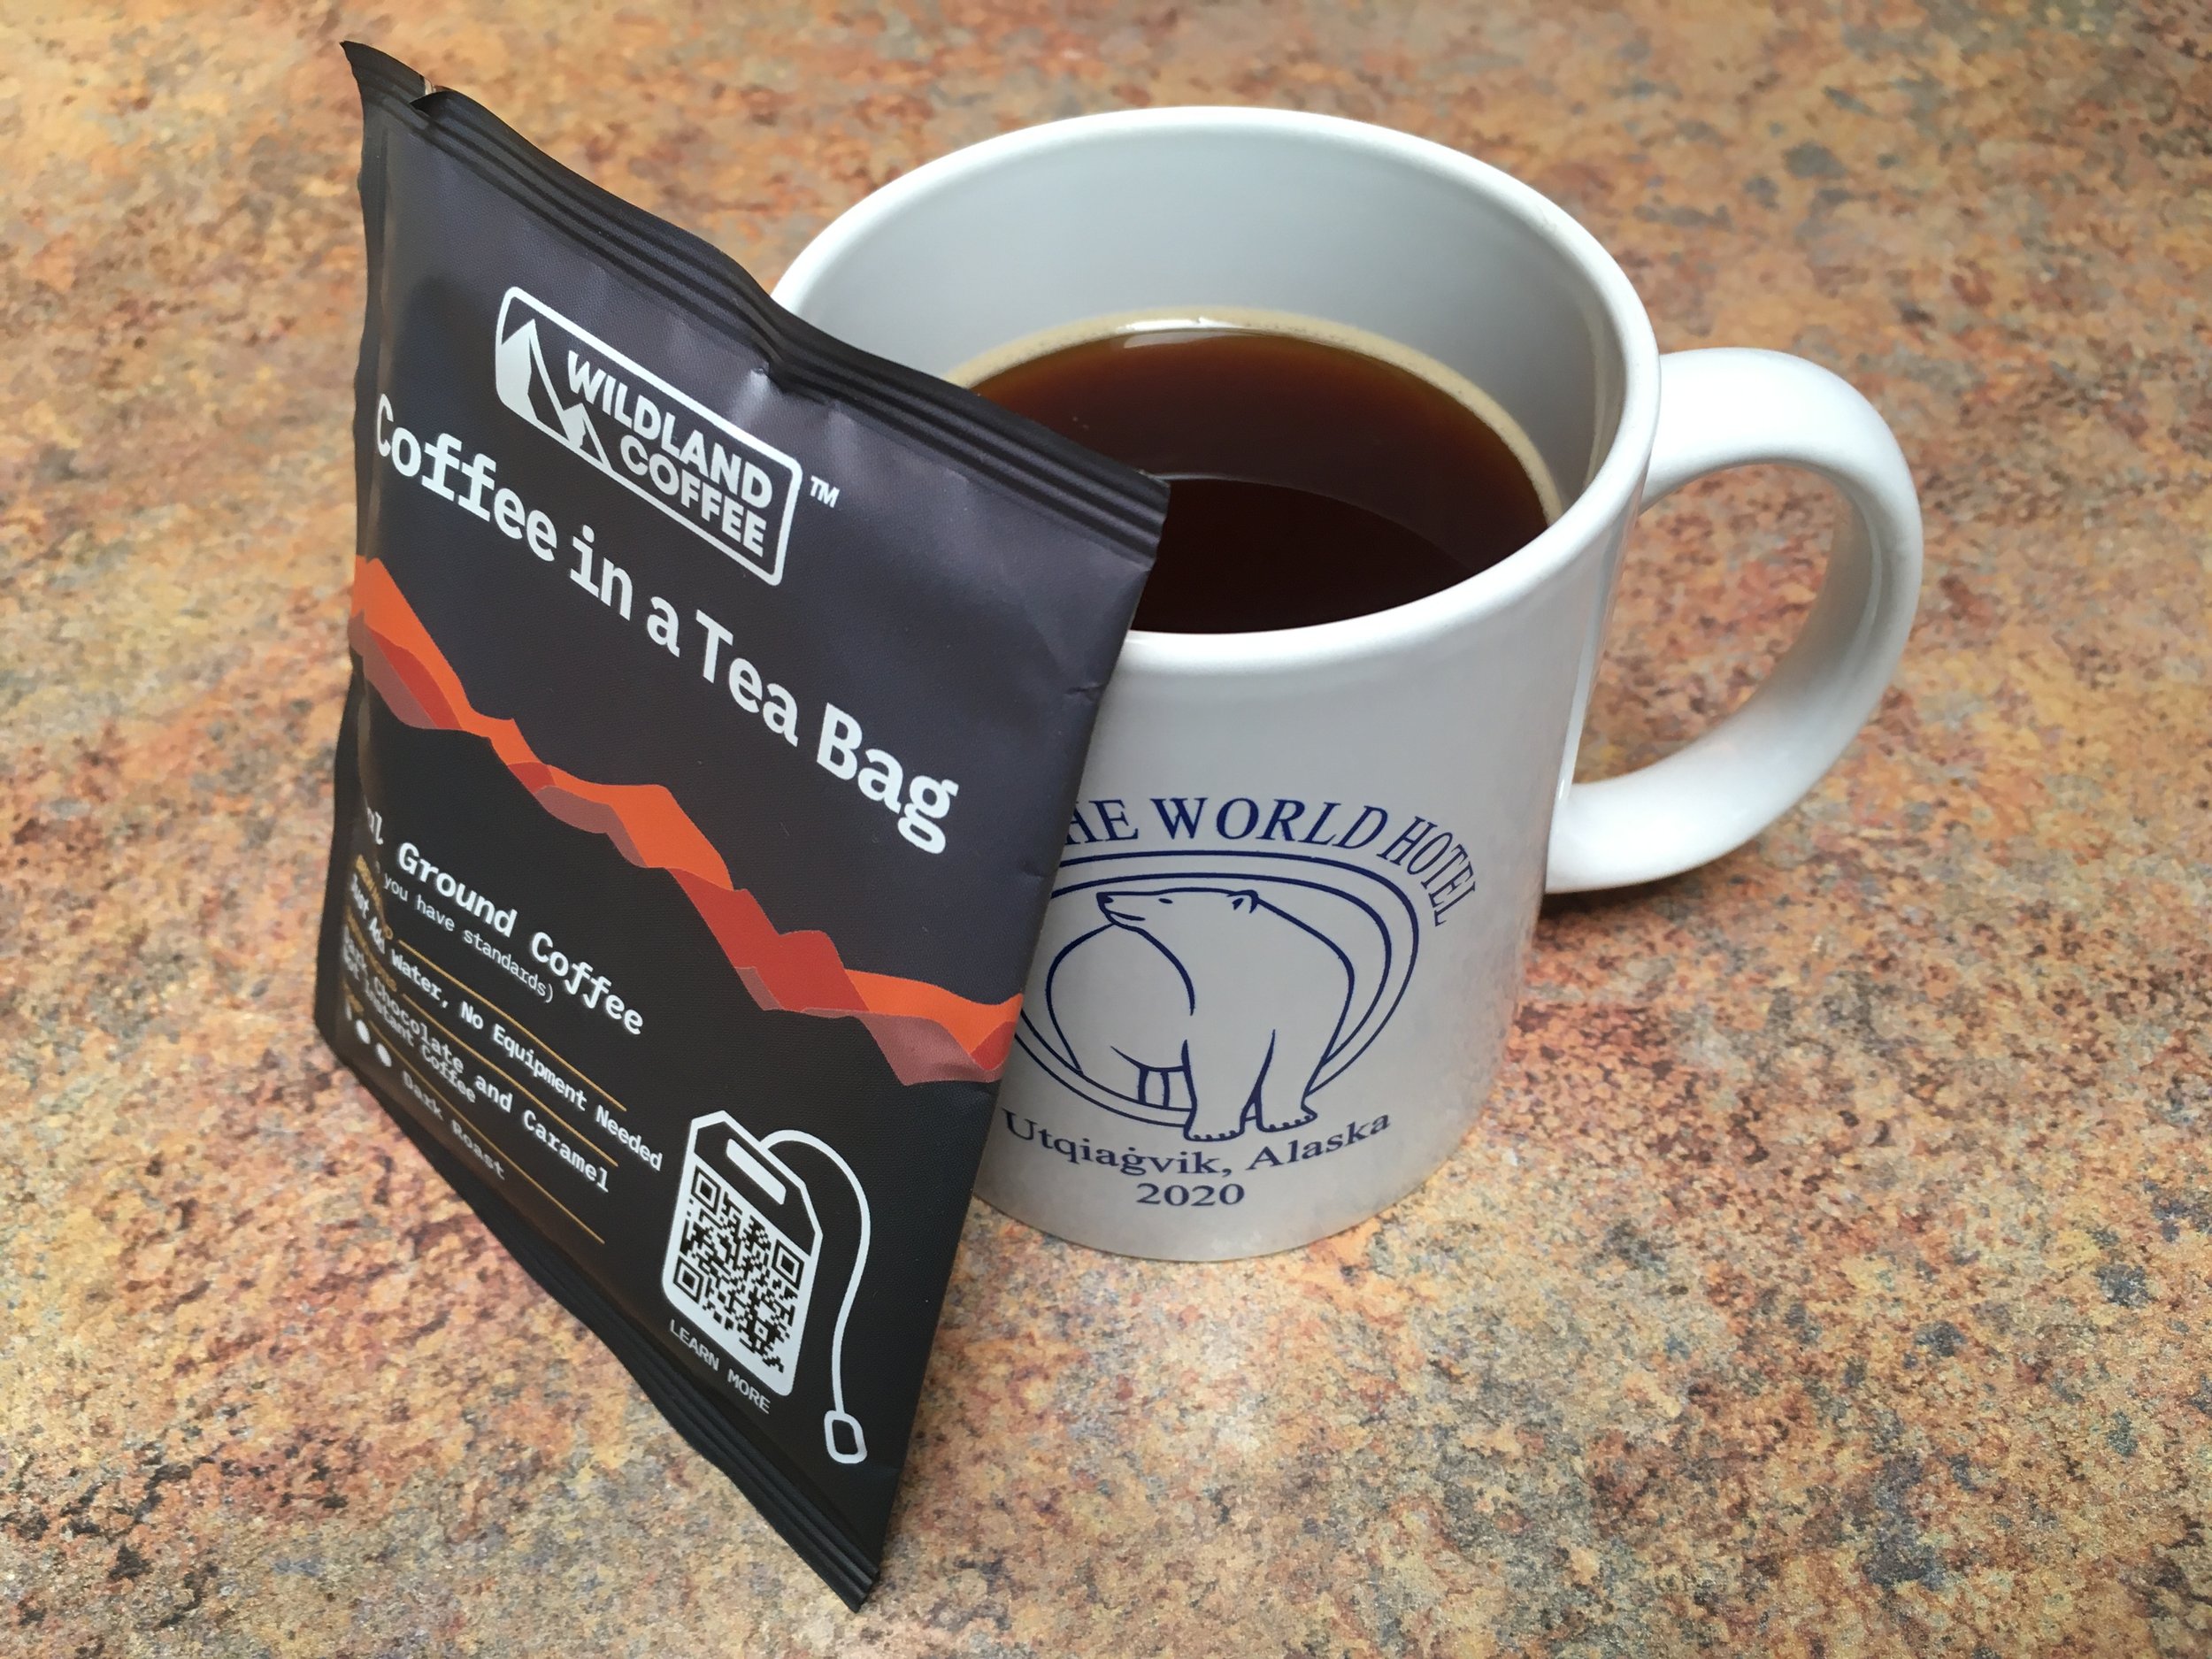
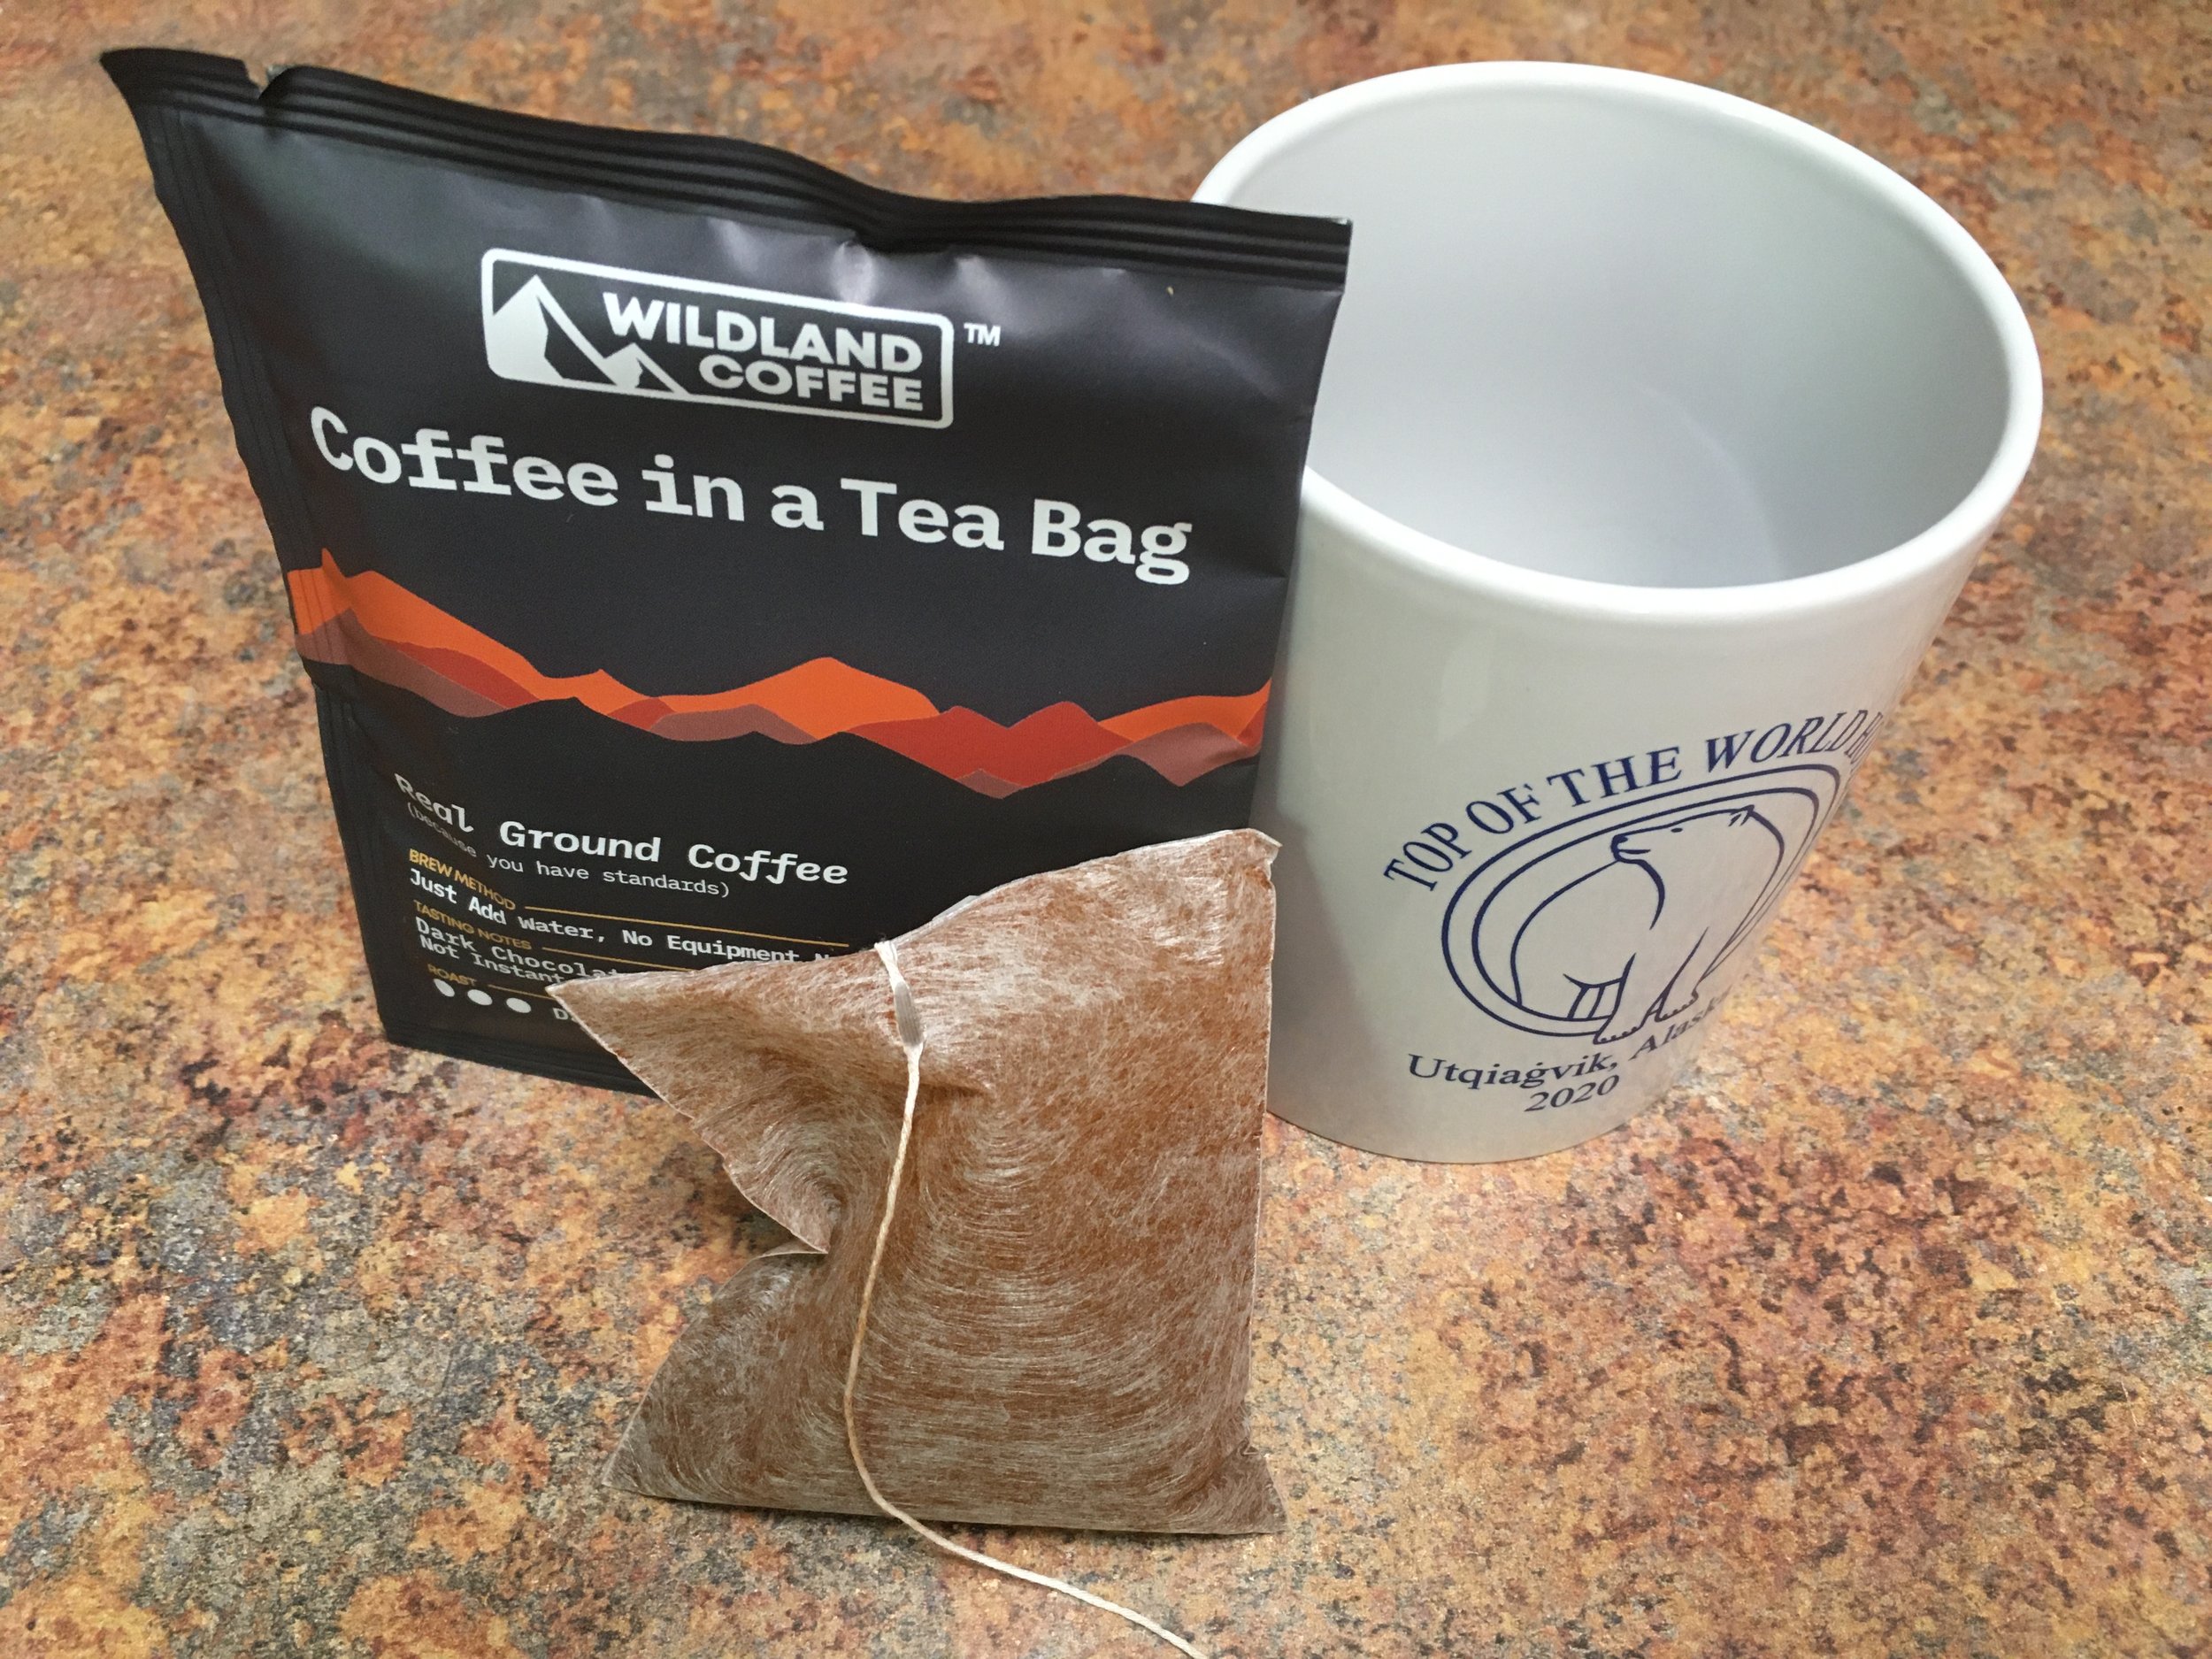
The Wildland Coffee concept is self-evident: actual ground coffee (from, depending on the roast, Guatemala or Brazil) is individually packed in oversized “tea” bags in individual foil packets designed to keep the contents fresh for twelve months. To brew, one simply brings water to a near boil and pours eight ounces of it over the bag in a mug. The instructions say to let it brew (steep?) for eight minutes—which, on a cold morning in camp, I suspect would result in a tepid drink. I stirred and massaged the bag actively and figured it was done just a few minutes later—and still hot.
And, well . . . it tasted like coffee. It wasn’t freshly-ground-pour-over-coffee coffee, but it was way, way better than any instant coffee I’ve ever had. It was a bit silty, like French-press brew, but full-bodied and tasty. I was expecting to sample it and dump the rest; instead I happily finished—and enjoyed—the whole cup.
The obvious selling point for Wildland Coffee is the ease and speed with which one can be enjoying a fresh, quite decent cup of coffee. On the other hand, each serving requires a foil packet that must be discarded, in addition to the bag itself. And of course it is significantly more expensive per cup than if you use bulk beans. As such, even if I weren’t a bit of a snob who also actually enjoys the ritual of making morning coffee, I wouldn’t carry this as my regular brew. However, I’ll be quite happy to take along a half dozen packets for when I’d really like a cup but don’t have time for the entire ritual—say, mid-morning on the road. And a few packets stored in the little impromptu stove kit I keep in the FJ40 means I could always have the option of a cup without the worry of stale beans or ground coffee.
If I were Zach’s marketing manager I’d urge him to try to lose the tea connection altogether. “Coffee in a satchel.” Or, “Dammit, it’s not a tea bag!” Something like that. But that’s just me.
Wildland Coffee is here. The $10 sample pack is an easy way to give it a try.
Edit: Zach seems to have had the same thoughts I did regarding the tea connection. Here’s his new packaging.
Swing-away kitchen in a Pelican case
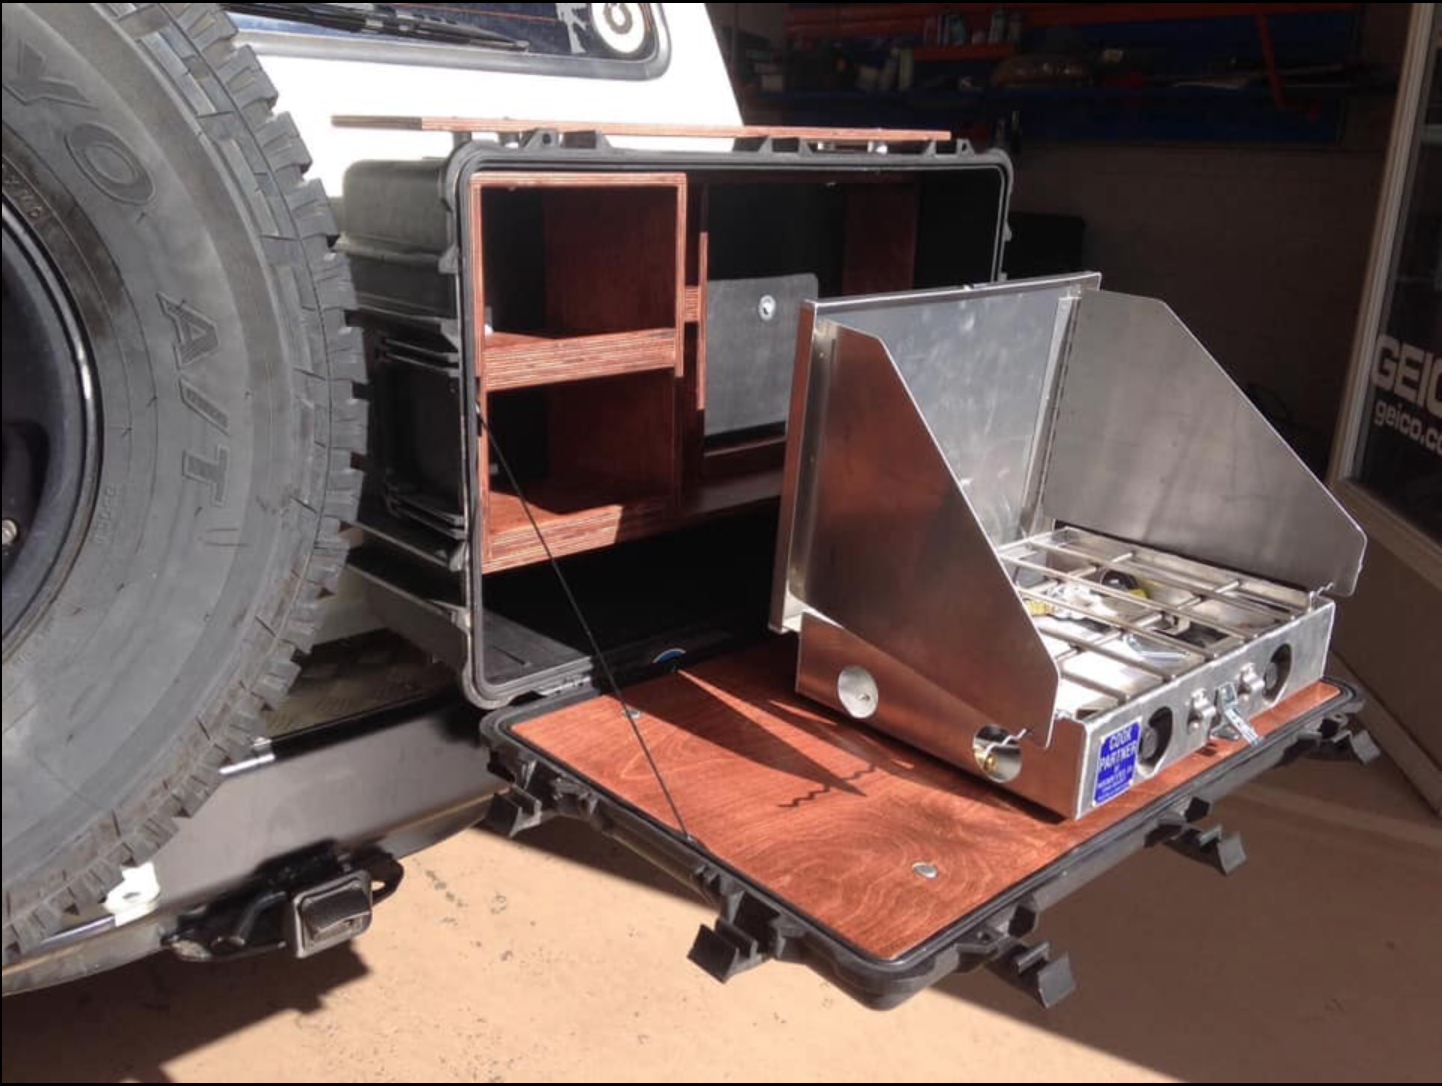
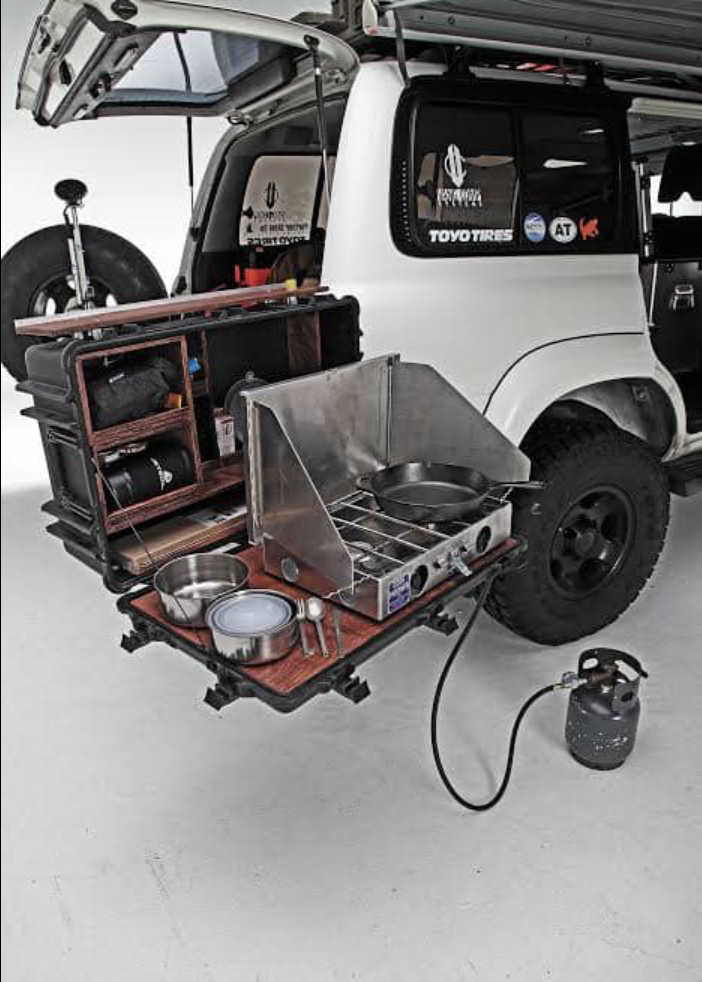
Full disclosure: I screen-shot these images from a Facebook post years ago, and noted the names of the owner/fabricator and a friend who, I believe, helped him with it. A couple of years later I tried to track down the owner and could not; however, I did make contact with his friend who informed me that, sadly, the owner had died in the interim. If anyone reading this knows more (or differently)—or if you are the current owner of the Land Cruiser, please contact me.
With that caveat, the reason I archived the images should be obvious: This is a very clever hack of a Pelican case, which with some simple interior woodwork turned it into an extremely usable and convenient kitchen and chuck box. I wish I had more and larger files, but it’s easy to get the idea from these. If you don’t need the extra swingout on your Kaymar (etc.) bumper for fuel or water, this would be a useful alternative and would save space inside while not adding too much weight out back.
Exploring Overland makes number two . . .
. . . in Feedspot’s list of “the top 60 overlanding blogs to follow.” Thanks Feedspot! And thanks to everyone who reads and corresponds with us.
The InDeflate changed my mind.
I have to be honest. When I first read about the InDeflate, it looked like a solution to a problem that didn’t exist.
There are plenty of deflators on the market, all of them a fraction of the size of this thing, which comprises an analog gauge, sliding dump valve, and coupler, complicated with a pair of long hoses ending in locking valve clips. The sales information made much of the fact that you could deflate—or, by hooking the unit up to an air source, inflate—two tires at once. Okay, cool—but is that really worth the extra complexity and bulk, not to mention the cost? At $170 the InDeflate is over three times the price of the ARB E-Z Tyre Deflator. A full set of four Coyote/Staun automatic deflators is $75. The only more expensive option is the CB Developments “mil-spec” automatic deflator, which will run you $200 per pair. (See here for an earlier review I did on deflators.)
Price aside, the InDeflate pouch was four times the size of the one my ARB E-Z Tyre Deflator came in. The E-Z Deflator rides in the glove box—no way is the InDeflate going in there. I can hide four Coyote automatic deflators in my fist. The ability to deflate (or inflate) two tires at once couldn’t possibly justify the downsides, could it? I was so dubious about the concept that the Indeflate kept sifting to the bottom of my review pile.
Well . . . I apologize to InDeflate, because after finally testing it I’ve changed my mind. Completely.
Here’s why. Pull the unit out of its pouch and either lay it on the ground or hang it from your tire rack in the back of the vehicle or the grille or bull bar in front by its included harness. Run a hose to a tire on each side and clip it to the valve, then return to the gauge.
Slide the valve up to deflate . . .
Notice something already? That’s right: You’re not kneeling in the dirt deflating one tire at a time as you would be with the E-Z Deflator; you’re standing comfortably upright. The gauge will read the current tire pressure—and, by the way, will equalize the pressure between the tires if it’s different. Now slide the dump valve up and listen to the whoosh of air released from both tires at once. Slide it down to stop deflation and check the pressure; once you’re at the desired pressure, decouple and swap vehicle ends. The deflation is not as fast per tire as is accomplished with the ARB E-Z Deflator, which removes and captures the valve core and really blasts air out—but I did a little timing test, comparing the time needed to air down two tires with the ARB and with the InDeflate. The InDeflate was virtually neck and neck, thanks both to its ease of operation as well as the fact that it’s deflating two tires at once. There’s no fiddling with the valve-core removal sequence as with the ARB. (The manual of arms on the E-Z Deflator is complex enough that it usually takes a new user three or four tries to get it down. Mastering the InDeflate is a matter of ten seconds: clip, clip, deflate.)
. . . down to stop.
Another thing occurred to me during this part of the trial: I’ve always been just a little apprehensive about constantly removing and replacing the valve cores on my tires in order to air down. It’s a teeny tiny little absolutely critical piece, after all. Have I ever damaged or lost one? Not so far, but I do think about it, and I always carry spares (a good idea anyway). Coaching a new E-Z user on just how much to tighten when re-inserting the valve core is always a bit fraught. “Snug but not tight” is wide open to interpretation. No need for concern with the InDeflate.
The InDeflate also proved quicker overall than my four Coyote/Staun deflators. The advantage to the Coyote deflators is that you simply screw them on to each valve, then enjoy your coffee or conversation or birdwatching while the deflators hiss and chatter away down to their preset pressure. However, they are fairly slow, and of course are set to a single pressure—changing it requires a time-consuming procedure. If you’re like me, you don’t always air down to the same value for all conditions—soft sand requires considerably lower pressure than a rocky trail or just a washboarded dirt road. When I carried Coyote deflators as my main tool in my FJ40, I set two of them to 27 PSI, two of them to 18 PSI, and just used a pair at a time to arrive at the appropriate pressure, which obviously slowed down the procedure. The InDeflate, as with the ARB E-Z, allows tuning to an infinite number of values.
I noticed during all my experiments that the InDeflate’s clip-on chucks are noticeably better than any I’ve ever used on numerous compressors and gauges. Normally I have about a 60-70-percent probability of achieving a tight seal on the tire’s valve with clip-on chucks; by contrast the InDeflate locked on every single time. Of course this is critical to the nature of the tool, since you won’t be kneeling at each tire to re-attach a leaking clip or simply hold it on manually, but it was surprising nonetheless. Why do other makers have such a difficult time designing one that works?
When it’s time to air up, the InDeflate really jumps into the lead, since every compressor on the market is configured to inflate one tire at a time. Whatever model you own, connecting the chuck to the fitting on the InDeflate allows you to inflate two tires at once, to precisely the same pressure. Clearly, filling two tires at the same time slows down the compressor somewhat, but not enough to overcome the time lost moving around to each tire individually. And, again, it’s all accomplished standing up comfortably rather than squatting by each tire.
The InDeflate has other, at least theoretical, functions. You can use it to bleed off air from one tire into another that is under-inflated. If for some reason you found yourself in the field with a low tire, a flat spare, and no compressor, you could scavenge a little air from the three full tires to reach home or a service station. Unlikely, perhaps, but possible.
Hanger is a nice addition, but the hook needs to be bigger.
InDeflate offers a four-hose model as well; however, on no vehicle I’ve ever owned have I inflated front and rear tires to the same pressure, whether on the street or trail. So I’d recommend the standard two-hose unit. Incidentally, if you happen to own the superb ARB Twin portable compressor kit, the (two-hose) InDeflate will just fit in the case with some careful arranging of the compressor’s power cables.
I don’t recall another product about which I had such low expectations, and which subsequently changed my mind completely. Don’t misunderstand me: There is absolutely nothing wrong with the ARB E-Z deflator or the Coyote deflators, especially considering the price difference. Or, for that matter, the tip of the small blade on a Swiss Army knife, if you’re willing to be on your knees for ten minutes. But I believe anything that encourages proper airing down—which optimizes traction, reduces stress on the vehicle and damage to the trail, and increases comfort for the vehicle occupants—is worth the expense. The InDeflate makes airing down a breeze, and it’s now my standard tool for the job.
The InDeflate is manufactured in South Africa, and sold here by Adventure Imports.
Land Cruiser engine block—in a wall . . .
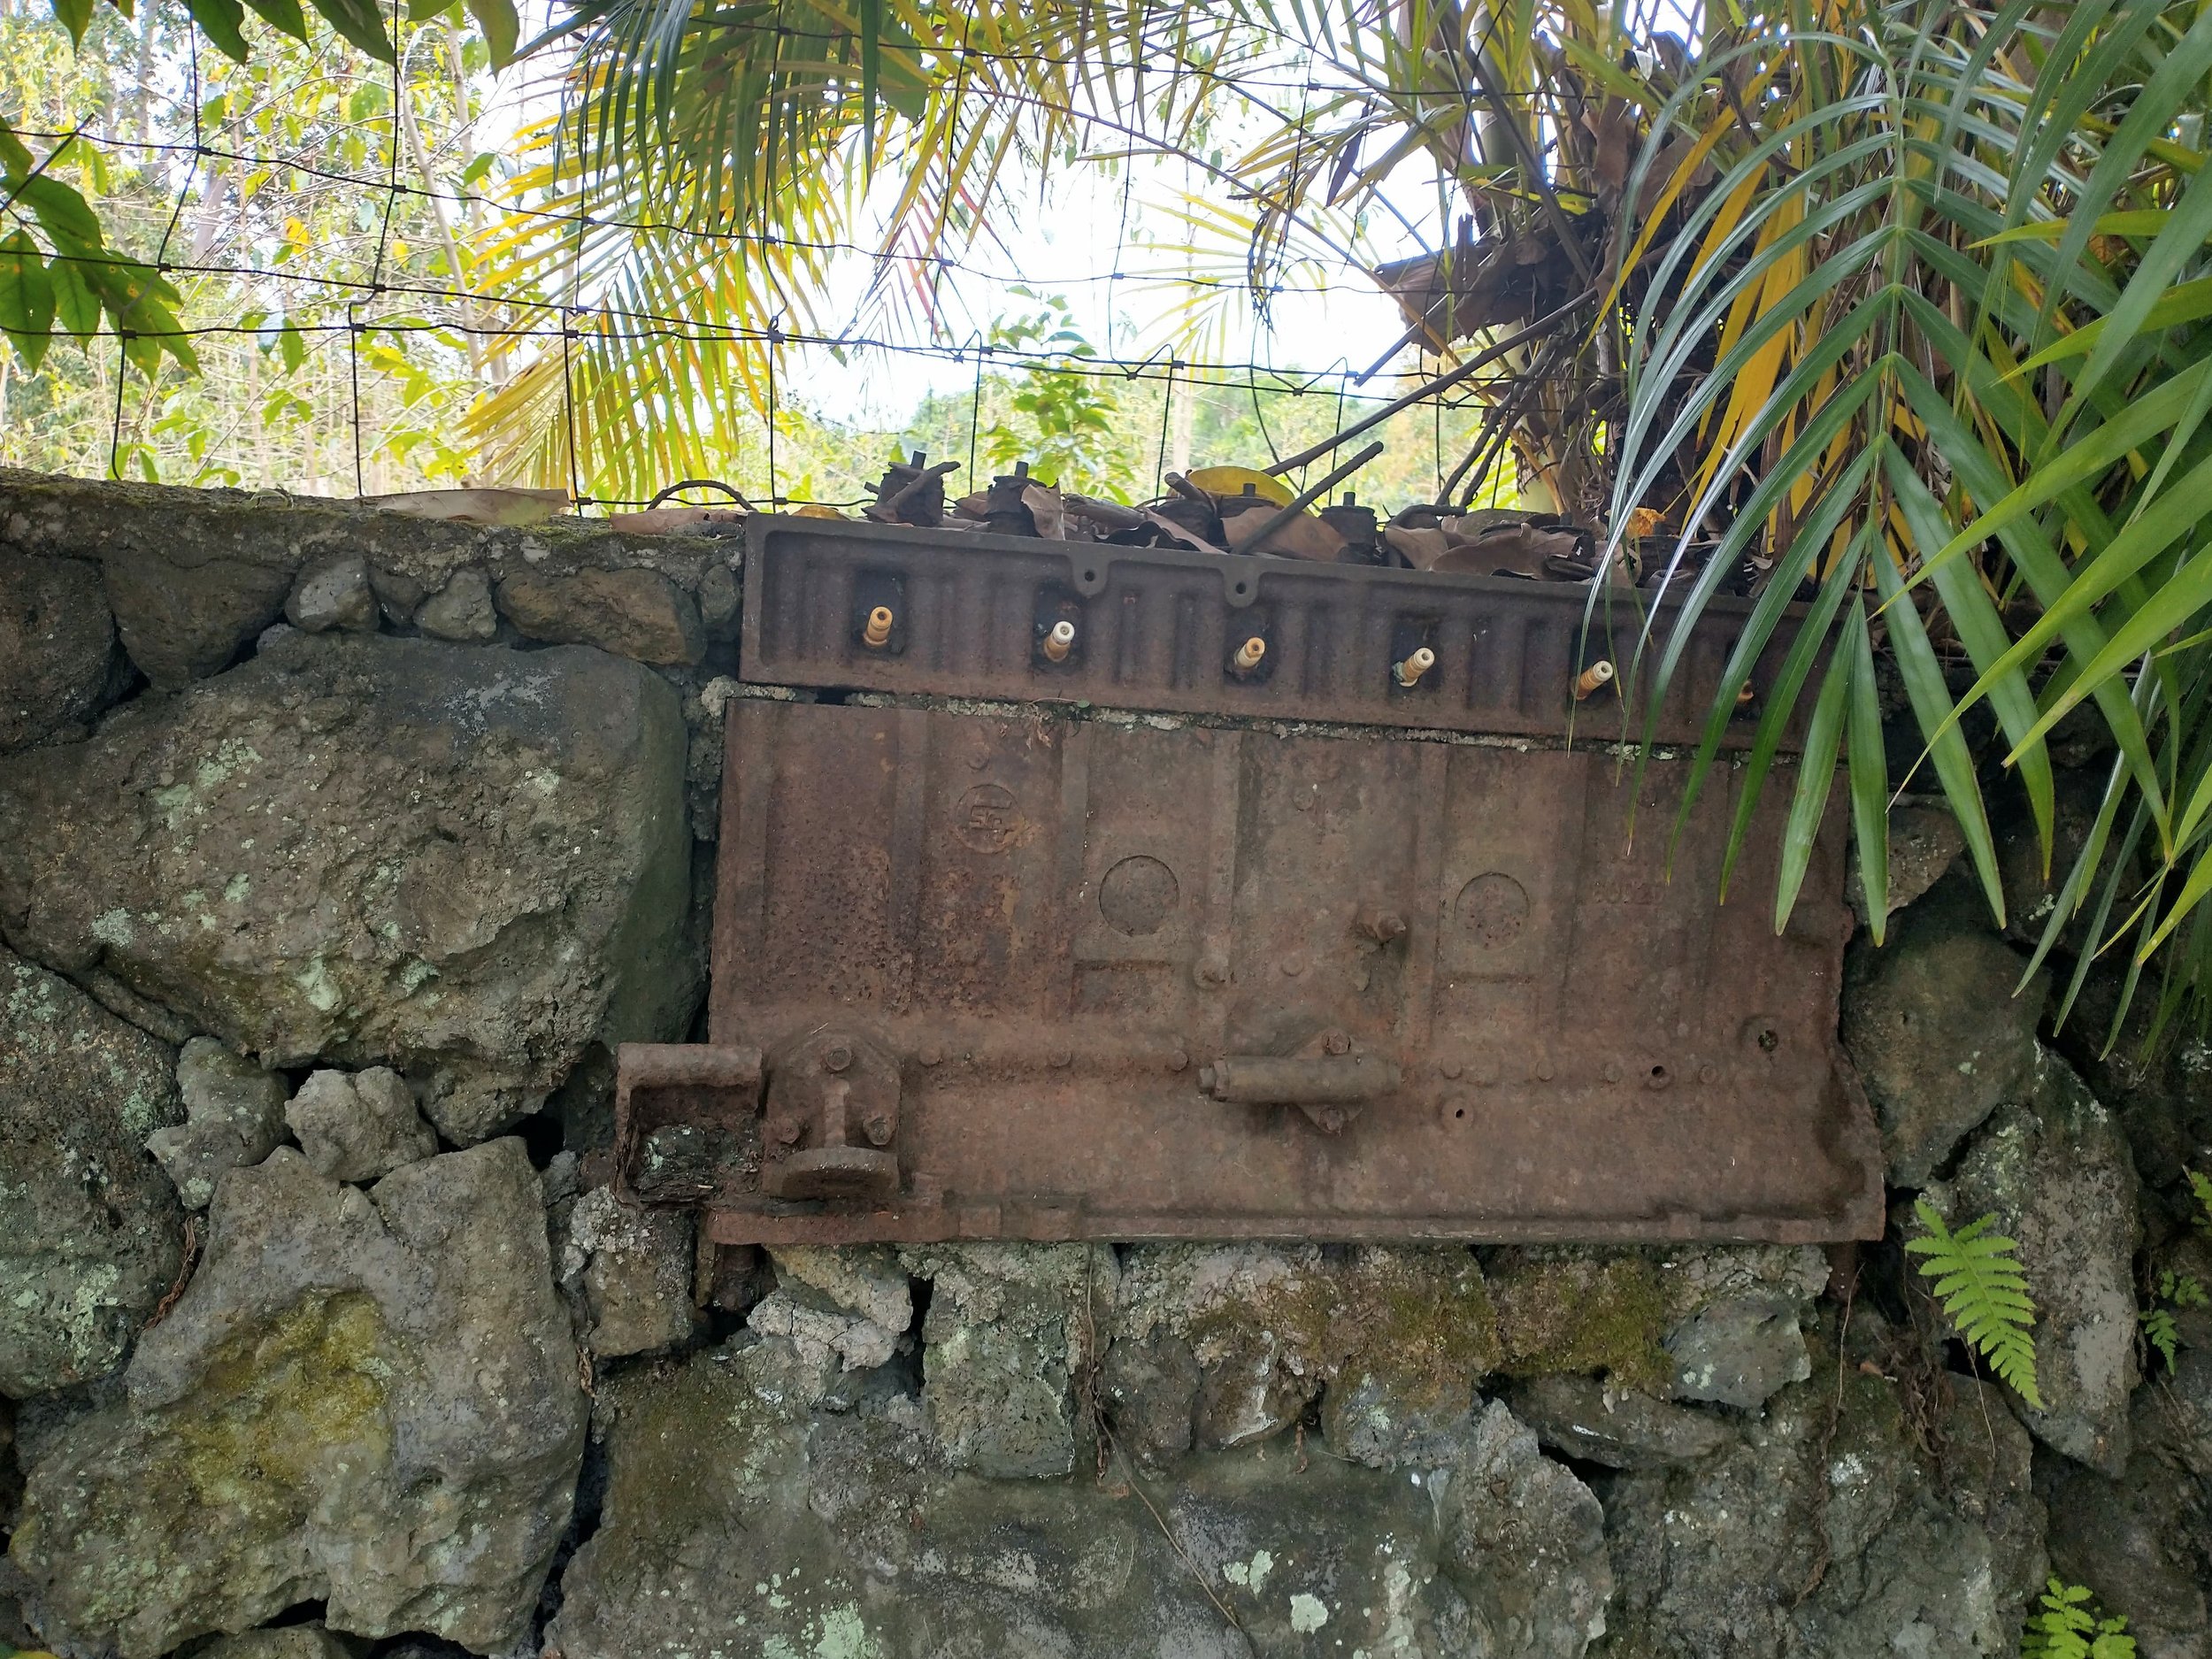
How’s this for random? Found by accident by my friend (and FJ40 owner) Craig Miller while on a hike in Hawaii. An F engine block and head securely mortared into a stone wall. Spark plugs still in place.
My friend and master Toyota mechanic Bill Lee’s comment was, “I can get that running.”
When another friend mused as to the motivations behind the placement, I said, “Well clearly, someone is doing an experiment to see which is more durable: a Land Cruiser engine, or rocks.”
I’m betting on the engine.
Finally! A new (small) shipment of VDEG Edition 5
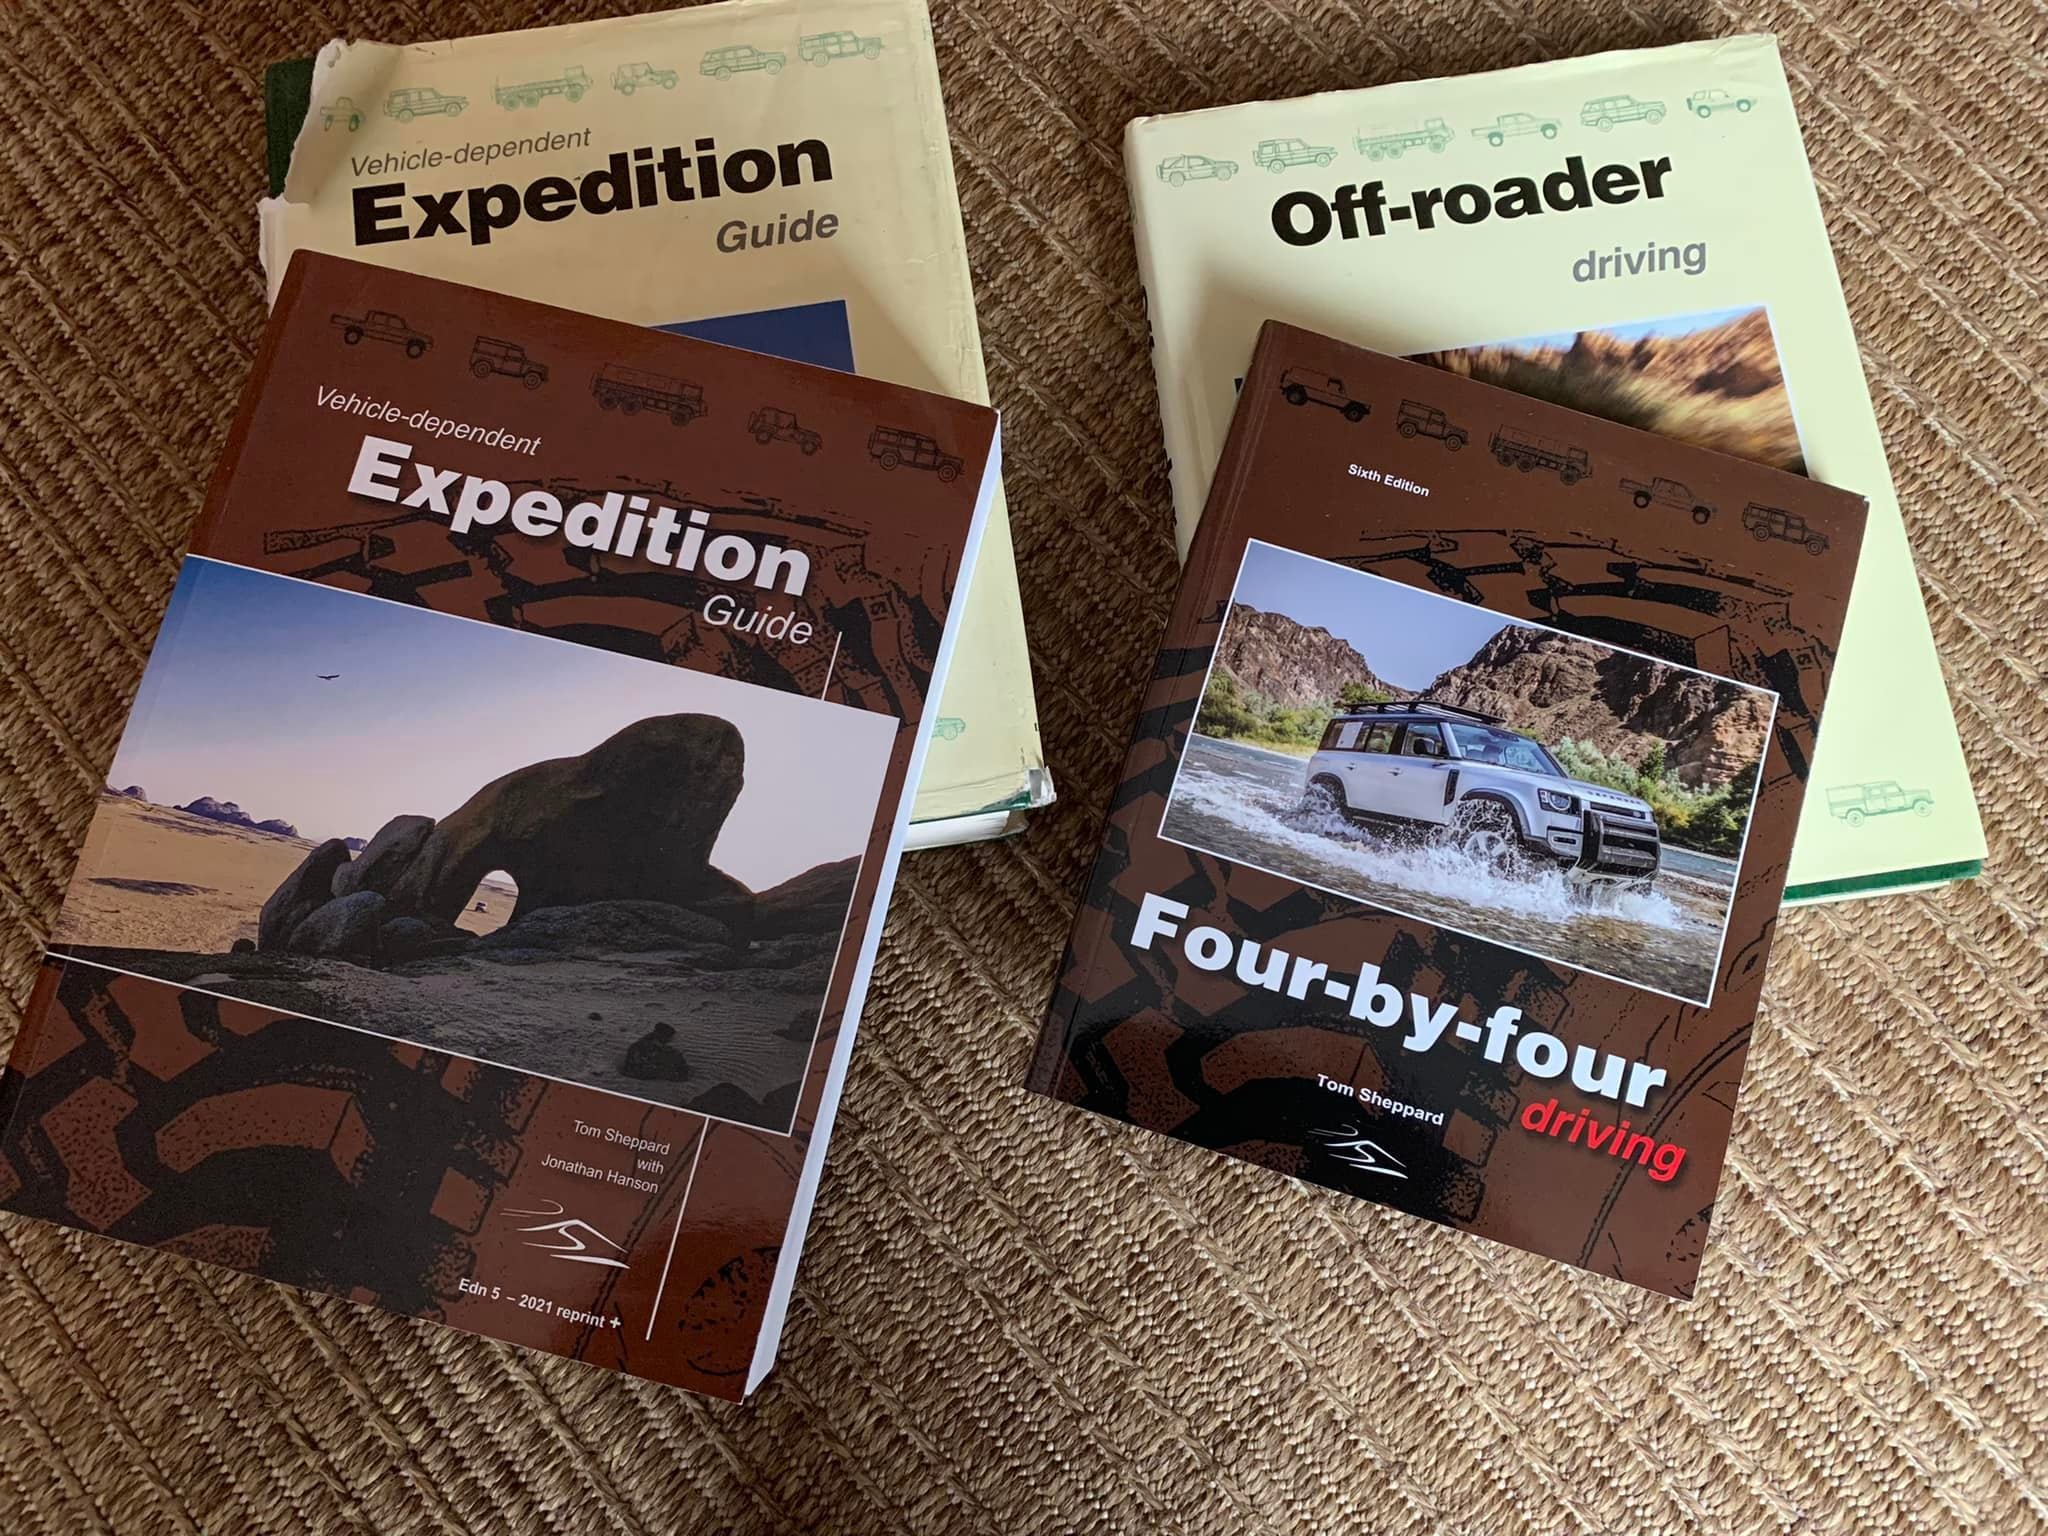
We have been out of stock on the revised and enlarged Vehicle-dependent Expedition Guide edition 5 for two months, but finally a small shipment is on the way from England. Tom Sheppard shepherded a new digitally mastered print run, and the pallet has now landed on the east coast and is en route to Tucson.
If you order a copy now it will be shipped as soon as we’ve laid our hands on them.
VDEG remains the standard by with all others of its kind are measured—600-plus pages and four pounds of expertise. Despite the recent worldwide challenges with inflation and transportation, we’ve held the price to the same as the last batch.
Few books have as loyal a following as this one. I drove 120 miles to buy my first copy in 1999. I know readers who have purchased every edition; others, such as my friend Peter Sweetser, dragged their original 20-year-old copies of VDEG plus Tom’s 4x4 Driving all over the world before finally updating their expedition library:
I was honored and humbled when Tom brought me on board in 2015 to help make the book more relevant to North American readers. Between the two of us the Vehicle-dependent Expedition Guide keeps getting better and better (and bigger . . .). If you don’t yet own a copy, your expedition library is tragically incomplete! Order here.
Hint: When using “Search,” if nothing comes up, reload the page, this usually works. Also, our “Comment” button is on strike thanks to Squarespace, which is proving to be difficult to use! Please email me with comments!
Overland Tech & Travel brings you in-depth overland equipment tests, reviews, news, travel tips, & stories from the best overlanding experts on the planet. Follow or subscribe (below) to keep up to date.
Have a question for Jonathan? Send him an email [click here].
SUBSCRIBE
CLICK HERE to subscribe to Jonathan’s email list; we send once or twice a month, usually Sunday morning for your weekend reading pleasure.
Overland Tech and Travel is curated by Jonathan Hanson, co-founder and former co-owner of the Overland Expo. Jonathan segued from a misspent youth almost directly into a misspent adulthood, cleverly sidestepping any chance of a normal career track or a secure retirement by becoming a freelance writer, working for Outside, National Geographic Adventure, and nearly two dozen other publications. He co-founded Overland Journal in 2007 and was its executive editor until 2011, when he left and sold his shares in the company. His travels encompass explorations on land and sea on six continents, by foot, bicycle, sea kayak, motorcycle, and four-wheel-drive vehicle. He has published a dozen books, several with his wife, Roseann Hanson, gaining several obscure non-cash awards along the way, and is the co-author of the fourth edition of Tom Sheppard's overlanding bible, the Vehicle-dependent Expedition Guide.

