Overland Tech and Travel
Advice from the world's
most experienced overlanders
tests, reviews, opinion, and more
A cheap, bombproof lens-shipping case.
For the first 30 years of my career as a writer/photographer, all my camera gear went with me on airlines as carry-on luggage, packed securely in a Pelican case. For 30 years, there were no enforced weight limits for carry-on items, so no one ever noticed that the loaded case eventually weighed upwards of 33 pounds. That changed on one flight to Australia, when the check-in clerk asked to weigh it, and actually laughed out loud when she hefted it. Pointing to the sign I hadn’t noticed that said, MAXIMUM CARRY ON WEIGHT 7KG (15 pounds), she demanded I offload half its contents into our checked baggage. There followed five minutes of panic as we rolled a couple thousand dollars worth of DSLR equipment into our clothing, stuffed it into the middle of our checked duffels, and prayed for the best. (Walking past the business-class check-in we noticed that the limit there was 14kg or 30 pounds, sort of giving the lie to our clerk’s assurance that the limits were to “balance the load.)
We were lucky and everything made it to Sydney intact, but it was obvious a new approach was going to be necessary given increasingly widespread carry-on weight limits. Henceforth I carried a single camera body and a couple lenses on board, and packed the rest inside hard cases in our luggage, knowing it would inevitably be subjected to casual treatment by baggage handlers who, even if they were conscientious, were invariably pressed for time.
Early this year I picked up one of Sony’s brilliant 200-600mm zoom lenses for my Alpha 9 camera, and decided it needed extra protection—and thanks to my long-past life as a fixer-of-most-things, I knew how I wanted to go about it.
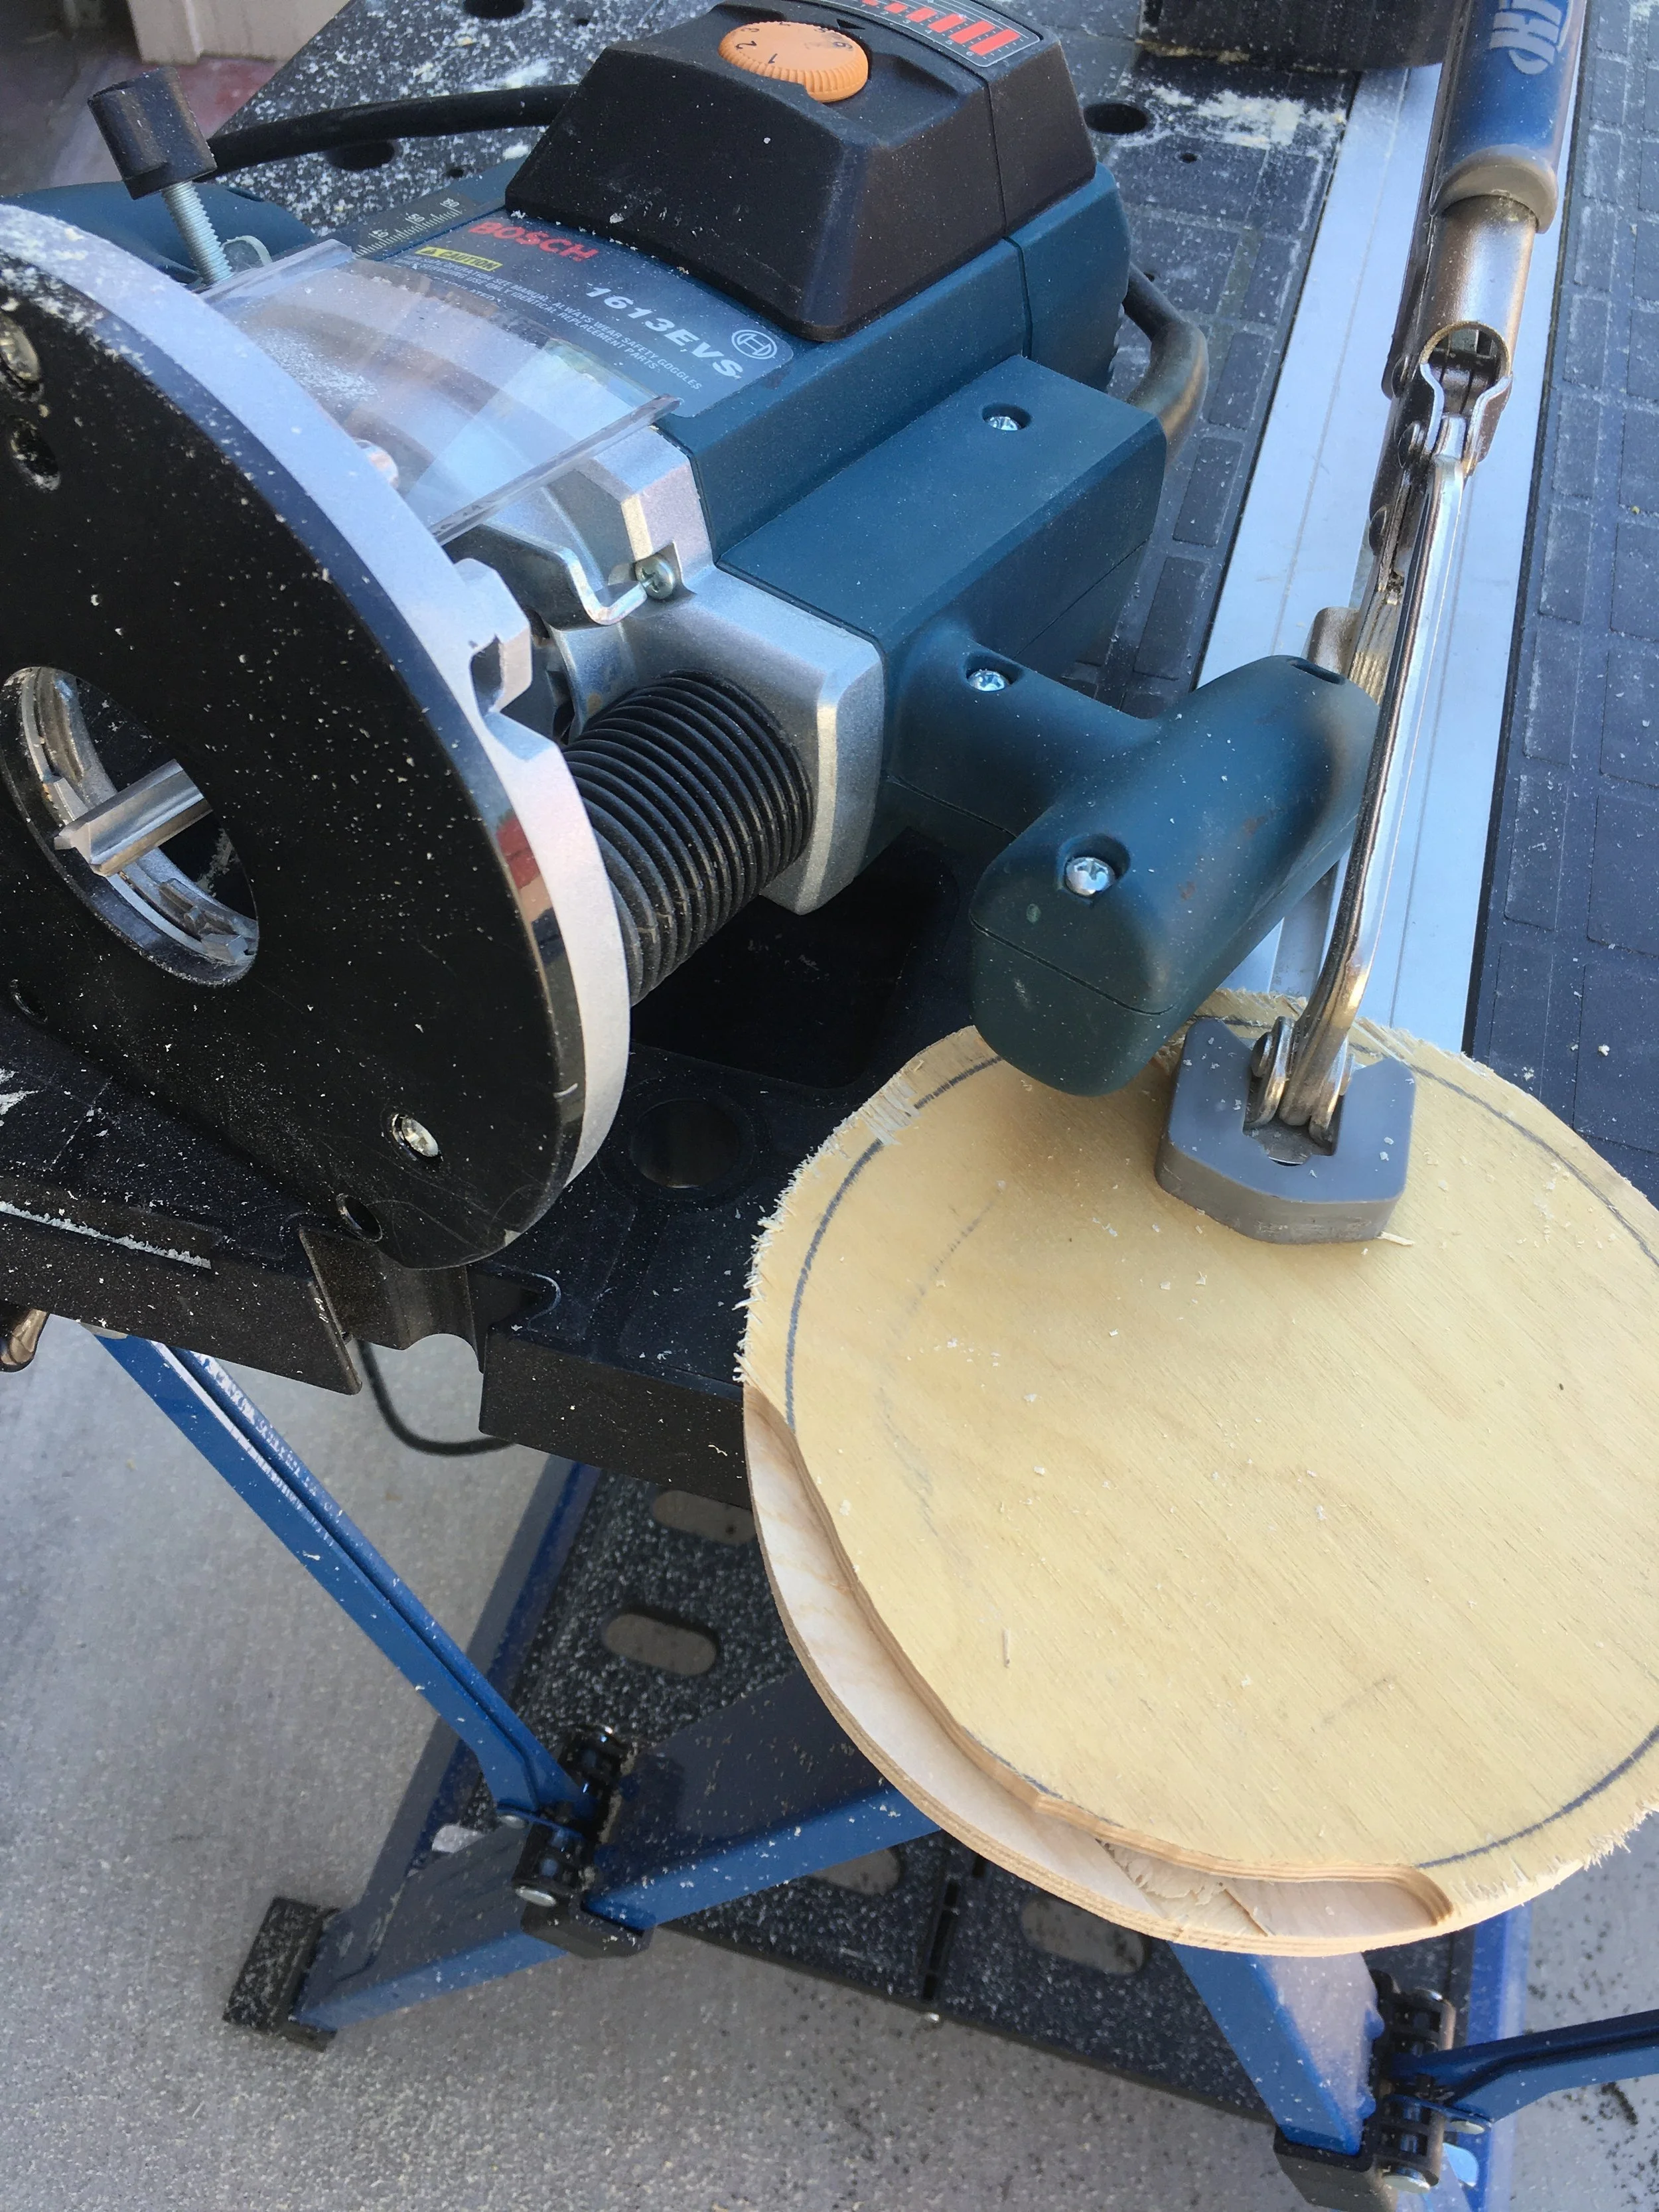
At Lowe’s Home Improvement I picked up an ABS stand pipe, six inches in diameter and 24 inches long, for the princely sum of $8.95 plus tax. Back home I picked out a scrap piece of 3/4-inch plywood (it happened to be Baltic birch but ordinary plywood would suffice). I traced the outer circumference of the pipe twice, then traced another circle inside each, a bit more than the thickness of the pipe wall. With a jigsaw I cut out each circle, then used a router to relieve the outer edge so each cap would fit securely into each end of the pipe.
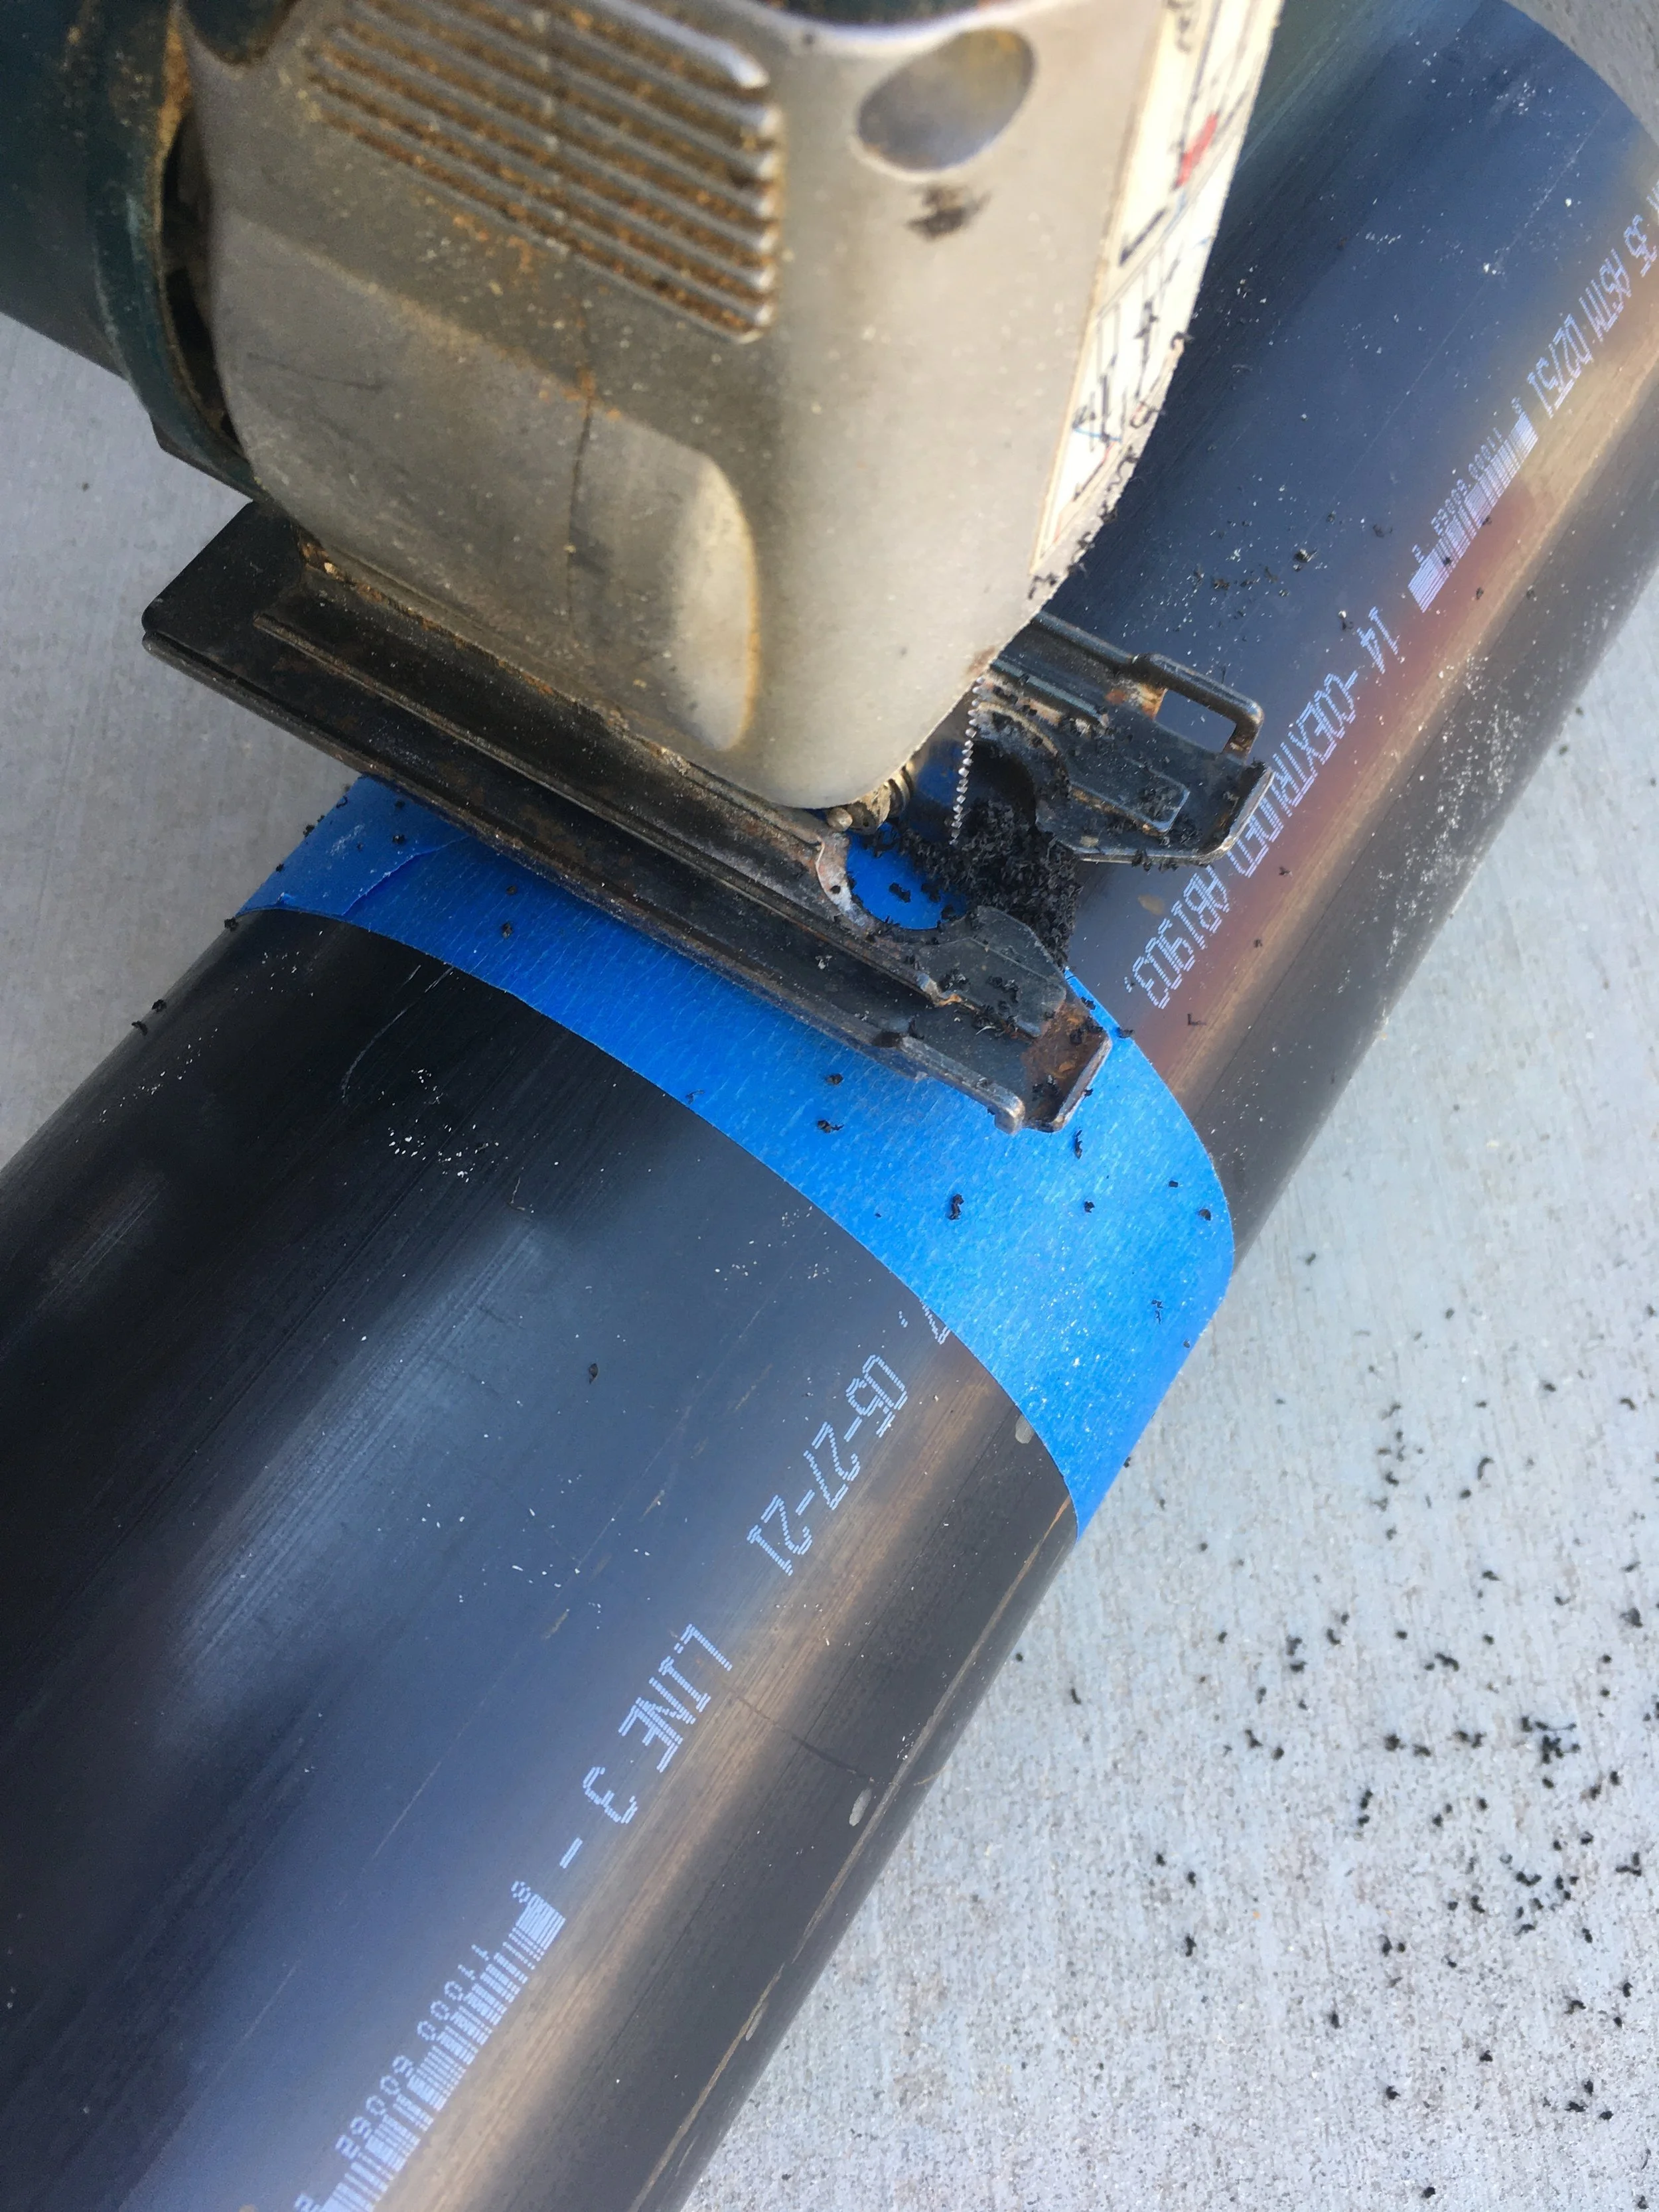
Next I set up the Sony lens next to the pipe, gauging its length with space left over for padding on each end. I marked the spot with a circumference of painter’s tape and trimmed the pipe with the jigsaw.
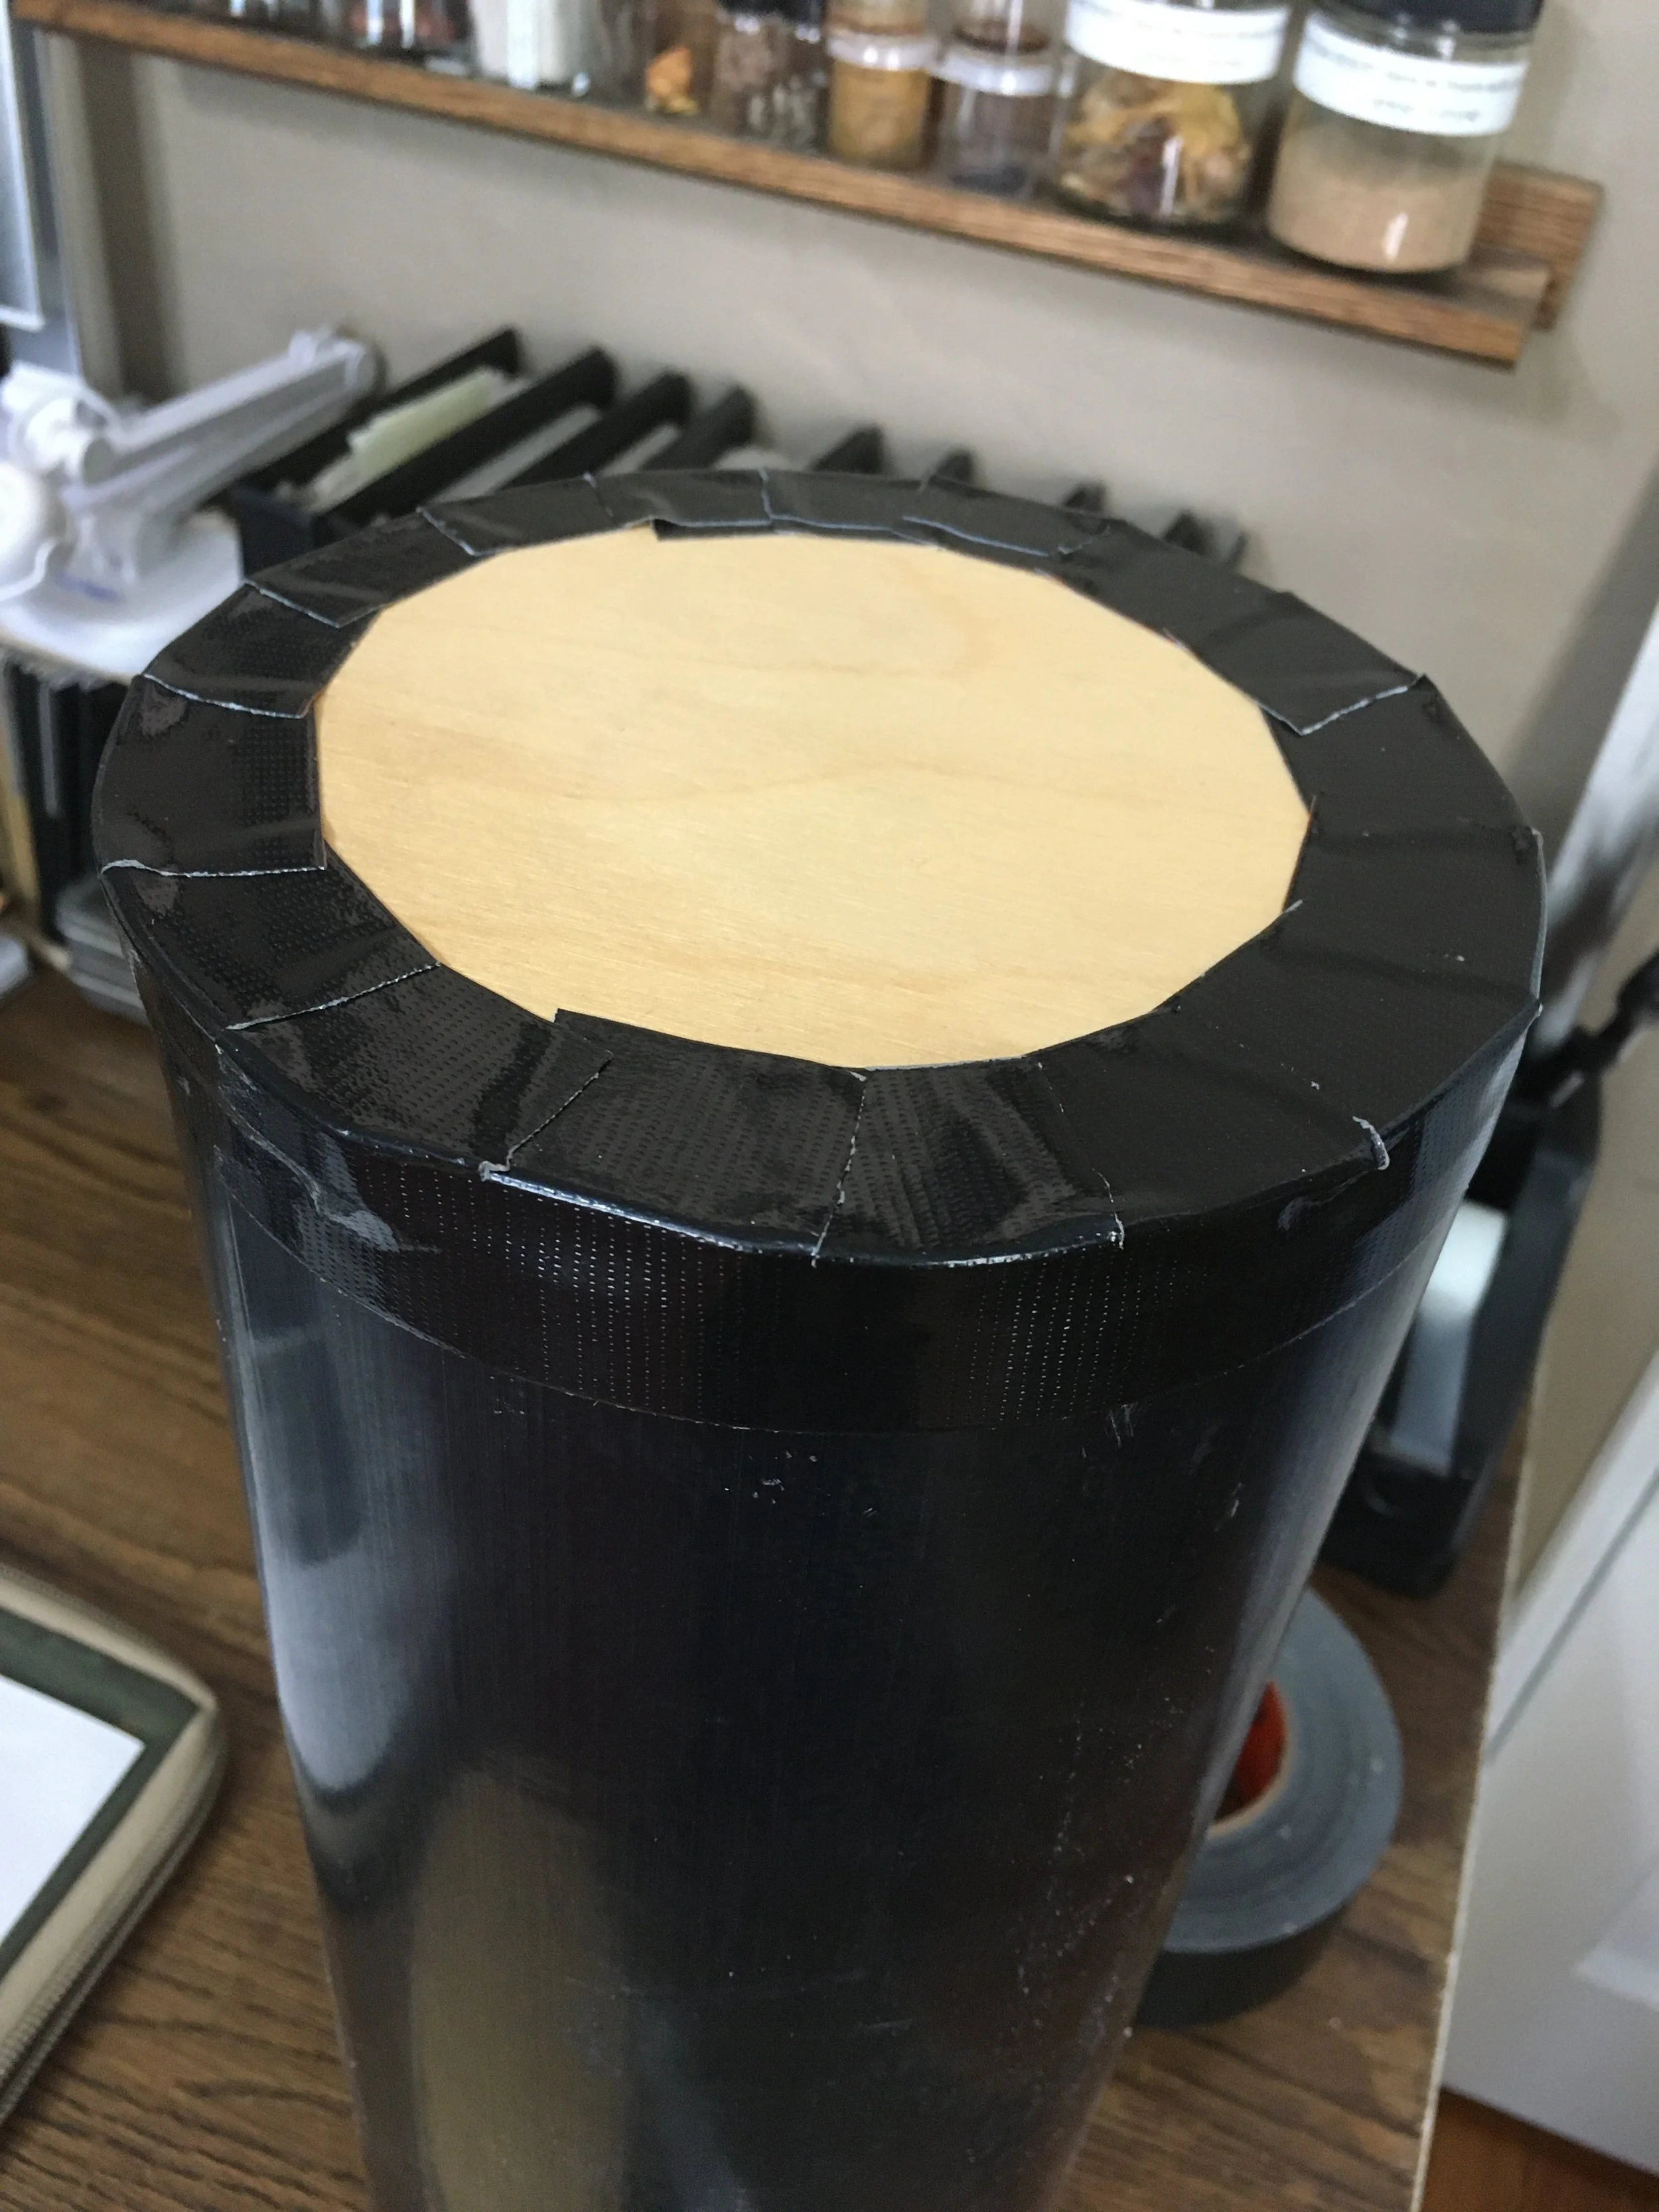
Nearly finished. I made sure the length was good, then used Gorilla tape to secure the “bottom” cap to the pipe, first with a piece around the edge, cut and overlapped thus:
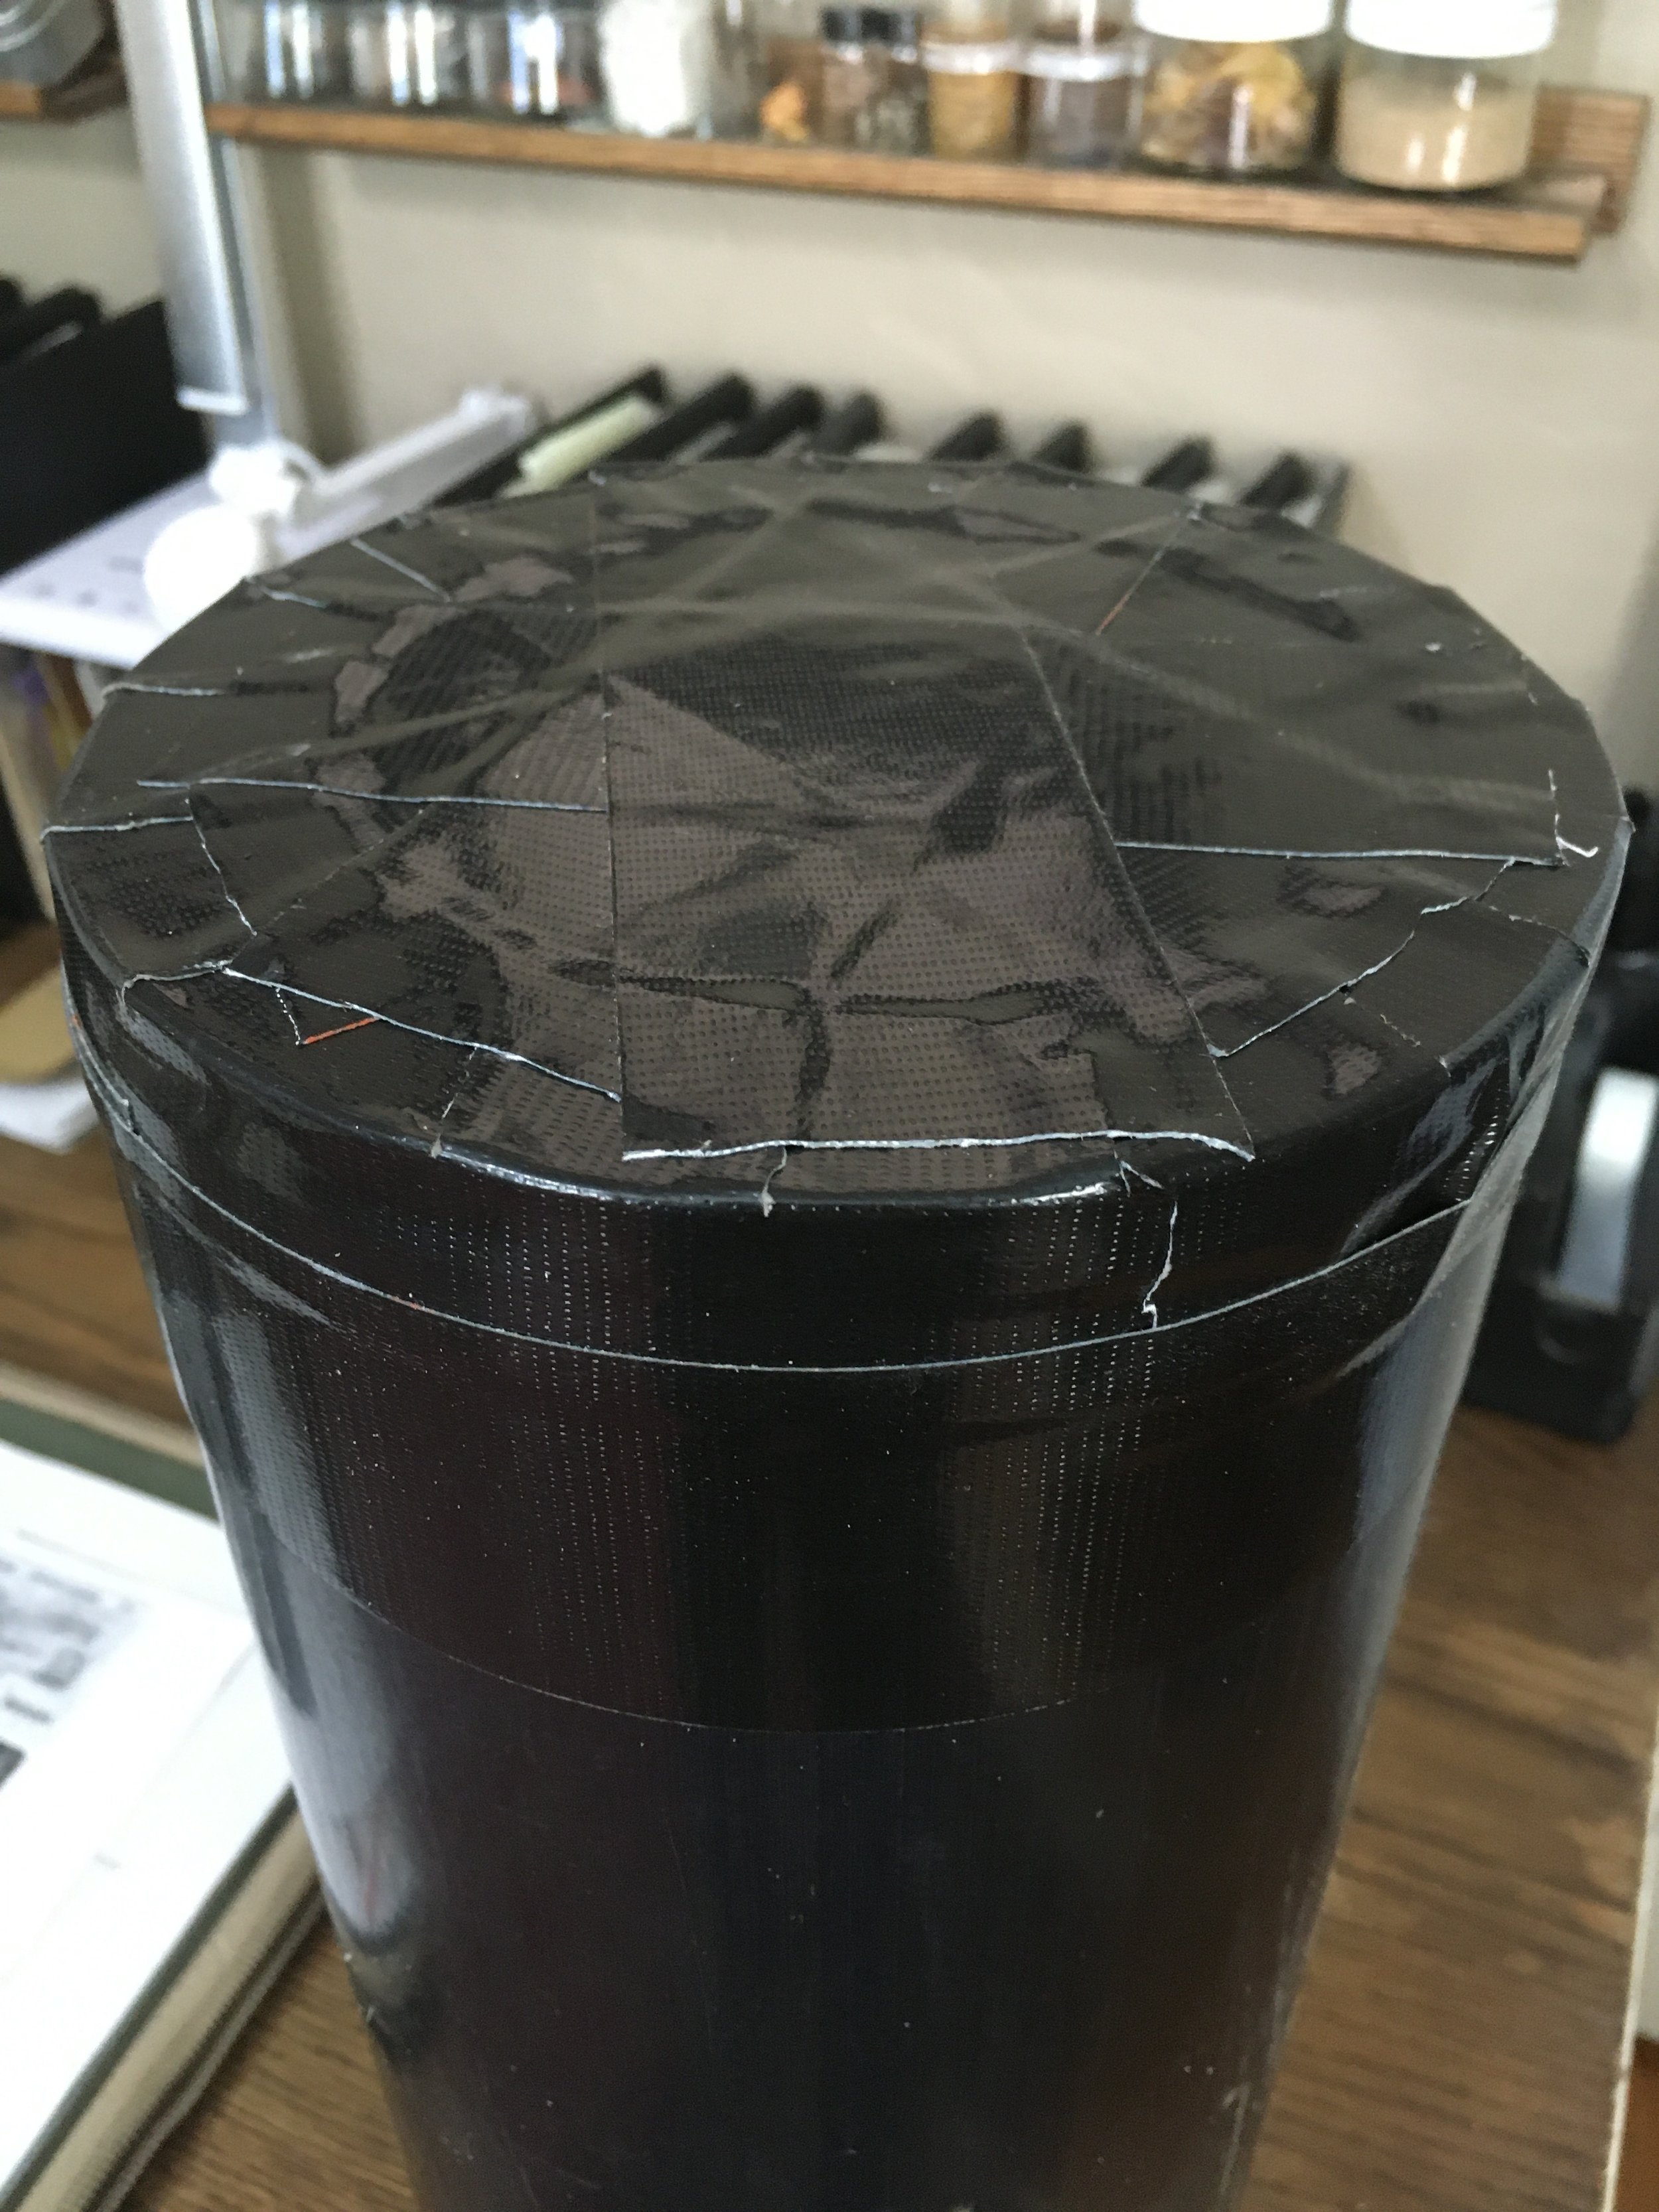
. . . then with strips all the way across.
All that remained was to load the lens—wrapped in a plastic bag to keep it dust-free—well-surrounded by packing peanuts. On top I inserted the remainder of the roll of tape to re-secure it on the way home—and also, I hoped, to allow anyone who might open it for inspection to re-secure it.
With the top taped shut, the case felt utterly bombproof. You’d have to run over the thing with a tractor to damage it (perhaps not beyond the realm of possibility at a couple airports I know, but . . .). I still marked the outside with warnings.
Of course the case survived multiple flights to, from, and within Alaska with zero issues, and for once we felt zero stress consigning such a piece of equipment to the vagaries of checked luggage.
Total out-of-pocket cost: $8.95. Plus tax.
A guide to recovery jacks, for the beginner . . . or procrastinator
A few years ago I was helping lead a group trip along the Continental Divide, when one of the participants badly sliced a tire on his Tacoma on a back road in Wyoming. Roseann and I were riding tail gunner, and as we pulled up the driver had already chocked the wheels, retrieved the factory scissors jack, and placed it under the rear axle. But he was failing completely in his efforts to raise the axle and tire, straining mightily but futilely on the crank handle. Why? Because mounted on the back of the Tacoma was a Four Wheel Camper, which was in turn loaded with water, food, and supplies for a two week trip. We stopped, I got out my four-ton hydraulic bottle jack, and we effortlessly lifted the truck and swapped the tire.
With very few exceptions—such as the superb Italian-made hydraulic bottle jack supplied with solid-axle Land Rovers for some time—factory-supplied jacks are designed to minimal specs to lift the vehicle, on pavement, just high enough to change a tire. Load that vehicle up with bumpers, winches, roof racks, camping gear—or a camper—and you might find that jack whimpering under the load. Actually it would be you who were whimpering.
If you want something that can handle a tire change on a loaded vehicle, as well as recovery duties—for example to lift the vehicle off a high-centered situation, or to shovel substrate under a bogged tire, or insert MaxTrax—you need to step up the game with something rated to at least half to two-thirds the GVWR of your rig.
And then you have a major decision to make: Do you want to lift from up top, via a bumper or slider, or from below, via an axle or the chassis?
The advantage to a bumper jack is, first, you don’t have to crawl under the vehicle to lift it—nice for staying clean but also possibly critical if your 4x4 is buried right to the axles in sand or mud. Or water. Disadvantages? First, your vehicle must be equipped with sturdy, recovery-capable bumpers front and rear—and preferably with rock sliders as well—that will accept the jack’s tongue. Second, to lift a tire off the ground with a bumper jack to change it you have to cycle through the vehicle’s full suspension travel first, which can mean a foot or more of wasted elevation and leave the vehicle precariously tippy. Finally, bumper jacks tend to be heavy and bulky.
The axle/chassis jack is compact (with the understandable exception of the Pro Eagle here), doesn’t waste lifting height to raise a punctured tire, and with a few accessories can perform a variety of recovery tasks. But access to the underside of the vehicle is mandatory, and bottle jacks in particular tend to have limited lifting range—often only six or seven inches unless you buy a double-extension model, which will increase that by another four or five inches. Still paltry compared to the 30 inches or more of a bumper jack.
My suggestion: If you mostly need a sturdy jack for tire changing and occasional recovery work, look at the chassis jacks here. If you like to challenge yourself and your vehicle and frequently find yourself a bit buried, consider making room for the Hi-Lift or one of the ARB jacks.
Hi-Lift jack ($100 48” all-cast)
How many products survive a century virtually unchanged? Yet the antediluvian Hi-Lift still scores points in this group with its low price, rugged simplicity, ease of refurbishment, and versatility—it’s the only product here that will also function as a clamp or a (very slow) winch.
The Hi-Lift’s 4,660-pound rating has become the de facto standard for competitors, and in this group its range of lift is second only to the ARB Jack. Downsides include the Hi-Lift’s 29-pound mass and jam-prone lifting mechanism (the latter usually rectified with a dousing of almost any lubricant, including, according to my nephew, Keystone Light). Also, while proponents always bring up those “clamping and winching” functions, the number of times I’ve done either except to demonstrate it is exactly zero. (On the other hand, I once successfully sleeved a broken tie rod with a Hi-Lift handle and a bunch of baling wire.)
To lift a vehicle by a bumper with the Hi-Lift, you must raise the lifting tongue—along with the entire lifting mechanism—up the main beam to the height needed. Thus if you’re using the common 48-inch model and your bumper is 36 inches off the ground, you’re left with just a few inches of travel (since the mechanism can’t go all the way to the top).
The big red flag in the Hi-Lift’s manual of arms, as anyone who’s used one knows, is what I call the ZoD: the “Zone of Disfigurement” circumscribed by the arc the handle makes. Let your head stray inside this arc—whether you’re raising or lowering—and you’re asking for a broken nose or jaw if you lose your grip. When lifting a heavy vehicle—especially if the operator isn’t heavy—it can be difficult indeed to apply enough force to accomplish the task while simultaneously staying out of the ZoD. And lowering a load takes exactly as much force as raising it, so don’t let down your guard just because you’re letting down the vehicle. Losing control of the handle while lowering can trigger a feedback loop that results in the handle slamming against the beam and rebounding wildly, ratcheting the vehicle down all on its own.
I know experiencedbackcountry drivers who wouldn’t leave home without a Hi-Lift, and equally experienced backcountry drivers you couldn’t pay to carry one. Over the years I’ve migrated between both camps, so I’ll be no help—except to slyly point you to the product below.
Bloomfield Manufacturing is here.
ARB JACK ($833)
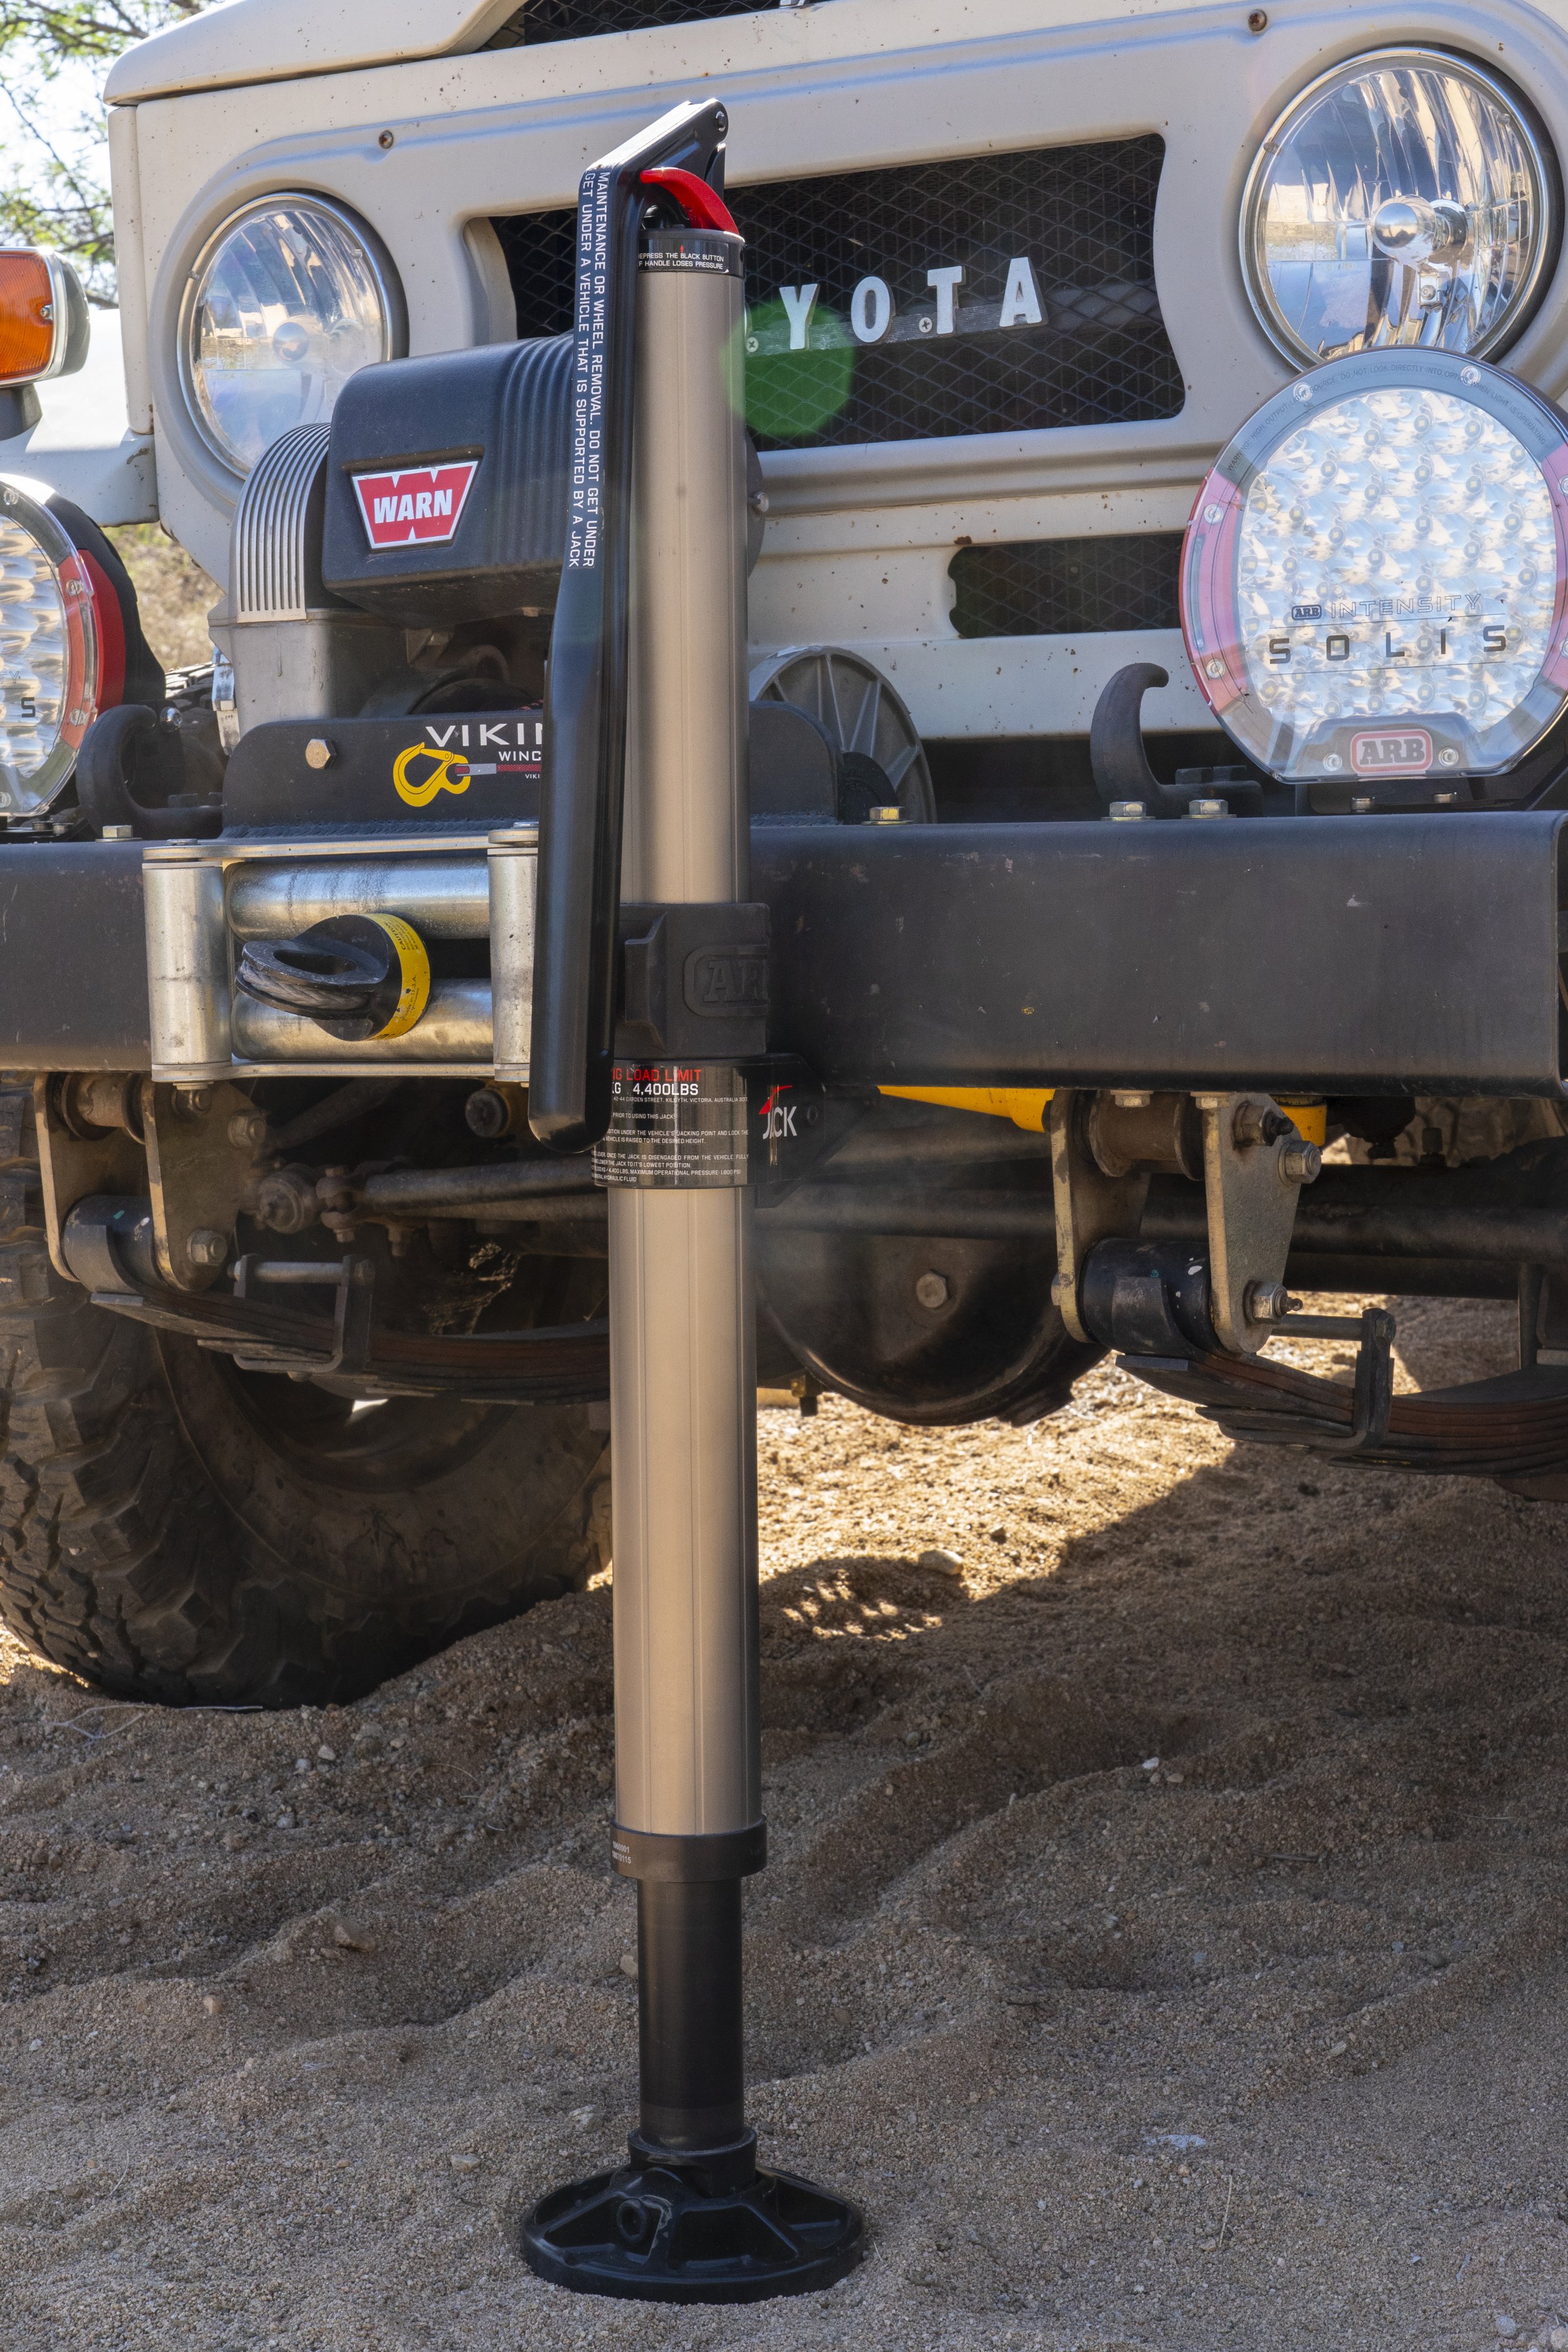
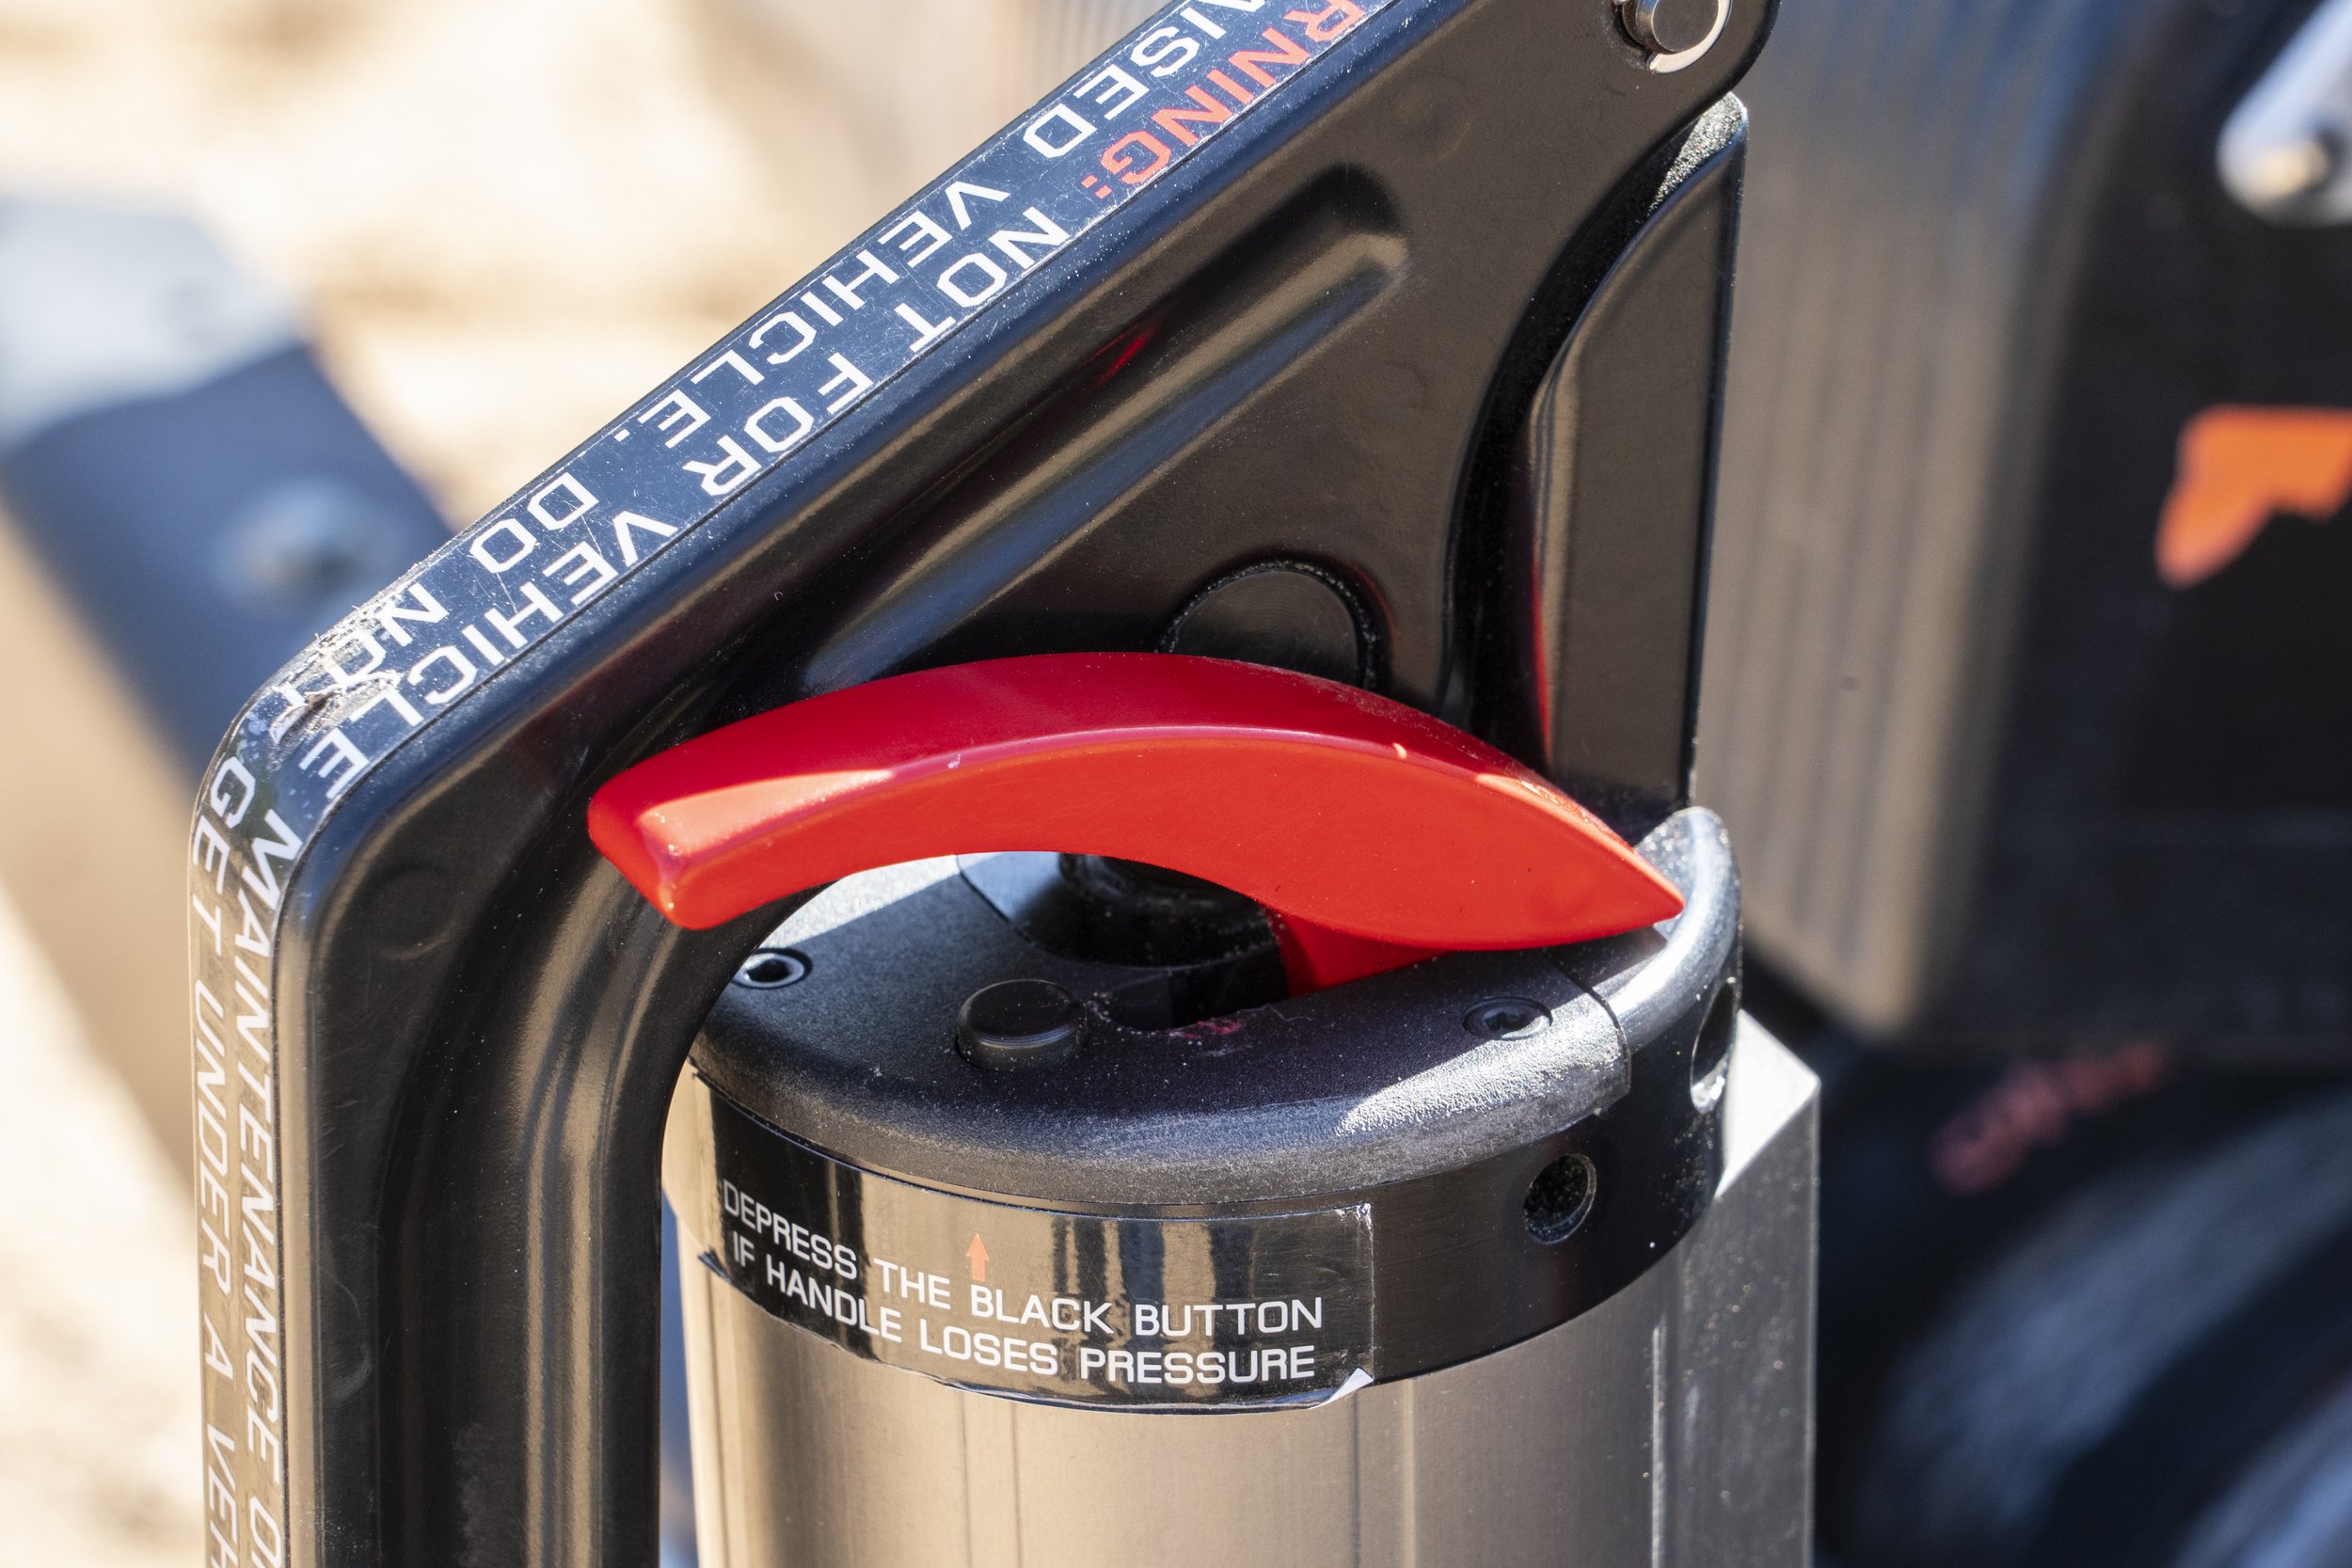
Think of the ARB Jack as a Hi-Lift that went to a very expensive finishing school. The coarse mechanical mechanism is gone, replaced with smooth and powerful hydraulics—my 115-pound wife can lift the entire loaded rear end of our 70-Series Troop Carrier. At one demo I gave at the Overland Expo using the front of an FJ40, a lifelong Hi-Lift user walked up and gave the handle exactly one pump, said, “That’s all I need to see,” and headed for the ARB booth. There’s zero possibility of face-altering kickback—let go the handle and it simply sits there waiting for you to get back to work—and lowering is quite literally a one-finger operation via a little red lever. While a Hi-Lift can only lower the vehicle in increments of an inch, the ARB can gently ease it down millimeters at a time.
In another sharp contrast to the Hi-Lift, to adjust the lifting tongue of the ARB Jack to bumper height, you only have to lift the tongue itself to the appropriate slot on the aluminum body, leaving the full lifting range of the jack intact—up to 48 inches. One quirk: Once the weight is off the ARB Jack when lowering, it does not drop free like the Hi-Lift; there is still a considerable amount of hydraulic resistance. You need to keep the red lever pressed and really lean on the jack to compress it. A separate compression-release button (suitably guarded to avoid inadvertent activation) would be a handy future modification.
The ARB Jack is 15 percent lighter than a Hi-Lift, and only 36 inches long in its carrying case. The sealed mechanism won’t jam in dusty conditions, and the base even has a clever cutout to facilitate breaking the bead on a tire. What’s not to like? I just hope you were sitting down when you saw the price. If you can rationalize—and afford—the difference, I will say that the ARB Jack is hands down superior to the Hi-Lift, and, while accepting that this aspect is in large part a function of the user, a far safer one as well. Also check out the ARB jack base, which smartly accommodates either the ARB or Hi-Lift jack foot.
One caveat: ARB recommends the Jack be stored upright to protect the seals. I store mine upright at home, but carry it horizontal in the vehicle. So far I’ve had no issues.
ARB is here.
Safe Jack Bottle Jack kit ($269)
There may be more versatile jack systems around, but none that also fits in a .50-caliber ammo can. The 27-pound Safe Jack “Sergeant” kit comprises a six-ton hydraulic bottle jack, a flat (chassis) and a curved (solid axle) lifting attachment, and three extension posts, one of them adjustable. Other Safe Jack kits, from “Private” to, yes, “General,” include fewer or more extras (all of which are available separately).
The range of extensions allows you to lift from an axle, the chassis, or a bumper, as needed. Its compact size limits the included jack to six inches of lift; however, as long as the post is compatible, you could pair the Safe Jack attachments to any bottle jack you like, such as the double-extension model I already owned. My Safe Jack kit hasn’t yet met a vehicle it couldn’t lift. A suggestion: Have a blackmsith make you a “wheel claw” similar to the one Tom Sheppard had made and carried in the Sahara for decades (configured for a specific wheel type), and your bottle jack will easily lift one wheel to allow the insertion of a MaxTrax or other recovery mat.
Safe Jack is here.
Tom Sheppard’s bespoke folding wheel claw lifts one wheel for insertion of traction mats.
Surplus M998 scissors jack ($75) and Agile Off Road chassis adapter ($90)
Gotta love military surplus. The heavy-duty (3.5-ton) scissors jack configured to lift the front or rear A-arms of the High Mobility Multipurpose Wheeled Vehicle—Humvee to most of us—is available by the score on eBay with case, ratchet handle, and extension rods, for around 75 bucks. Add Agile Off Road’s reversible billet-aluminum adapter and it will securely support your non-combat vehicle at either the axle or chassis. A reversible ratcheting handle means you don’t have to crank in a complete circle in a confined space—a brilliant idea—and as long as your truck weighs less than an up-armored HMMWV this jack will lift it easily to a height of 20.5 inches with the adapter in place. A generous 7 by 12-inch base plate ensures support in Middle-Eastern-theater sand, or any other kind. The lifting post on the jack has a bit of wobble built in; Agile Off Road recommends tack-welding this to increase stability. However, I used it as is and had zero problems. I now carry this setup permanently in my FJ40.
Agile Off Road is here.
Pro Eagle Off Road jack ($440)
A floor jack with off-road tires—why didn’t someone think of this before? Take a two-ton hydraulic floor jack—the easiest way ever to lift a vehicle on a concrete driveway—add solid axles and burly composite wheels, and you’ve got an all-terrain floor jack. The Pro Eagle rolled over my gravel driveway effortlessly, and lifted the entire front end of my FJ40 in a sandy wash without digging in more than a couple inches. Given the fat tires plus a full-length underbody “skid plate,” it shouldn’t sink in any substrate that doesn’t have a current. Pop on the adjustable extension post for a full 26 inches of lift height. I certainly wouldn’t carry this bulky, 52-pound jack for field duty in the FJ40, but if you’ve got a full-size truck or Sprinter (there’s also a 3-ton version) or are traveling with a group, it will make any recovery a breeze. And, of course, at home it’s an excellent shop jack (I sold my old standard floor jack). One operational note—like all such jacks, the lifting pad moves through an arc as it rises. If you employ the extension, and both the jack and vehicle are held stationary by the substrate, the extension can wind up tilted significantly at full height. Plan ahead.
A full-length bottom plate prevents sinking even in sand.
Pro Eagle is here.
ARB X Jack ($270)
Some of the jacks here are easy to operate; some are difficult to operate—but only one is effortless to operate. Situate the deflated X jack under the chassis of your 4x4, hold the inflation cone over the exhaust pipe or connect an air compressor to the Schrader valve, and the expanding bag will lift up to 4,400 pounds up to 30 inches in the air.
Truck buried to the bumpers with no way to get a bottle jack or Hi-Lift underneath? All you need is four inches of scooped clearance for the X jack to slide underneath. Stuck in rocks with no secure base for a bumper jack? The X Jack molds itself around virtually any substrate, and the hard rubber “teeth” on the bottom help prevent slippage. Included is a thick square of guard material to protect the already-stout envelope, but it’s best to remember this thing is still a heavy-duty balloon, and keep it away from bolt ends and hot exhaust pipes. I’ve seen two punctures resulting from (extremely) careless placement, although the envelope can be patched effectively with the included kit.
Another possible issue with the X Jack is compatibility with your exhaust opening. The jack’s connector is a simple rubber cone, and if your exhaust tip is rectangular you might not be able to achieve a tight seal, critical for inflation. In that case an air compressor will work, but it’s much slower—the X Jack likes a lot of volume and low pressure, the opposite of what most compressors produce.
Finally, remember that at full height your vehicle is supported on air inside a flexible casing; expect a bit of squidginess.
But then, you wouldn’t get under a vehicle supported only by any if these jacks, right?
ARB is here.
A final note: None of these jacks should be employed unless the vehicle is securely chocked. Among the best of that breed I’ve seen are the Safe Jack nesting chocks. One is slightly smaller than the other and so fits inside when folded, yet the pair is substantial enough to serve as chocks for winching duty.
A version of this article originally appeared in Tread magazine.
The Pro Eagle Off Road jack
A floor jack with off-road tires—why didn’t someone think of this before?
A floor jack is the easiest way ever to lift a vehicle on a concrete driveway. But most will be stopped in their tracks by a quarter-inch-diameter pebble. Pro Eagle took a two-ton floor jack, beefed up the chassis and added fat tires, and invented the all-terrain floor jack. The Pro Eagle rolled over my gravel driveway effortlessly, and lifted the entire front end of my FJ40 in a sandy wash without digging in more than a couple inches. Given the fat tires plus a full-length underbody “skid plate,” it shouldn’t sink in any substrate that doesn’t have a current.
The Pro Eagle barely sank lifting the front of the FJ40 in sand.
An adjustable extension post (stored near the base of the handle) pops on for a full 26 inches of lift height. I certainly wouldn’t carry this bulky, 52-pound jack for field duty in the FJ40 (although a convenient carrying handle helps moving it around), but if you’ve got a full-size truck or Sprinter (there’s also a 3-ton version) or are traveling with a group, it will make any recovery a breeze.
And, of course, at home it’s an excellent shop jack. I’ve abandoned my standard floor jack because the Pro Eagle is so much easier to move around—even in urban settings—and because of its greater lifting capability.
One operational note—like all such jacks, the lifting pad moves through an arc as it rises. A floor jack on concrete will roll slightly to compensate for this. If you employ the extension on the Pro Eagle, and the jack is immobilized in sand or rock, the extension can wind up tilted significantly at full extension. Plan ahead.
Pro Eagle is here. The two-ton model retails for $430.
So a hitch ball is okay as a recovery point? (But I saw it on the Internet!)
A couple weeks ago Gigglepin 4x4, a UK company that specializes in high-quality 4x4 recovery gear, especially for competition, posted a video on Facebook that showed someone attaching one of their rapid-deployment Hook Link recovery hooks to . . . a hitch ball.
The reaction was swift. Several people, including me, posted replies saying any suggestion to use a tow ball for recovery was inconceivably irresponsible. One of the first inviolable lessons any 4x4 training school with which I’m familiar teaches is to never, ever use a tow ball as a recovery point.
The next day the company responded . . . by reporting my post (and, I presume, others as well) as spam and having it removed.
Then something interesting happened. The original video, as far as I can tell, was taken down. Instead, the company posted another video on their website explaining “what we actually meant” in the first one. In it, the spokesman first demonstrates attaching a Hook Link and strap to a proper recovery point on a Discovery, and notes that it is, “Much safer than placing the strap or rope over the tow ball.” He then says that using the Hook Link and strap on a tow ball is “ideal for recoveries on the road and light duties around the workshop,” and adds that it’s “not ideal” for extreme recovery situations. Confused yet? He then says, even more confusingly, that the MSA (Motorsports South Africa) rule book allows some UK-style tow balls—which, unlike typical U.S. versions, are usually flanged and fastened with two M16 bolts—to be used for recovery in racing.
Contradictions aside, let’s look at this. First, as far as I recall (since I can no longer find it), the original video contained no such explanations or caveats; it simply showed the Hook-Link being snapped over a hitch ball, quite clearly as a suggested application. The opportunities for this to be interpreted as a universally acceptable practice by inexperienced 4x4 drivers/Facebook users are rife.
Second, a friend who called my attention to the first video followed up and contacted a well-known supplier of this type of tow ball in England, to ask for their stance on the use of such balls for recovery.
The response:
“Towbars are designed to pull the safe rated load that they were tested and type-approved at in a smooth and controlled manner. They are not designed to be subjected to any sharp impact or snatch, using them for this purpose is most likely to overload and cause damage, possibly invisible to the naked eye, that may not become immediately apparent but weeks or months later may cause failure and pose a danger to other road users. Using a towbar in this manner would be classed as outside of their intended use and would invalidate any warranties.”
There’s another potential factor at work in such a scenario. I couldn’t find any specs of the Hook-Link that listed the width of the neck of the hook. It appears to be around two inches or more. If the neck is larger than the tow ball over which one hooks it, a sudden jolt and slack could pop the hook off the top of the ball. In the U.S. standard tow balls start at 1 7/8 inches in diameter.
I noticed one more confusing aspect to the Hook Link. The spokesman noted there are two versions of the product, identical in size but employing different aluminum alloys in construction. The model made from 6082 is rated at 4.5 tons, the one in 7075 to 6.5 tons. I assumed he was referring to a metric ton (2,204 pounds) and, indeed, the Hook-Link shown on the website is stamped “Break strain 4500kg”—which is 9,920 pounds, and 4.5 times 2,204 equals 9,918 pounds. But . . . “break strain?” That doesn’t sound like our familiar working load limit (WLL) with a 2X or 3X (or greater) safety factor; that sounds like the point at which things might come apart precipitously. Perhaps it’s a matter of cross-Atlantic nomenclature, but here we like to see both a WLL and a separate minimum breaking strength (MBS).
I’m going to restate the rule: Don’t use a tow ball—any tow ball—as a recovery point. Period.
What about alternative methods for employing a receiver hitch as a recovery point? Many articles and trainers suggest inserting the loop of a recovery strap into the receiver tube and fastening it with the hitch pin. This has the advantage of securely anchoring the end of the strap or rope.
However, look at the diagram below, from Dougal Hiscock, a mechanical engineer at at Engen Consulting in New Zealand, which shows the relative stresses exerted on a tow ball and a hitch pin subjected to a 5,096 kilogram (11,235 pound) steady pull. The stress is three times higher on the pin due to its smaller diameter. The pin is also subjected to a three-point bending load, from the strap in the middle of the pin and the through-points on the side of the receiver. When towing a trailer using a hitch insert the pin is subject only to sheer loads, as the square receiver insert rides closely against the wall of the tube. A wide strap or rope, such as the one illustrated, might reduce the focus of this bending stress, but it will still be much higher than that exerted by a receiver tube under the same load.
The only acceptable way to employ a receiver for recovery is to use a receiver shackle insert and shackle to attach the kinetic strap or rope. Even then, I much prefer a dedicated shackle mount on a bumper designed for recovery duty, or a chassis-mounted recovery ring.
7-inch universal LED headlamps from KC HiLites (yes, THAT KC HiLites)
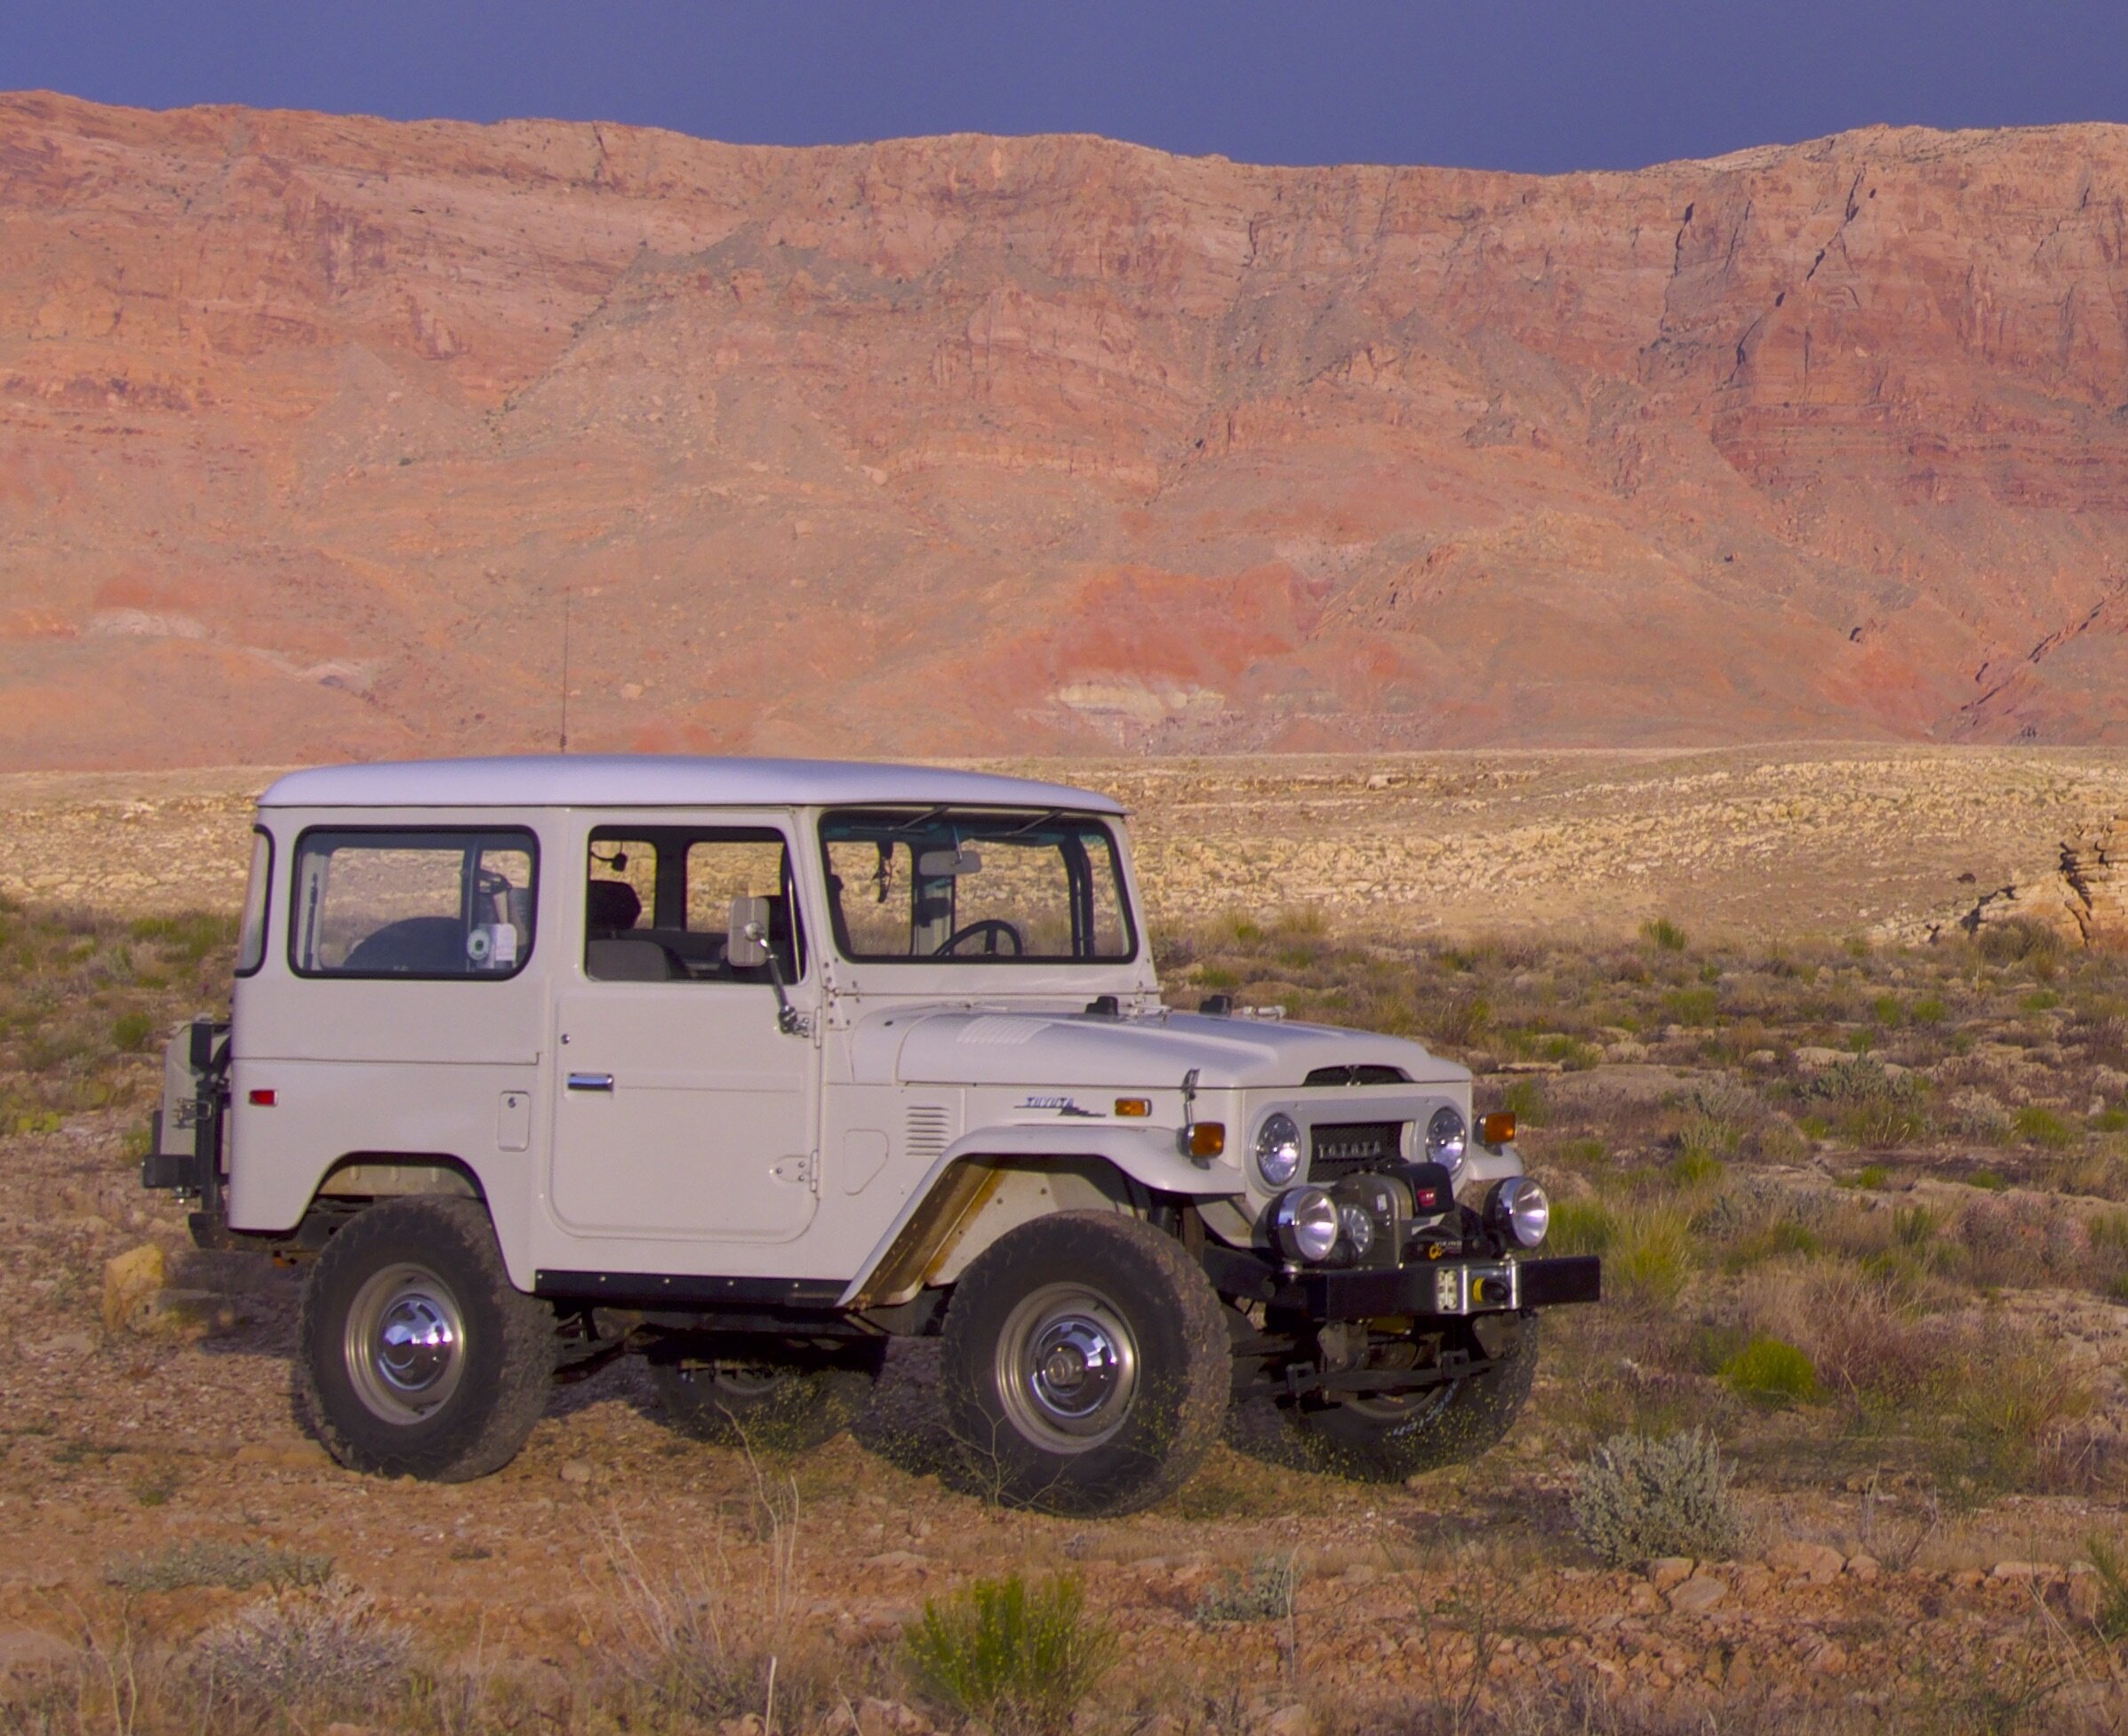
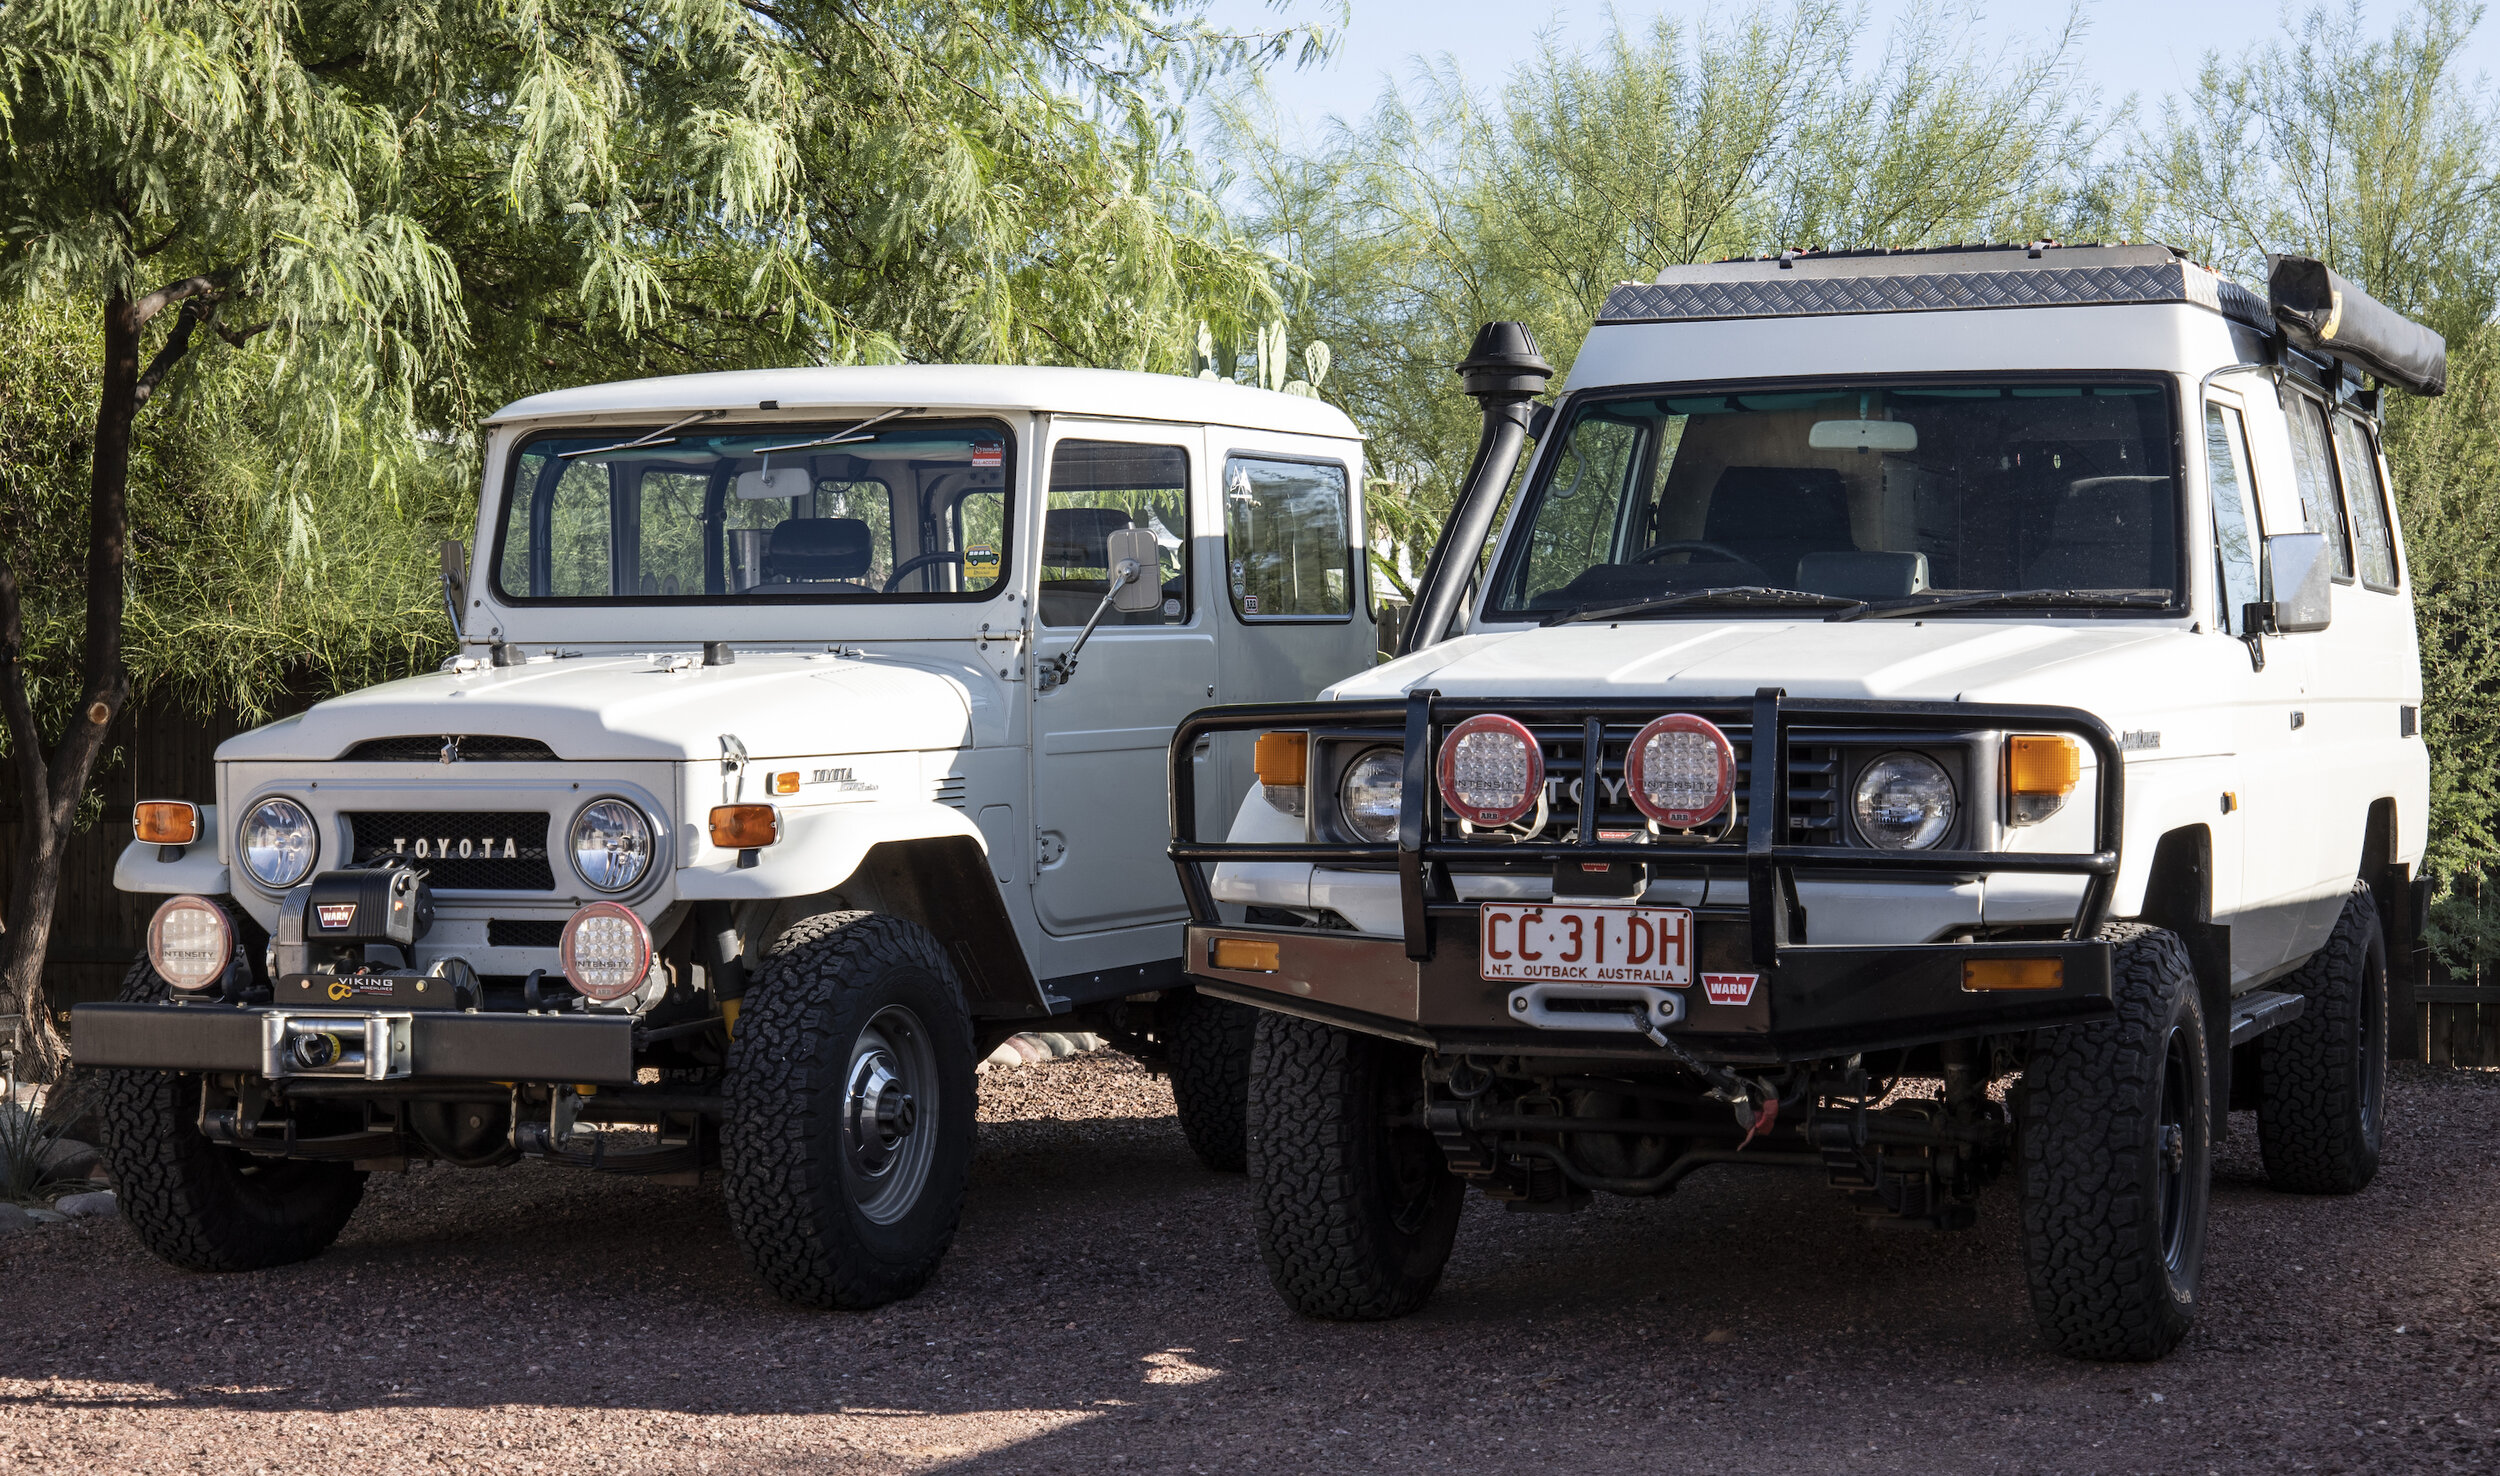
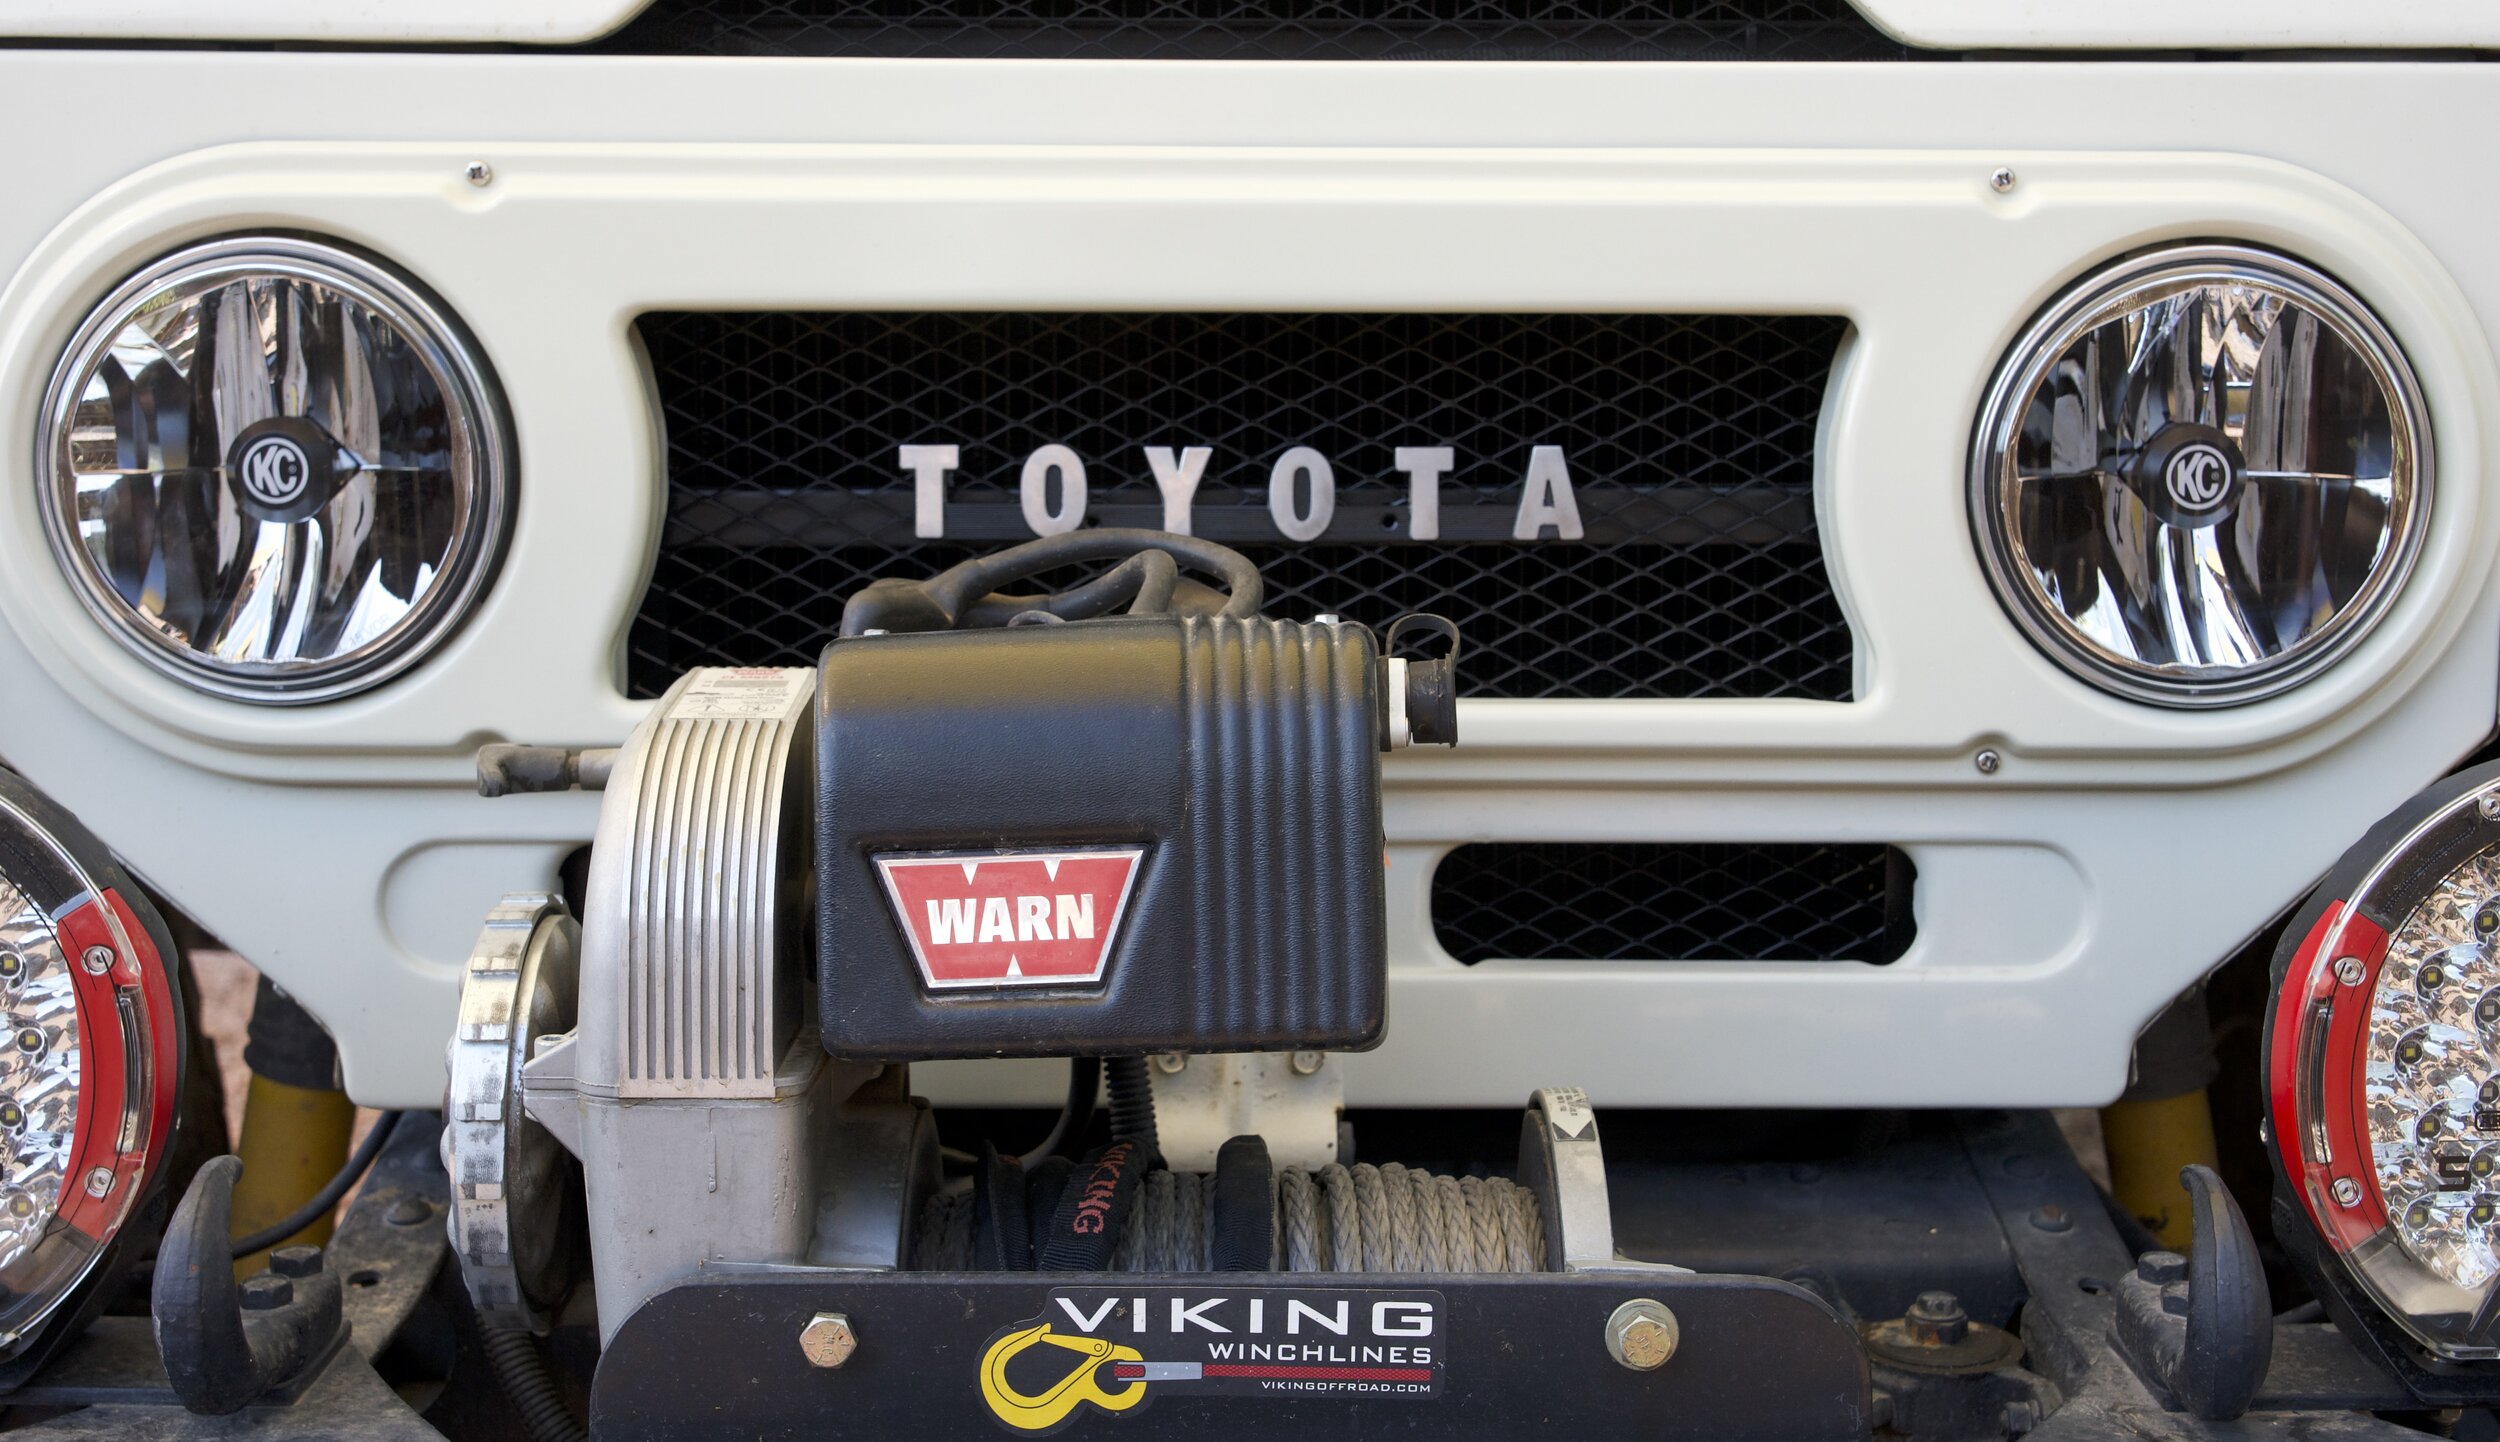
Over four decades of ownership, I’ve made a number of significant modifications to my 1973 FJ40—a different (but still Land Cruiser) transmission, a drop-down tailgate to replace the mini swing doors, post 1975 single-piece front doors to reduce rattles, late-model European mirrors, and a few others. I’ve also added several aftermarket accessories—a Stout Equipment rear swingaway tire/jerry can carrier (brilliant, and no longer made), the Warn 8274 winch, Old Man Emu suspension, and, at various times, a roof rack and front brush guard.
Through all the years, however, I’ve tried to maintain more or less a semblance of a period look to the vehicle. After running alloy wheels for several years, I reverted to aftermarket but correct non-USA 16 x 6-inch steel wheels that accept the factory hubcaps—and nothing says quirky original Land Cruiser styling than those hubcaps. I stuck with the factory seats but had them re-upholstered in more comfortable fabric than the sweaty—and shamefully cheap—factory vinyl. (Quality upholstery was the last aspect of manufacturing Toyota mastered.) I stuck with the stock, 17-inch diameter hula hoop of a steering wheel but stitched a one-piece leather cover on it for a bit of extra grip. Power steering? Never.
In one aspect I never hesitated to alter the factory components or look: safety. I installed a full front roll cage and three-point inertia-reel lap and shoulder harnesses, replacing the original lap belts. I added late-model head restraints (interestingly the seat backs had provision for them). And I swapped out the four-wheel drum brakes for four-wheel discs. Much of this did nothing but slightly update the apparent model year of my FJ40, since the 40-series body remained virtually the same right through the end of production in 1983.
Another critical safety consideration was lighting. Shortly after buying the 40 I installed a set of Cibié’s superb Z-beam halogen headlamps, vastly superior to the 1940’s technology sealed-beam originals. Some time later I added a pair of Cibié Super Oscar driving lamps, at the time the pinnacle of automotive lighting technology and virtually standard equipment on rally cars and Paris-Dakar racers at the time. The combination served me well when I was guiding in Mexico, where livestock on even major highways is a common hazard, and later when Roseann and I lived on several remote properties, on the dirt roads to which cattle, deer, and coyotes made occasional suicidal forays.
I used the Super Oscars until they were completely sand-blasted and the reflectors had finally oxidized, and replaced them (yes, I threw them away!) with an equally effective if considerably less romantic set from IPF. The Z-Beams had also gone, replaced with Hellas that, while excellent, never seemed to have quite the same perfect beam control or even spread of light. After the Arizona and Mexico desert sands wore out the Hellas (I’ve owned this vehicle a long time) I installed a pair of Trucklite halogen lamps with complex reflectors and clear lenses, which were probably better than the Cibiés. This eased me away from the traditional faceted lenses of earlier headlamps, but still looked reasonably period.
Trucklite complex-reflector halogen headlamps—excellent for a halogen lamp
Then the LED revolution happened. And the look of driving lamps and headlamps changed forever.
Even after testing several brands of LED driving lamps, I couldn’t bring myself to install them on the FJ40. They just looked too . . . modern. Too much bling compared to the simple reflectors of the IPFs. And the early replacement 7-inch round LED headlamps I reviewed left much to be desired, evidencing massive purple fringing and blotchy patterns.
One salient thing nibbled at the back of my brain however: My FJ40 has a 55-amp alternator (compared to the 120-plus amps of modern alternators), and it is difficult to upgrade because all the power from the alternator runs through the ammeter via a single wire (a rare dumb design from Toyota). When I flicked on the IPFs and their 125-watt bulbs, they sucked up 21 amps of that output, and with the halogen headlamps on high beam, that was another 16 amps. It was a wonder there was power left to get to the spark plugs. Those LED driving lamps required a fraction of the power to produce the same light.
I got over my Luddite stylistic hangups in Australia. There we had bought a 1993 HZJ75 Troop Carrier and had it converted with a pop top and a bunch of other modifications—one of which was a set of ARB Intensity LED driving lamps furnished by the company. On a single, poorly planned drive after dark toward Alice Springs, those lamps—well, I can’t say they paid for themselves, but they would have—anyway, they safely bored a bright 5000ºK hole through the Australian night, illuminating the large marsupials bounding suicidally across our path. When we got home I immediately added an identical pair to the FJ40. The headlamps, however, remained stubbornly incandescent. If LED driving lamps looked like something off the Starship Enterprise, most LED headlamps looked like they belonged on a Klingon Bird of Prey.
However . . .
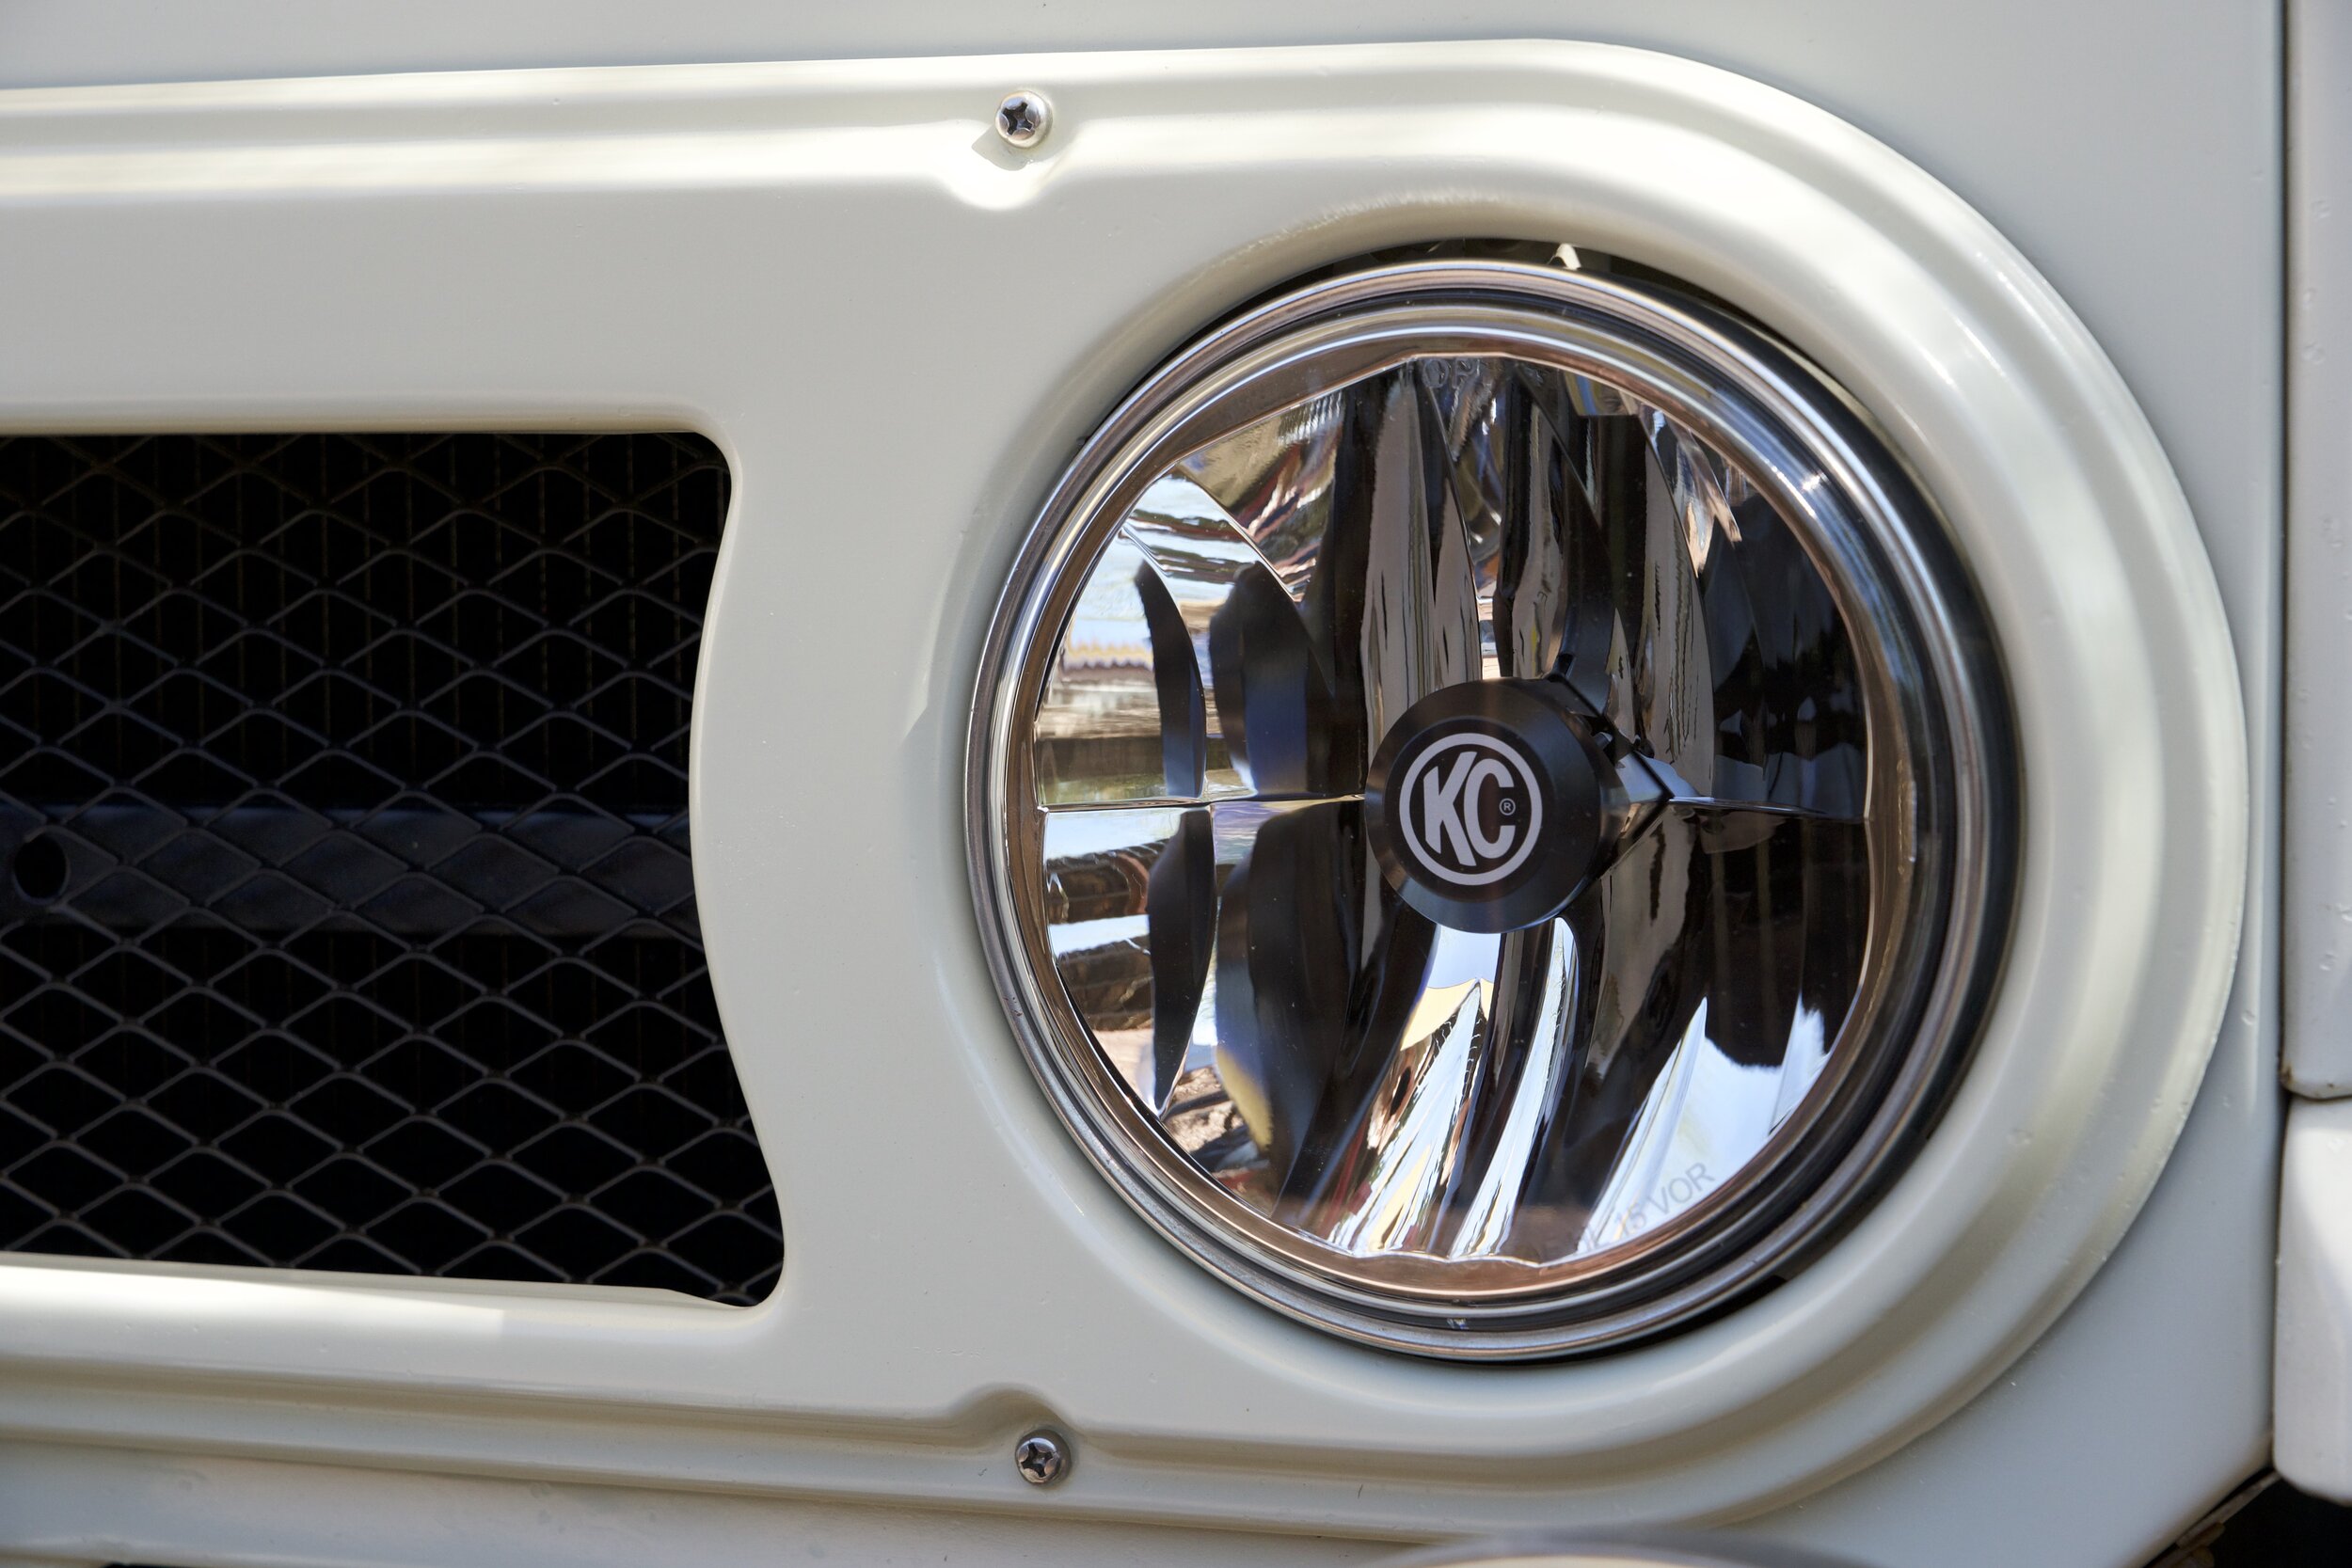
I’m working on an article for Tread magazine, about upgrading classic 4x4 vehicles such as the FJ40, or Series Land Rovers, Scouts, or CJ Jeeps, to make them more comfortable, safe, and capable for modern use. The FJ40 is getting new gearing, AC, and, just possibly, fuel injection, along with the existing upgrades I mentioned above. Given the goals, I decided it was time to grit my teeth and upgrade the headlamps, and KC Hilites—yes, KC of the classic budget Daylighters with the smiley-face covers—offered to send me a pair of their 7-inch Gravity LED headlamps. When received, I was relieved to note that they look less . . . Klingony . . . than most of their kind.
The Gravity headlamps are virtually a universal, plug-in fit for any vehicle with 7-inch round headlamps, although I found that I need to trim the headlamp buckets on the 40 by just a couple millimeters to clear the backs of the Gravity lamps. Once that was accomplished—the work of five minutes with a jigsaw—they dropped right in.
The width of a black marker tip was all the trimming necessary
I’ve yet to be able to head out to Ravenrock for a full test, but initially the pattern and color look excellent. Power draw on high beam is just 3.6 amps. For both lamps.
And the appearance? Hmm . . . I’ll get back to you . . .
Pinnacle product: the Antiluce latch
Can a tailgate latch with one moving part qualify as a pinnacle product? Absolutely. In fact, that’s exactly why it does.
I’m not sure when the “Antiluce” (get it?) latch was invented—Google suffered a rare fail in not finding me something like an Antiluce Appreciation Society with monthly meetings at the Queen’s Head in Tunbridge Wells. I know they were on Series II Land Rovers because I’ve seen them. Photos of JUE 477, the very first production Land Rover, seem to show a type of Antiluce latch, perhaps refined as production progressed. For all I know it could have been invented decades before that. A small British company named Burrafirm, later purchased by Albert Jagger Limited, seems to have held the patent for quite some time.
The Antiluce is so simple that it would take the proverbial one thousand words to describe it, so if you’re not familiar with it look at the photos and it will be clear. It’s essentially a toggle latch—flip it horizontal to close the tailgate and the hole in the hasp fits over it. Then flip it vertical, push in on the tailgate to snug it against its weather strip, and the stepped opening in the Antiluce automatically takes up the slack and ensures a rattle-free fit. With new weatherstrip the latch might only drop down to the first or second step, but as the weatherstrip beds in or wears, the latch simply drops down a step at a time to maintain consistent tension. Brilliant. Its natural tendency is to obey gravity, so if the tailgate flexes over rough roads the pin will only snug itself, not loosen or come unfastened.
The drop-down tailgate on my FJ40 closes with over-center draw latches, which are bulkier, heavier, fiddlier, and no better. If I ever do a complete restoration on the Land Cruiser I plan to convert it to Antiluce latches. They’re available from numerous sources including all the major Land Rover stores, and could easily be adapted to other uses on custom trailer compartments or cabinetry. The threaded shaft can be had in several lengths, and there are weld-on versions too. At around $30, it’s possibly the cheapest pinnacle product on earth.
LiFePO4 voltage stability
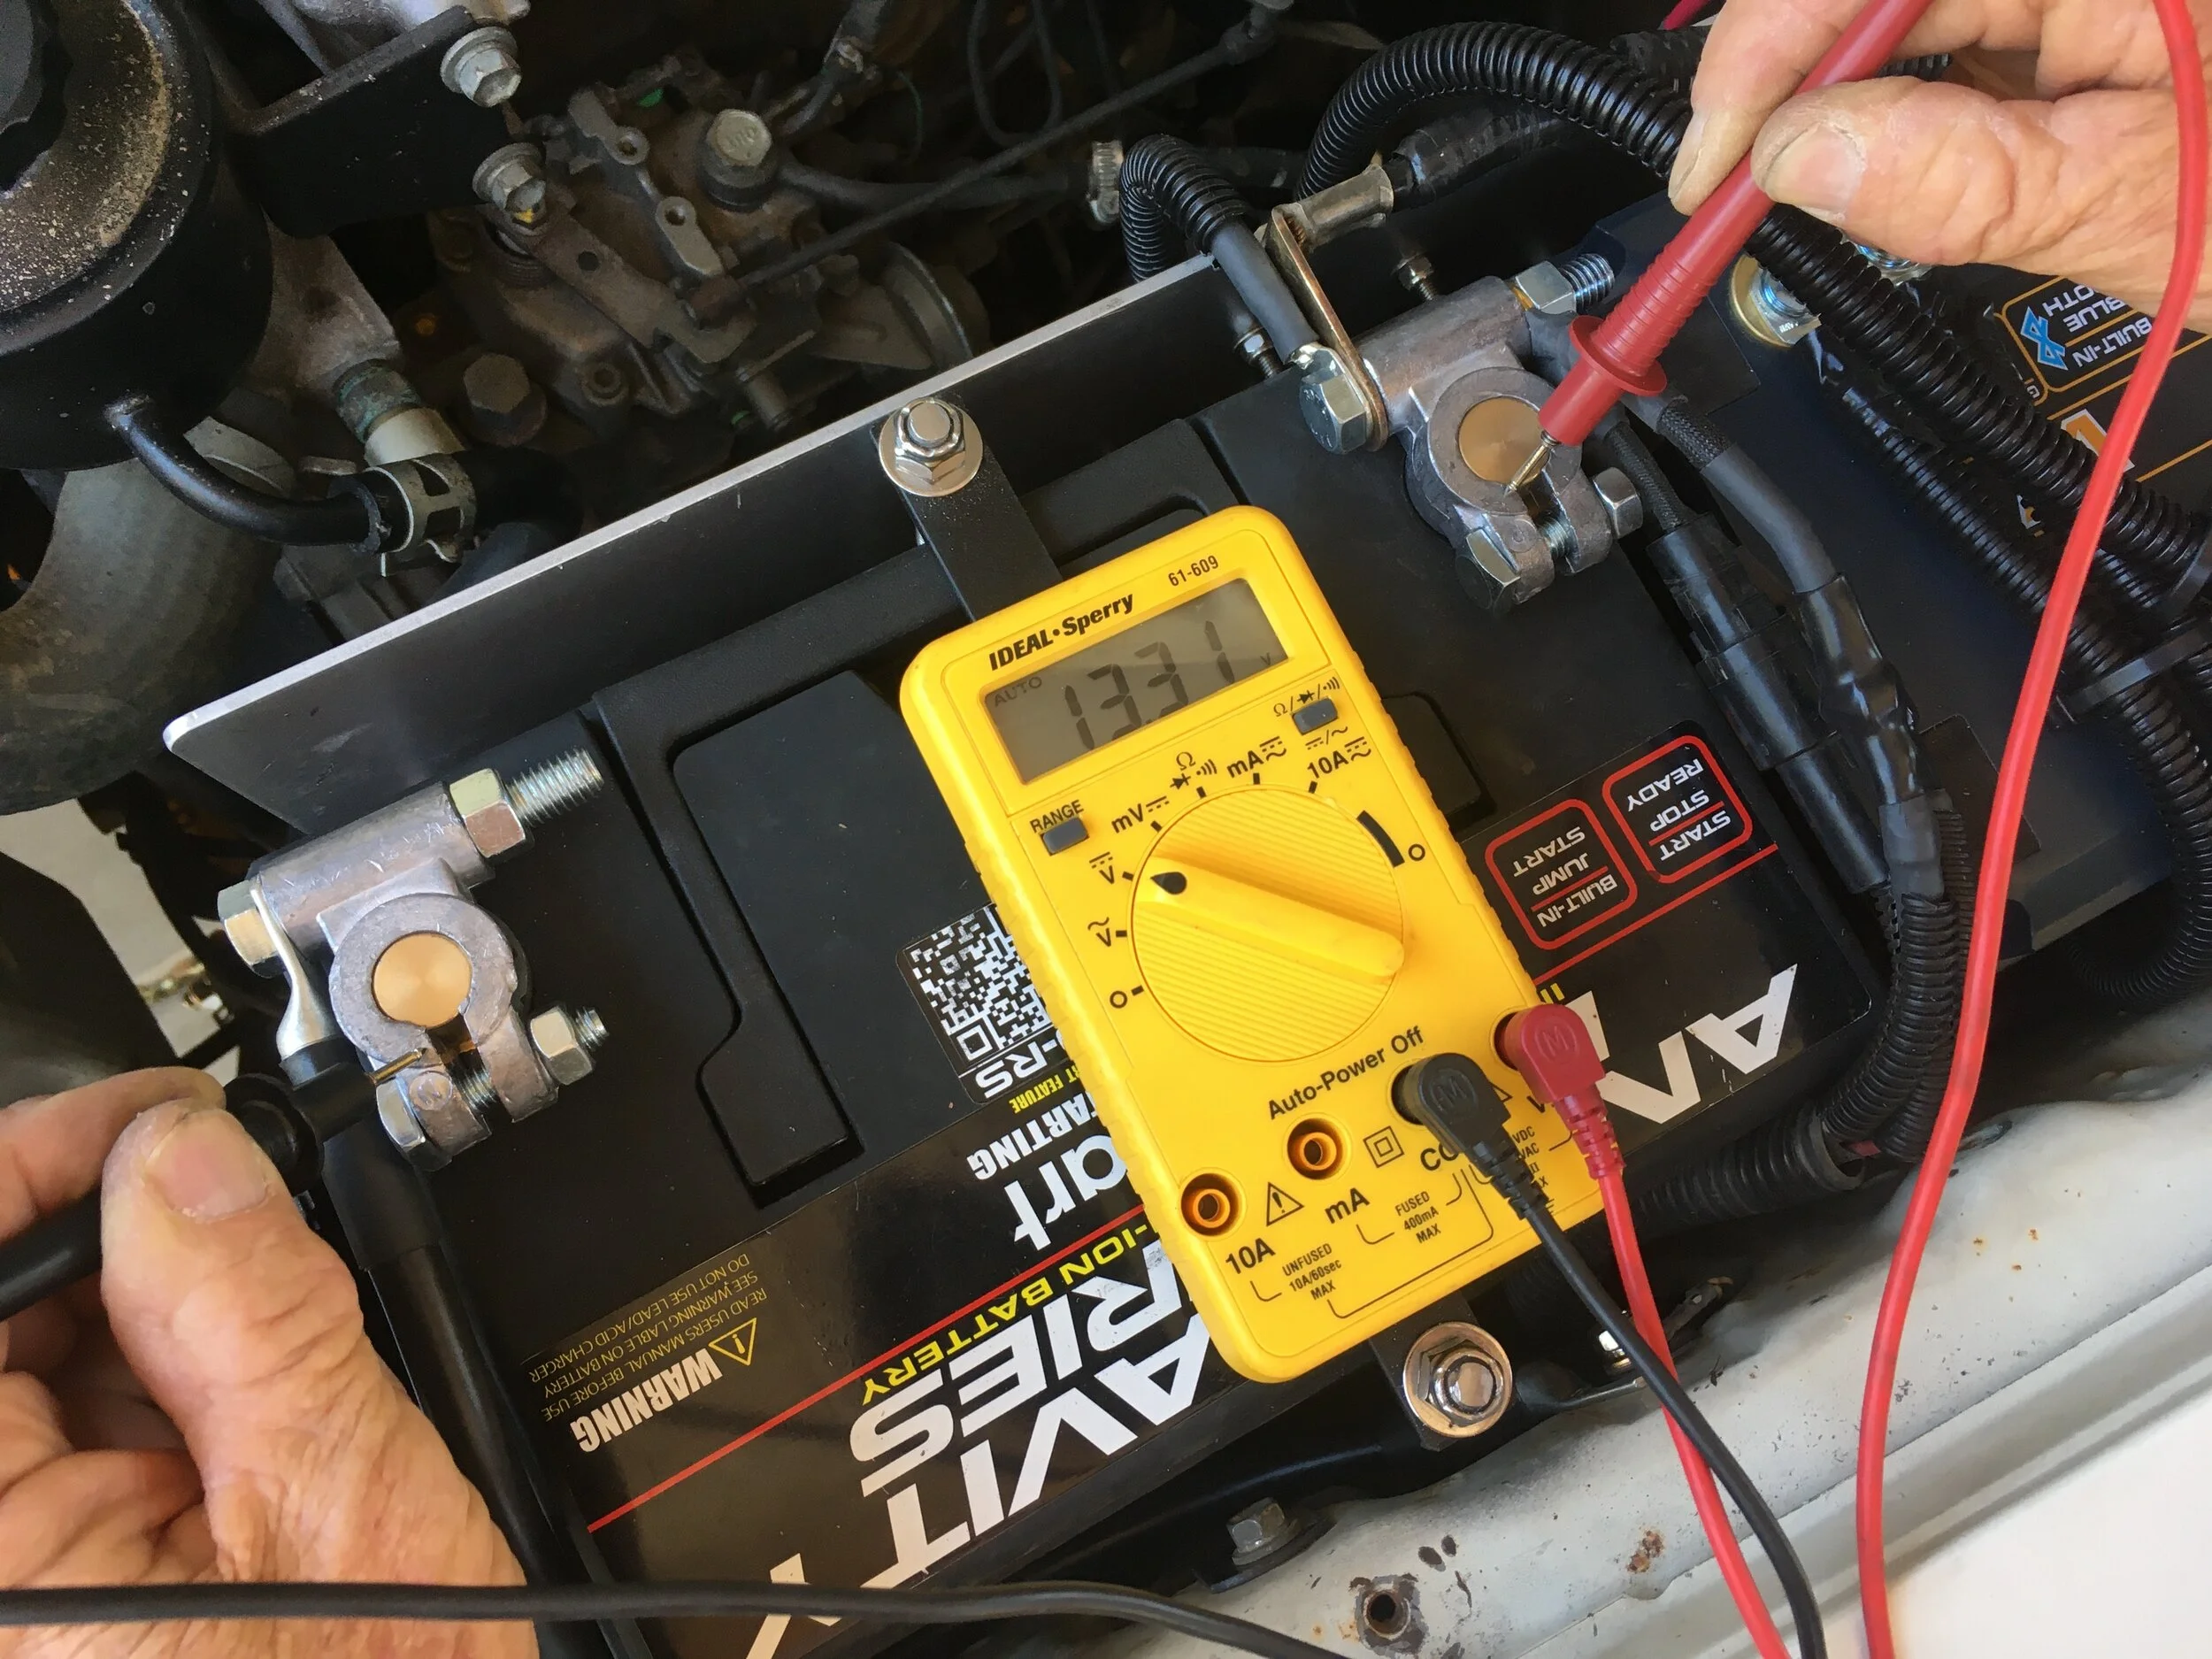
After an extended interval collecting the bits for the LiFePO4 dual-battery system I’m installing in our Troopy, I’m finally buttoning up the project, which will appear first in OutdoorX4. The delay gave me a chance to experience in a small way one of the benefits of LiFePO4 batteries, which is their superior voltage stability when left idle. I received this battery from AntiGravity in early February, and it has sat since then. Upon installing it I checked the voltage before starting the engine, with the result here. That’s impressive.
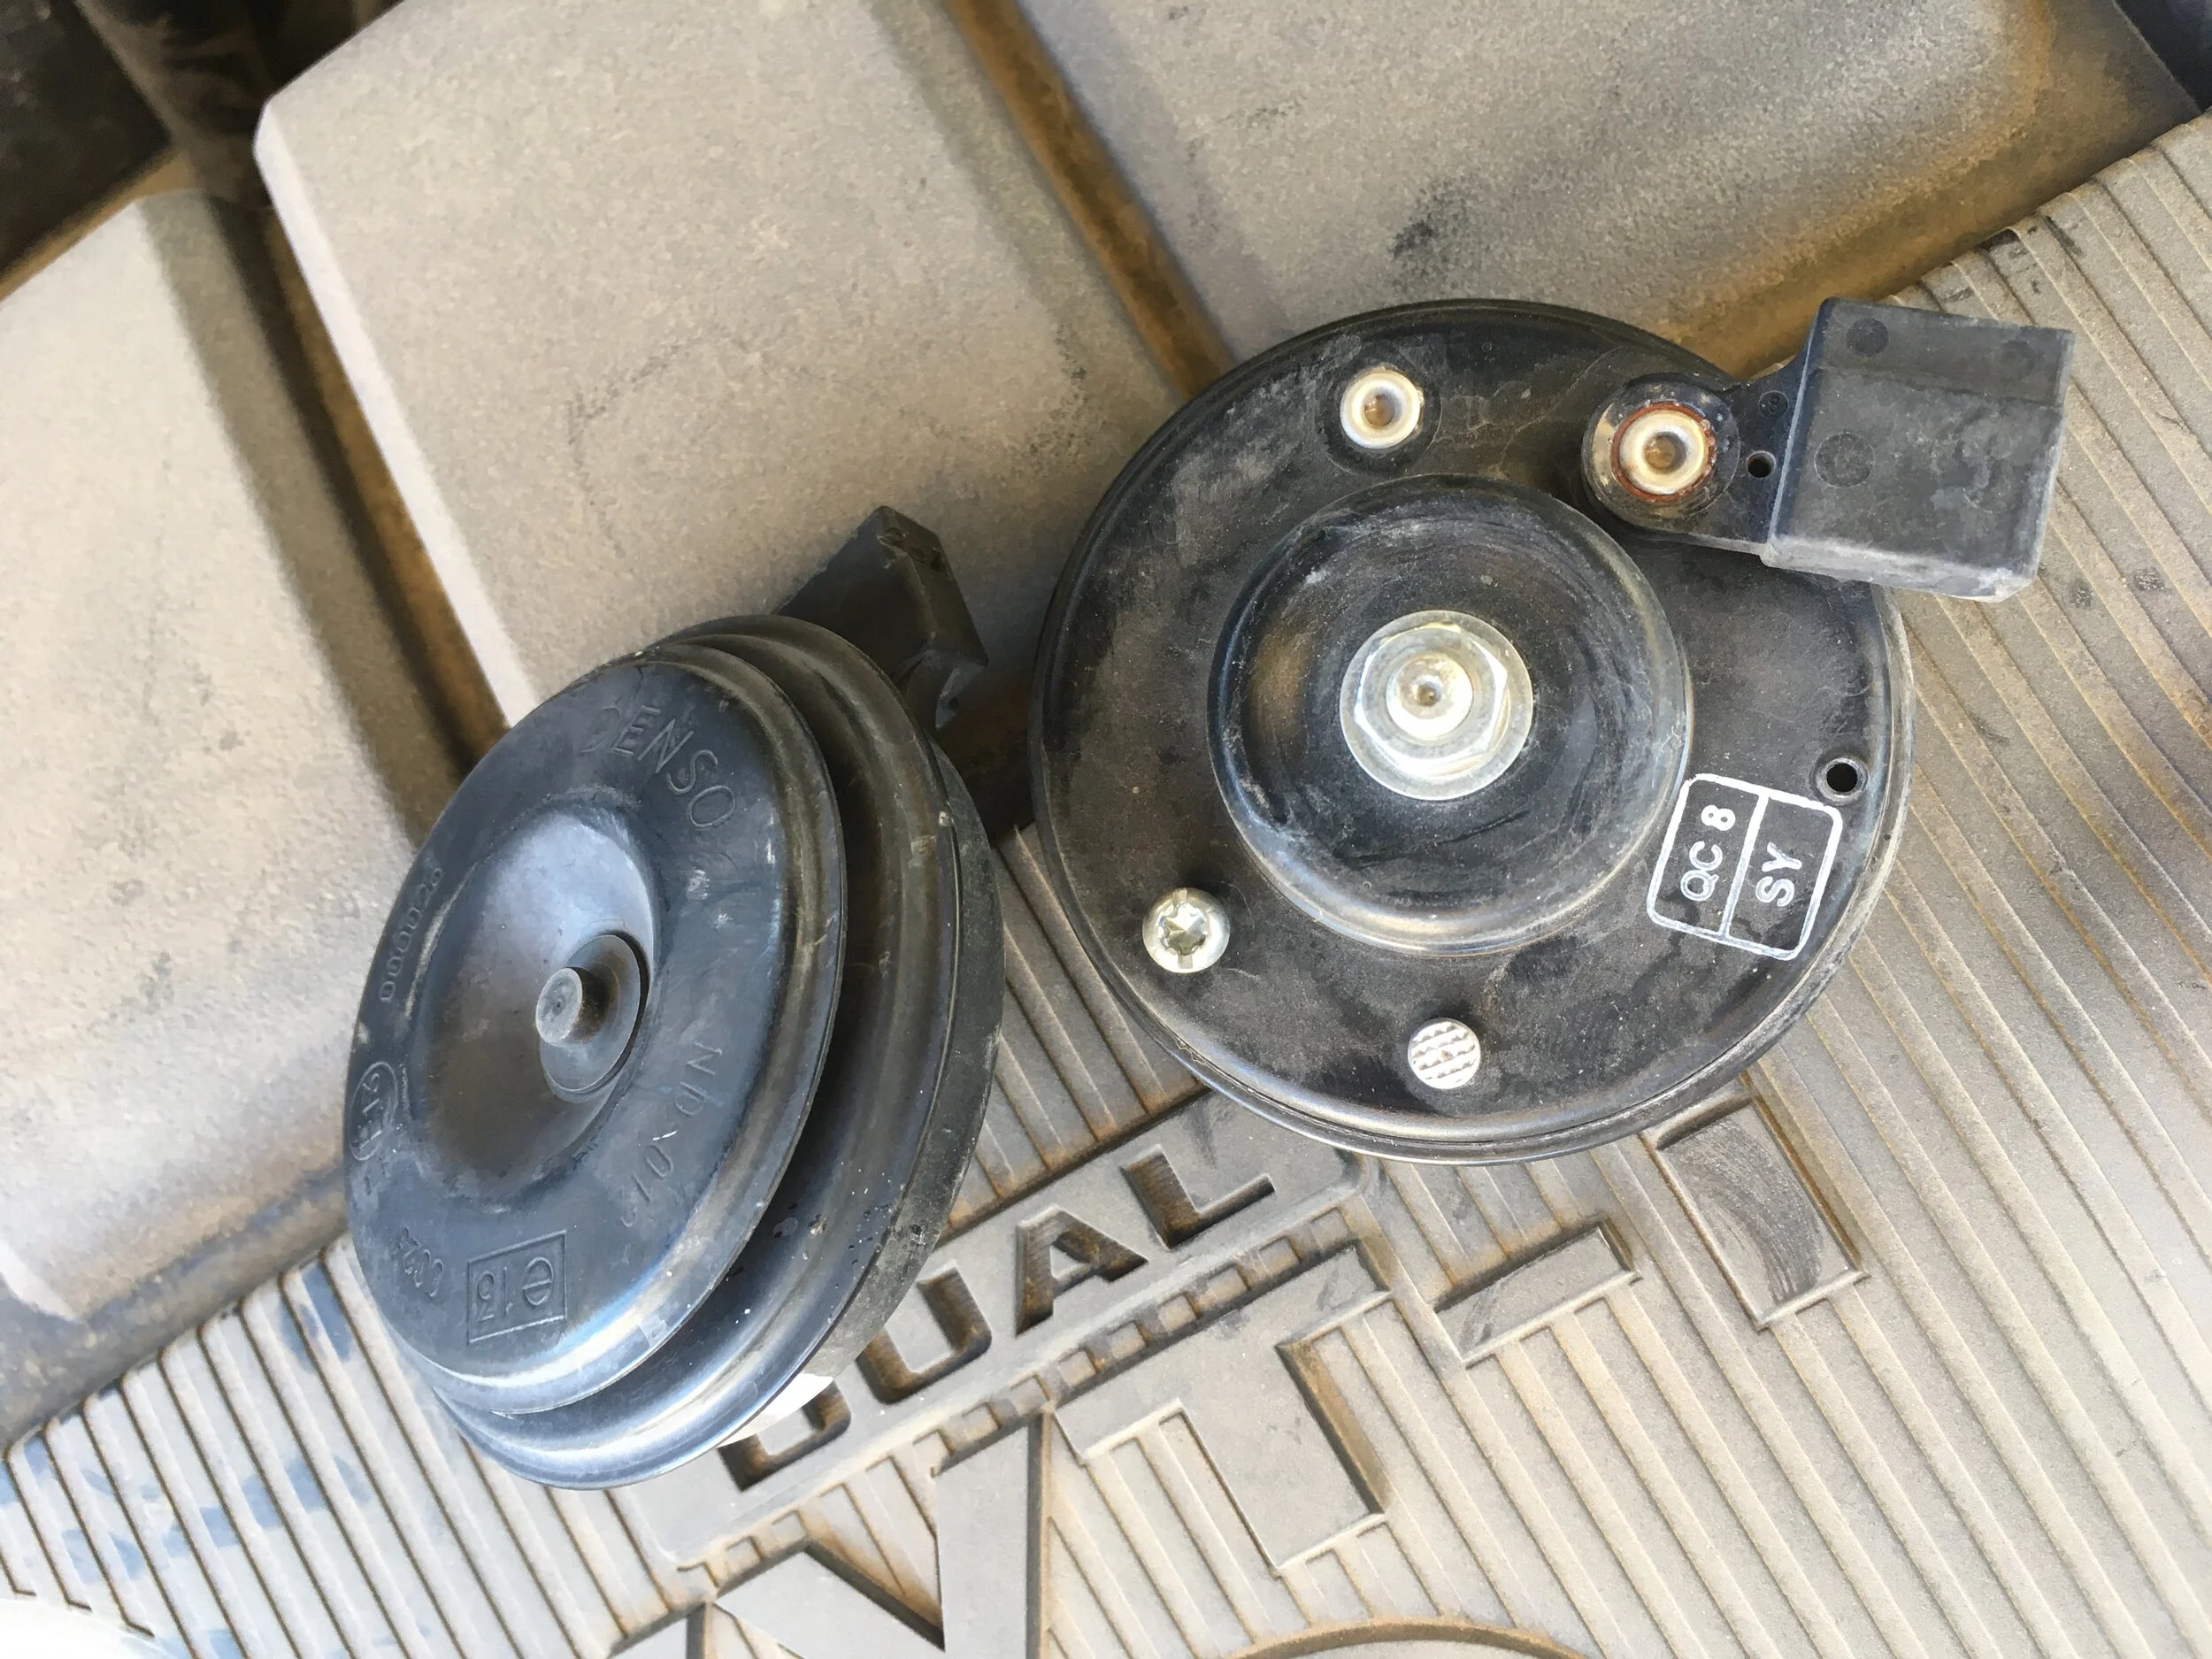
Hella horns
The only car I’ve ever owned that had decent factory horns was a Porsche 911SC, which was equipped with proper Autobahn blasters to move inattentive slower cars into the right lane right now. All others—and especially all the Japanese makes—needed serious upgrades to perform at a level I consider acceptable. I don’t use my horn very often, but when I do I want it to capture its target’s undivided attention. This has become significantly more important in the age of texting—which studies have show to be more dangerous than drunk driving. Why? Drunk drivers, at least, are generally paying attention because they know they’re drunk and they don’t want to alert the police. Texting by definition requires one to remove all one’s attention from the road.
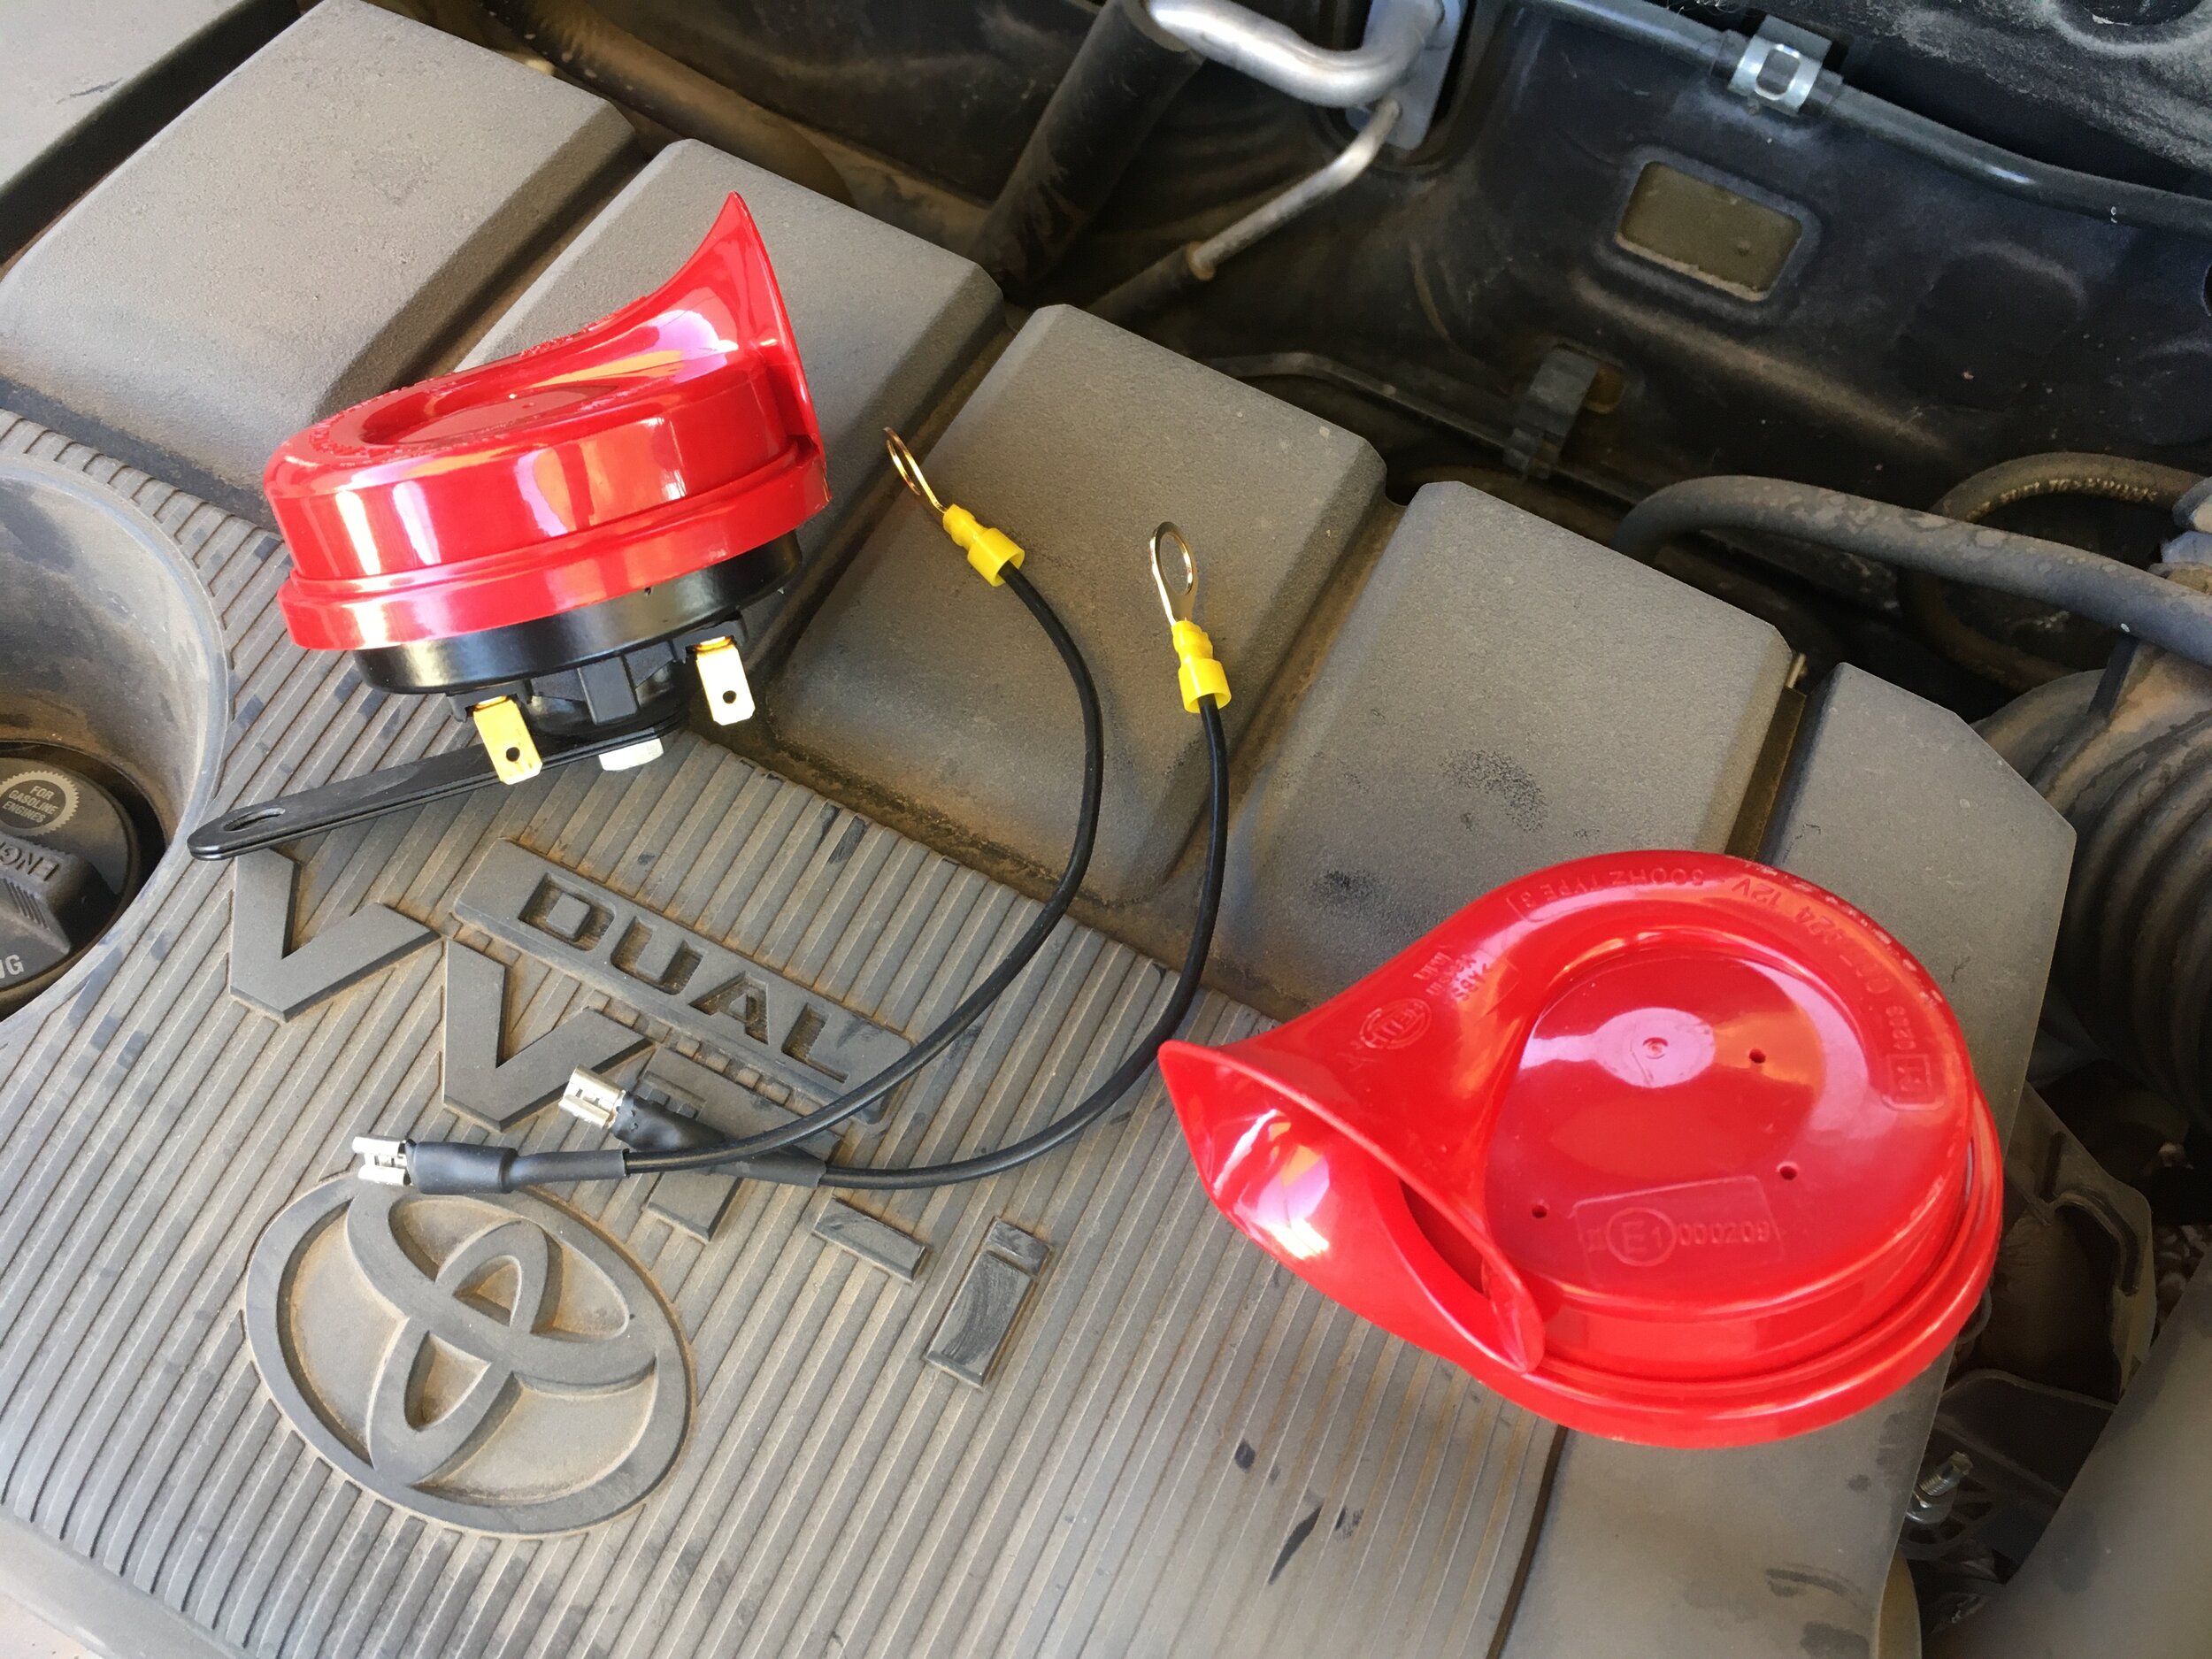
Thus all of our vehicles carry Hella horns of one model or another. They’re affordable, starting around $20 or so, and all have an authoritarian tone. My favorites are the twin or triple-trumpet air-powered models, which have a lovely teeth-on-edge screech, but the lesser models such as the ones here are still excellent.
These went on Roseann’s mother’s RAV4, which we have taken over since she gave up driving at 90 and is now allowing us to chauffeur her around town. The stock horn on this vehicle was even worse than most Japanese horns, which tend to sound like sheep bleating. This one sounded like an asthmatic sheep bleating.
Of course, being a modern vehicle, removing the “grille” on the RAV to access the horns actually involved peeling off the entire plastic front end of the thing . . .
. . . which, thanks to a helpful YouTube video describing the location of the hidden fasteners, only took about ten minutes.
After that it was easy. The Hellas require a separate ground wire, which I simply connected to each horn’s mounting bolt. The result is a huge improvement. I’m going to go hunt for texters.
Hint: When using “Search,” if nothing comes up, reload the page, this usually works. Also, our “Comment” button is on strike thanks to Squarespace, which is proving to be difficult to use! Please email me with comments!
Overland Tech & Travel brings you in-depth overland equipment tests, reviews, news, travel tips, & stories from the best overlanding experts on the planet. Follow or subscribe (below) to keep up to date.
Have a question for Jonathan? Send him an email [click here].
SUBSCRIBE
CLICK HERE to subscribe to Jonathan’s email list; we send once or twice a month, usually Sunday morning for your weekend reading pleasure.
Overland Tech and Travel is curated by Jonathan Hanson, co-founder and former co-owner of the Overland Expo. Jonathan segued from a misspent youth almost directly into a misspent adulthood, cleverly sidestepping any chance of a normal career track or a secure retirement by becoming a freelance writer, working for Outside, National Geographic Adventure, and nearly two dozen other publications. He co-founded Overland Journal in 2007 and was its executive editor until 2011, when he left and sold his shares in the company. His travels encompass explorations on land and sea on six continents, by foot, bicycle, sea kayak, motorcycle, and four-wheel-drive vehicle. He has published a dozen books, several with his wife, Roseann Hanson, gaining several obscure non-cash awards along the way, and is the co-author of the fourth edition of Tom Sheppard's overlanding bible, the Vehicle-dependent Expedition Guide.


