Overland Tech and Travel
Advice from the world's
most experienced overlanders
tests, reviews, opinion, and more
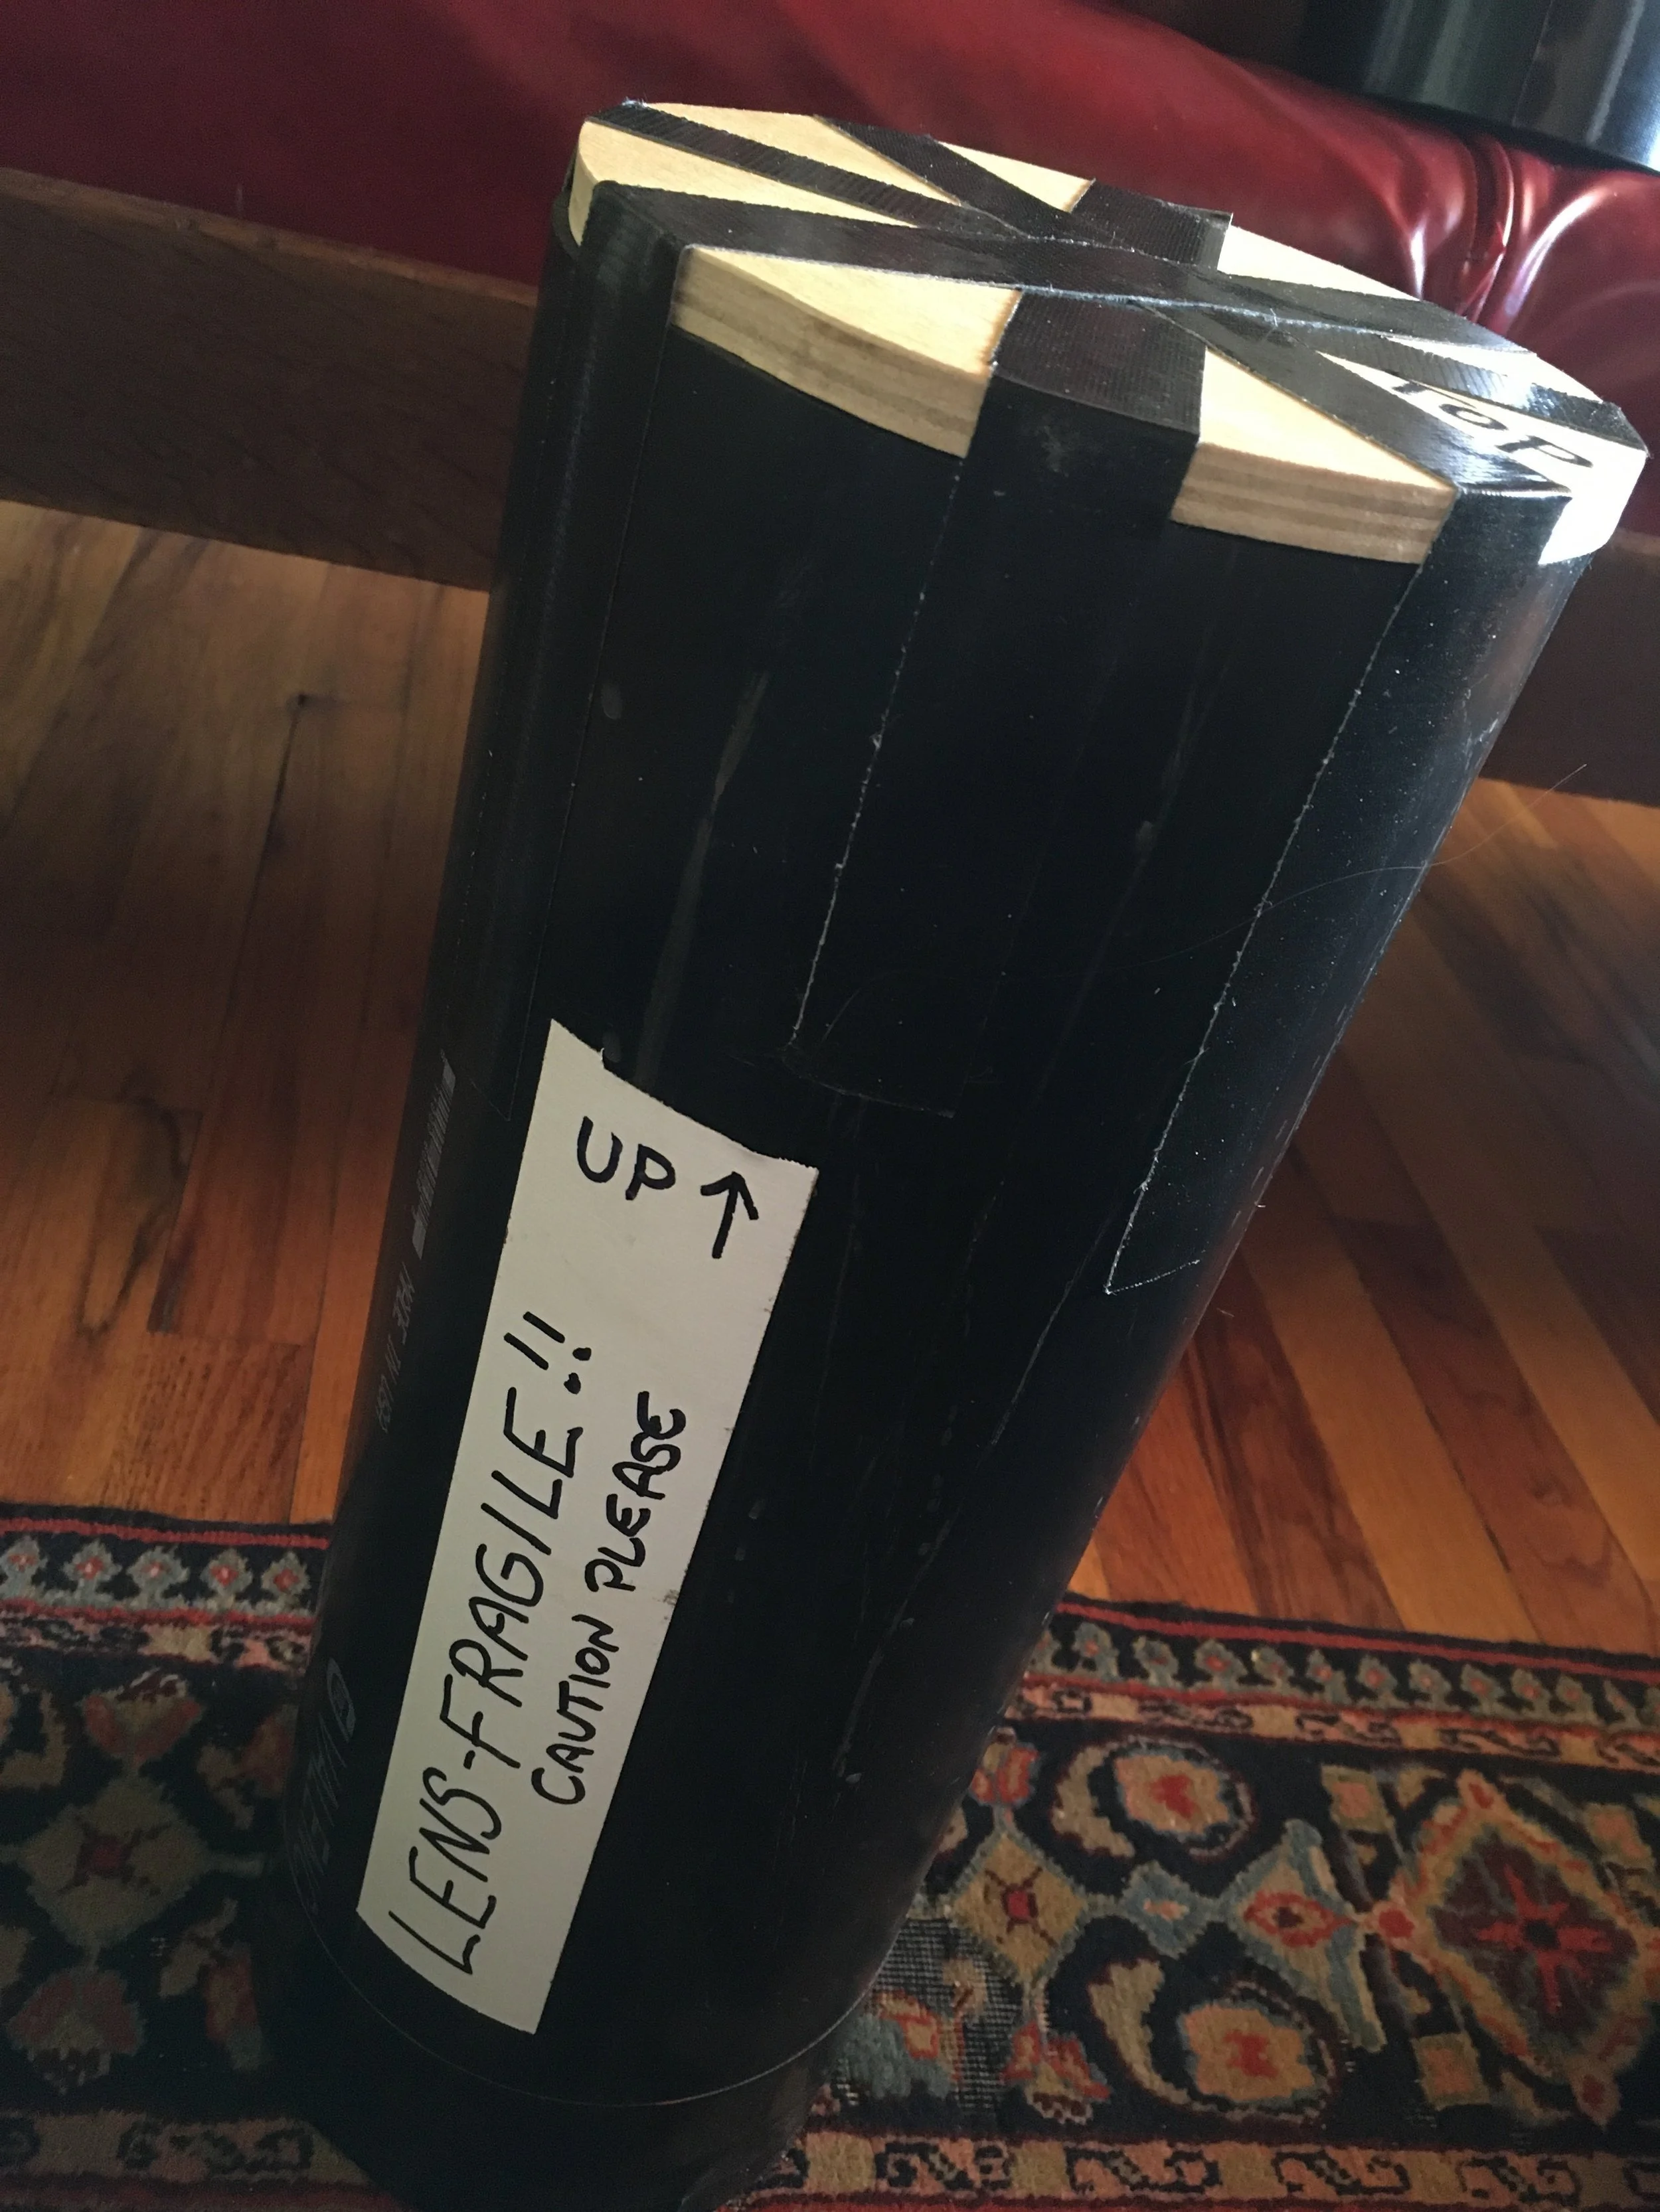
A cheap, bombproof lens-shipping case.
For the first 30 years of my career as a writer/photographer, all my camera gear went with me on airlines as carry-on luggage, packed securely in a Pelican case. For 30 years, there were no enforced weight limits for carry-on items, so no one ever noticed that the loaded case eventually weighed upwards of 33 pounds. That changed on one flight to Australia, when the check-in clerk asked to weigh it, and actually laughed out loud when she hefted it. Pointing to the sign I hadn’t noticed that said, MAXIMUM CARRY ON WEIGHT 7KG (15 pounds), she demanded I offload half its contents into our checked baggage. There followed five minutes of panic as we rolled a couple thousand dollars worth of DSLR equipment into our clothing, stuffed it into the middle of our checked duffels, and prayed for the best. (Walking past the business-class check-in we noticed that the limit there was 14kg or 30 pounds, sort of giving the lie to our clerk’s assurance that the limits were to “balance the load.)
We were lucky and everything made it to Sydney intact, but it was obvious a new approach was going to be necessary given increasingly widespread carry-on weight limits. Henceforth I carried a single camera body and a couple lenses on board, and packed the rest inside hard cases in our luggage, knowing it would inevitably be subjected to casual treatment by baggage handlers who, even if they were conscientious, were invariably pressed for time.
Early this year I picked up one of Sony’s brilliant 200-600mm zoom lenses for my Alpha 9 camera, and decided it needed extra protection—and thanks to my long-past life as a fixer-of-most-things, I knew how I wanted to go about it.
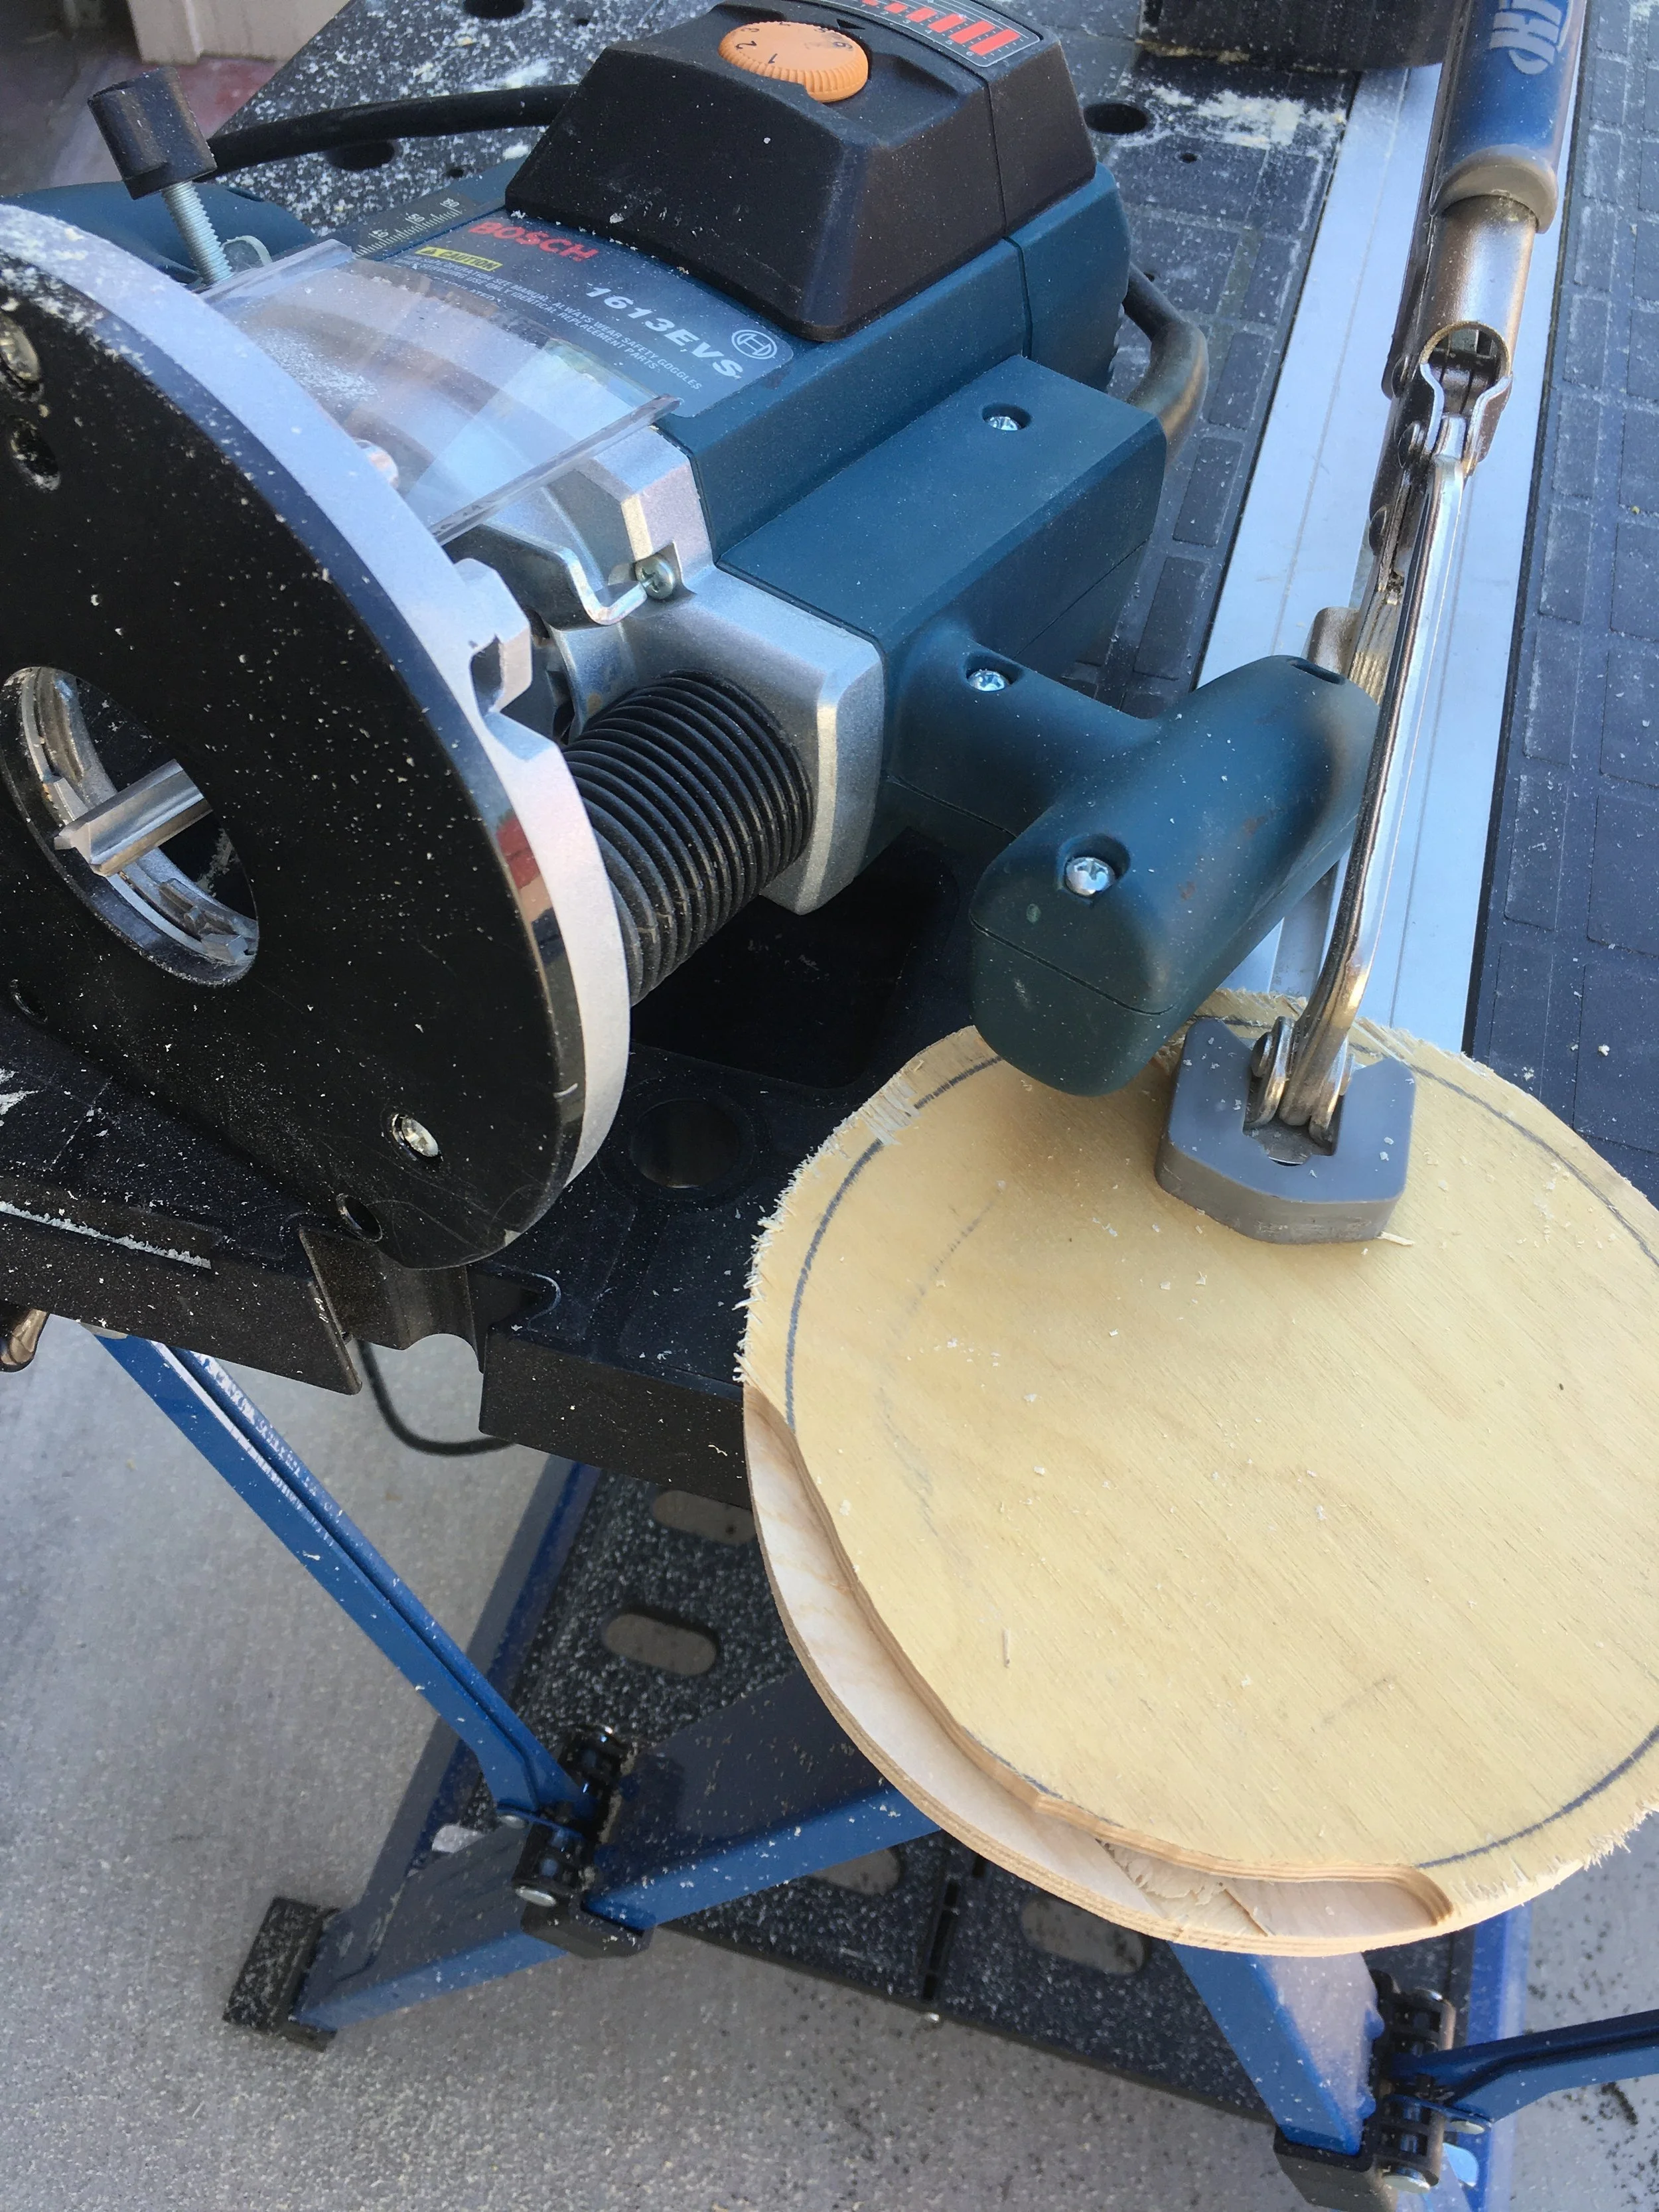
At Lowe’s Home Improvement I picked up an ABS stand pipe, six inches in diameter and 24 inches long, for the princely sum of $8.95 plus tax. Back home I picked out a scrap piece of 3/4-inch plywood (it happened to be Baltic birch but ordinary plywood would suffice). I traced the outer circumference of the pipe twice, then traced another circle inside each, a bit more than the thickness of the pipe wall. With a jigsaw I cut out each circle, then used a router to relieve the outer edge so each cap would fit securely into each end of the pipe.
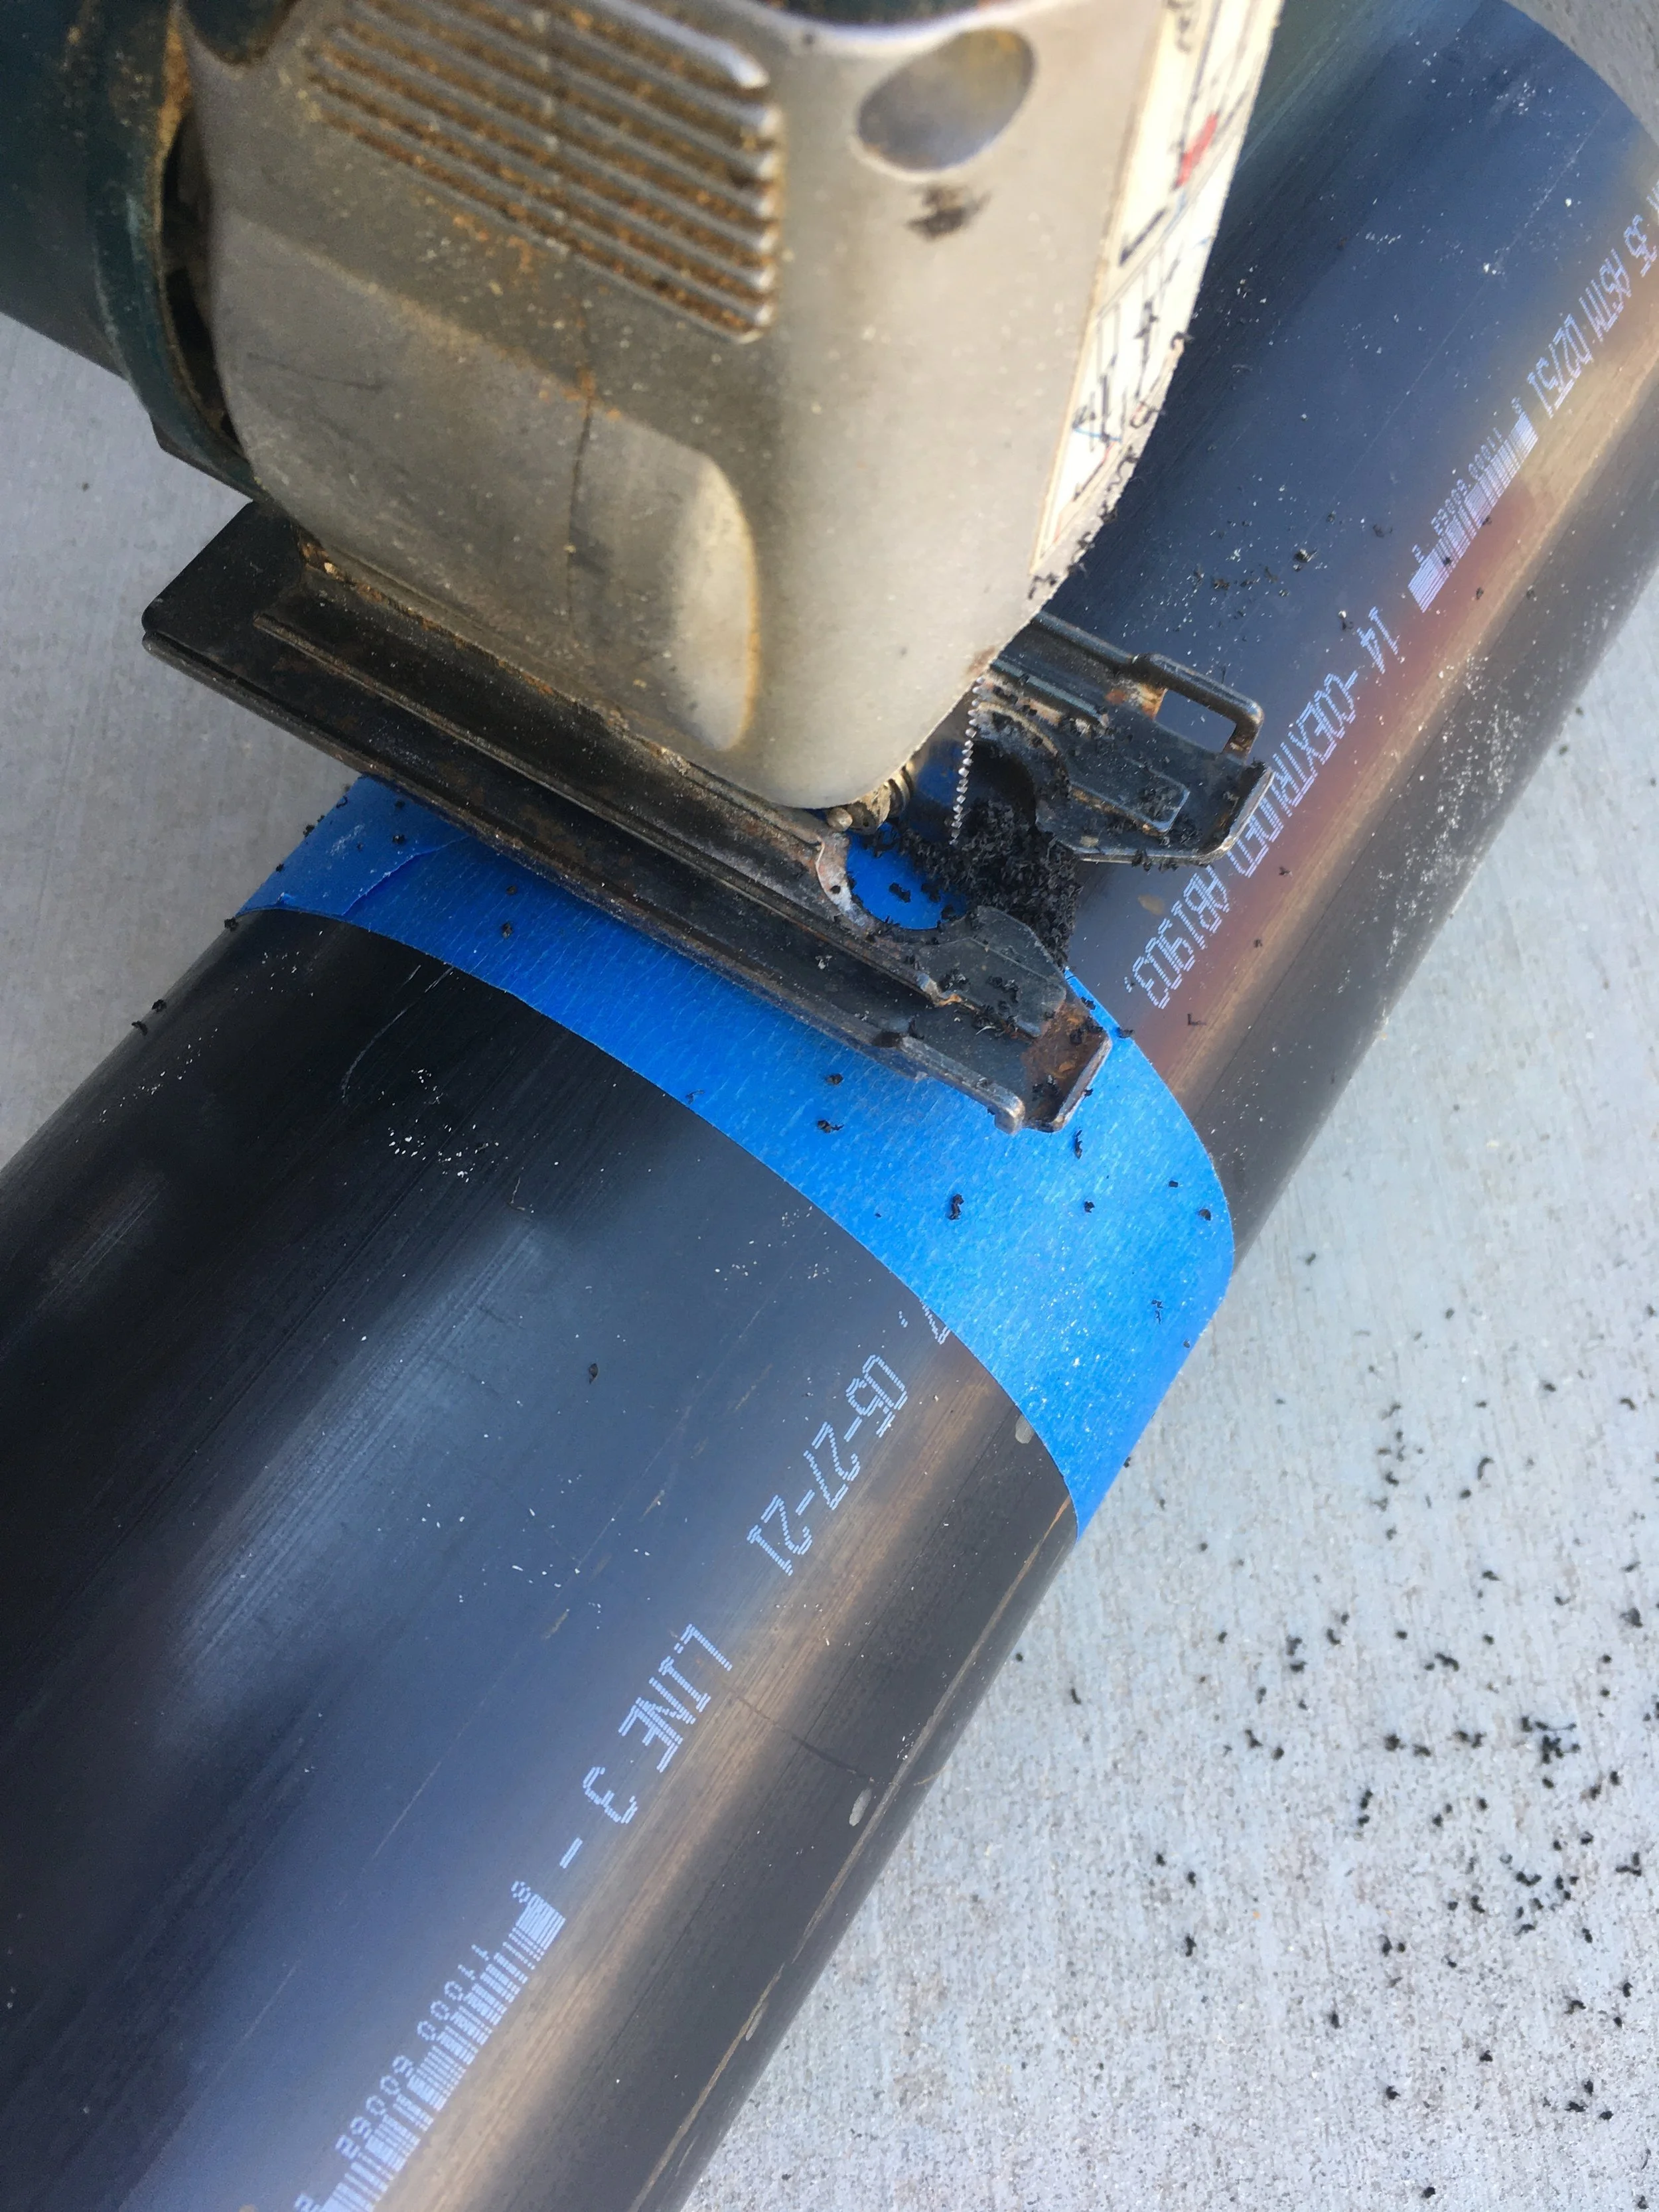
Next I set up the Sony lens next to the pipe, gauging its length with space left over for padding on each end. I marked the spot with a circumference of painter’s tape and trimmed the pipe with the jigsaw.
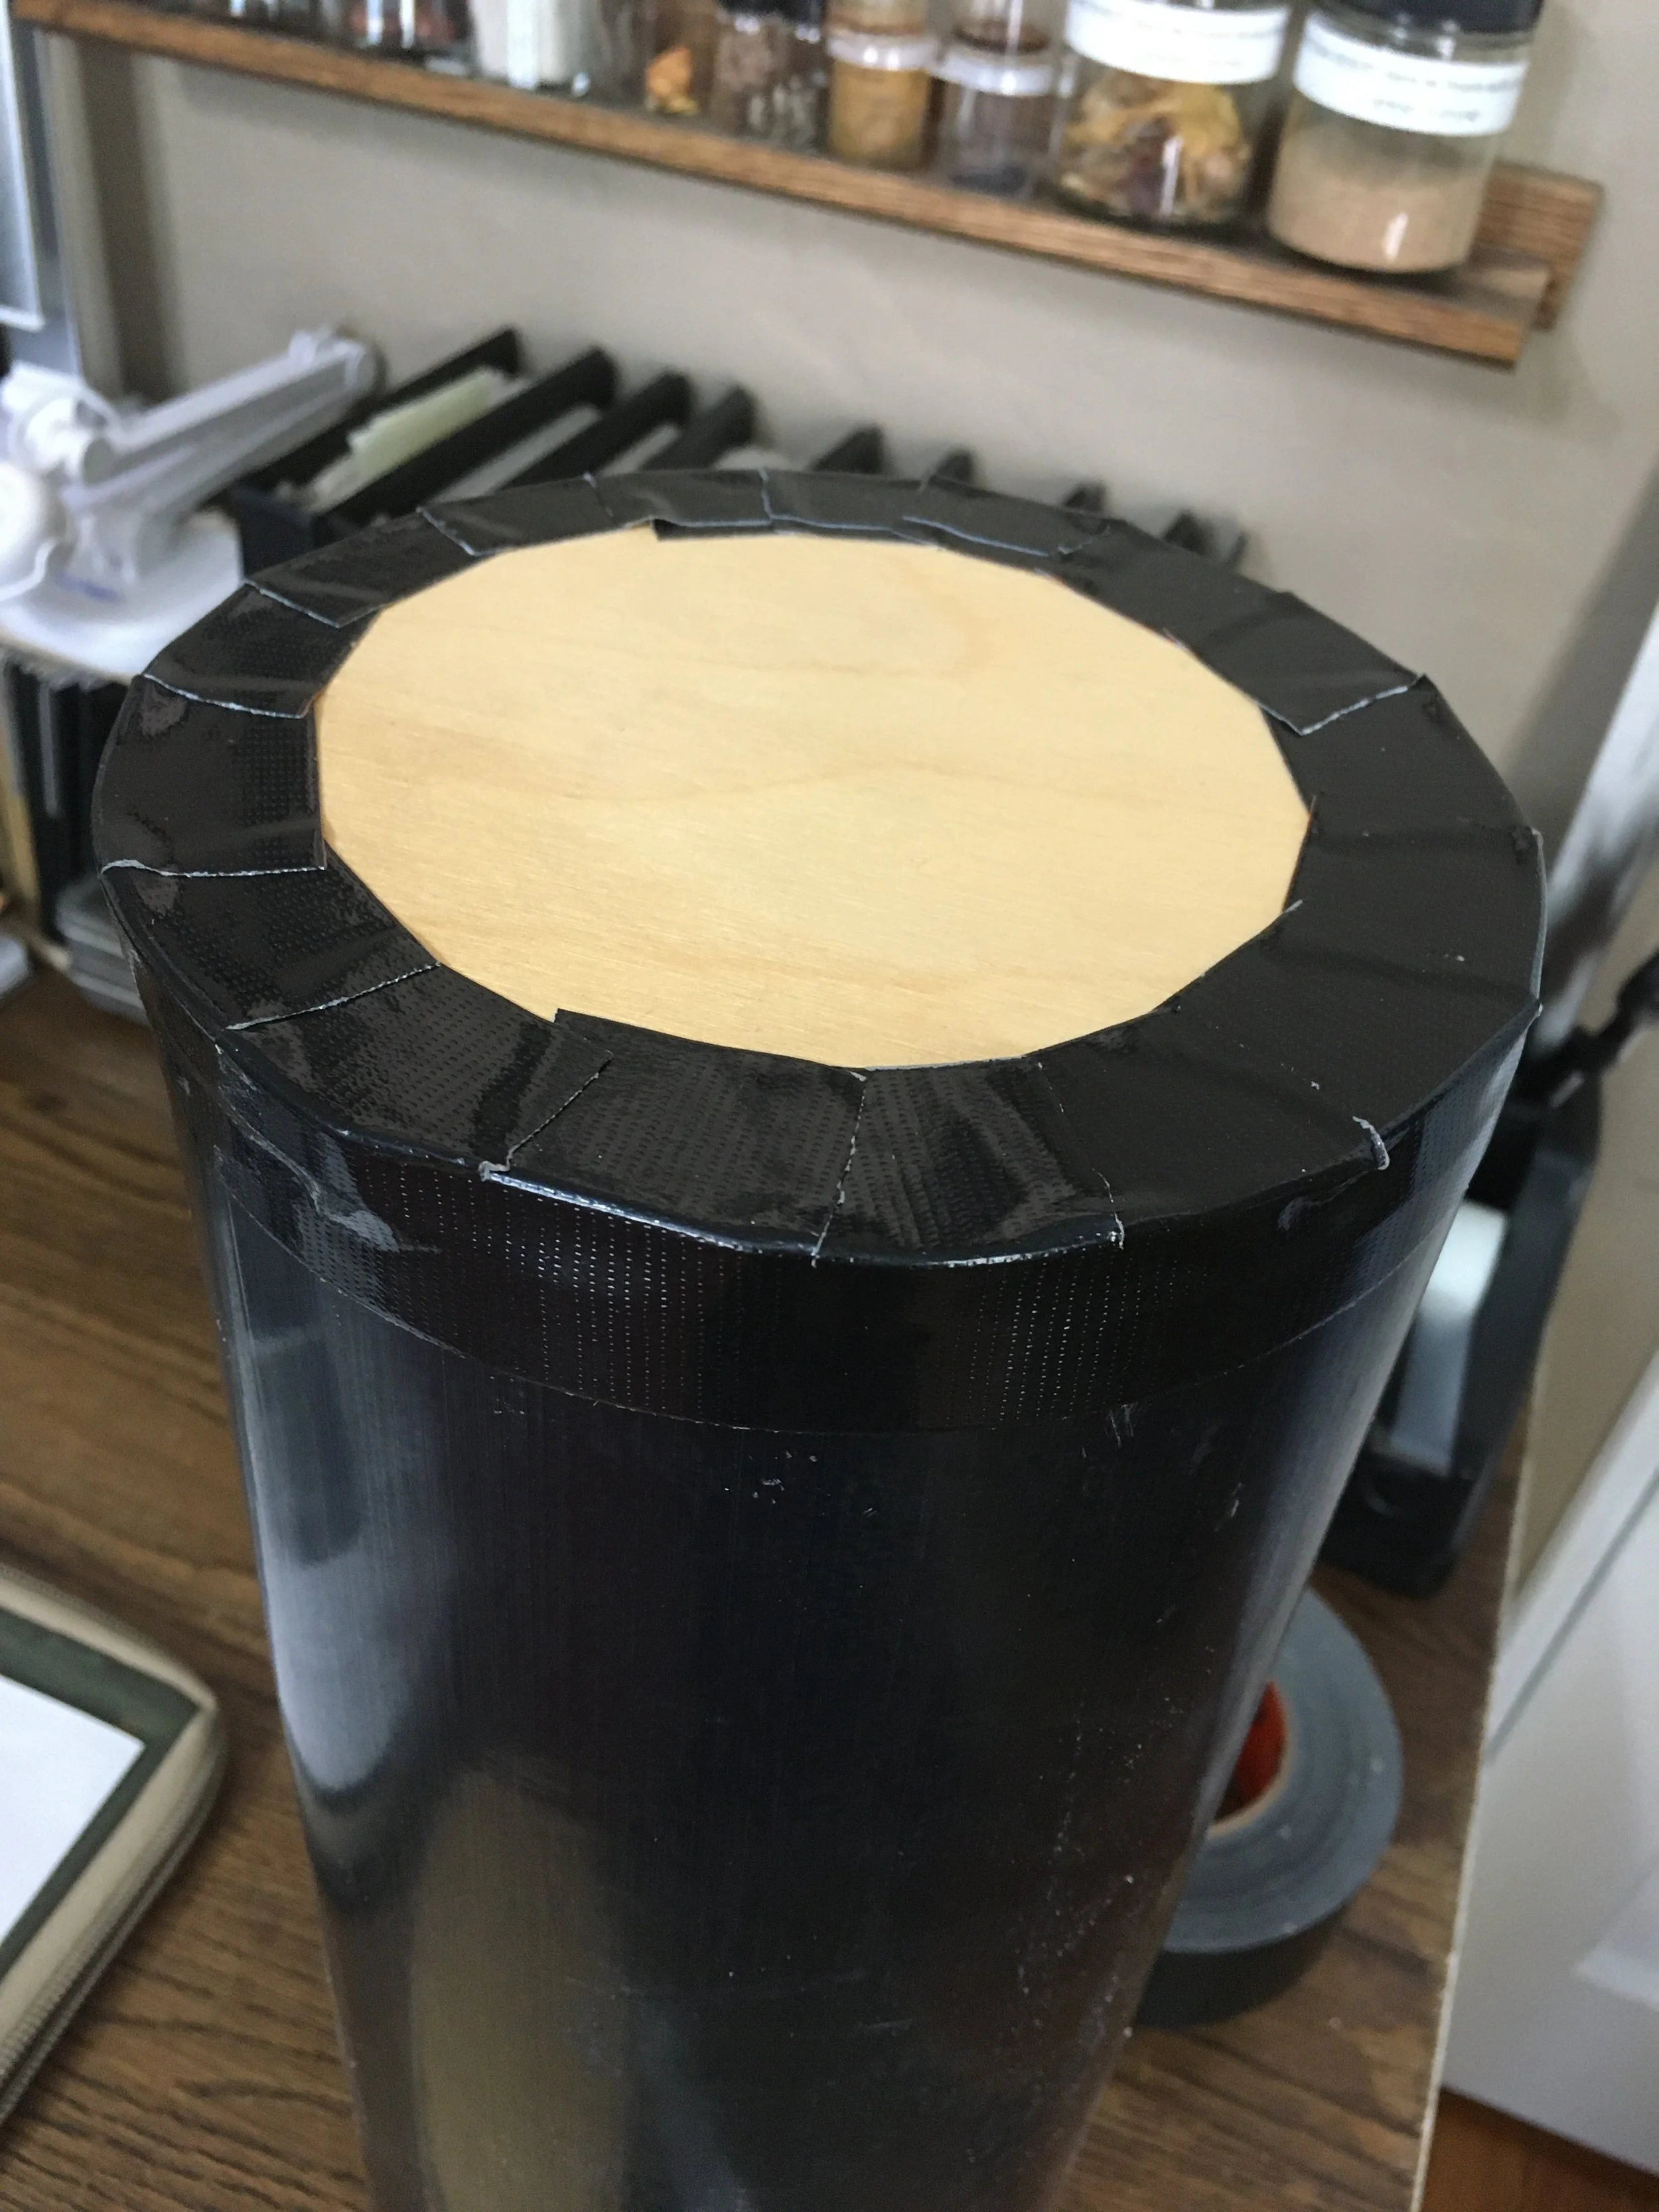
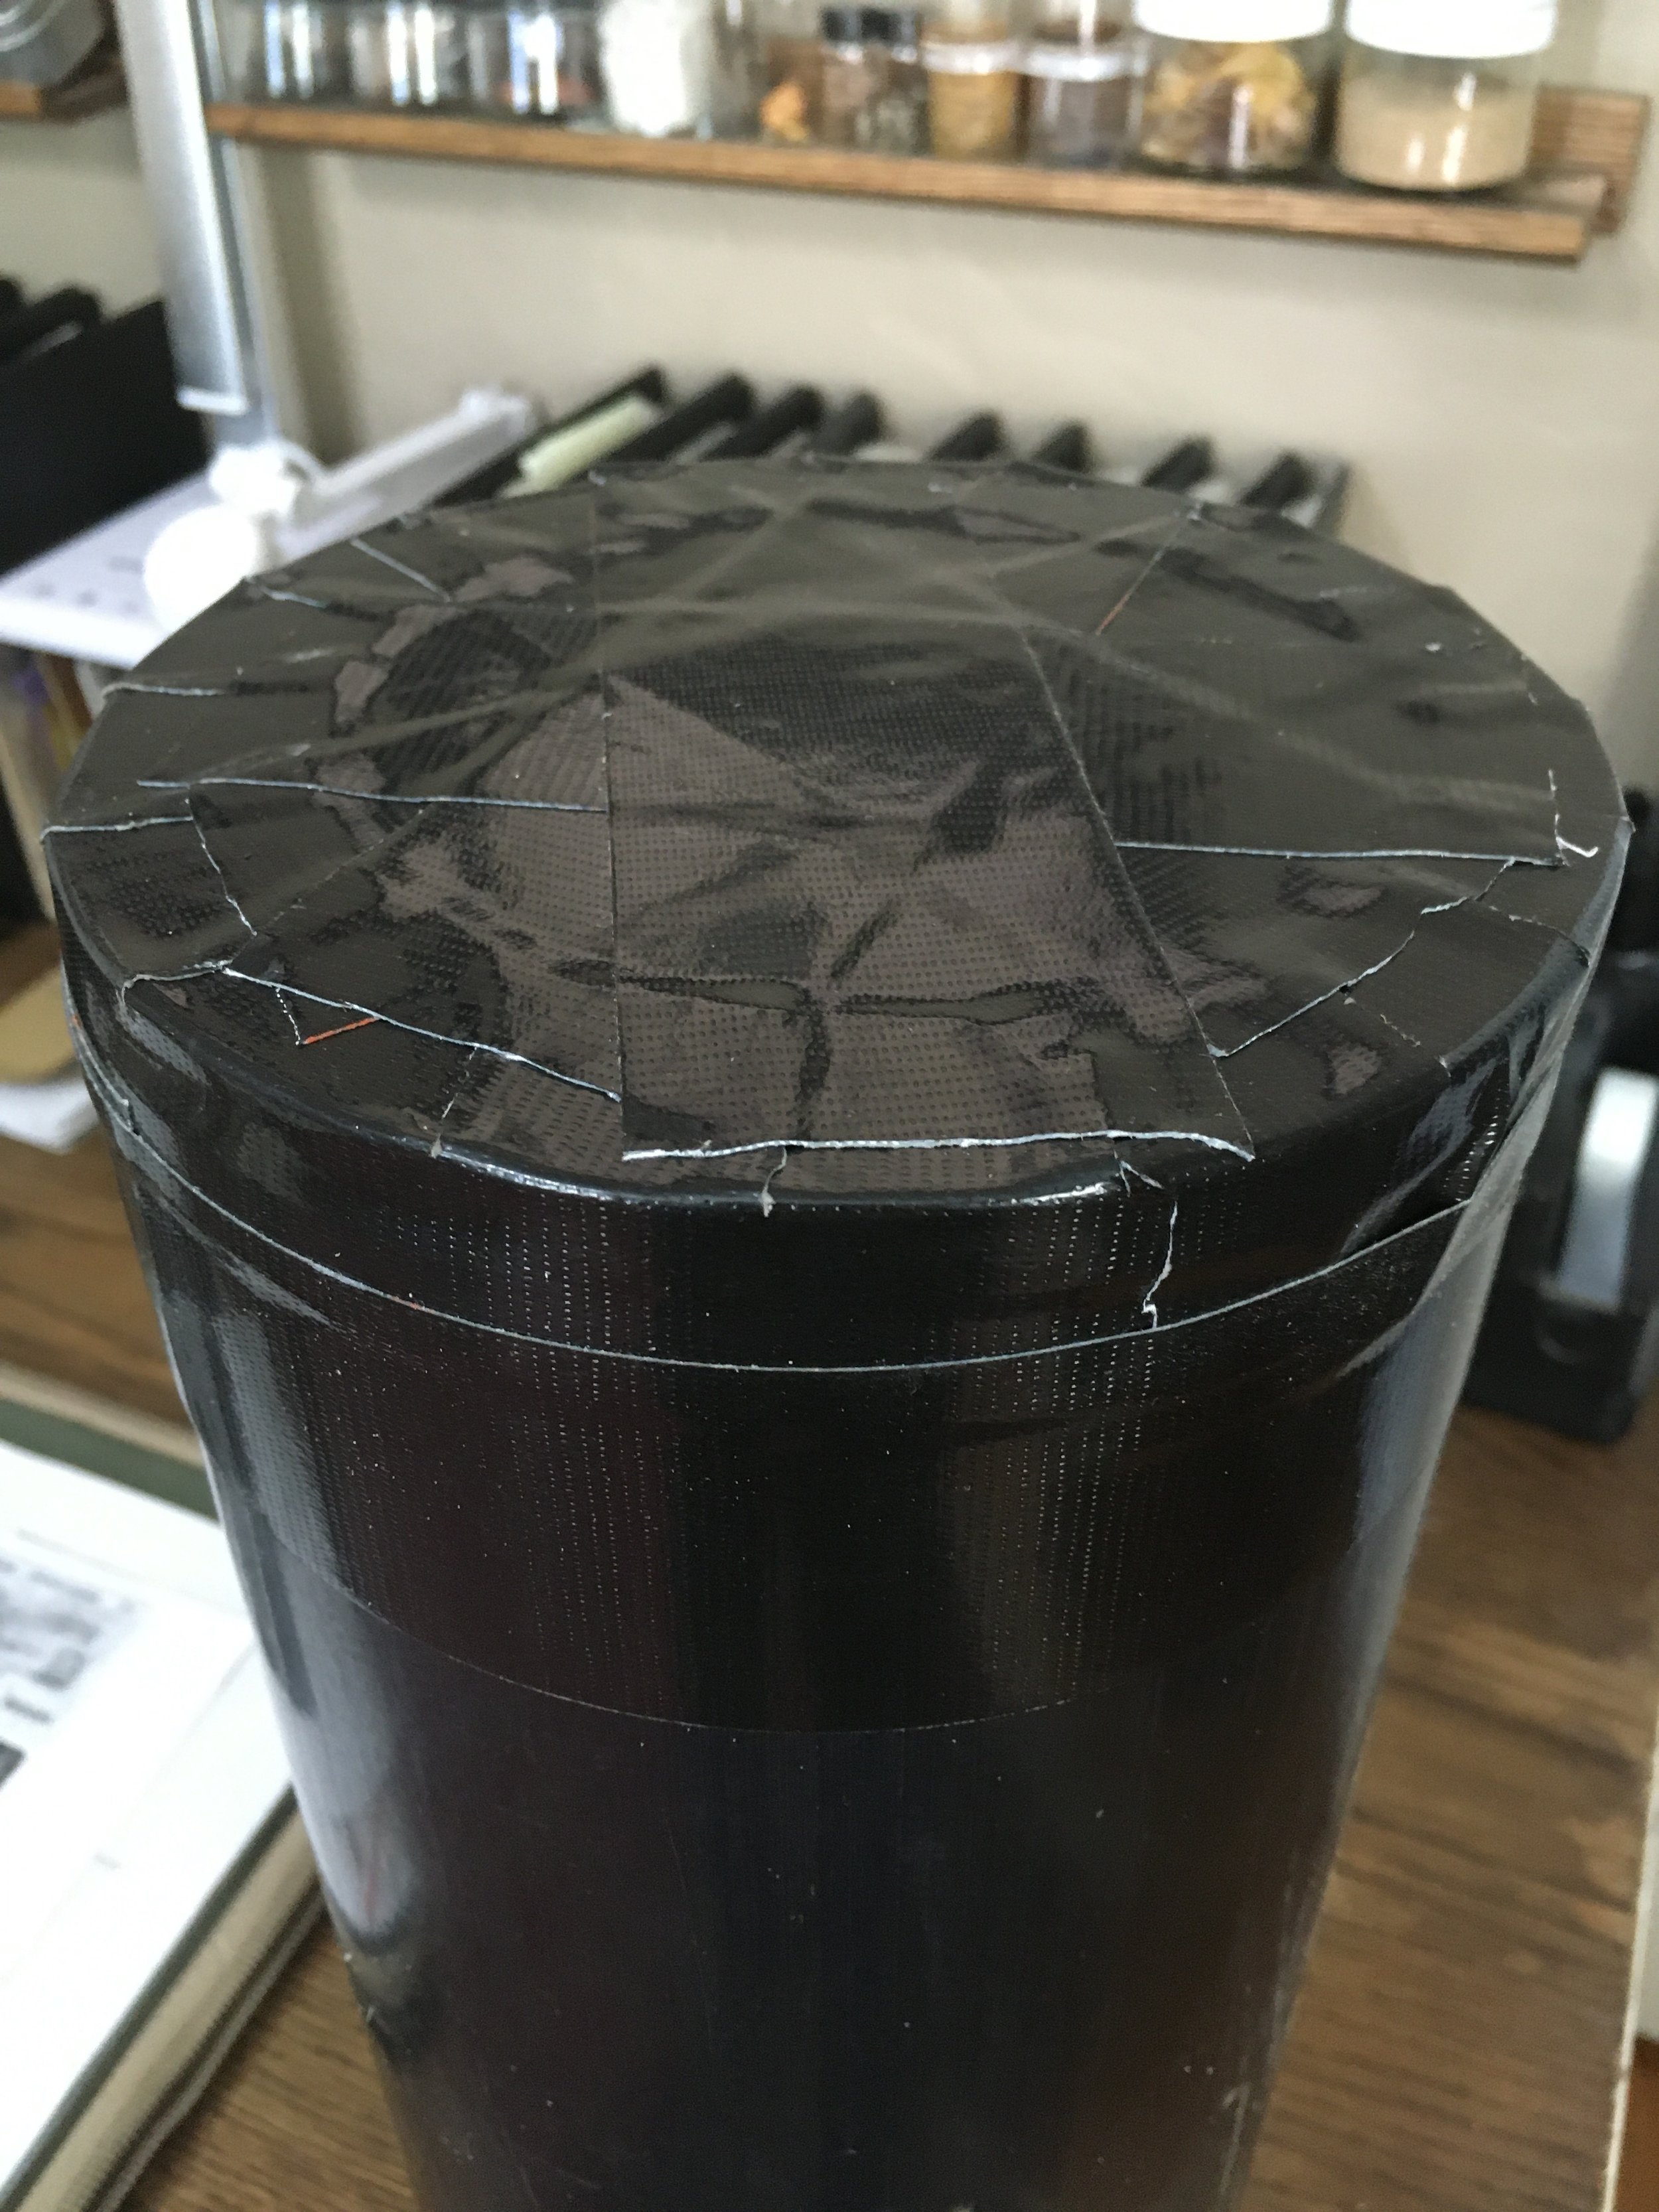
Nearly finished. I made sure the length was good, then used Gorilla tape to secure the “bottom” cap to the pipe, first with a piece around the edge, cut and overlapped thus:
. . . then with strips all the way across.
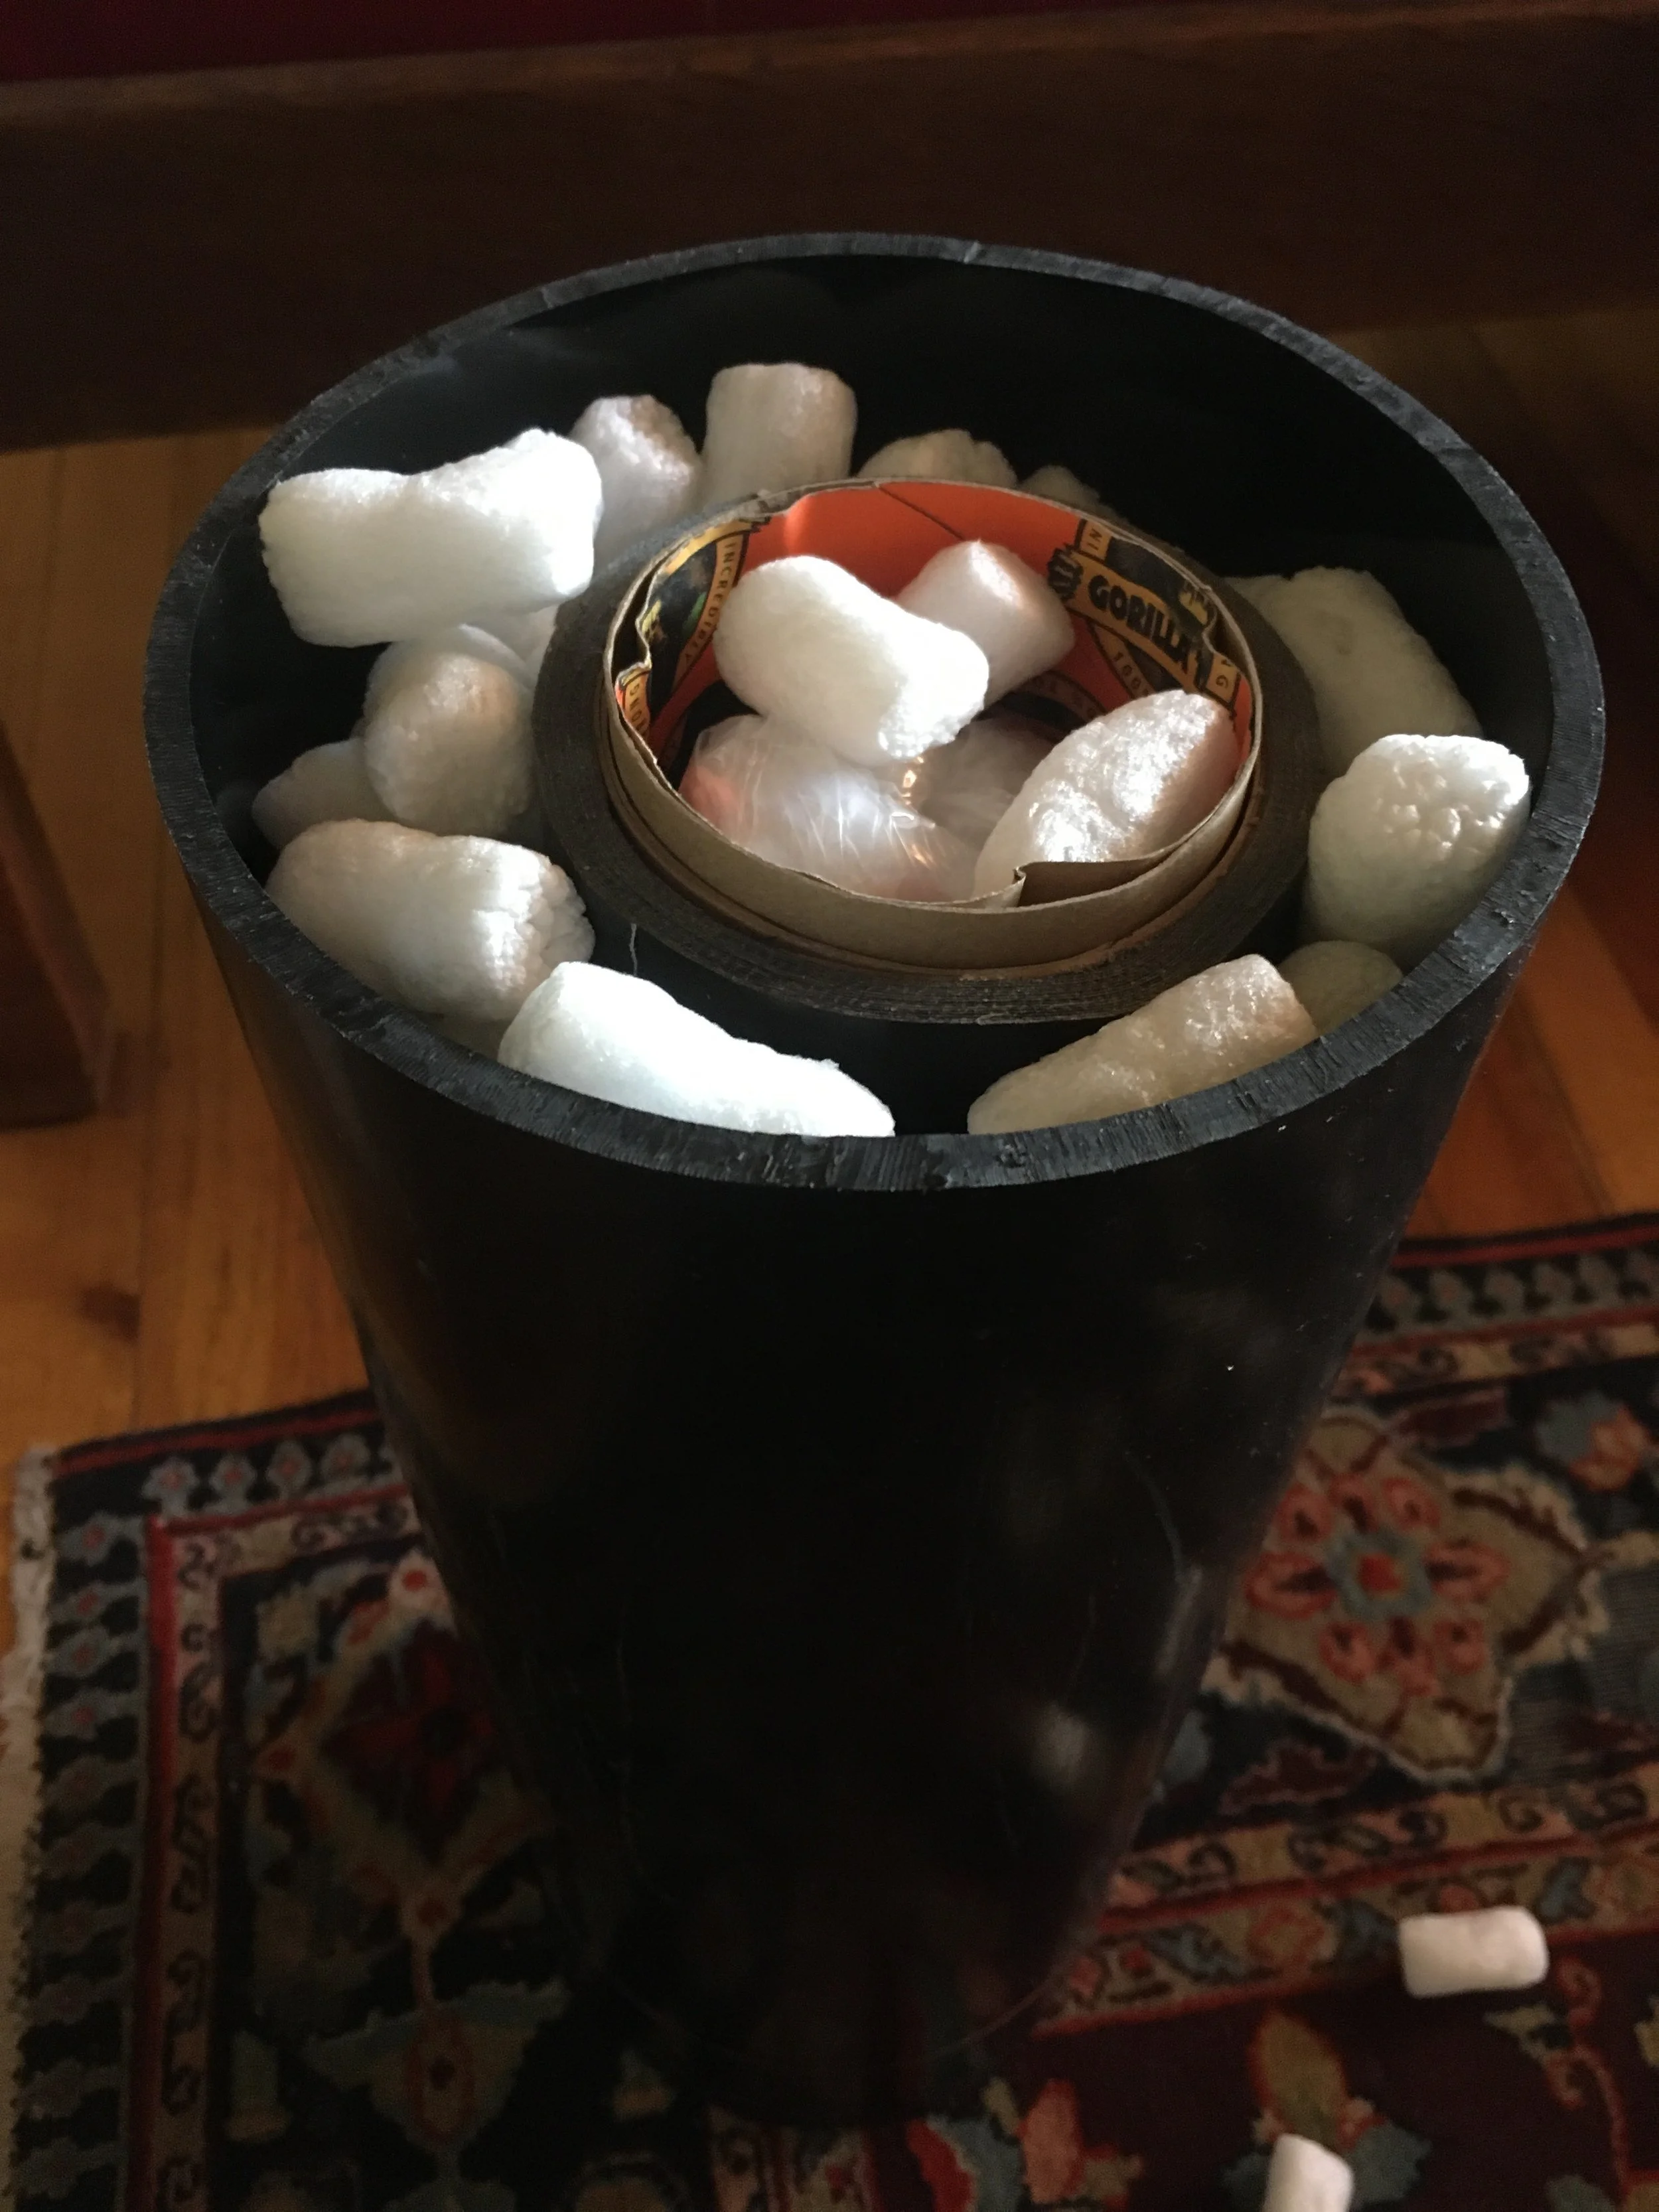
All that remained was to load the lens—wrapped in a plastic bag to keep it dust-free—well-surrounded by packing peanuts. On top I inserted the remainder of the roll of tape to re-secure it on the way home—and also, I hoped, to allow anyone who might open it for inspection to re-secure it.
With the top taped shut, the case felt utterly bombproof. You’d have to run over the thing with a tractor to damage it (perhaps not beyond the realm of possibility at a couple airports I know, but . . .). I still marked the outside with warnings.
Of course the case survived multiple flights to, from, and within Alaska with zero issues, and for once we felt zero stress consigning such a piece of equipment to the vagaries of checked luggage.
Total out-of-pocket cost: $8.95. Plus tax.
The Pro Eagle Off Road jack
A floor jack with off-road tires—why didn’t someone think of this before?
A floor jack is the easiest way ever to lift a vehicle on a concrete driveway. But most will be stopped in their tracks by a quarter-inch-diameter pebble. Pro Eagle took a two-ton floor jack, beefed up the chassis and added fat tires, and invented the all-terrain floor jack. The Pro Eagle rolled over my gravel driveway effortlessly, and lifted the entire front end of my FJ40 in a sandy wash without digging in more than a couple inches. Given the fat tires plus a full-length underbody “skid plate,” it shouldn’t sink in any substrate that doesn’t have a current.
The Pro Eagle barely sank lifting the front of the FJ40 in sand.
An adjustable extension post (stored near the base of the handle) pops on for a full 26 inches of lift height. I certainly wouldn’t carry this bulky, 52-pound jack for field duty in the FJ40 (although a convenient carrying handle helps moving it around), but if you’ve got a full-size truck or Sprinter (there’s also a 3-ton version) or are traveling with a group, it will make any recovery a breeze.
And, of course, at home it’s an excellent shop jack. I’ve abandoned my standard floor jack because the Pro Eagle is so much easier to move around—even in urban settings—and because of its greater lifting capability.
One operational note—like all such jacks, the lifting pad moves through an arc as it rises. A floor jack on concrete will roll slightly to compensate for this. If you employ the extension on the Pro Eagle, and the jack is immobilized in sand or rock, the extension can wind up tilted significantly at full extension. Plan ahead.
Pro Eagle is here. The two-ton model retails for $430.
2022 Toyota Tundra: Continuing the "My Grille is Bigger than Your Grille" Wars (EDITED)
Toyota has revealed some details of the 2022 Tundra. The most-featured news is the deletion of the long-serving V8 engine for a twin-turbocharged V6, following current popular trends in configuration and number of pistons. The top-of-the-line model produces 437 horsepower.
Other changes include rear coil suspension—a welcome upgrade and one the Tundra should have had from the beginning.
What I haven’t found out is if the Tundra’s sub-par “Triple-Tech” chassis, with open-channel frame members under the bed, has been ditched for a proper boxed chassis, as every competitor has. I still don’t know why the company abandoned boxed chassis in its trucks for a design similar to that found on Fords and Chevys in the 1970s.
More news as I uncover it.
EDIT: Ha! The 2022 Tundra has returned to a fully boxed chassis. Thank you Toyota. Along with the coil-sprung, multi-link rear axle, this represents a genuine leap in the design of this truck.
Three cheers!
Now, can we talk about that grille?
So a hitch ball is okay as a recovery point? (But I saw it on the Internet!)
A couple weeks ago Gigglepin 4x4, a UK company that specializes in high-quality 4x4 recovery gear, especially for competition, posted a video on Facebook that showed someone attaching one of their rapid-deployment Hook Link recovery hooks to . . . a hitch ball.
The reaction was swift. Several people, including me, posted replies saying any suggestion to use a tow ball for recovery was inconceivably irresponsible. One of the first inviolable lessons any 4x4 training school with which I’m familiar teaches is to never, ever use a tow ball as a recovery point.
The next day the company responded . . . by reporting my post (and, I presume, others as well) as spam and having it removed.
Then something interesting happened. The original video, as far as I can tell, was taken down. Instead, the company posted another video on their website explaining “what we actually meant” in the first one. In it, the spokesman first demonstrates attaching a Hook Link and strap to a proper recovery point on a Discovery, and notes that it is, “Much safer than placing the strap or rope over the tow ball.” He then says that using the Hook Link and strap on a tow ball is “ideal for recoveries on the road and light duties around the workshop,” and adds that it’s “not ideal” for extreme recovery situations. Confused yet? He then says, even more confusingly, that the MSA (Motorsports South Africa) rule book allows some UK-style tow balls—which, unlike typical U.S. versions, are usually flanged and fastened with two M16 bolts—to be used for recovery in racing.
Contradictions aside, let’s look at this. First, as far as I recall (since I can no longer find it), the original video contained no such explanations or caveats; it simply showed the Hook-Link being snapped over a hitch ball, quite clearly as a suggested application. The opportunities for this to be interpreted as a universally acceptable practice by inexperienced 4x4 drivers/Facebook users are rife.
Second, a friend who called my attention to the first video followed up and contacted a well-known supplier of this type of tow ball in England, to ask for their stance on the use of such balls for recovery.
The response:
“Towbars are designed to pull the safe rated load that they were tested and type-approved at in a smooth and controlled manner. They are not designed to be subjected to any sharp impact or snatch, using them for this purpose is most likely to overload and cause damage, possibly invisible to the naked eye, that may not become immediately apparent but weeks or months later may cause failure and pose a danger to other road users. Using a towbar in this manner would be classed as outside of their intended use and would invalidate any warranties.”
There’s another potential factor at work in such a scenario. I couldn’t find any specs of the Hook-Link that listed the width of the neck of the hook. It appears to be around two inches or more. If the neck is larger than the tow ball over which one hooks it, a sudden jolt and slack could pop the hook off the top of the ball. In the U.S. standard tow balls start at 1 7/8 inches in diameter.
I noticed one more confusing aspect to the Hook Link. The spokesman noted there are two versions of the product, identical in size but employing different aluminum alloys in construction. The model made from 6082 is rated at 4.5 tons, the one in 7075 to 6.5 tons. I assumed he was referring to a metric ton (2,204 pounds) and, indeed, the Hook-Link shown on the website is stamped “Break strain 4500kg”—which is 9,920 pounds, and 4.5 times 2,204 equals 9,918 pounds. But . . . “break strain?” That doesn’t sound like our familiar working load limit (WLL) with a 2X or 3X (or greater) safety factor; that sounds like the point at which things might come apart precipitously. Perhaps it’s a matter of cross-Atlantic nomenclature, but here we like to see both a WLL and a separate minimum breaking strength (MBS).
I’m going to restate the rule: Don’t use a tow ball—any tow ball—as a recovery point. Period.
What about alternative methods for employing a receiver hitch as a recovery point? Many articles and trainers suggest inserting the loop of a recovery strap into the receiver tube and fastening it with the hitch pin. This has the advantage of securely anchoring the end of the strap or rope.
However, look at the diagram below, from Dougal Hiscock, a mechanical engineer at at Engen Consulting in New Zealand, which shows the relative stresses exerted on a tow ball and a hitch pin subjected to a 5,096 kilogram (11,235 pound) steady pull. The stress is three times higher on the pin due to its smaller diameter. The pin is also subjected to a three-point bending load, from the strap in the middle of the pin and the through-points on the side of the receiver. When towing a trailer using a hitch insert the pin is subject only to sheer loads, as the square receiver insert rides closely against the wall of the tube. A wide strap or rope, such as the one illustrated, might reduce the focus of this bending stress, but it will still be much higher than that exerted by a receiver tube under the same load.
The only acceptable way to employ a receiver for recovery is to use a receiver shackle insert and shackle to attach the kinetic strap or rope. Even then, I much prefer a dedicated shackle mount on a bumper designed for recovery duty, or a chassis-mounted recovery ring.
Toyota's new (not for the U.S.!) 3.3-liter V6 turbodiesel
Along with the near simultaneous announcements that Toyota would be pulling the Land Cruiser from the U.S. Market while introducing the completely redesigned 300 Series Land Cruiser elsewhere, the company also announced a brand new engine for the updated model. Replacing the existing 4.5-liter, twin-turbo V8 is a 3.3-liter, twin sequential turbo V6. This is Toyota’s first diesel V6.
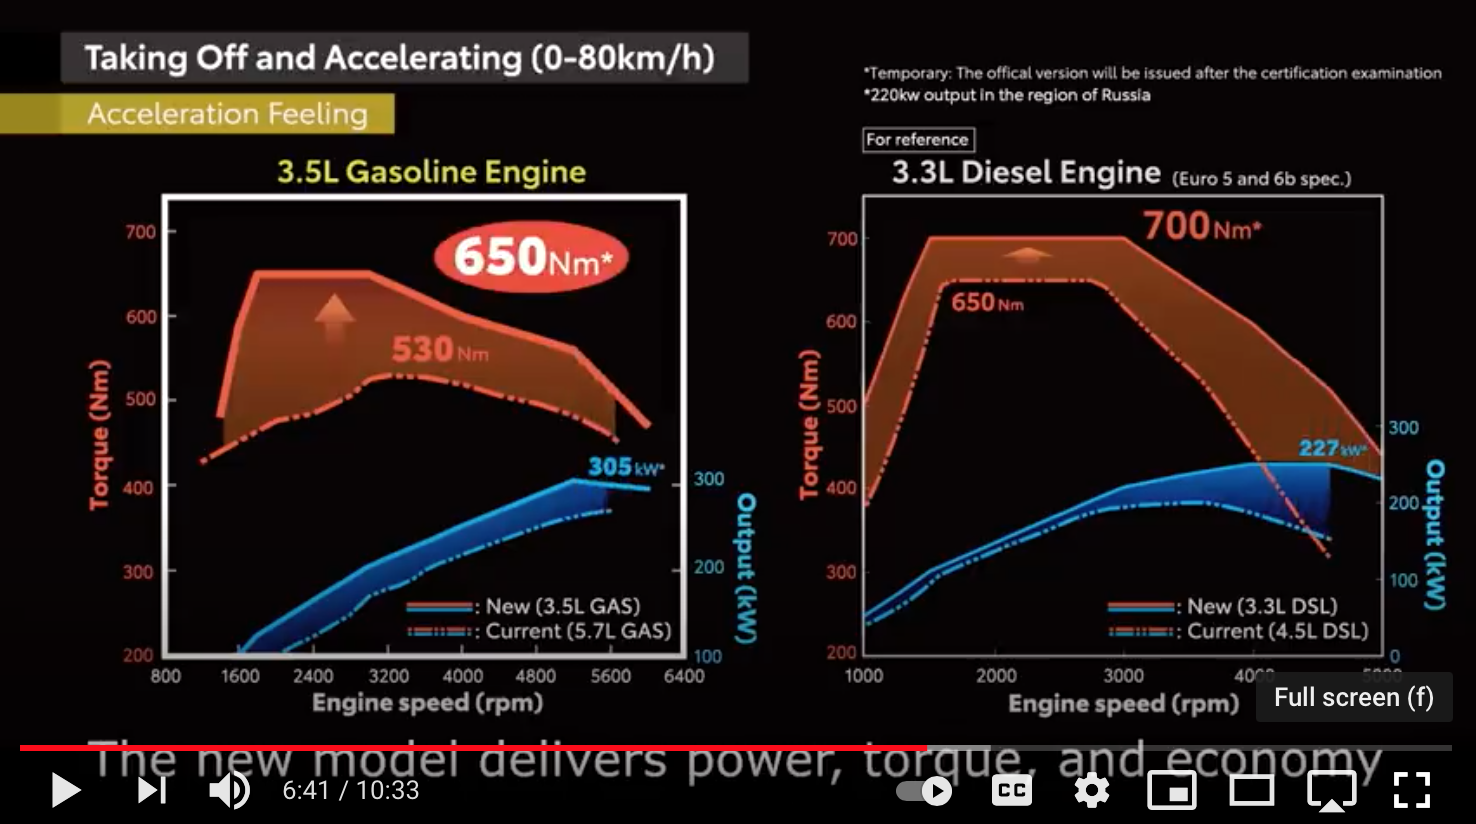
Reflecting the advances in turbodiesel technology, the new engine boasts increased power and torque compared to its significantly larger predecessor—304 horsepower and 516 lb./ft. compared to 268 horsepower and 480 lb./ft.
Just as importantly, and contrary to the fears of those who predicted the smaller engine would have a torque peak higher in the RPM range, the 3.3’s curve peaks in more or less exactly the same range as the 4.5, from 1,500 to 2,900 rpm. Note the chart on the right below.
The new engine should exhibit significantly decreased turbo lag, thanks both the the sequential turbo configuration (in which one is set up to provide immediate boost while the other takes over higher in the rev range) and the “hot vee” arrangement of the exhaust.
In contrast to standard V engine construction, in which the intake manifold sits between the cylinder banks and the exhaust exits under the sides of the V, the hot vee turns everything around, siting the exhaust manifolds between the cylinder banks. This drastically shortens the run from the exhaust ports to the turbos.
The 4.5 was known for—depending on your point of view—underwhelming specific power output, or being admirably under-stressed for heavy-duty use. The 3.3 is obviously tuned to a higher level, but much of that might be attributed to the configuration. The 4.5 also had a few problems, at least early on, with disappointing oil consumption (although I only read about this in connection with the single-turbo version in the 70-Series vehicles).
I’ve not yet read anything regarding the new engine’s fuel-delivery system—or, more to the point for overland travelers who rightly view the 70-Series vehicles as the ultimate global expedition platforms—whether or not it will be installed in the Troop Carrier and its brethren.
There are tent stakes, and tent stakes . . .
This . . . is the latter.
If you’ve read my work for more than a few weeks, you probably know how much I hate cheap tents (see here if not). It should be banally axiomatic that your tent is your home away from home, your last refuge from wind, rain, snow, and insects. It makes no sense to economize on a piece of equipment that, at the very least, can mean the difference between a peaceful or sleepless night, and at the worst, could be your key to survival.
The same goes for the stakes with which you secure that tent (or awning). The finest, most aerodynamic four-season tent on earth is worthless if it’s secured with flimsy, undersized stakes, and the same goes for the expensive batwing awning on your overland truck, which can pluck inadequate stakes out of the hardest substrate when a bit of a blow lifts its sail-like surface area. During every Overland Expo Roseann and I ran we struggled with and cajoled and threatened vendors to tie down their blue EZ-Up awnings with something more than the flimsy aluminum toothpicks they came with, which I could—and did, as a demonstration—bend between my teeth.
These stakes will not bend between my teeth.
We already own a set of very decent stakes for the Eezi-Awn Bat 270 awning on our Troopy—one set of thick round steel pegs for hard ground, and another of wide, curved aluminum for sand.
Recently, however, I was browsing the Major Surplus site and came across a pack of six French military steel stakes for $29.95. They looked awesome, so I ordered a set. And they are indeed awesome: cruciform steel, seventeen inches long and 1.45 pounds each, with a welded hook. I immediately ordered another set. They should suffice for any kind of substrate.
These stakes will secure any tent not capable of enclosing a trapeze act. No, I won’t carry them on my bicycle for use with my Hilleberg Anjan GT, but for bigger shelters? Take my advice and get a set; you’ll sleep better.
Touching up 48-year-old paint
Most people find it hard to believe my 1973 FJ40 still wears most of its original paint (aside from the newer doors I installed and had matched, and a couple of repaired areas). Despite having sat uncovered in the Arizona sun for at least 26 years of its life, the paint still glows with a hand application of Classic Car Wax (until the brand disappeared) or Mother’s California Gold—no ceramic coatings, no polymers, just good old-fashioned “wax on; wax off” cleaner and carnauba. I’ve lost track of those who ask me where I had my Land Cruiser restored.
That is, until they walked around front.
Thanks to the thousands of miles of dirt roads the 40 has covered, it has over the decades collected what seems like thousands of tiny stone chips, which stand out like a bad case of acne once one gets closer than ten feet. I imagine as the paint has aged it has probably become more brittle and thus more prone to chipping, as well. When I had the new doors painted a few years ago I got an extra pint of the match and painstakingly dabbed dozens of chips on the edge of the hood, the front clip and fenders, and the windshield surround. In the intervening years, however, another couple hundred have appeared. The can of paint had long since petrified, so I went online to one of the paint companies specializing in touch-up matching, and looked up the chart for a 1973 Land Cruiser in white. The first company led me to a color coded 040, so I ordered a tiny $20 bottle of the stuff.
Not even close. It was way, way too white.
Back to the research. Several people online swore my color should be T12, Cygnus White, and linked me to a color chart of 40-series colors in the early 70s. And there it was, overlapping from 1970 to 1975. Perfect. Except . . . in looking for the paint I found this offering at Cruiser Corps:
Well, my fiberglass top is and always has been a distinctly whiter shade of white than the body, which is distinctly off-white. Still, several forum members swore Cygnus White was the body color on their early 70s FJs. So, I ordered another $20 mini bottle.
And it, too, was too white. Not, perhaps as too-white as the first one, but not a match. Now I was down 40 bucks with nothing to show for it. Back to the forums, and this time someone suggested Arctic White, 022, which on another chart was listed as a 1973 color for Toyotas—but not specifically Land Cruisers. Ugh. Do I risk another 20 bucks for a few CCs of maybe?
No. I decided on a different route. I pulled off the locking fuel filler lid and took it up to Finish Master, a professional auto paint supply store in Tucson. When I explained to the counter guy—whose name I should have recorded—he at first demurred. “We’re mostly a professional supply source; we don’t usually do small batches. And what we make is designed for spraying; it’s pretty thin. What kind of vehicle is it?”
When I said, “It’s a 48-year-old Land Cruiser,” he perked up. “Really?” He thought for a moment. “Well, look, I can match the paint with our camera, and you could just build up layers if it’s too thin. But the smallest amount I can sell you is a quart, and it will be $40.”
“Done,” I said. He thought for another moment, then said, “You know, since you don’t need that much for stone chips, I could take some of it out and make up two cans of aerosol. It would be an extra $24.”
“Seriously?” I said. “That would be great!”
He took the filler flap and scanned it. “When can I come back?” I asked.
“Do you have ten minutes? We’ll make it up right now.”
This just kept getting better. I waited; ten minutes later I had my paint, which proved to be an excellent match.
I used the can to dab chips on the edge of the hood and fenders. I tried to fill in each one to slightly above the level of the surrounding paint, and then sanded it all flush with 1500-grit sandpaper, brought back the finish with rubbing compound, and finally applied the Mother’s California Gold.
Looking at the front apron, which was particularly loaded with acne, I decided to try the aerosol. So I pulled off the apron, cleaned it and sanded it with 800-grit wet-and-dry paper, and started spraying on layers. The paint went on well but, as I’d been warned, in thin layers, and the stone chips still showed up behind it, so I bought some lightweight polyester filler and faired in most of the tiny nicks, then resanded and repainted. After three or four more coats I smoothed out the paint with rubbing compound, then went at it with the Mother’s California Gold.
And, well, it looked pretty darn good when I was finished—certainly not the mirror finish a professional painter would have achieved, but it shines well and looks ten thousand percent better than it did. Since it is such a discrete part of the front of the vehicle, any slight contrast with adjoining panels is difficult to see.
Overall the improvement is astonishing. From a couple of feet away you can see the repairs, but from ten the work is nearly invisible.
LiFePO4 voltage stability
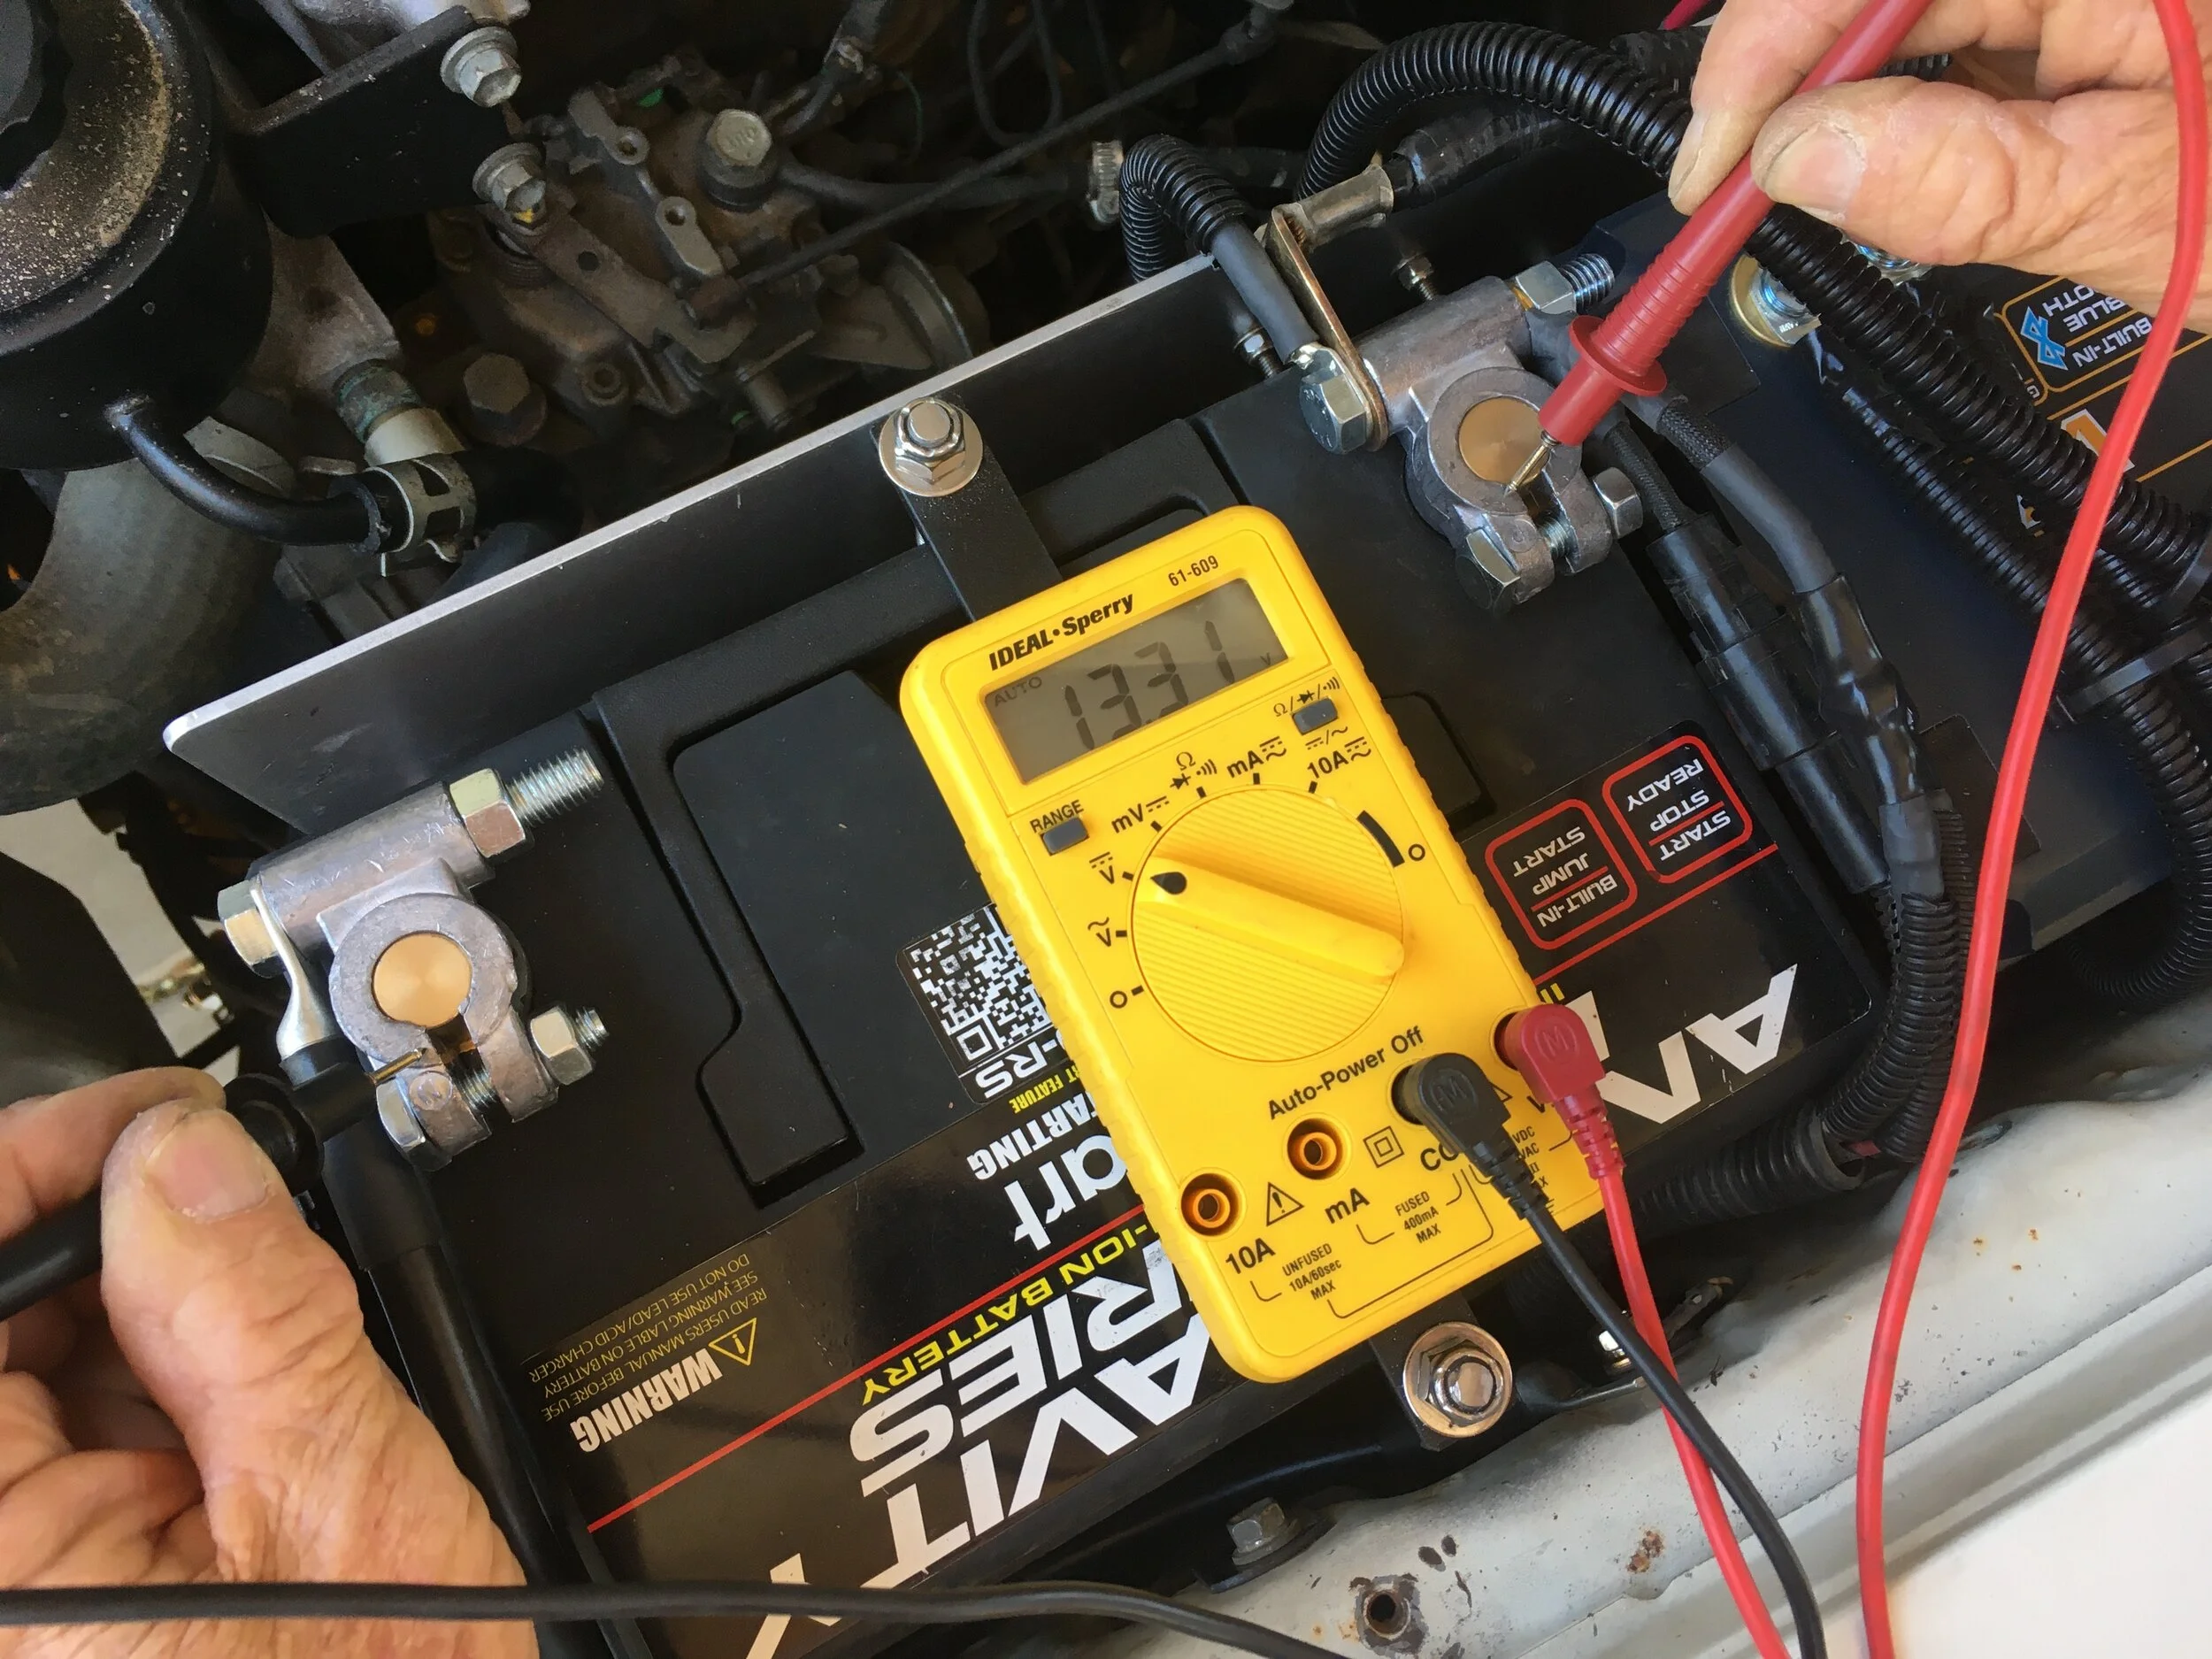
After an extended interval collecting the bits for the LiFePO4 dual-battery system I’m installing in our Troopy, I’m finally buttoning up the project, which will appear first in OutdoorX4. The delay gave me a chance to experience in a small way one of the benefits of LiFePO4 batteries, which is their superior voltage stability when left idle. I received this battery from AntiGravity in early February, and it has sat since then. Upon installing it I checked the voltage before starting the engine, with the result here. That’s impressive.
Hint: When using “Search,” if nothing comes up, reload the page, this usually works. Also, our “Comment” button is on strike thanks to Squarespace, which is proving to be difficult to use! Please email me with comments!
Overland Tech & Travel brings you in-depth overland equipment tests, reviews, news, travel tips, & stories from the best overlanding experts on the planet. Follow or subscribe (below) to keep up to date.
Have a question for Jonathan? Send him an email [click here].
SUBSCRIBE
CLICK HERE to subscribe to Jonathan’s email list; we send once or twice a month, usually Sunday morning for your weekend reading pleasure.
Overland Tech and Travel is curated by Jonathan Hanson, co-founder and former co-owner of the Overland Expo. Jonathan segued from a misspent youth almost directly into a misspent adulthood, cleverly sidestepping any chance of a normal career track or a secure retirement by becoming a freelance writer, working for Outside, National Geographic Adventure, and nearly two dozen other publications. He co-founded Overland Journal in 2007 and was its executive editor until 2011, when he left and sold his shares in the company. His travels encompass explorations on land and sea on six continents, by foot, bicycle, sea kayak, motorcycle, and four-wheel-drive vehicle. He has published a dozen books, several with his wife, Roseann Hanson, gaining several obscure non-cash awards along the way, and is the co-author of the fourth edition of Tom Sheppard's overlanding bible, the Vehicle-dependent Expedition Guide.

