Overland Tech and Travel
Advice from the world's
most experienced overlanders
tests, reviews, opinion, and more
Terrain Tamer parabolic springs for the FJ40
A few weeks ago I wrote a technical article explaining the science behind parabolic leaf springs (here). Briefly, parabolic springs eliminate almost all of the disadvantages of standard multi-leaf springs, offering far less internal and inter-leaf friction, plus true progressive action; that is, the spring offers more and more resistance as it compresses. On top of all that, a parabolic spring weighs at least a third less than a comparable multi-leaf spring.
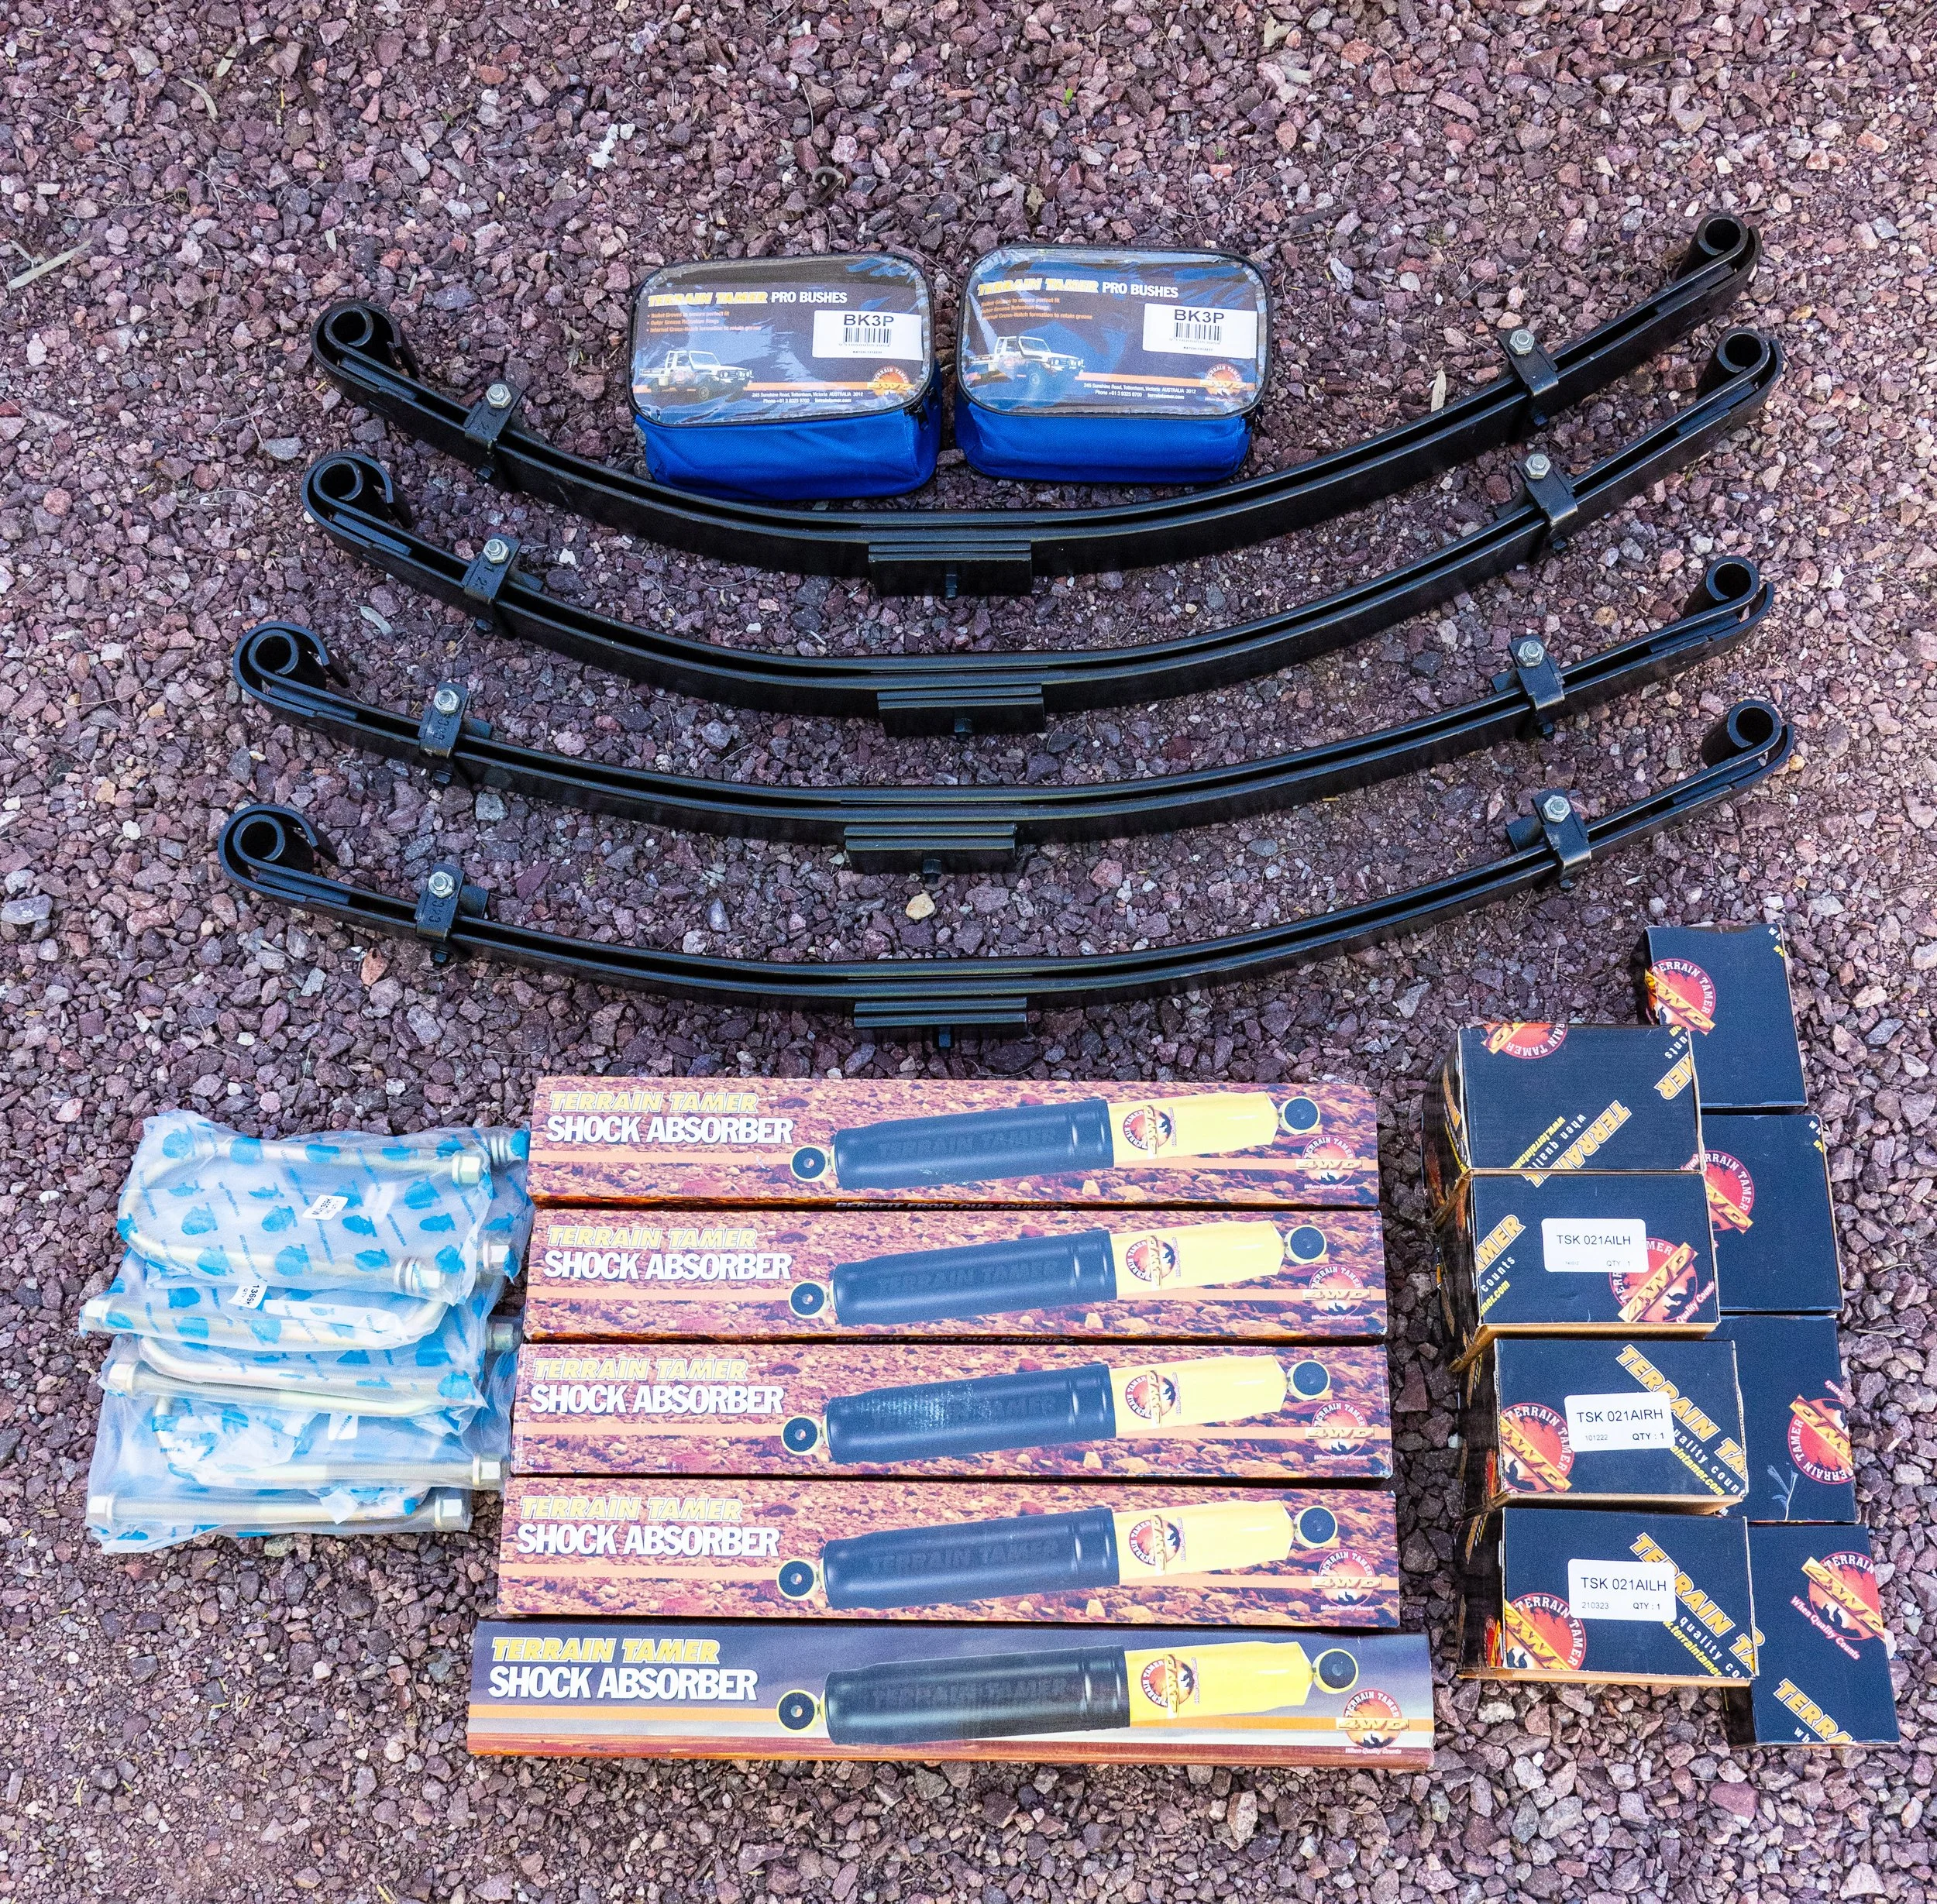
In the article, I lamented the lack of parabolic spring kits for the 40-series Land Cruisers, and particularly the FJ/BJ40. To my surprise (and embarrassment), a few weeks later I received an email from the owner of Terrain Tamer suspension, in Australia—a company I had actually referenced in the article. The email read, “I saw your article on parabolic springs. We manufacture a kit for the FJ40 and can ship to the U.S. I’d like to send you one and have you review it.”
Well . . . okay!
The kit arrived at our commercial mail depot while we were driving from Alaska to Tucson, so our friend Brian generously picked it up and stored it until we arrived. When I retrieved everything from his house, two things were immediately apparent: first, this is a comprehensive kit, comprising springs, shocks, a steering damper, shackles, and bushings. Second, parabolic springs are astonishingly lighter than conventional leaf springs. I’m looking forward to weighing the springs now on our FJ40 and comparing.
I’ll be documenting the conversion process in depth, first measuring ride height, compliance (RTI), handling, and subjective ride comfort. There’s little reason to doubt that the Terrain Tamer kit will transform the ride and compliance of the FJ40, while potentially removing well over a hundred pounds of unsprung weight.
Terrain Tamer is here. The full kit, at the current (extremely favorable) exchange rate, is only $1,625, although shipping will of course add a good chunk. But short of a multi-thousand-dollar bespoke coil-spring conversion, there’s nothing that will do more for the ride of a 40-series Land Cruiser.
Time for split rims to roll into the sunset
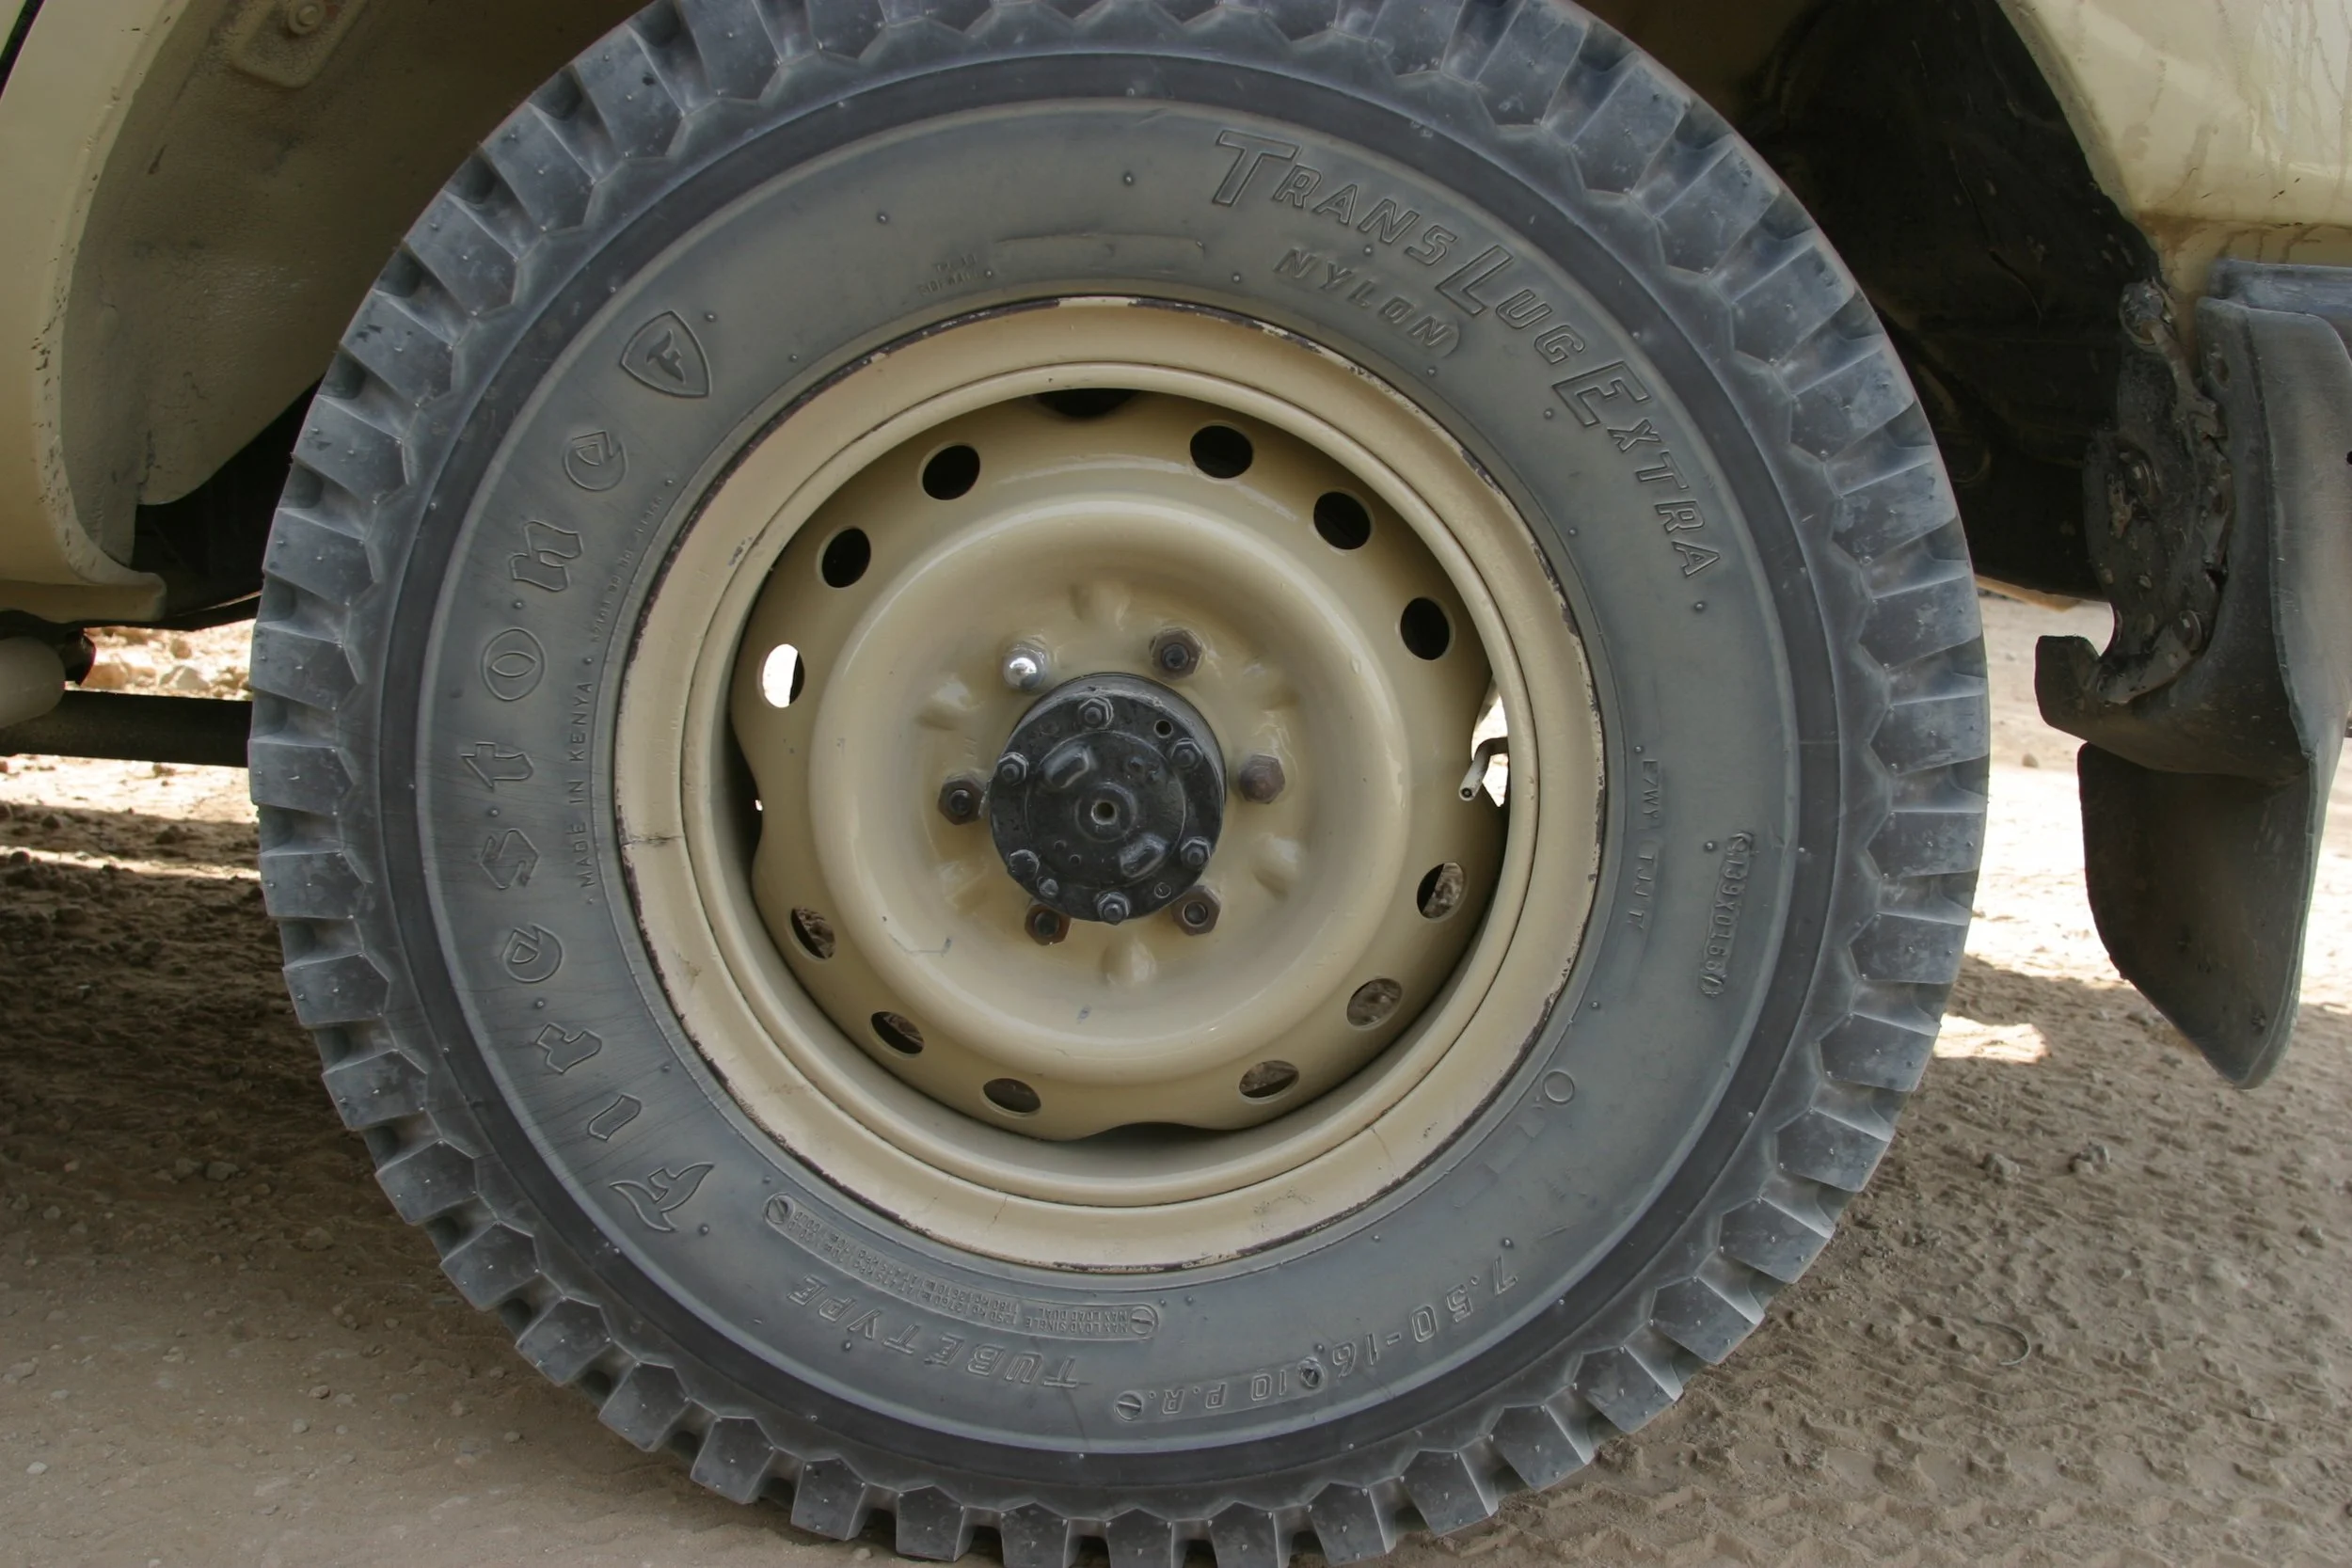
I’m astonished at how often I still read posts on various forums from those who want to swap out their tubeless tires and wheels for split rims and tubed tires. The rationale is all about the romantic aura that still clings to split rims—often glued there by those who still sell them. They’re “Heavy duty.” “Made for serious expedition use.” “You can repair and replace your tires in the bush!”
Is there substance behind the legend?
Let me put it this way: Swapping your tubeless tires and wheels for split rims and tubes because “You can changes tires in the bush!” makes as much sense as throwing away your electronic ignition system and installing a points-style distributor because you can set the gap with a matchbook cover. Or ditching your fuel injection for a carburetor because if your fuel pump goes out you can gravity-feed gas to the carb from a jerry can on the roof. Both quite true of course, but simply impractical—and unnecessary—given the reliability of modern ignition and fuel supply systems, which are actually far more trouble- and maintenance-free than their predecessors.
Let me explain why you neither want nor need to run split rims to be completely self-sufficient in terms of tire repair in the remotest regions on the planet.
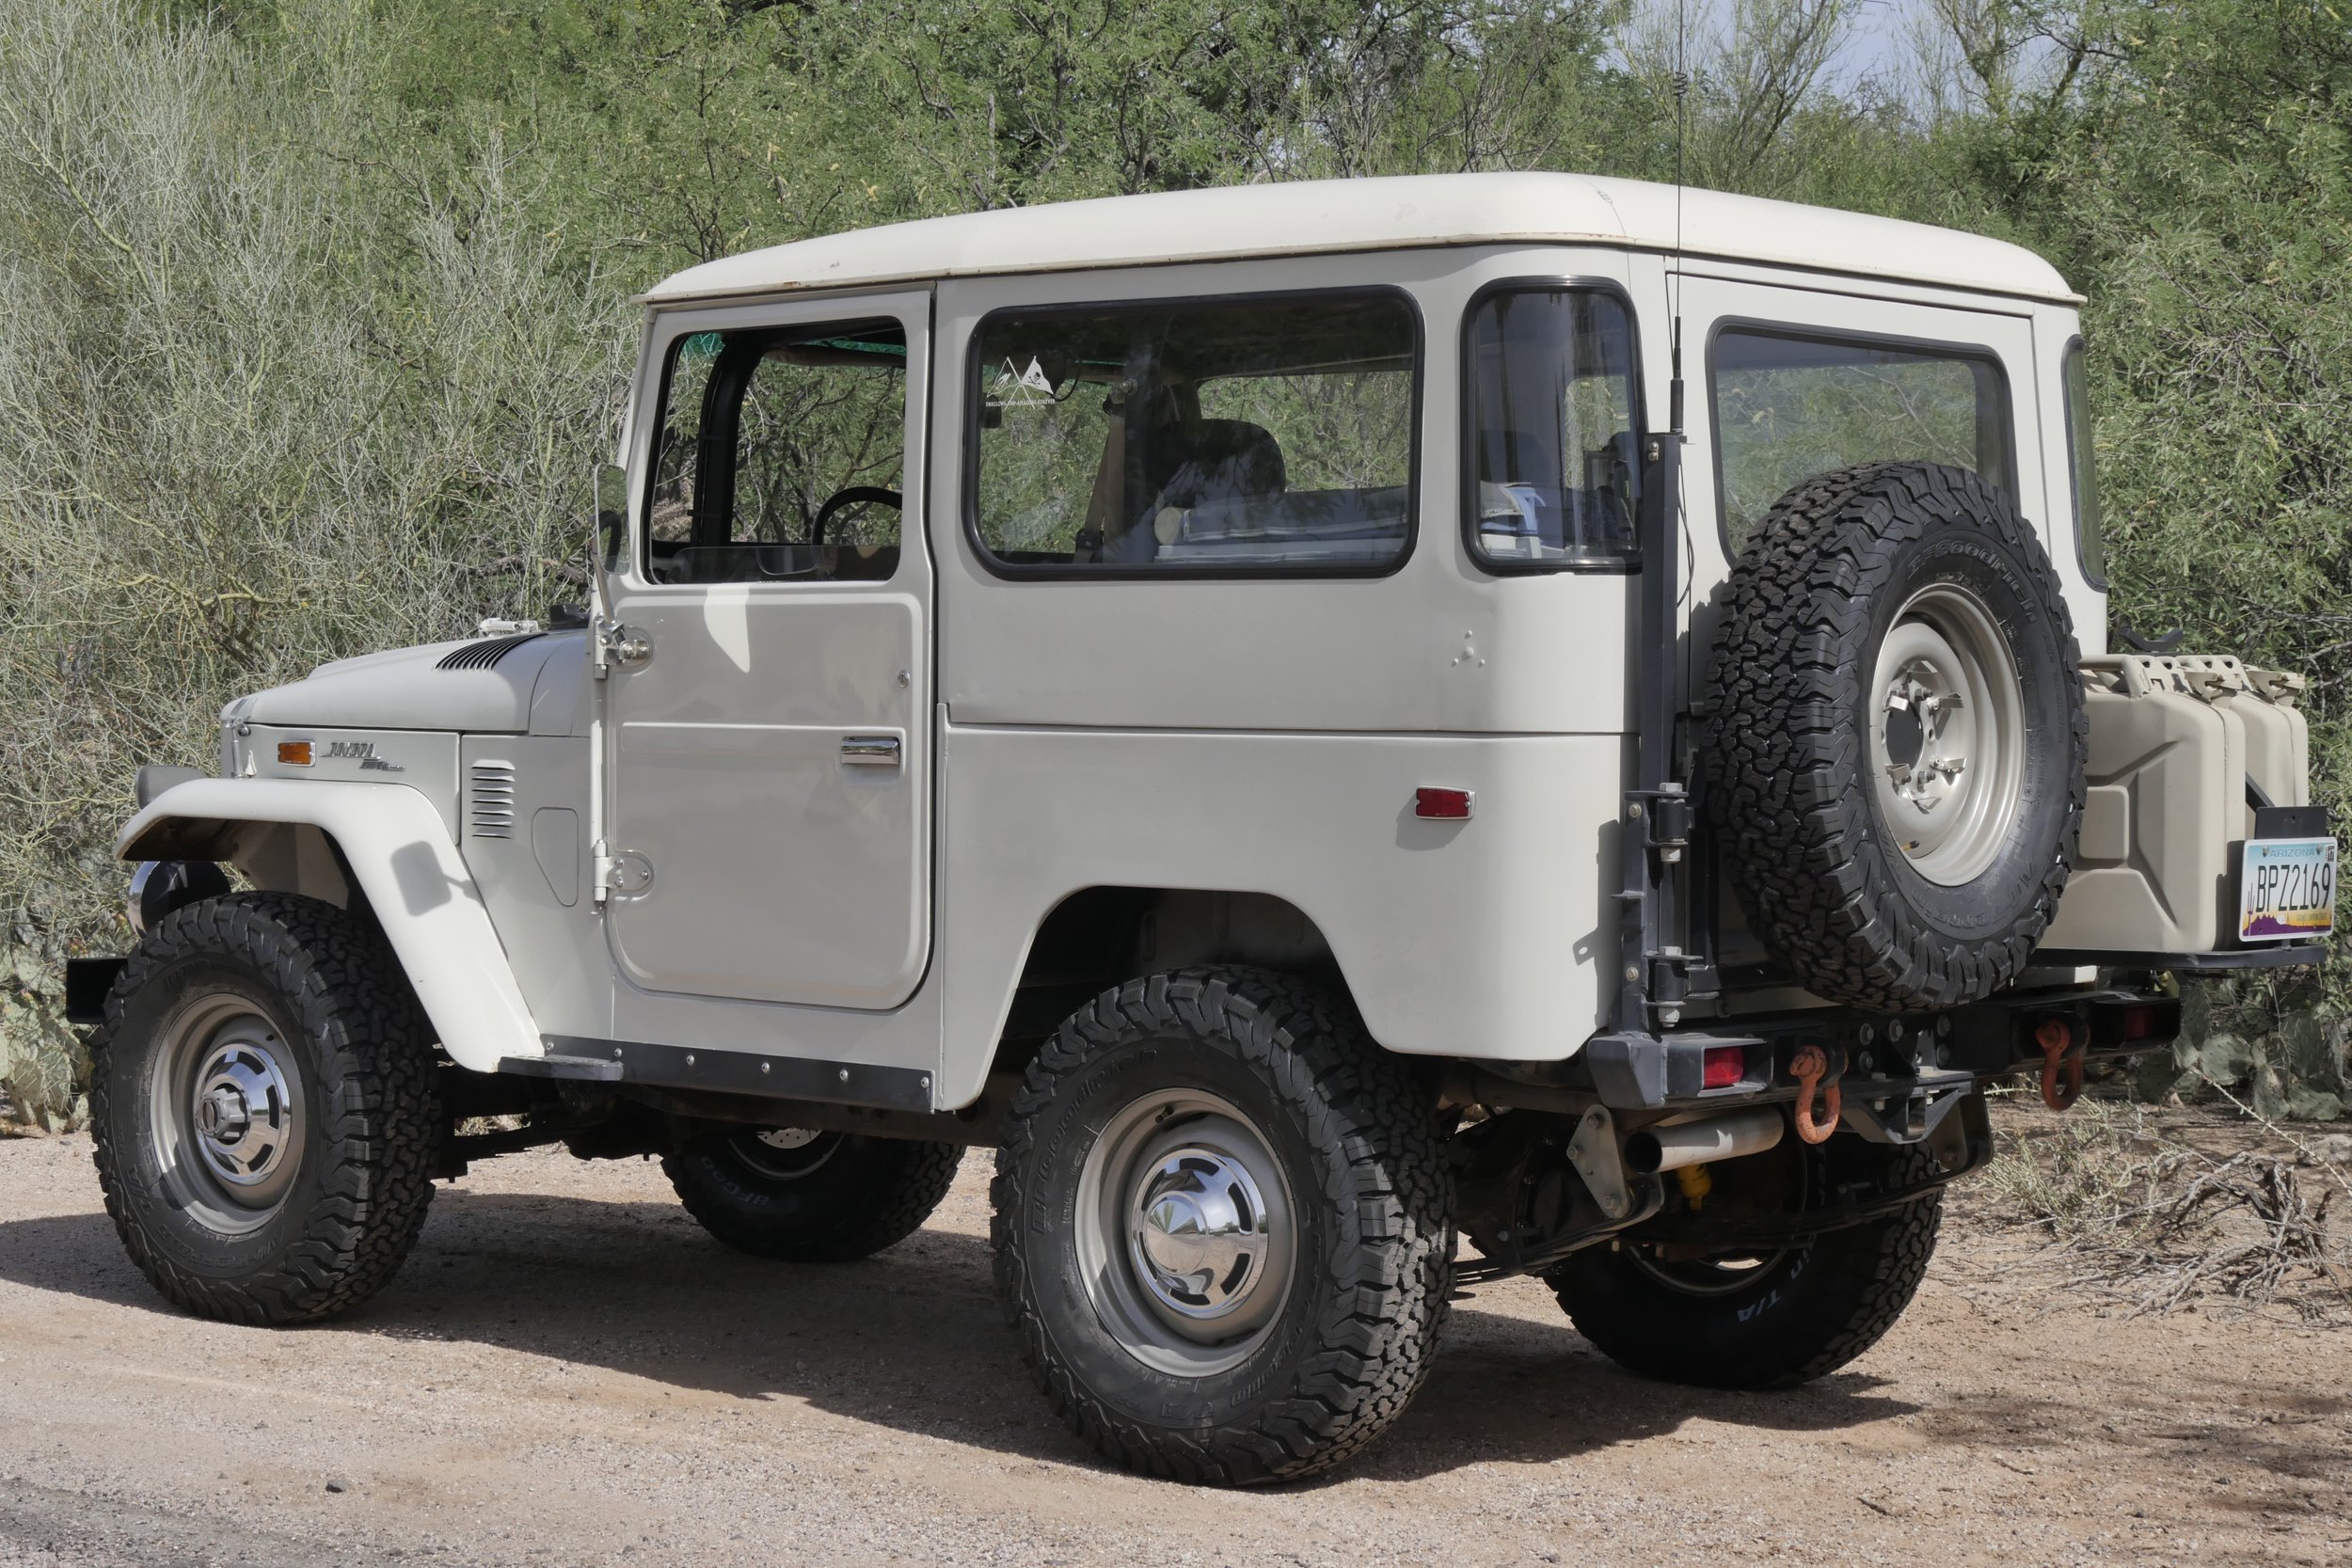
I learned the hard way. In the 1990s I ran a sea kayak touring business in Mexico’s Gulf of California, using my FJ40 as the guide vehicle. I had no crew; it was just me and the Land Cruiser leading clients in their own vehicles to sometimes extremely remote beaches on the mainland and Baja Californian side of the gulf. I towed a home-built trailer that carried up to six kayaks, plus all the gear, food, and water we’d need. Obviously it was critical that my transport be faultlessly reliable to avoid the possibility of ruining the vacations of a half-dozen people—and having to refund a substantial chunk of money. I had complete confidence in the Land Cruiser although it already had more than 200,000 miles on it. What worried me were two things: the battery and the tires. At that time I was not aware of either dual-battery systems or tire plug kits, so I relied on the best battery I could find, and was a very early adopter of the Optima AGM. But for tires all I knew was the spare—and Roseann and I had experienced one epic 24 hours when we had a puncture in one tire on the way to a study site on the gulf 350 miles from home, and discovered a slow leak in another when we reached our camp after sunset. The result was a marathon slog back to Tucson in the middle of the night, seeking out open Pemex stations with compressors to top up the leaking tire.
It was around then I remembered reading about split rims and their vaunted repair-anywhere capability. And to my surprise, the local Toyota dealer was able to order a set of factory split rims, 16 x 5.5. I had a set of 235/85 x 16 BFG All-Terrains mounted at the local Pep Boys—the only store in town willing to do so. I bought a set of tire irons and practiced removing and replacing tires until I could complete the entire procedure in less than 20 minutes (not counting any time to repair a tube). I carried a cheap compressor and a bicycle tire pump as backup. I figured my tire worries were behind me.
And, after a fashion, they were.
Let me digress here to discount a myth. The Toyota-style split rim, a two-piece wheel comprising the main body of the wheel and a separate, spring-steel retaining ring on the outside edge, is completely, utterly safe to work on with hand tools. With the tire deflated there is scant tension on the retaining ring, and it is easy to pry off with irons. Re-installing it is a simple matter of tucking one free end under the edge of the rim, then stomping the perimeter into place. It’s obvious when the ring is correctly placed, and it cannot fly off when re-inflating the tire. You would have to do something really stupid to injure yourself with this style wheel. (Toyota Gibraltar Stockholdings has an excellent video on the procedure, here.) However, they are heavy. I never weighed mine, but I noticed a definite diminution in ride comfort—astonishing given the normal state of “ride comfort” in an FJ40.
Back to the field. Indeed, I proved my ability to repair punctures anywhere. Clients were impressed with the procedure—at least the first time. But there were problems. First, any puncture necessitated a complete breakdown of the assembly to patch the tube. Small nails, which might remain in a tubeless tire for days with little loss of air, immediately deflated the tube because the nail squirmed around in the tube as the tire rolled, enlarging the hole. I experienced significantly more flats with tubed tires than I had with tubeless tires. In addition, I had recently learned about the benefits of airing down for driving in soft sand—and at the same time was warned about doing so with tubed tires, due to the danger of the tire moving on the rim enough to shear off the valve stem. Tube-type tire beads do not grip the rim like those on tubeless tires, which require a tight bead seal to hold in air. Tube-type tires are held in place largely by the outward pressure of the inflated tube. My Land Cruiser’s ability to cope with Mexican beach sand was hampered by my fear of airing down below 25 psi or so.
Worse was to come, again as a result of my—and Pep Boys’—ignorance. They had sold me standard, tubeless BFGs. I didn’t think anything of it, but later I learned why there are tires specifically designated “tube type.” Tubeless tires are left with a rough interior finish, which if installed with tubes abrades them quickly. Tube-type tires are finished inside to avoid this. A little over a year into my time with split rims I experienced two catastrophic blowouts close to each other. I was alarmed at the first one but didn’t suspect a proximate cause until the second. Some pre-Google research revealed the issue.
By that time I had had enough. In the intervening year I’d learned about plug kits, with which I could repair at least 90 percent of the punctures I’d experienced in a couple minutes, without even removing the wheel from the vehicle. But plug kits, of course, are useless on tubed tires. So I sold my romantic, evocative, “heavy-duty, expedition-ready” split rims and went back to standard rims and tubeless tires. Shortly thereafter I heard about the Australian-made Tyreplier, which makes easy work of breaking the bead on a tubeless rim, and I learned how to re-seat a bead on a tubeless tire. I could now, if necessary, completely break down a one-piece wheel and tire just as I had with the split rim.
Using Tyrepliers to break the bead on a tubeless tire and wheel, prior to demounting.
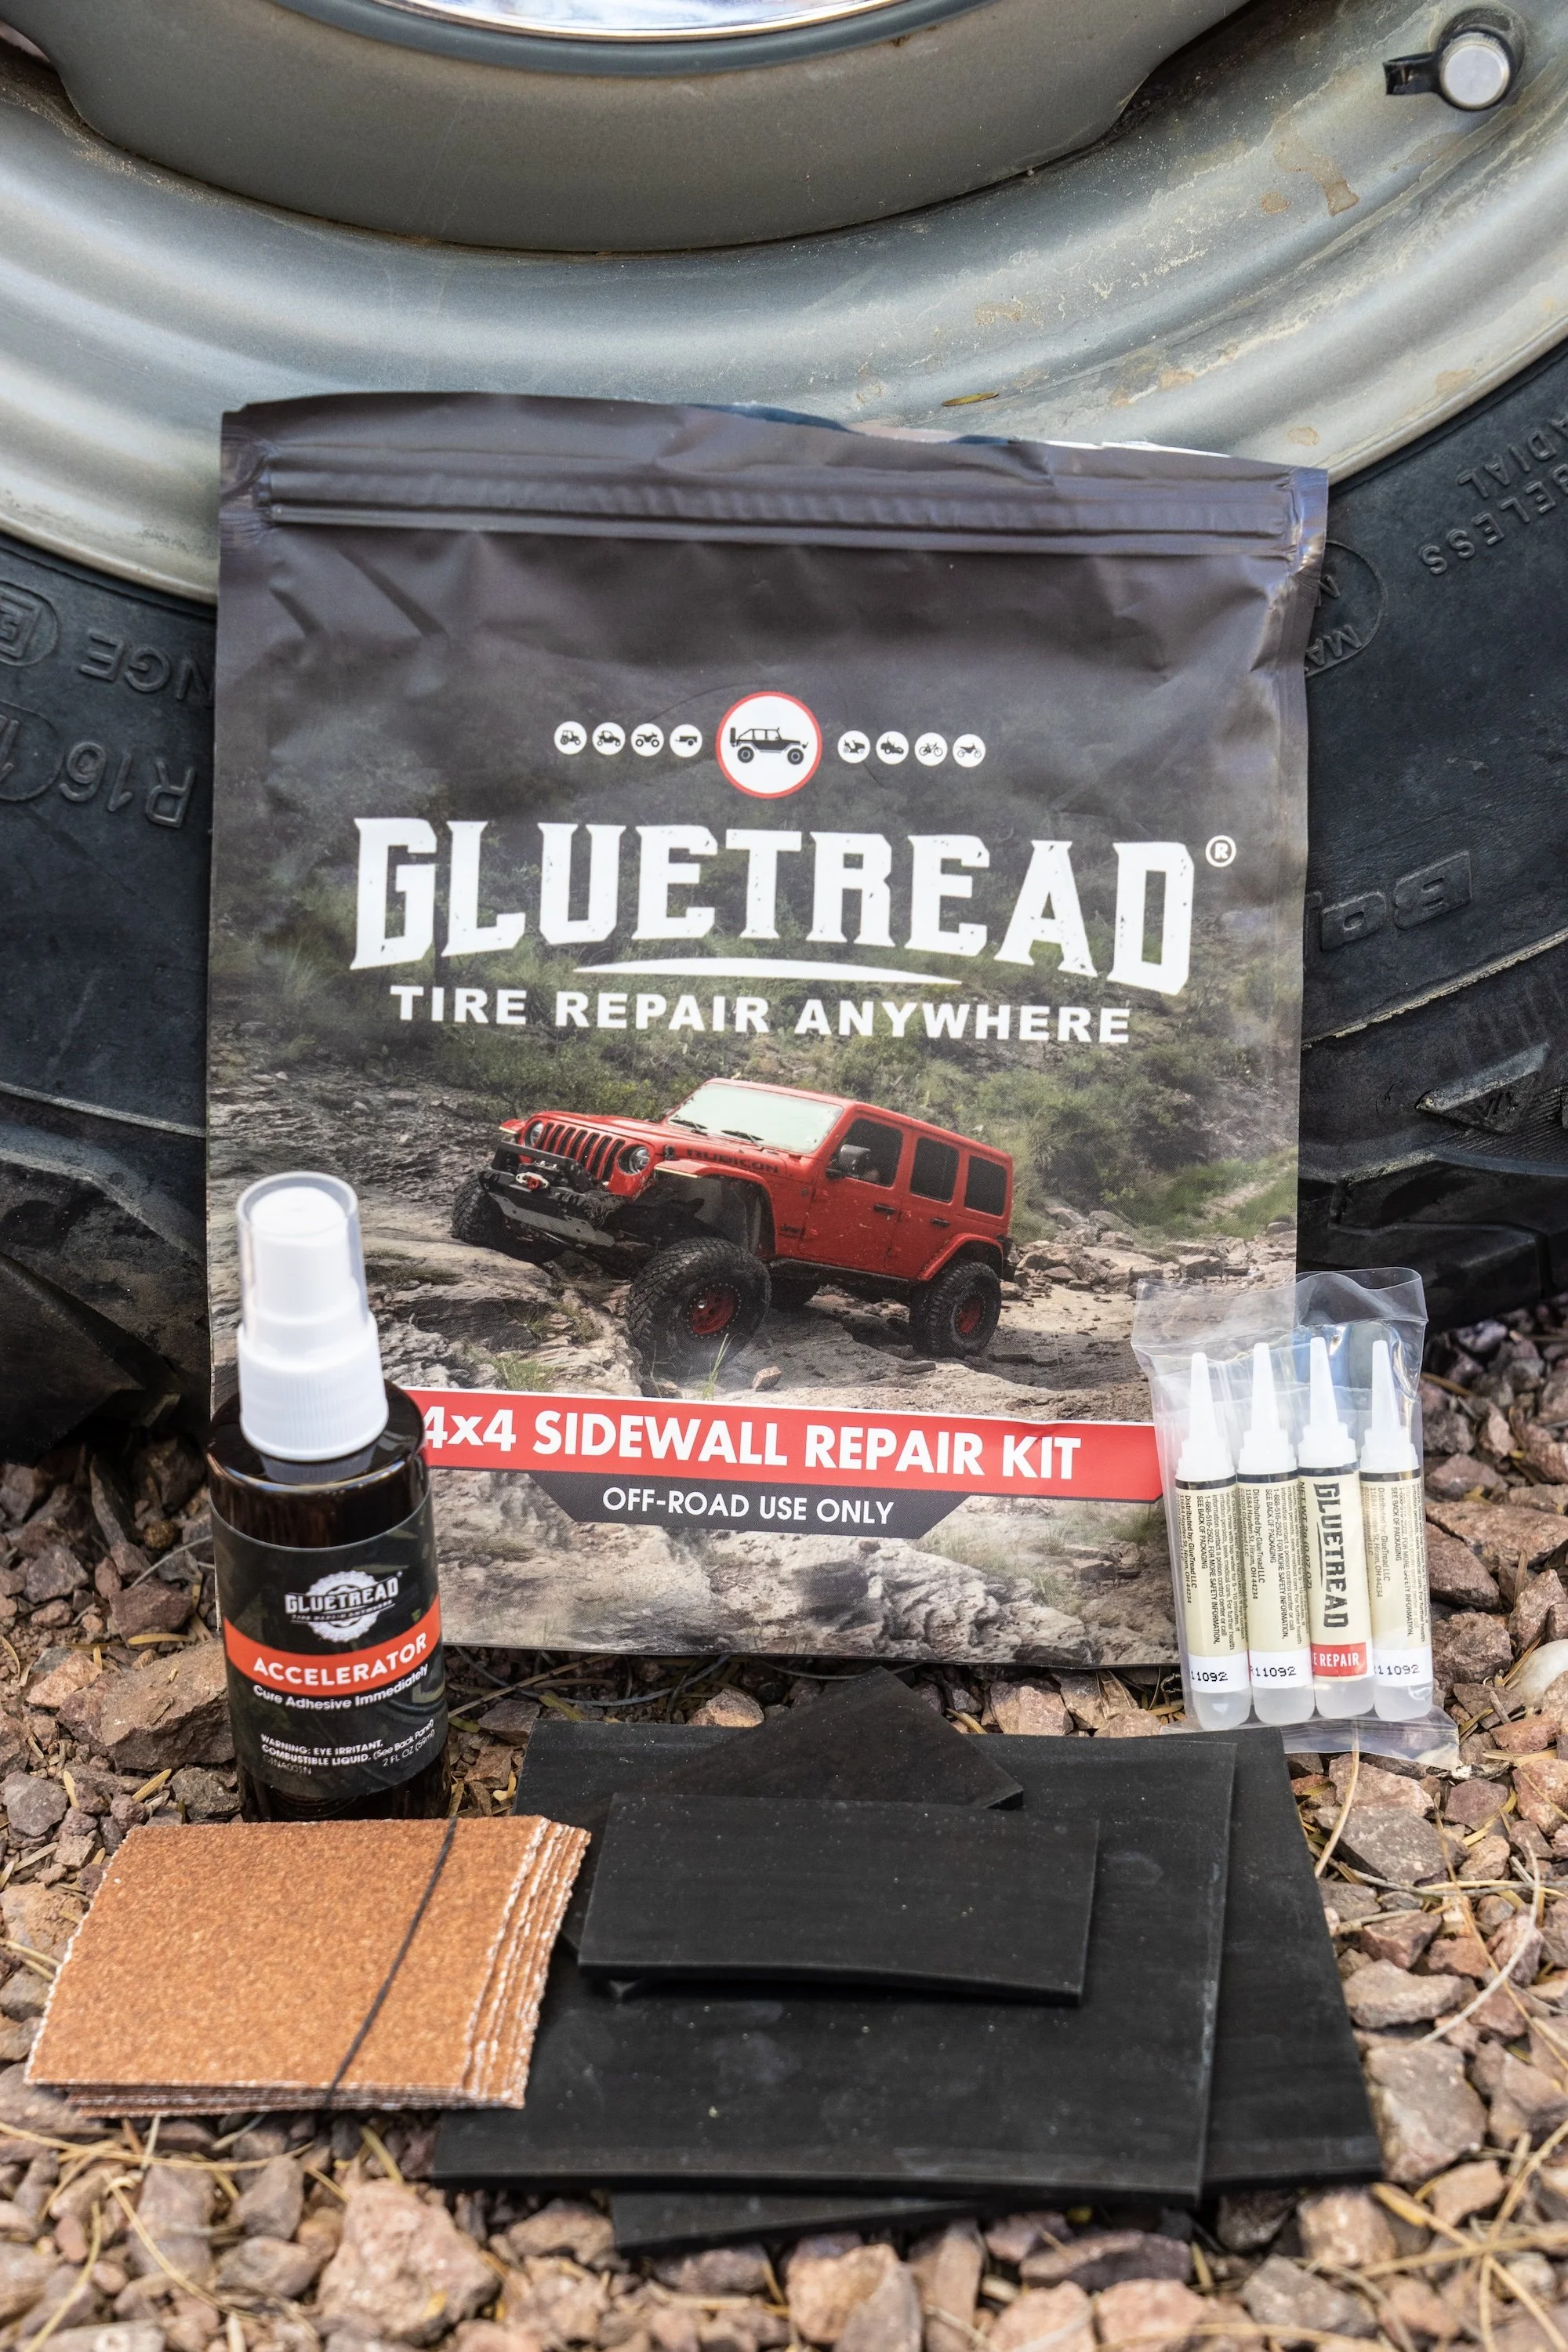
More recently, the Glue Tread kit enables temporary exterior sidewall repairs on tubeless tires that formerly would have required demounting.
(There was one follow-on from this experiment with split rims. I’d learned to love the 235/85 x 16 tire size, and in another few years discovered City Racer’s 16-inch wheels, which are the perfect width for that tire and come complete with clips for the stock FJ40 hub caps.)
One-piece wheels from City Racer facilitate fitting of tubeless 235/85-16 All-Terrains.
Some of you might be wondering: If this is all true, why do so many African Land Cruisers and Land Rovers still run split rims? And why does Toyota Gibraltar Stockholdings, which supplies new Land Cruisers to aid agencies all over the world, still equip their vehicles with split rims?
I have a couple of theories. First, I’ve driven many thousands of miles in split-rim-equipped Land Cruisers in East Africa and never suffered a puncture, I think for two reasons. First, the tires on these vehicles are typically heavy-duty bias-ply models, usually with a ten-ply rating, not oriented toward benign road manners. They simply shrug off most thorns. Second, there are vanishingly few random nails and screws left lying on the backroads of Africa—they’re simply too valuable there.
The second theory applies to Toyota Gibraltar Stockholdings vehicles as well as the African rentals. These vehicles are used in places that don’t have tire shops with the big powered removal stands you see the guys in Discount Tire using to remove or install a tubeless tire in seconds. Instead they are probably operating out of camps or bases where new tires arrive in a stack on a truck or transport aircraft and must be installed on site. And while, as I mentioned, it’s perfectly possible to completely remove a tubeless tire from a one-piece rim with hand tools and replace it again, it’s far faster and easier with a split rim and a tubed tire—refer again to that video above.
I had fun learning how to manage split rim wheels and tubed tires. I’m happy to have the skill while driving in Africa, even though I have yet to need it. But I wouldn’t dream of reverting to split rims on any of my own vehicles.
Edit: I was taken to task by a friend and stickler on such things for using the generic term “split rim.” To be precise, a true split rim is a wheel that is bolted together in two vertical halves. The type of wheel we’re discussing here is technically a “retaining ring” or “split ring” wheel, in which only the outer, bead-retaining ring is removable.
The best spout for the NATO jerry can
Most readers here are aware of my strong preference—some might say worship—for the NATO-style steel fuel container over the various plastic alternatives. (Please read this and this.) If asked to justify my choice in five seconds or less, I’d just point to this photo of a friend’s British MOD (Ministry of Defense) can, marked with its date of manufacture—1966—and still perfectly usable. Do you think any plastic fuel containers will still be usable in 60 years? Nope—they’ll all be taking up landfill space.
One of the many advantages of the genuine NATO can is how quickly it decants, thanks largely to an effective breather tube that siphons air into the can as fuel or water pours out. But that advantage can be completely negated by using the wrong spout.
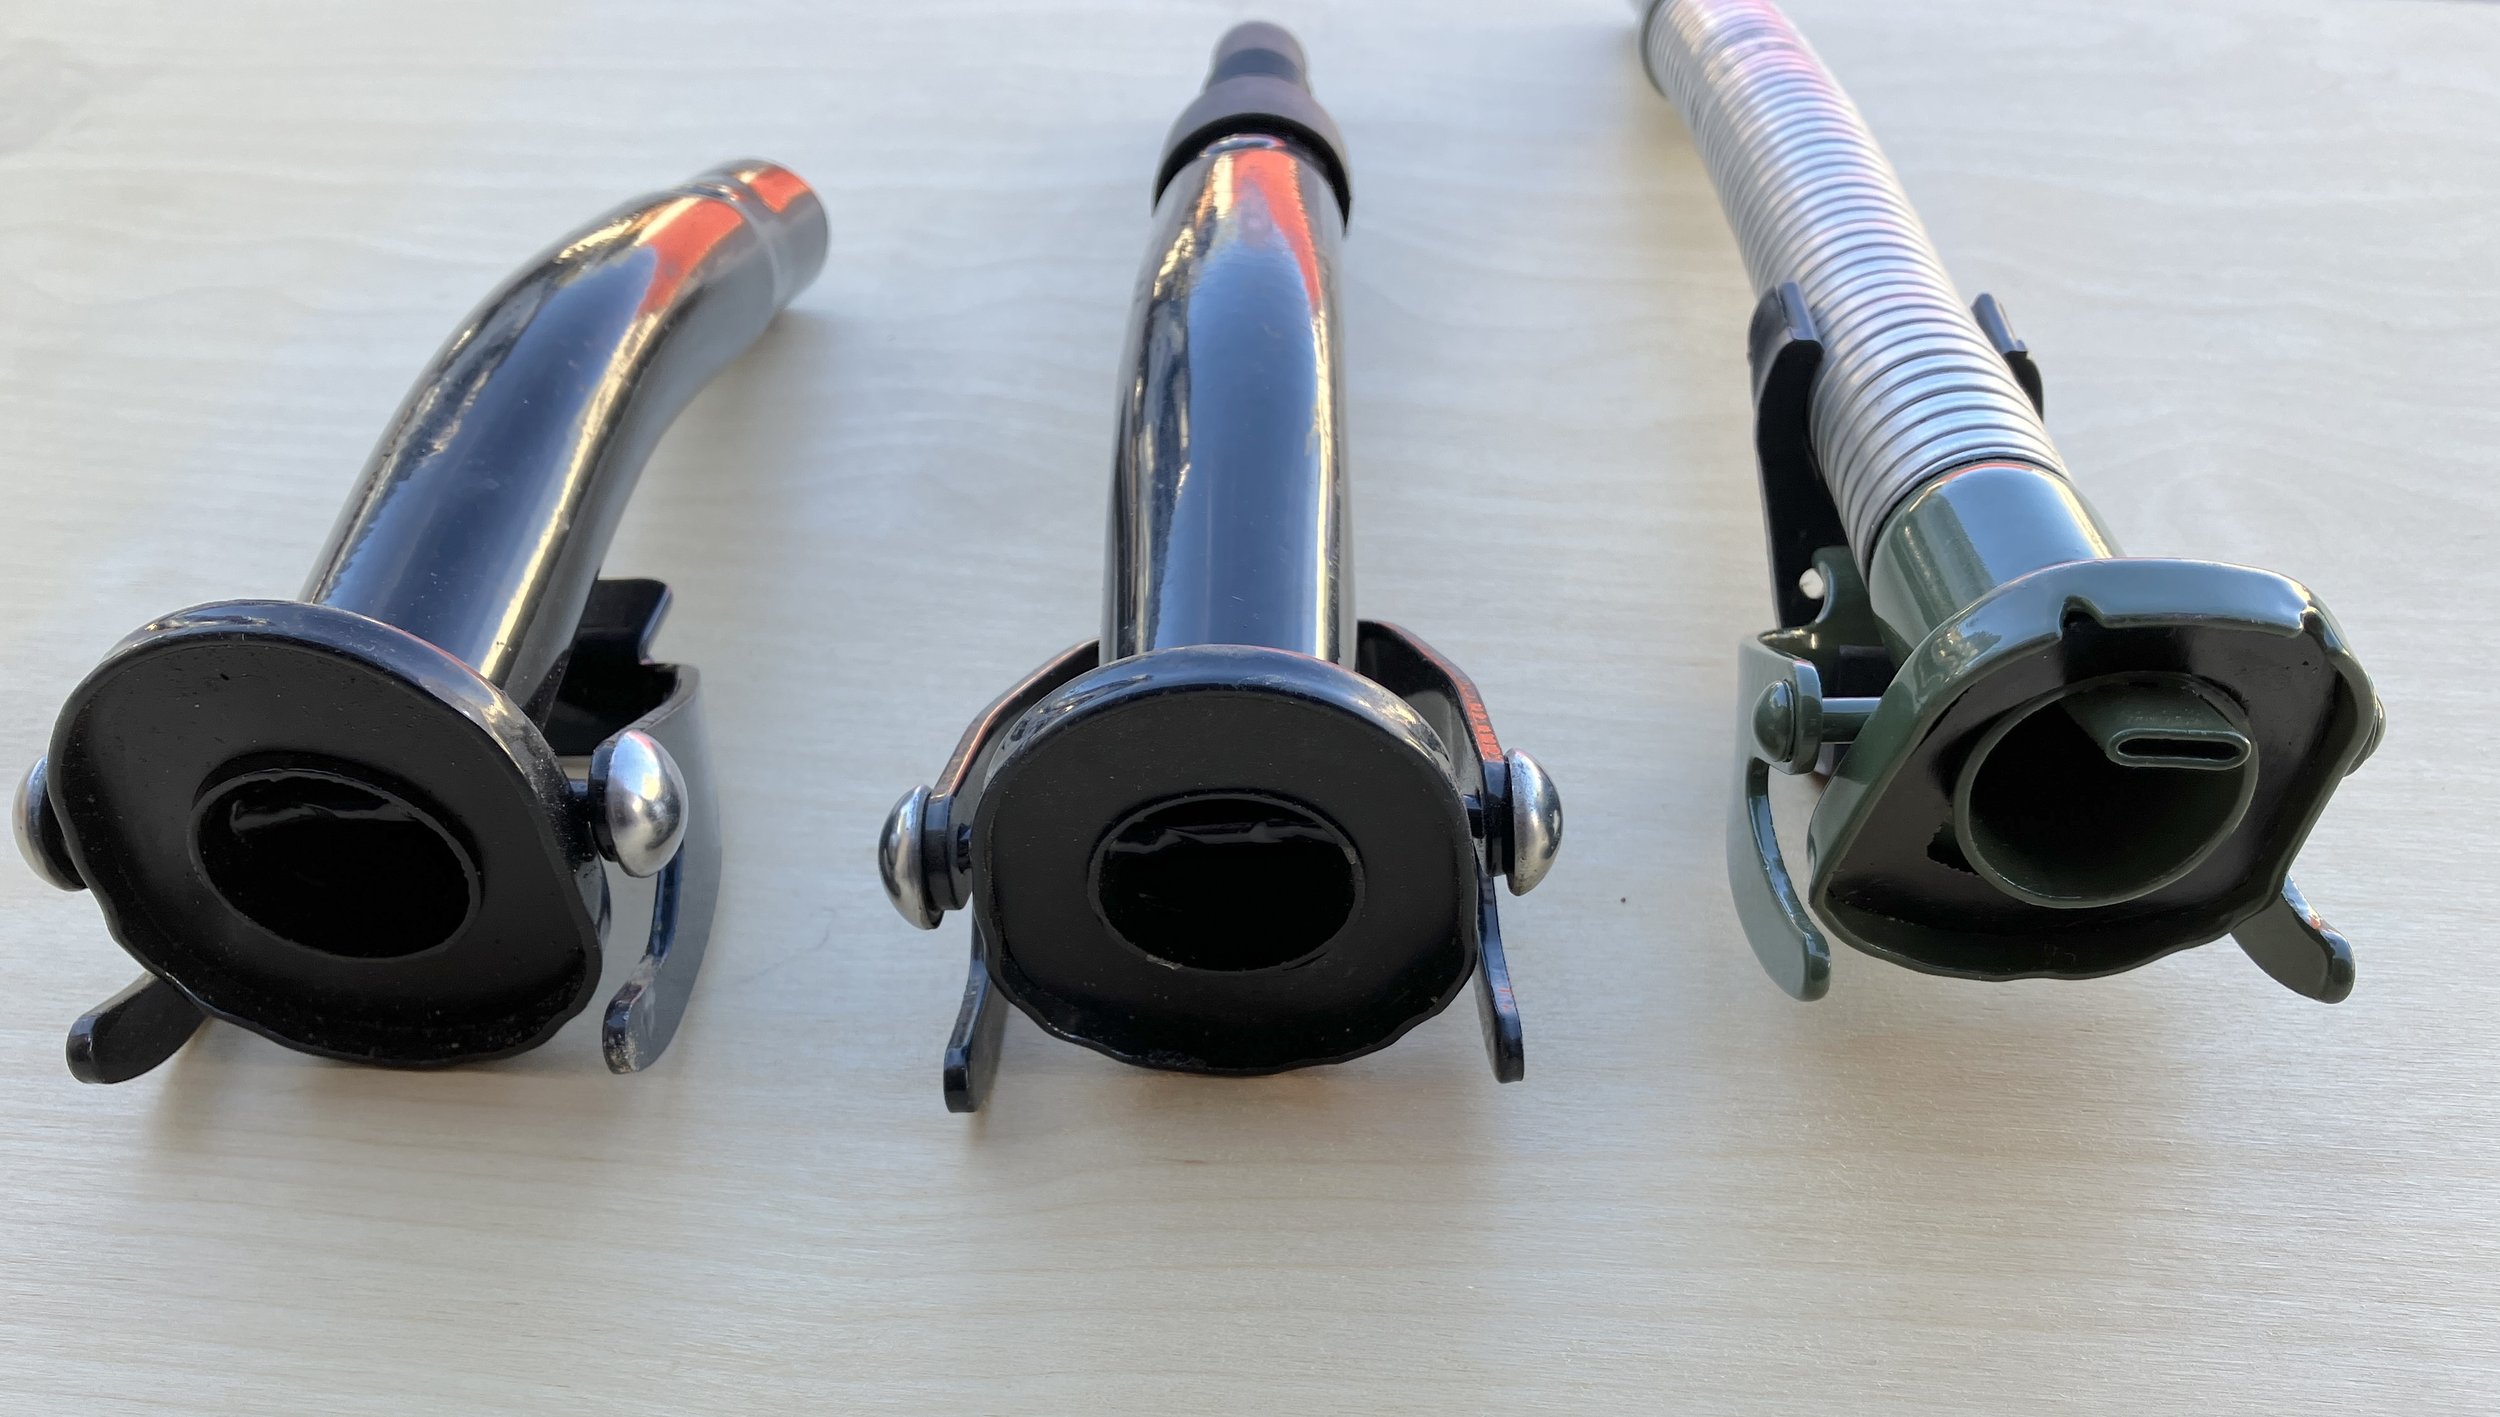
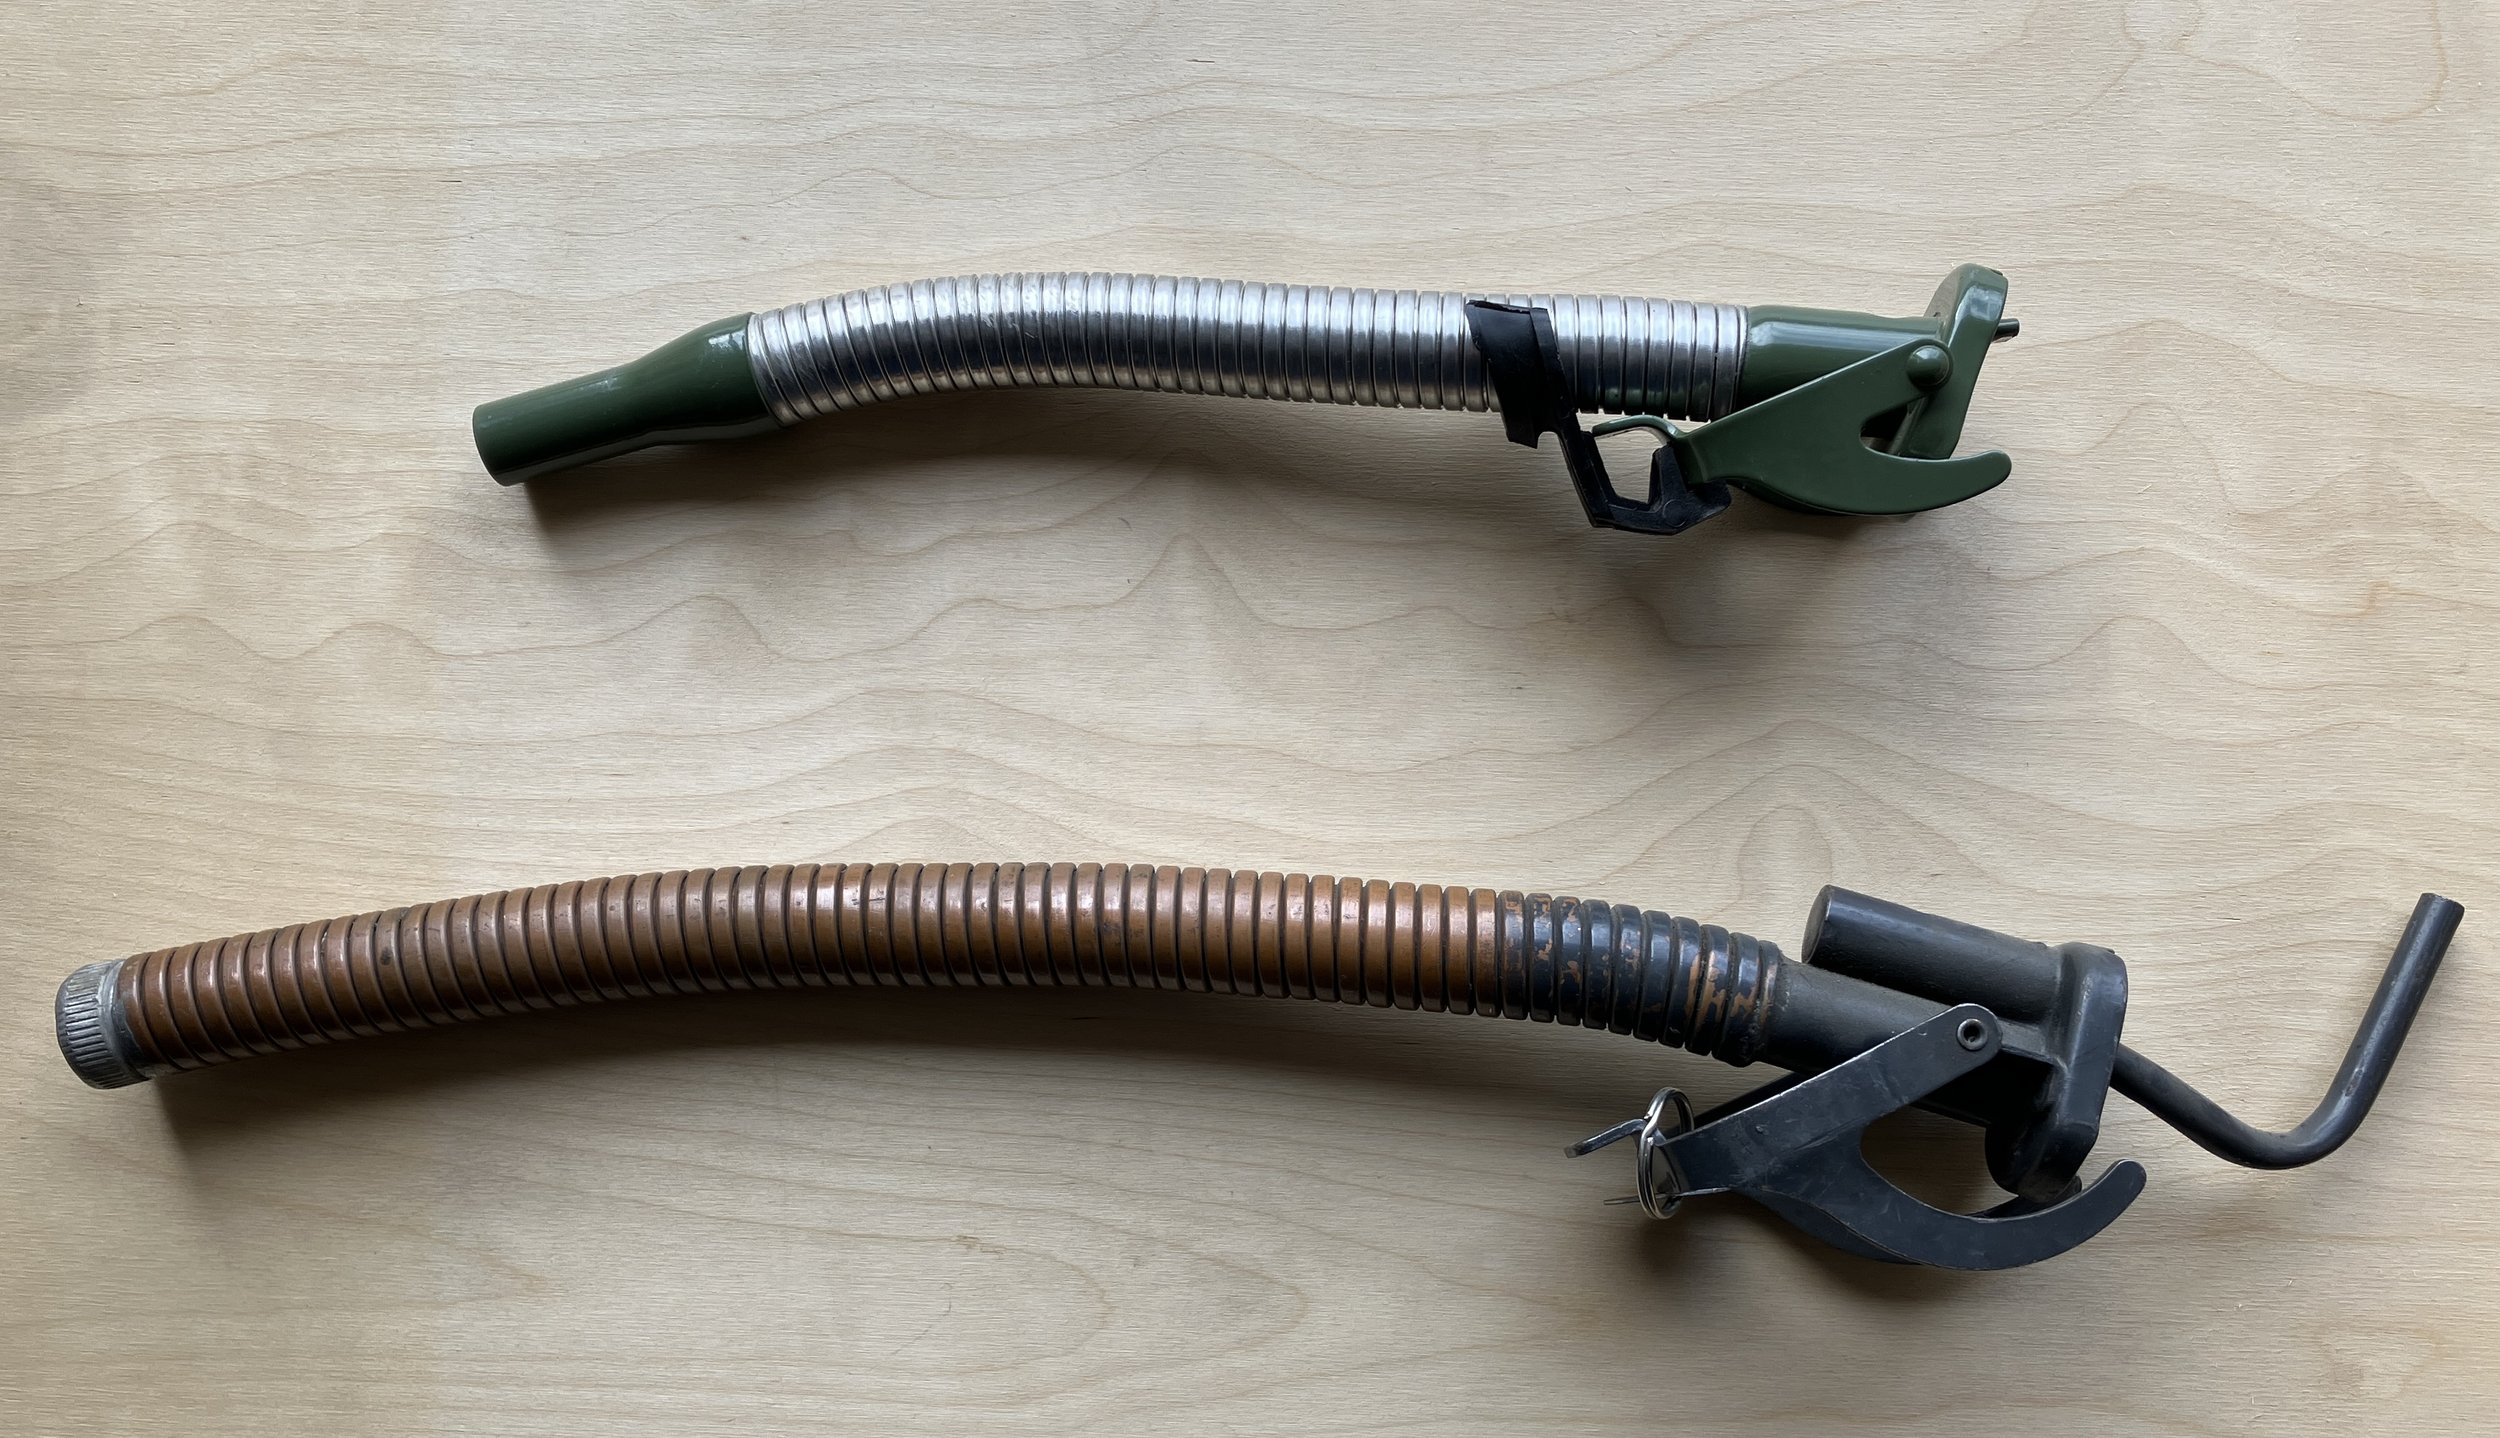
Look at the three spouts shown here—two generic units on top (identical except for the flexible unleaded-friendly extension on one) along with a proper Valpro-made spout.
Notice in the photo below that only the Valpro/NATO spout incorporates the correct breather tube and high-position air intake. The generic units make do with a simple punched hole near the end of the nozzle. (Furthermore, in this sample, the spout on the left wouldn’t even cam closed tightly enough to prevent seepage around the gasket.)
The Valpro includes an excellent, all-metal flexible nozzle with an unleaded-filler-compatible tip. Its cam secures perfectly, and the included rubber clip secures the cam from rattling when stored.
Wavian makes an excellent spout as well, functionally identical to the Valpro, although I’m not fond of the flexible plastic end piece. Chalk that to personal preference.
Wavian also produces a push-to-pour “safety” spout if your local laws require one.
There is, however, another spout—one that some consider the Holy Grail of NATO can spouts. It was made for the Swiss Army, and incorporates a significantly extended breather tube and a larger intake plenum. Legend has it these will empty a full 20-liter jerry can in under 20 seconds. Here’s one with the Valpro spout. The Swiss unit is significantly bulkier, and the nozzle—solid copper to reduce the risk of sparking—is too large for the standard unleaded fuel tank filler, although I know of people who have hacked them to fit.
I decided to put them all to the test.
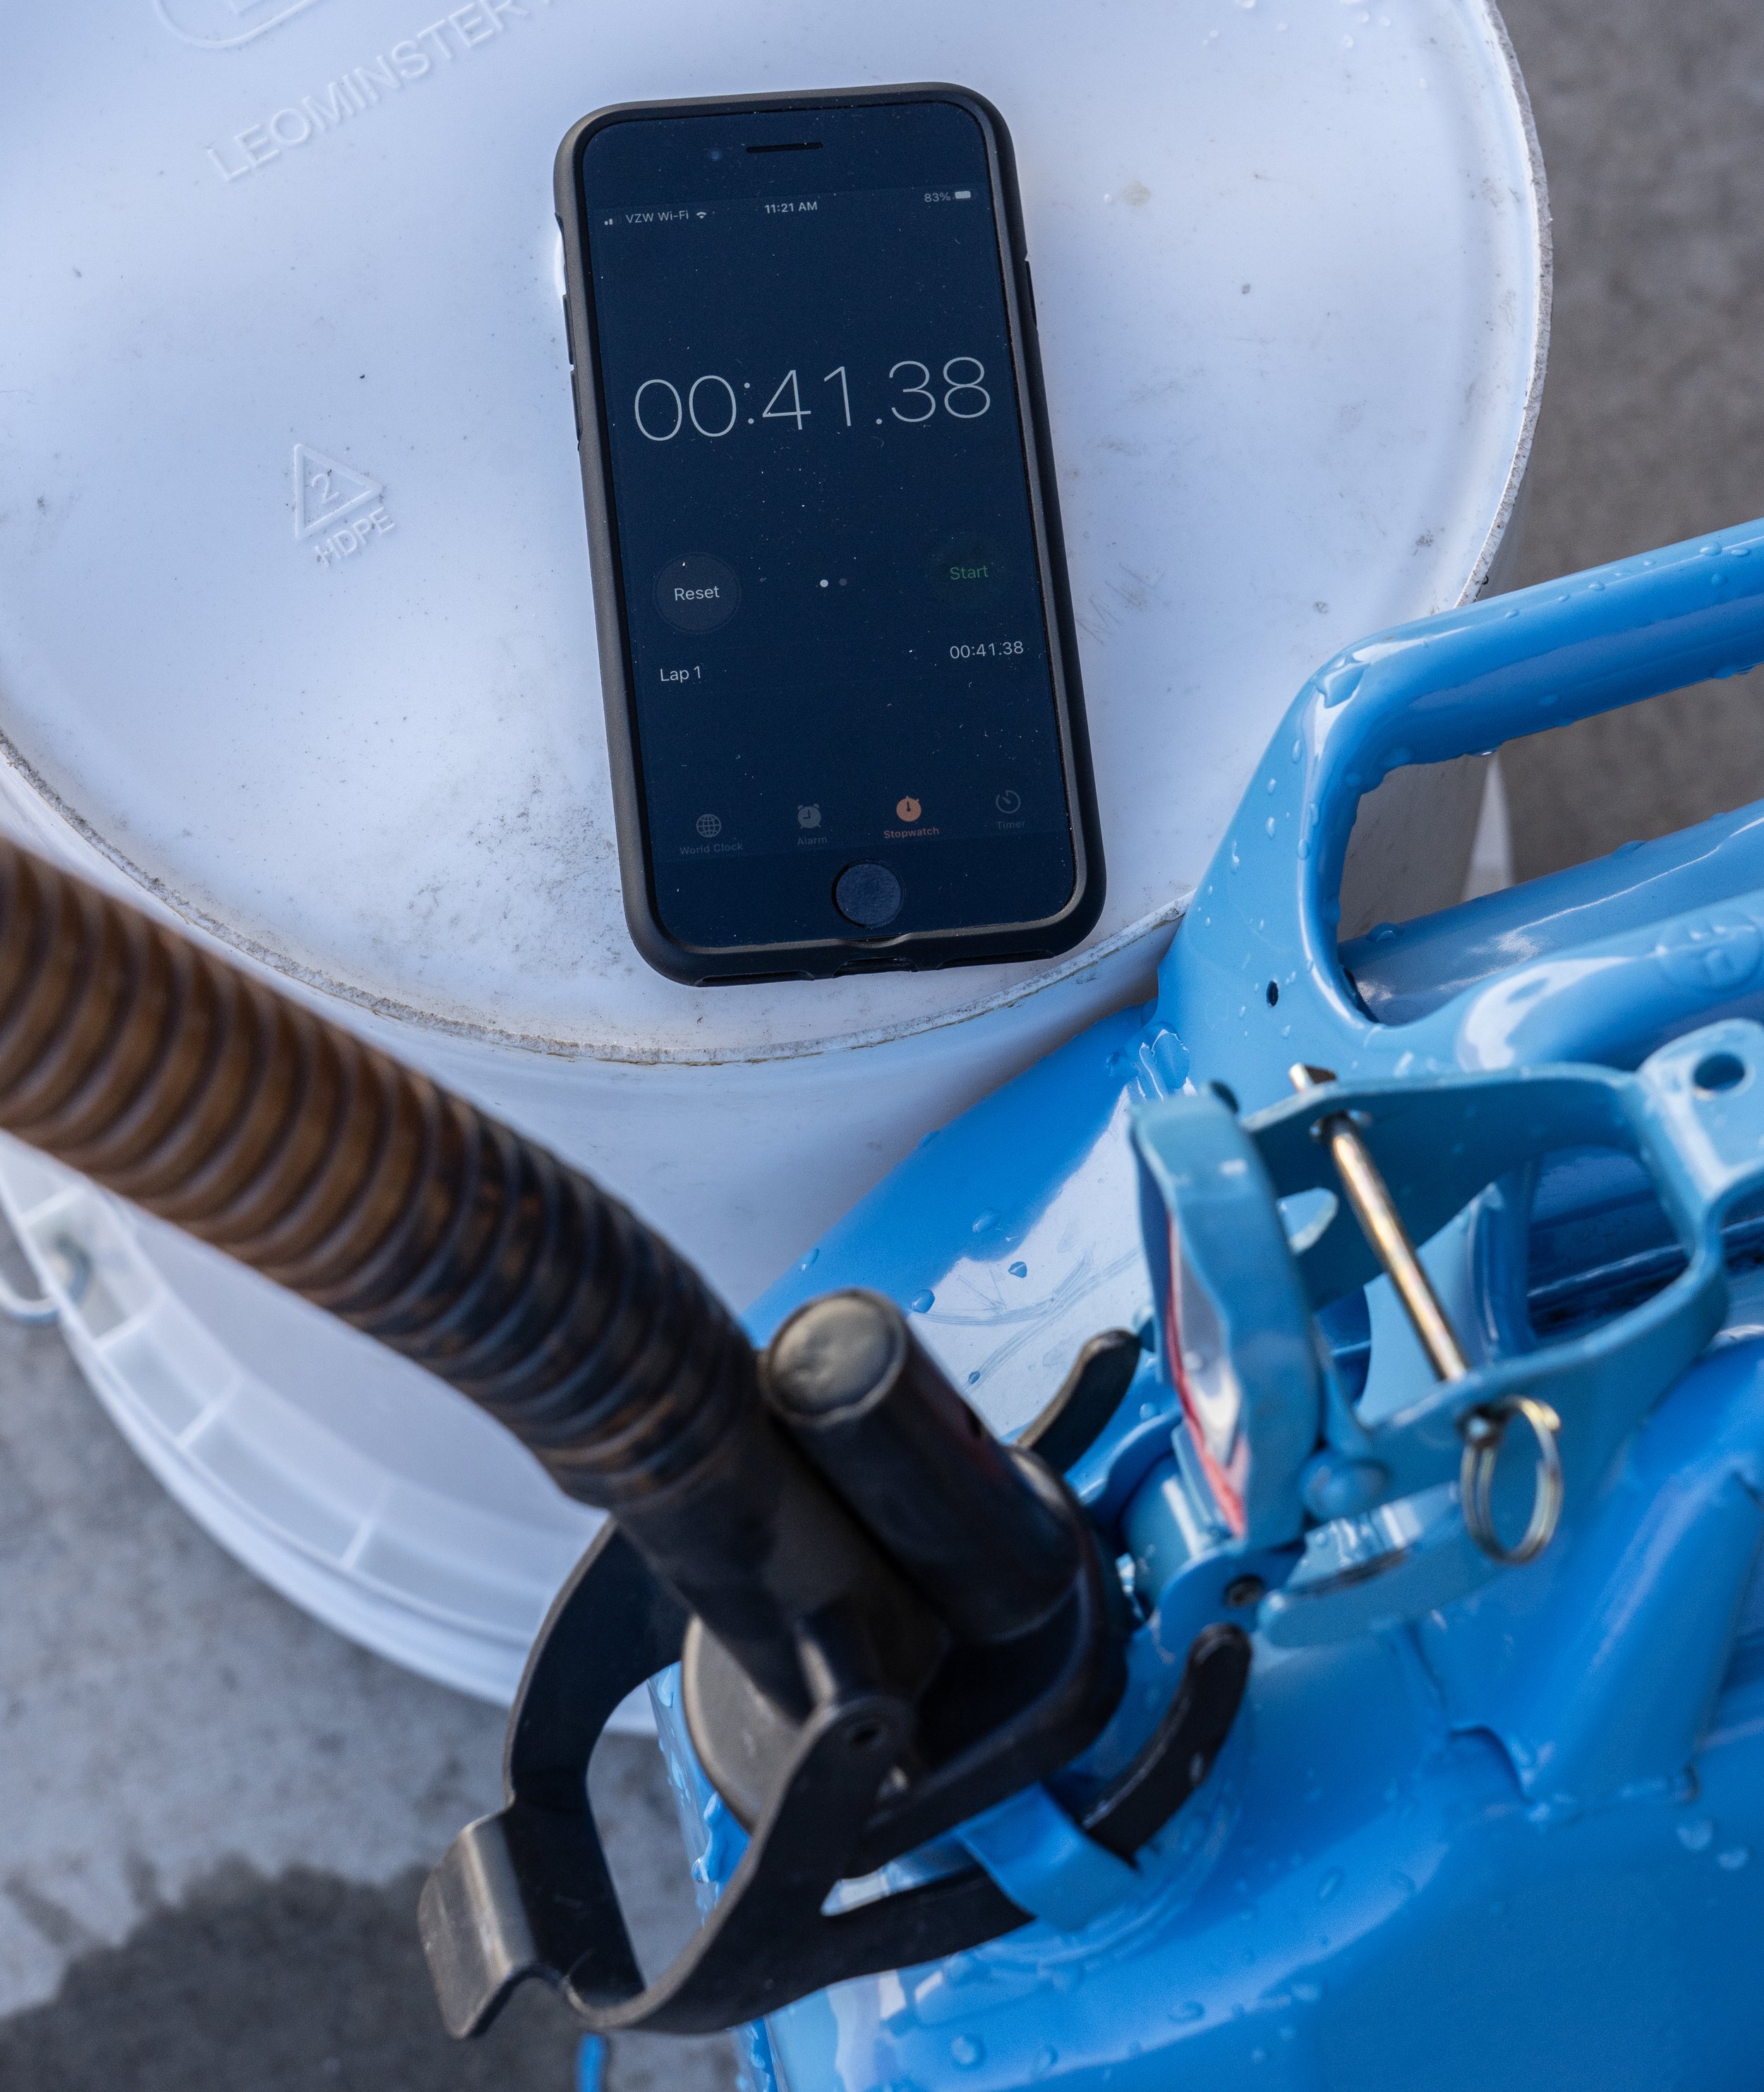
I started with the Valpro, which along with the Wavian is the high-quality standard. I timed how long it took to empty a full 20-liter water can into another can. In 52 seconds, accompanied by enthusiastic gurgling as the breather kept air flowing into the interior, the can was empty—a commendable performance.
Next up was the Swiss Army unit. Its breather seemed to aerate even better, and indeed emptied the can in 41 seconds. Neither the Valpro or the Swiss spout leaked a drop of water through the breather. A second test with each produced results within two seconds of the first.
The Swiss Army spout was definitely the fastest.
And the generic unit? I only tested the one with the flexible spout, since they were otherwise identical aside from the fact that the second one leaked. I tipped up the can and water began flowing, accompanied by an anemic slurping noise from its punched breather—along with steady spatters of water. Had I been decanting fuel instead of water it would have made a significant mess.
As to time: The last drop of water trickled into the second container five minutes and six seconds after I started.
Seriously?
Let’s parse those results. The generic spouts are around $9 on Amazon; the Valpro is $37 or so. The Wavian, with its simpler nozzle, is around $27. No contest there, unless you like the idea of holding up a 40-pound fuel container for five minutes while it slooooowly loses weight.
As to the Swiss spout; while it was about 20 percent faster than the Valpro, the difference between 52 seconds and 41 is not huge in the real world, and demolishes the legend of sub-20-second dump rates. Note, too, that the Swiss spout had the advantage—at least for decanting—of the larger, non-lead-free-friendly nozzle, although I did leave in the (very useful) fine mesh filter in the end, which might have slowed the rate a bit.
Given that the Swiss spout is a genuine unicorn, only appearing for sale now and then through surplus outlets at $60-$75, I think the Valpro (or Wavian) spout is the clear winner on balance of speed and cost.
Now I’ll sit back and wait for the smirky comments from early Land Rover and G-Wagen owners, whose vehicles incorporated cunning extendable filler necks that rendered the use of a spout completely unnecessary. (Looking at you, T.S.)
A thought occurred to test the dump rate of a—shudder—Scepter can. I do own a couple of Scepter cans (which I think are fine for water if miserable for fuel), so I might obtain a spout for one and try it. I’d even test a Blitz can if someone will loan me theirs; I’m not spending money on one.
A gullwing hatch for the Troopy
Considering most of it was overseen from 6,000 miles away, the modifications to our 1993 Troop Carrier significantly exceeded our expectations. Mostly.
The Mulgo pop top conversion, installed at the Expedition Centre in Sydney before we ever saw the vehicle, was exactly what we wanted. Full standing headroom, a full-size drop-down bed, excellent ventilation. The roof was strong enough to walk on, and the modification added just two inches to the Troopy’s stock height. A 100-watt solar panel (which I later upgraded to 200 watts) provided power to the auxiliary battery for the fridge, lights, etc., and a bracket held a pair of MaxTrax.
The extensive internal plywood cabinetry, which Roseann had designed and a provider to the Expedition Centre had built from CAD plans, worked out just as we’d hoped. We still haven’t run out of storage space.
However. As a reasonably proficient carpenter, I was less than satisfied with the quality of the plywood, which appeared to be a better grade of standard five-ply big-box-hardware-outlet stuff. Worse, though, were the numerous nail and screw holes, which had been filled in with badly contrasting white wood putty, even on drawer fronts. Some day I plan to pull the entire unit out and replicate it in Baltic birch, with dovetailed drawers and invisible fasteners. But for now, as I mentioned, it’s perfectly functional.
One spot, though, is worse than the rest. The back of the tall sink cabinet backs up against the big front rear window on the driver’s (i.e. right) side—and it is peppered with nail and screw holes that aren’t even spaced consistently. It made me cringe every time I walked past it.
Ug. Ly.
Fortunately I came up with a solution that was both aesthetically pleasing and practical as well.
There is a bit of clearance between the back of the cabinet and the glass, varying between one and a half and two and a half inches. The plywood offered a tempting place to mount things such as a hatchet, Silky saw, and jack components. And Graham Jackson had recently sent me a link to the German company Explore Glazing, which makes extremely high-quality glass and aluminum gullwing hatches for 70-Series Land Cruisers, as well as for Jeeps, Land Rovers, G-Wagens, and, recently, the Ineos Grenadier. I got back with Graham and we each ordered one—I of course specified solid aluminum to better hide that wood work, even though the glass versions are quite dark.
Graham and I were both impressed with the quality of the hatches when they arrived. He installed his first, and his emails saved me some extra work.
The first task is to remove the factory window, which is not difficult. The hardest part is getting all the butyl sealant off, and I found that Gorilla tape worked very well to peel it off cleanly. Then comes the violent bit: The vertical lips of the 70 Series factory window opening are slightly curved, and the hatch frame is flat. So you need to use something like a short section of 2x4 and a small sledge to pound the edges of the frame reasonably flat. It take some real force (and wincing) since the sheet metal there is doubled. Once that’s done you can line up the hatch frame to drill the mounting holes. The frame uses a thick foam gasket as a seal, so if you haven’t got the window from perfectly flat it won’t matter.
I ran into one issue that was unique to our situation: The very nice pop-out latches of the Explore hatch ran into the back of the cabinet. So I had to drill and cut out two little rectangular holes in the cabinet for clearance. Access for tools was limited, so the openings are not as neat as they could be. I console myself with the thought that they match the rest of the “woodwork.”
With everything in place you can mount the dual hydraulic struts, which hold the hatch open firmly, even in a strong wind. At this point the hatch is usable and, according to the company, “99.9 percent waterproof.” However, they include a tube of Dow Corning 721 with which to caulk around the perimeter of the frame, thus completely sealing it and adding a finished look as well. The instructions say to apply the sealant, then brush the excess with a soap and water solution to remove it. But an email from Graham said, “Don’t do it! It just makes a mess.” So I simply applied the bead very carefully (using a zero-drip caulking gun) to be flush with the edge of the hatch frame, and cleaned the excess with a razor and scrubbing pad once it had cured.
To say I’m happy with the result would be an understatement. No longer do I have to look the other way when I walk past that window. And there was enough area on the cabinet to mount a hatchet, a Silky saw, the Troopy’s jack extensions, and a breaker bar mounted with the correct 21mm socket for the vehicle’s wheel nuts. There’s actually still a bit of space to consider.
If you don’t have an ugly cabinet to cover up, there are at least a couple of alternative functions for the Explore gullwing. If you like the idea of having a few tools quickly available behind the hatch, the company has an optional molle panel that provides ample opportunities for attaching odds and ends. Or, of course, you can simply use the hatch to access items in the interior of the vehicle without the need to open the rear doors and swingaways. One friend with a Troopy installed his fridge where it can be accessed either from the interior when camped with the roof up, or through the hatch for lunches or drinks.
The Explore Glazing hatch is expensive (around $500 plus shipping), but the quality is impeccable.
Explore Glazing is here.
Writing workshop with Roseann and Jonathan Hanson—limited availability
Jonathan and Roseann wrote their way across Australia in 2019.
Do you dream of becoming a full-time freelance writer, or would you just like to write well enough to contribute articles to a specialized magazine devoted to your favorite activity?
Do you have a short story or novel bottled up inside you? A children’s book? Or do you keep a field journal and simply want to record the world around you in a scientifically literate and yet interesting fashion?
Whether your passion is non-fiction travel and adventure writing, long or short-form fiction, journaling, technical, or scientific writing—you can enhance your ability with the guidance of two award-winning authors and editors with over 40 years of experience in those fields.
You’ll learn how to write an effective query, not just a copy of some boilerplate from a writer’s handbook. You’ll learn which queries go straight to the editor’s delete folder, and which get noticed. And you’ll learn how to write engagingly to capture your readers’ attention from the outset.
All this, and in a setting worth a stay on its own: beautiful Aravaipa Ranch, set amongst desert hills next to a perennial stream.
Space is very limited, and tuition with meals begins at just $695.
Please go here for full details. We’re really looking forward to this one.
The last of the last VDEGs—edit: Out of stock!
Edit: We sold out of these last copies in two days. Sorry!
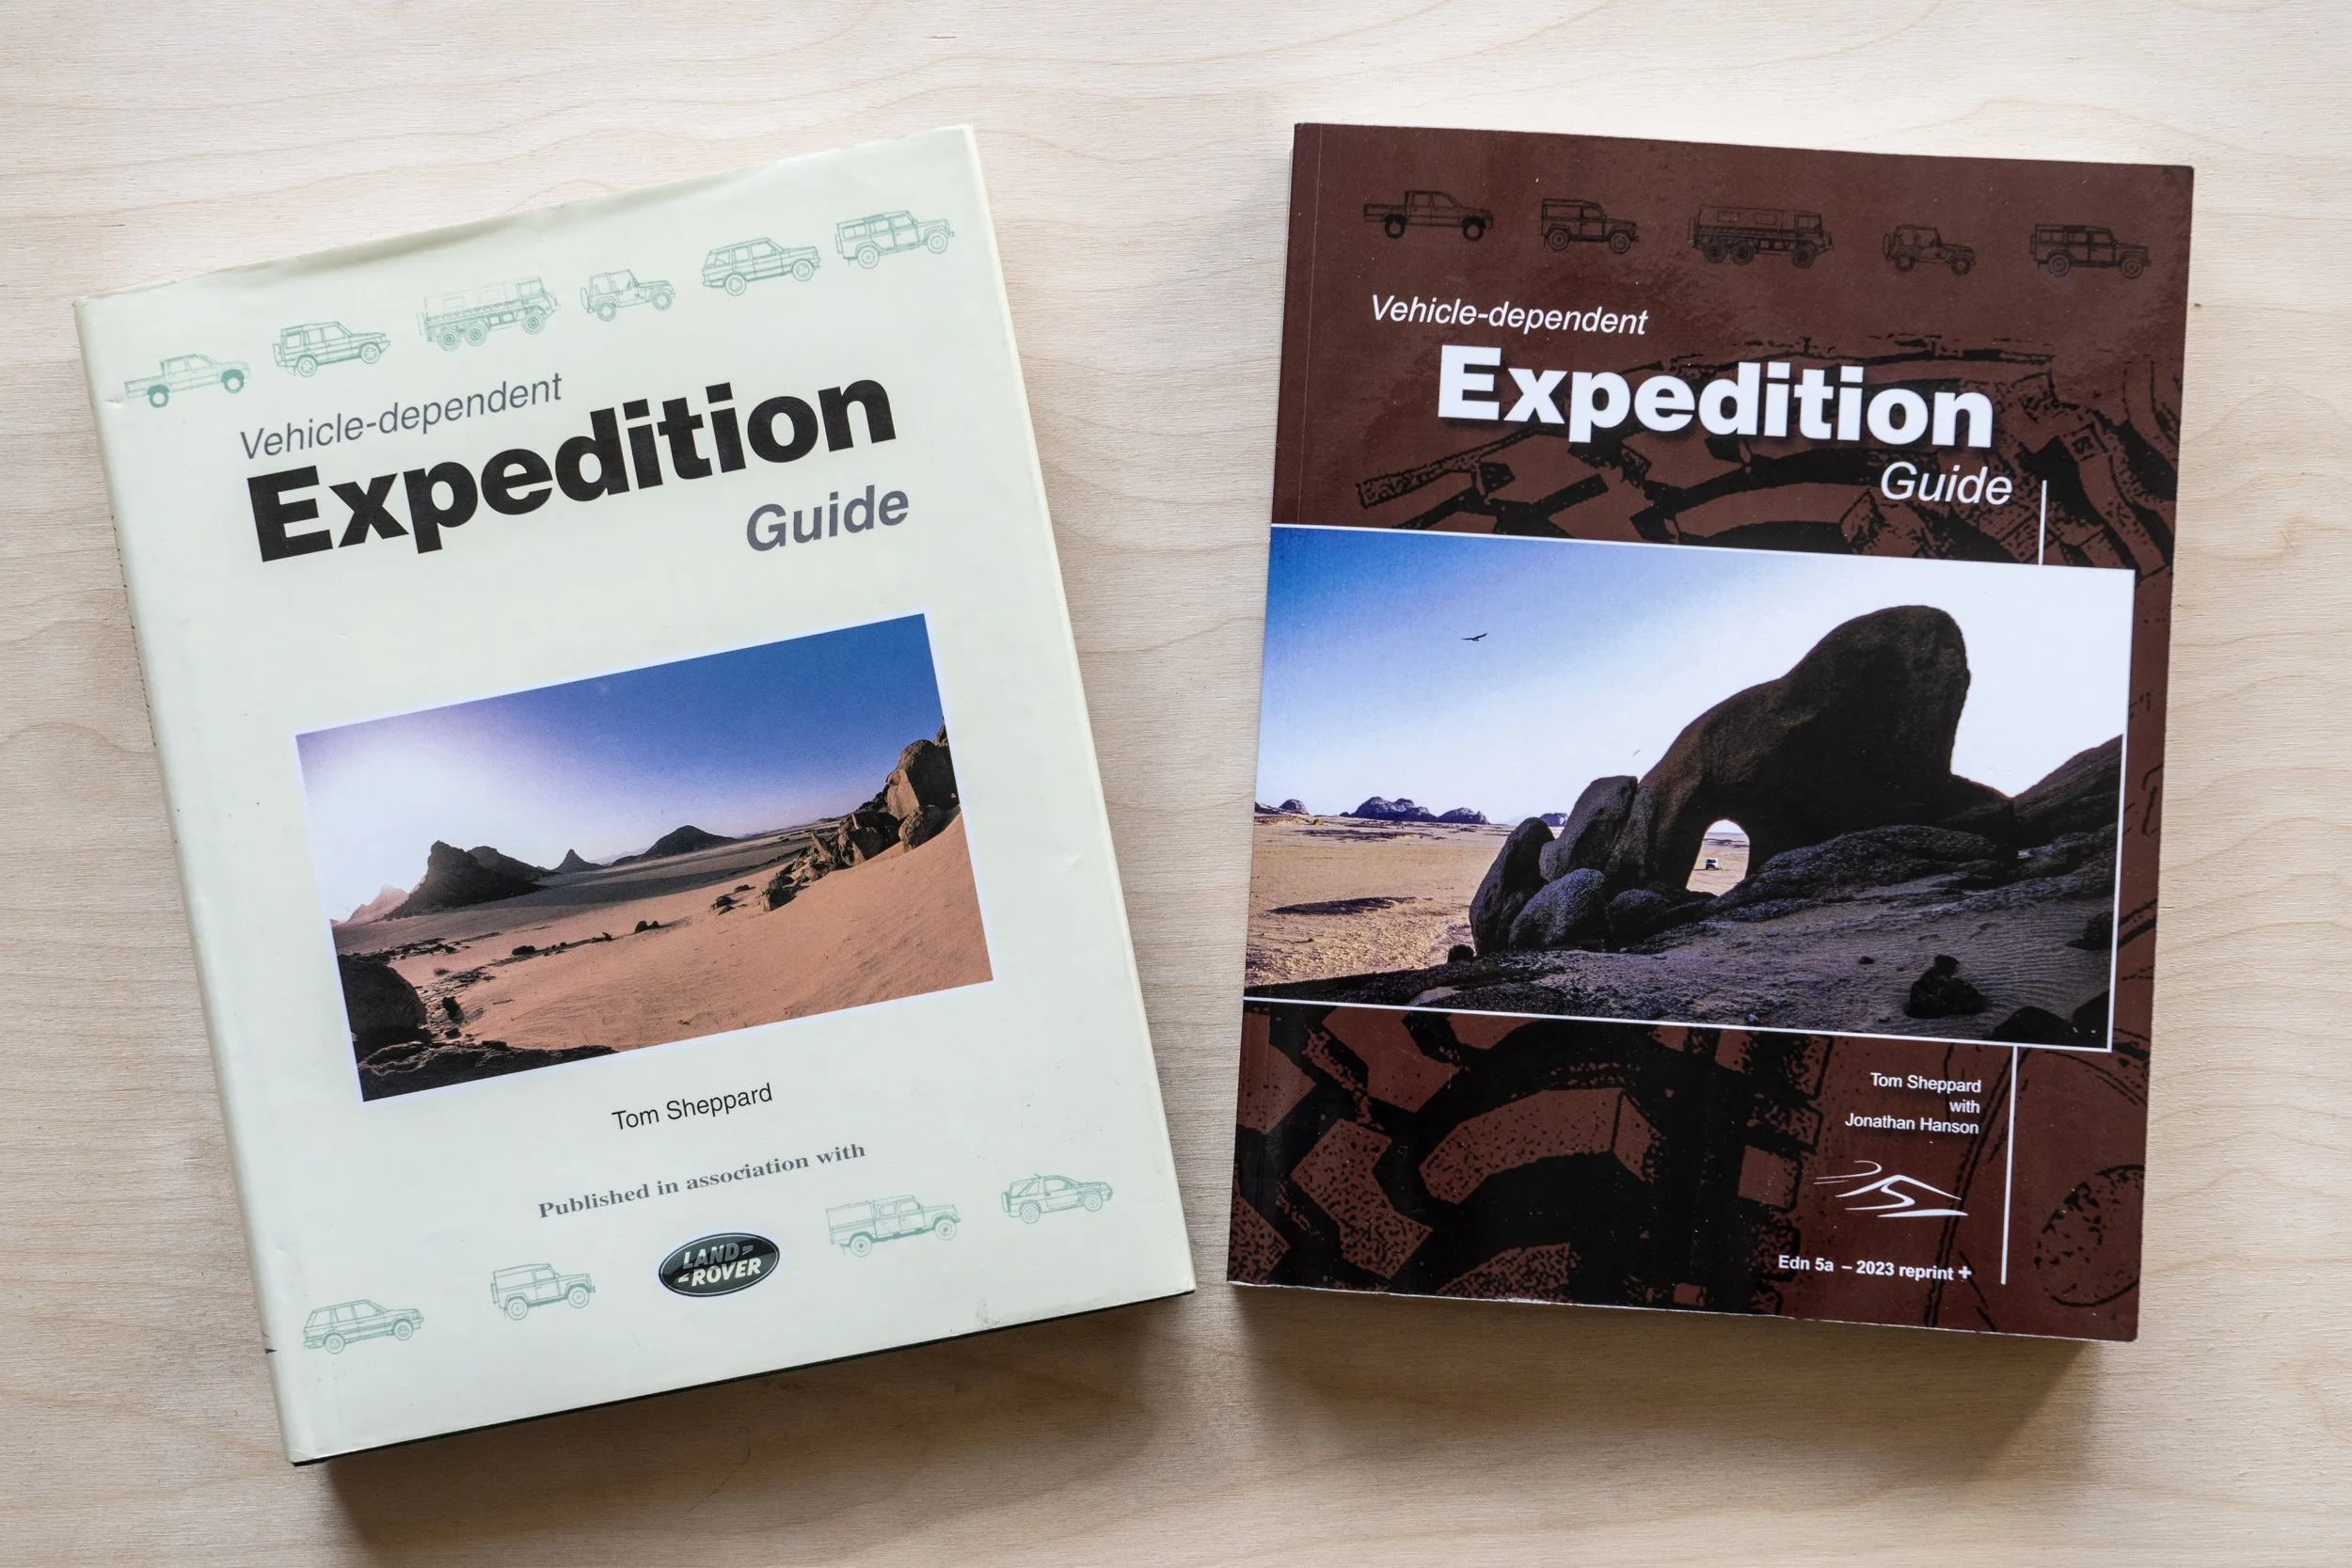
Nearly 30 years ago, Tom Sheppard published the first edition of the Vehicle-dependent Expedition Guide under the auspices of Land Rover. The book quickly gained a reputation as the definitive guide for anyone planning remote vehicle-based travel, whether a weekend jaunt in Montana or a month-long research expedition in Mauritania.
I bought my first copy in 1999, and instantly fell under its spell: a fanatically detailed, practical guide that also inspired dreams of far horizons. The author’s background as an RAF test pilot showed in his meticulous dives not only into vehicles, driving, provisioning, and shipping, but clothing, communications, group leadership—even an investigation into the chemistry of automotive oils that could have come from a BP engineer. “Definitive” was not merely ad-speak for this book. And those images of Land Rovers crossing Sahara dunes kept me up at night forging far-fetched plans—many of which were subsequently realized.
Sheppard soon assumed full responsibility for the VDEG (as its author and fans refer to it), giving him much greater editorial freedom, and he kept abreast of new vehicles and technologies with frequent revisions and new editions.
In 2015 I was honored when Tom, by then a good friend, asked me to come on board. Together we significantly enlarged the VDEG to over 600 pages; four solid pounds covering the massive increase in overland-oriented products introduced in the previous decade, as well as new driveline, navigation, and communication innovations. That edition itself has been updated several times, most recently with an increase in physical size and larger print and photographs.
As Tom closed in on his 90th birthday, he mentioned the possibility of slowing down a bit (although he still rides his BMW from Great Offley into Hitchin for grocery shopping). And finally he let me know that the current print run would be the last. The Vehicle-dependent Expedition Guide is now out of stock on both sides of the Atlantic.
However, a well-known 4x4 trainer in the UK, who specializes in teaching special forces units and who uses both VDEG and Tom’s equally authoritative 4x4 Driving, offered to pay up front for one last run of 100 copies to keep providing to his students, at least for a while. Tom decided to increase the run to 140 copies and offer the extras for sale.
Thus I’m happy—if a bit conflicted as well—to announce a very limited opportunity to purchase one of the last 40 copies of the bible of overland travel. I have a list of those already signed up; if you’re willing to commit to a copy as well please contact me via email. This will on be a first-come, first-served basis, of course. We’re limiting the offer to one copy per customer please. The orders and payment will go directly to Tom in the UK once the books are printed; given the current favorable exchange rate, the final price will be little, if at all, higher than the last $80 cover price and U.S. shipping.
Pelican Air 1535: The best carry-on for adventurers?
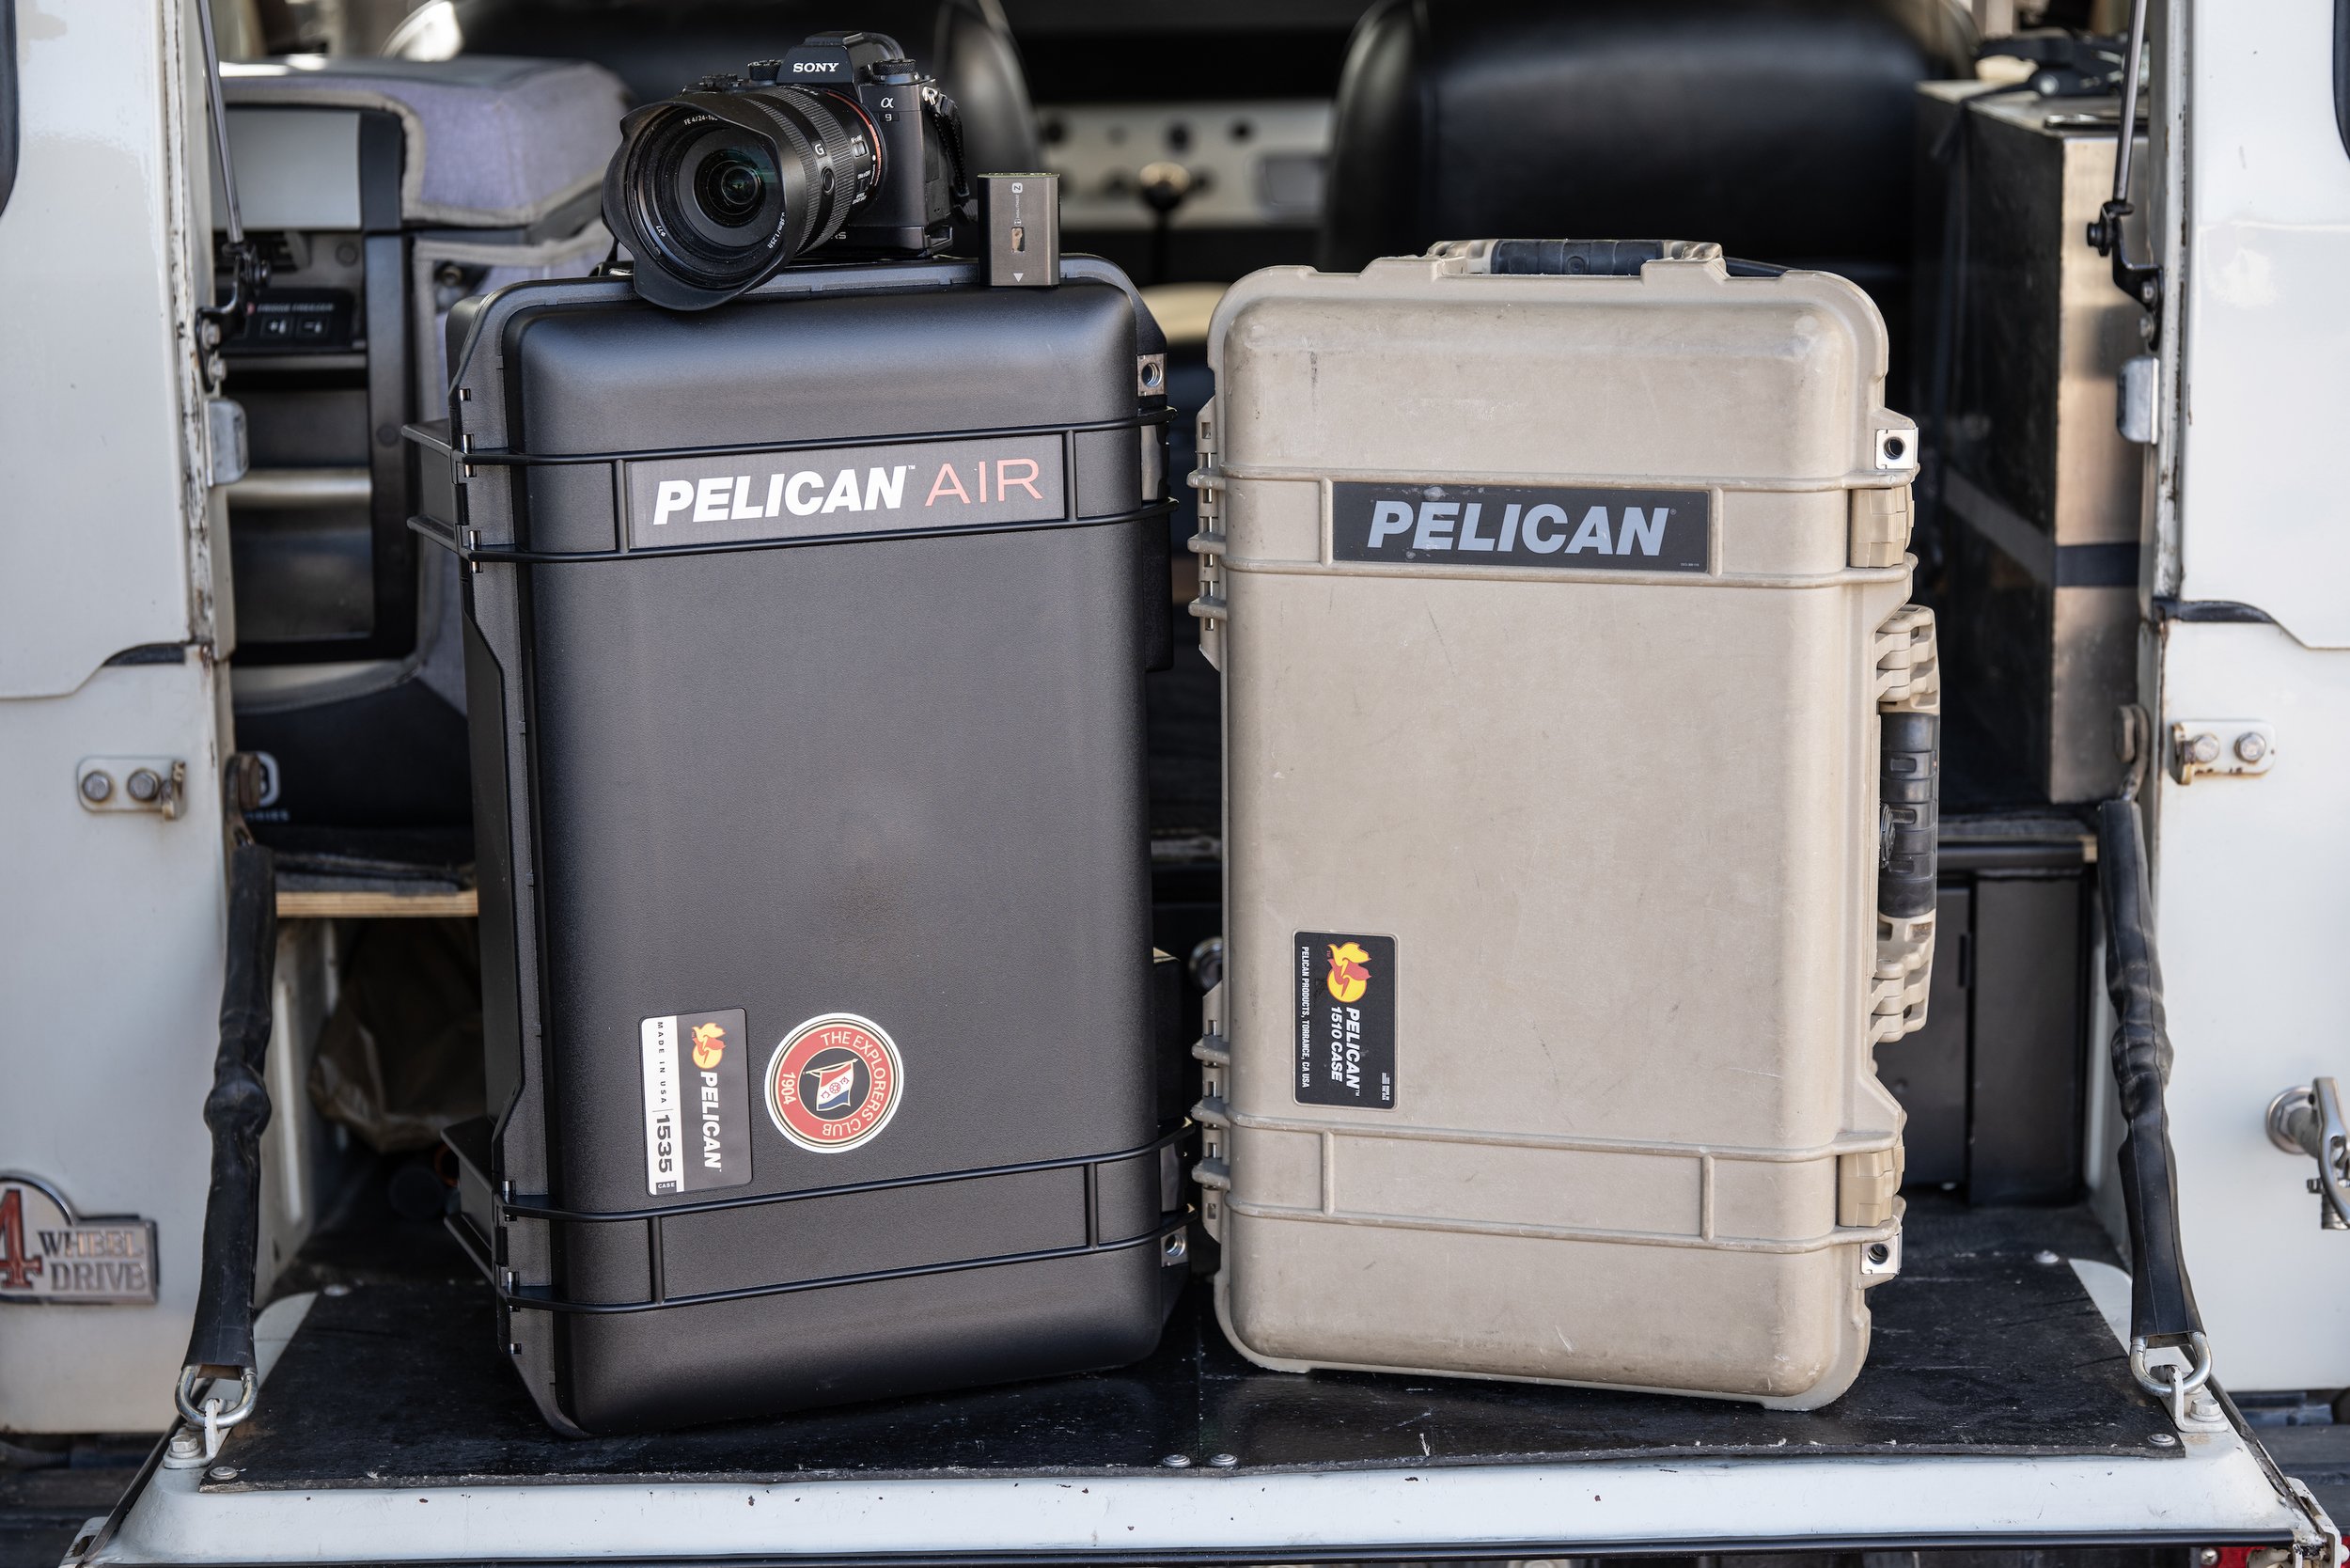
Left and right: same weight.
Does anyone else reading this think there should be a law that commercial airliners be built with overhead storage space actually equivalent to the number of seats?
Until there is such a rule—and, to be fair, until airlines start cracking down on passengers who heave on board bulging suitcases laughably larger than the little trial box next to the gate desk—the struggle to snag overhead space during boarding will continue to resemble trench warfare. And if, like me, your carry-on holds such critical equipment as cameras (plus associated lithium batteries), lenses, and binoculars, you do not want to be forced at the last minute to have it stuffed (“Free of charge!” as they always say, gee thanks) in the cargo hold. That’s why you have a carry-on.
If you are lucky or quick or vicious enough to successfully place your bag in the overhead bin, you know you cannot expect that any care will be given to it by subsequent aspirants to the space. It needs to be as crush-resistant as a bathyscaphe (ooh . . . too soon?).
Twenty five years ago I bought my first Pelican case, a 1500 with a padded camera-organizer interior made by Lowe Alpine systems, and used it on my first assignment to Africa. On one game drive in Zambia it was on the back seat of an open Land Rover, and while I was in the front seat and the vehicle was moving at a good pace down a track, another passenger tried to move it and wound up tipping it over the back just as I turned and watched in helpless horror. The (fortunately closed and latched) case cartwheeled end over end for about 20 feet before coming to rest in a pile of elephant dung. It, and the cameras inside, emerged unscathed, and I’ve been a Pelican disciple ever since.
Thus, several years ago I settled on a 1510 Protector as my carry-on—actual, legal, carry-on size. It was, like all Pelican cases in the line, completely water- and dust-proof, and laughed off the efforts of fellow passengers to abuse it. It rolled on two wheels with an extendable handle (I hate the “walk-the-dog”-style four-wheeled cases, which render their owners nearly two humans wide on a crowded concourse), it was lockable, and, set upright, served nicely as a perch at airport gates equipped with fewer seats than the aircraft parked outside (don’t get me started on that one). It served me flawlessly on many flights to several continents.
The only problem with the 1510, at least for flying, was weight. It scaled at exactly 12 pounds empty, thus contributing significantly to its total load. Given the recent habit of some carriers—looking at you, New Zealand Air—to limit (and check) carry-on weights, this was an additional drawback.
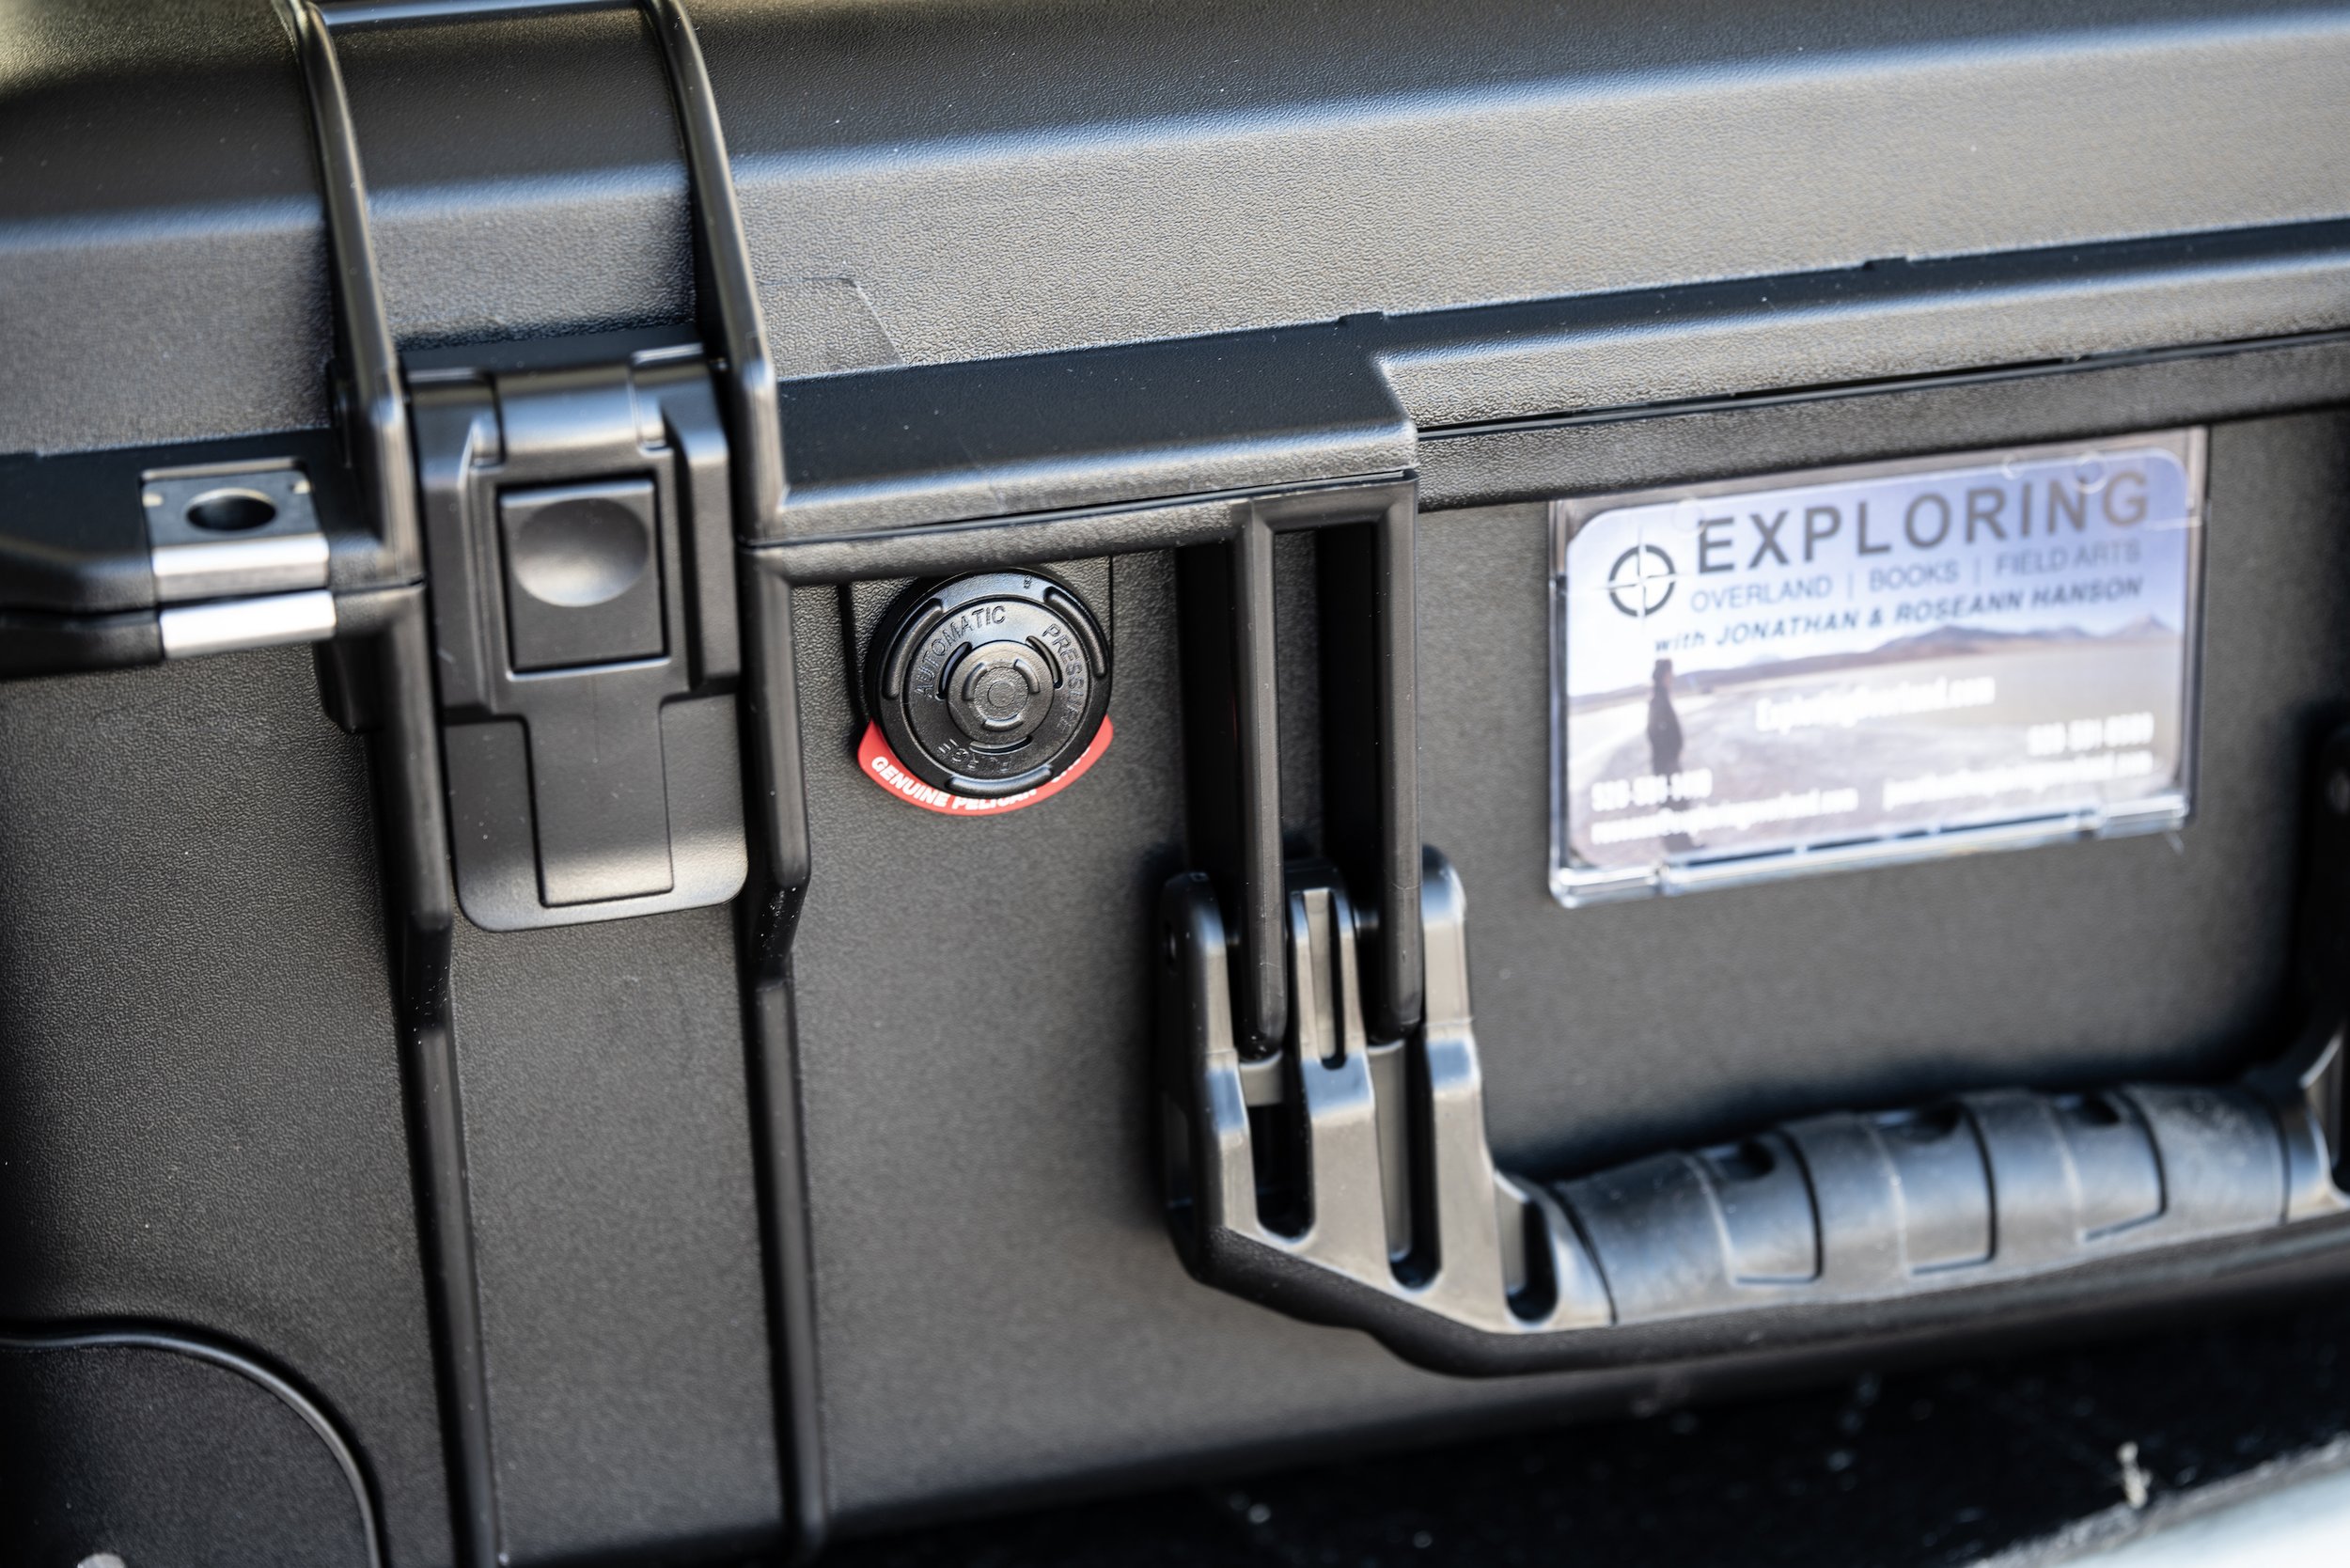
A few years ago Roseann bought one of the then-new Pelican Air cases, a 1535, virtually identical in dimensions to the 1510 but a full three and a quarter pounds lighter. Pelican says it’s made from “HPX” polymer, which is up to 40 percent lighter than their regular material. I admit to being skeptical that the Air could hold up, but Roseann’s proved—at least for the purposes of air travel—every bit the equal of the 1510. Crush-proof, sit-on-able (although I wouldn’t stand on the lid as I do with the 1510). It still incorporates stainless-steel padlock protectors and a pressure-equalization valve, and is IP-67 and MIL-SPEC certified. The wheels roll on stainless-steel bearings, as in the heavier case.
I wondered what that three-pound, four-ounce weight reduction represented in terms of contents, and discovered that my Sony A9, mounted with a 24-105 zoom, weighs three pounds two ounces. So call it the camera, lens, and an extra battery. That’s an impressive savings. We’re now a two-1535 family.
One of the things I like most about Pelican is that they constantly look for ways to improve. The newer 1535, for example, has the effortless push-pull latch system, which Roseann’s does not, and also a center handle on the vertical top of the case, for more versatile handling. Finally, there’s a nifty business-card holder/ID case only accessible with the lid open.
Perhaps my sole, niggling reservation is the plastic issue. However—remember my original 1500? It’s still perfectly functional and used regularly, and is likely to last at least another quarter century. At least that sets it apart from single-use plastic bags and water bottles. Here’s hoping Pelican eventually develops a completely recyclable polymer.
That aside, the Pelican Air 1535 comes highly recommended.
Reinforced padlock eyes, effortless push-pull latches, pressure-compensation valve, and sturdy business/ID card holder.
Pelican is here.
The ARB Bushranger exhaust jack . . . yea or nay?
ARB's Bushranger exhaust jack (along with its many copies) is like no other lifting device. It uses exhaust pressure from the engine (or, via a Schrader valve, an air compressor) to lift up to 2,000 kg (4,400 pounds) up to 30 inches. When deflated the envelope is barely three inches tall, and will fit and subsequently lift where no other jack can operate.
The bottom of the jack is peppered with grippy rubberized teeth; in addition its flexible nature enables it to wrap around a cobbled or even bouldery substrate where any standard jack base would slip. The top is surprisingly tough, and also comes with a separate protective mat to place between the jack and any sharp protuberances. It should of course be kept away from direct contact with the exhaust system. (The jack includes a repair kit.)
The Bushranger's 25-inch diameter gives it a huge footprint that supports it on top of nearly any substrate that doesn't have a current. There is no sand soft enough to defeat it. However, the 30-inch maximum lift height can be defeated depending on circumstances, the height of your vehicle's chassis, and the suspension on the vehicle. You can alleviate this by placing boards between the top of the jack and the chassis, or even simply piling up more sand (or rocks) underneath it.
Deploying the Bushranger takes less effort than virtually any other jack, except perhaps for a 12V electric model. As long as your exhaust outlet is round, not rectangular or elongated, just cram the jack's rubber cone over the tip after positioning the bag. It will rise quickly, and you can pause the process to reposition if necessary (the bag won't deflate). I found it helps to have a second person in the vehicle to raise the idle to prevent the engine bogging.
Keep in mind that, no matter how sturdy the bag is, it's still a giant balloon. The vehicle will not sit firmly atop it but can wiggle considerably back and forth. You obviously will not do any work under a vehicle supported only by an exhaust (or any other) jack. You could change a tire using it, but even this is better accomplished with a standard bottle or scissor jack under an axle.
The Bushranger is not particularly light at 20 pounds, and despite fitting into a nearly flat storage bag the diameter can make it bulky to store. It takes up considerable volume in my FJ40, which is one reason I've never carried it on solo trips. In a large truck, or for a group trip, it would serve as a useful alternative to a Hi-Lift jack in many recovery situations, and its operation is considerably less fraught.
ARB is here. However, finding the Bushranger jack is absurdly difficult. A simple Google search is easier.
Hint: When using “Search,” if nothing comes up, reload the page, this usually works. Also, our “Comment” button is on strike thanks to Squarespace, which is proving to be difficult to use! Please email me with comments!
Overland Tech & Travel brings you in-depth overland equipment tests, reviews, news, travel tips, & stories from the best overlanding experts on the planet. Follow or subscribe (below) to keep up to date.
Have a question for Jonathan? Send him an email [click here].
SUBSCRIBE
CLICK HERE to subscribe to Jonathan’s email list; we send once or twice a month, usually Sunday morning for your weekend reading pleasure.
Overland Tech and Travel is curated by Jonathan Hanson, co-founder and former co-owner of the Overland Expo. Jonathan segued from a misspent youth almost directly into a misspent adulthood, cleverly sidestepping any chance of a normal career track or a secure retirement by becoming a freelance writer, working for Outside, National Geographic Adventure, and nearly two dozen other publications. He co-founded Overland Journal in 2007 and was its executive editor until 2011, when he left and sold his shares in the company. His travels encompass explorations on land and sea on six continents, by foot, bicycle, sea kayak, motorcycle, and four-wheel-drive vehicle. He has published a dozen books, several with his wife, Roseann Hanson, gaining several obscure non-cash awards along the way, and is the co-author of the fourth edition of Tom Sheppard's overlanding bible, the Vehicle-dependent Expedition Guide.

